Configure DHCP Server, User and Group Creation, Group Policies, Setting up a File Server
Hello there,
let’s continue with our Windows Server Environment. Last time we installed Windows Server 2022, deployed and configured the Domain Controller role.
Today we will quickly configure the DHCP Server, create a few users and set up the Windows File Services. Let’s get right into it.
System Information
| Hostname | IP | Function |
|---|---|---|
| TEST-DC01 | 192.168.152.200/24 | Domain Controller / Active Directory / DNS / DHCP |
| TEST-FILE | 192.168.152.201/24 | File Services |
Network Information
| Network | 192.168.152.0 |
|---|---|
| Subnet | 255.255.255.0 |
| Gateway | 192.168.152.254 |
Installing and configuring a DHCP Server
First, let’s begin with the DHCP server.
Log into the Domain Controller or you could deploy another server for this service. That’s up to you however I will use the existing TEST-DC01 server, in this example. Open the “Server Manager” (this should open automatically), and select “Manage” in the top right corner. Click on “Add Roles and Features”. Click on “Next” until you reach the “Select Server Role” page.
Here we can select the “DHCP Server”.
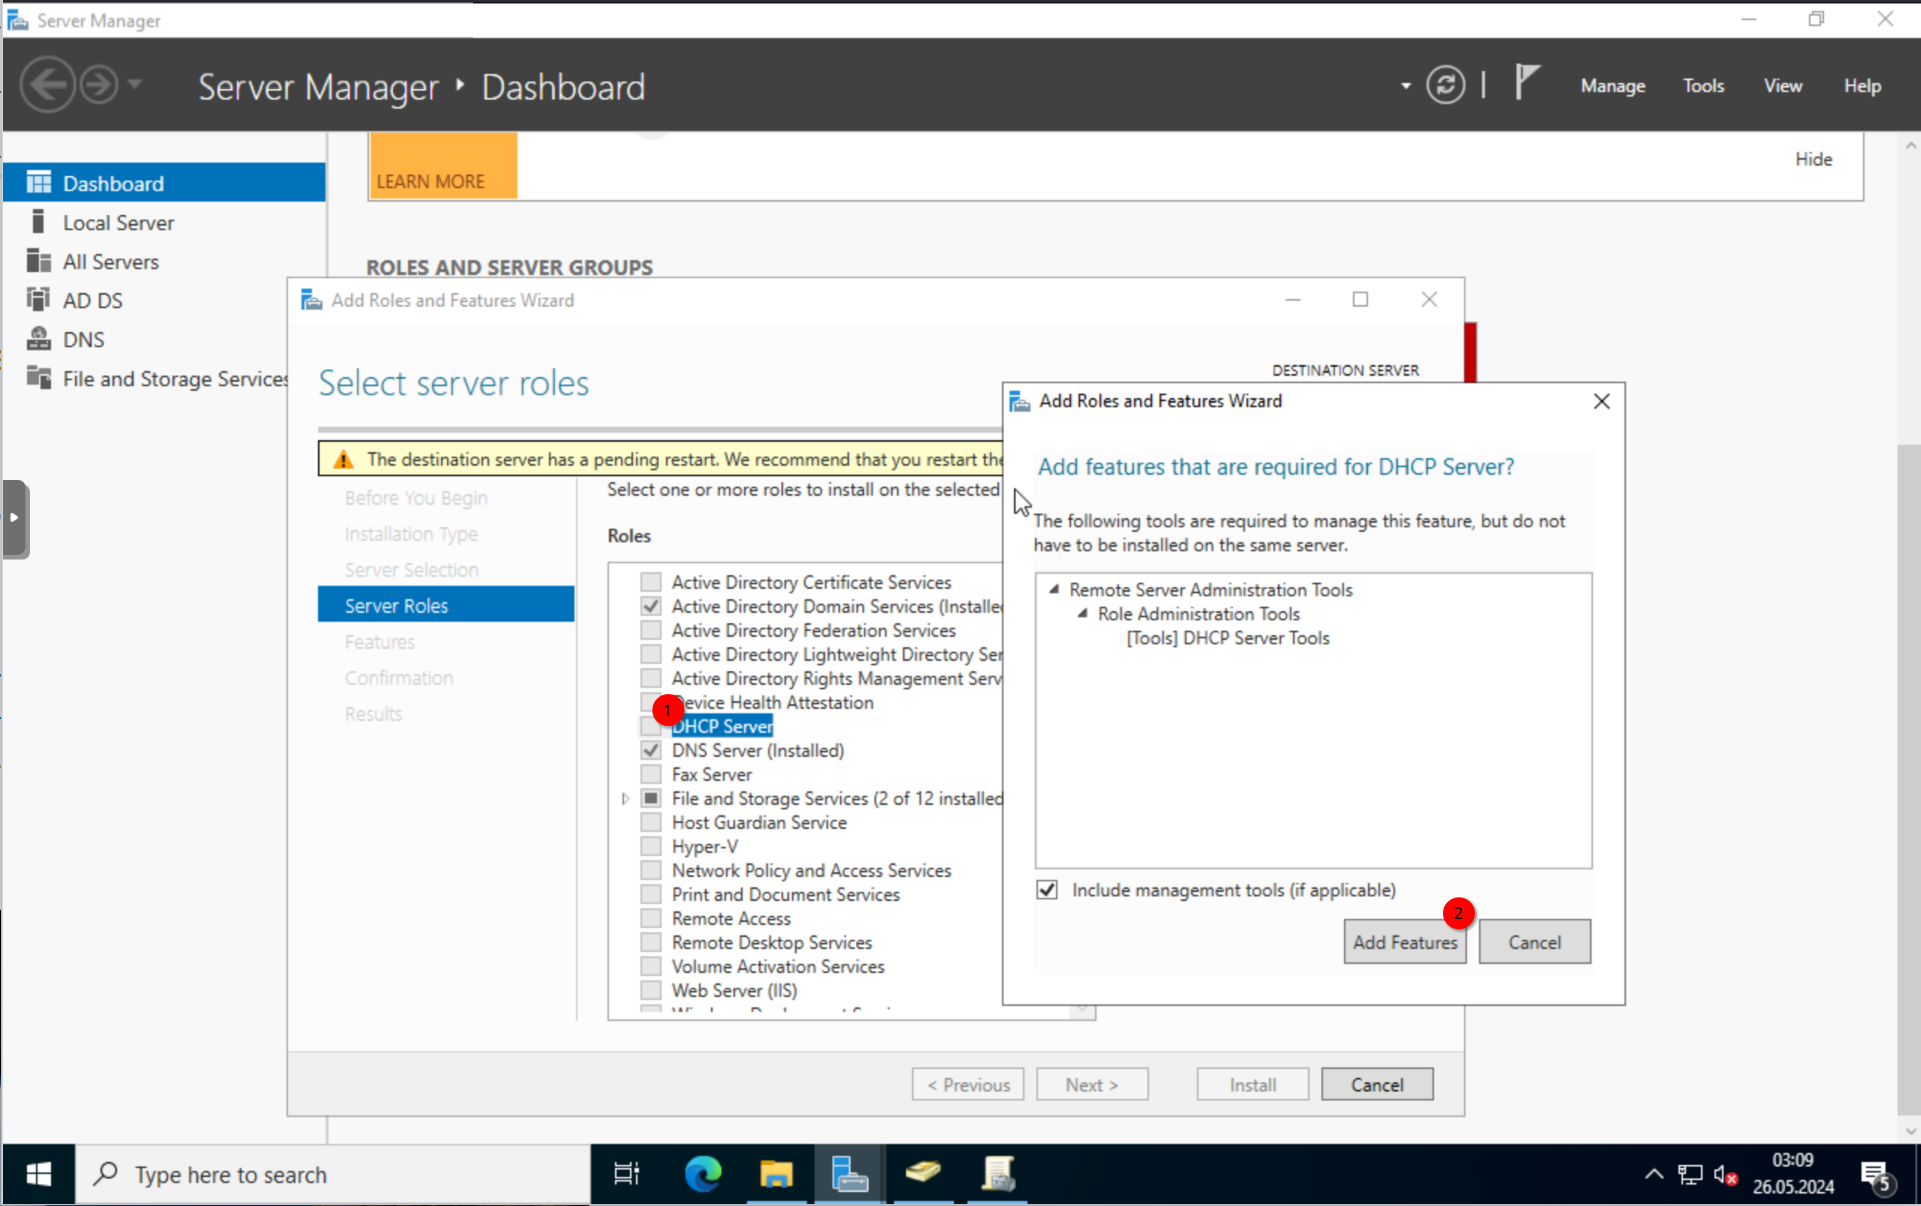
Select “Next” and “Install”.
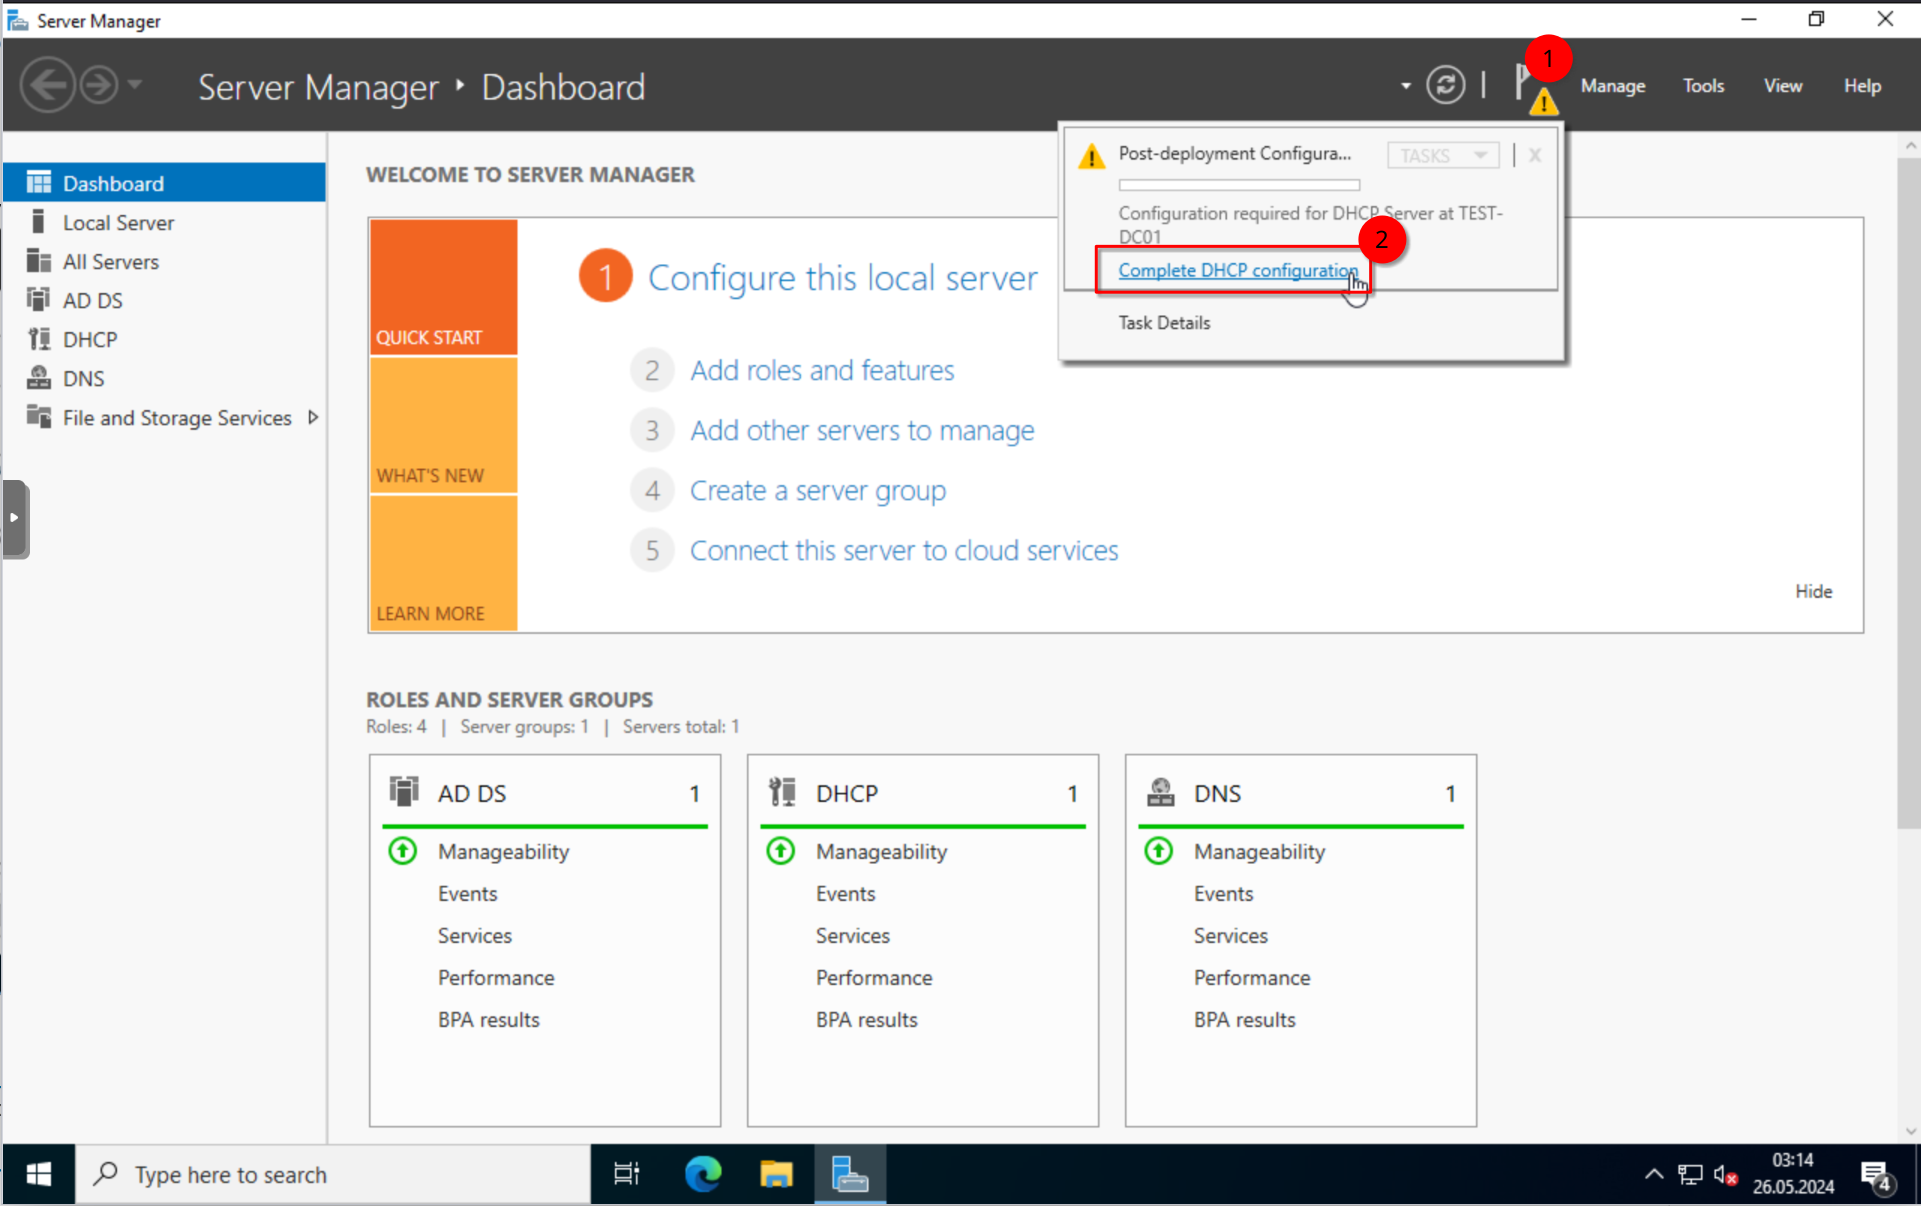
Once the installation is done, restart the server. Once it booted up, login and open the “Server Manager”, here we click on the banner on the top right and select “Complete DHCP configuration”.
Click on “Next” and “Commit”.
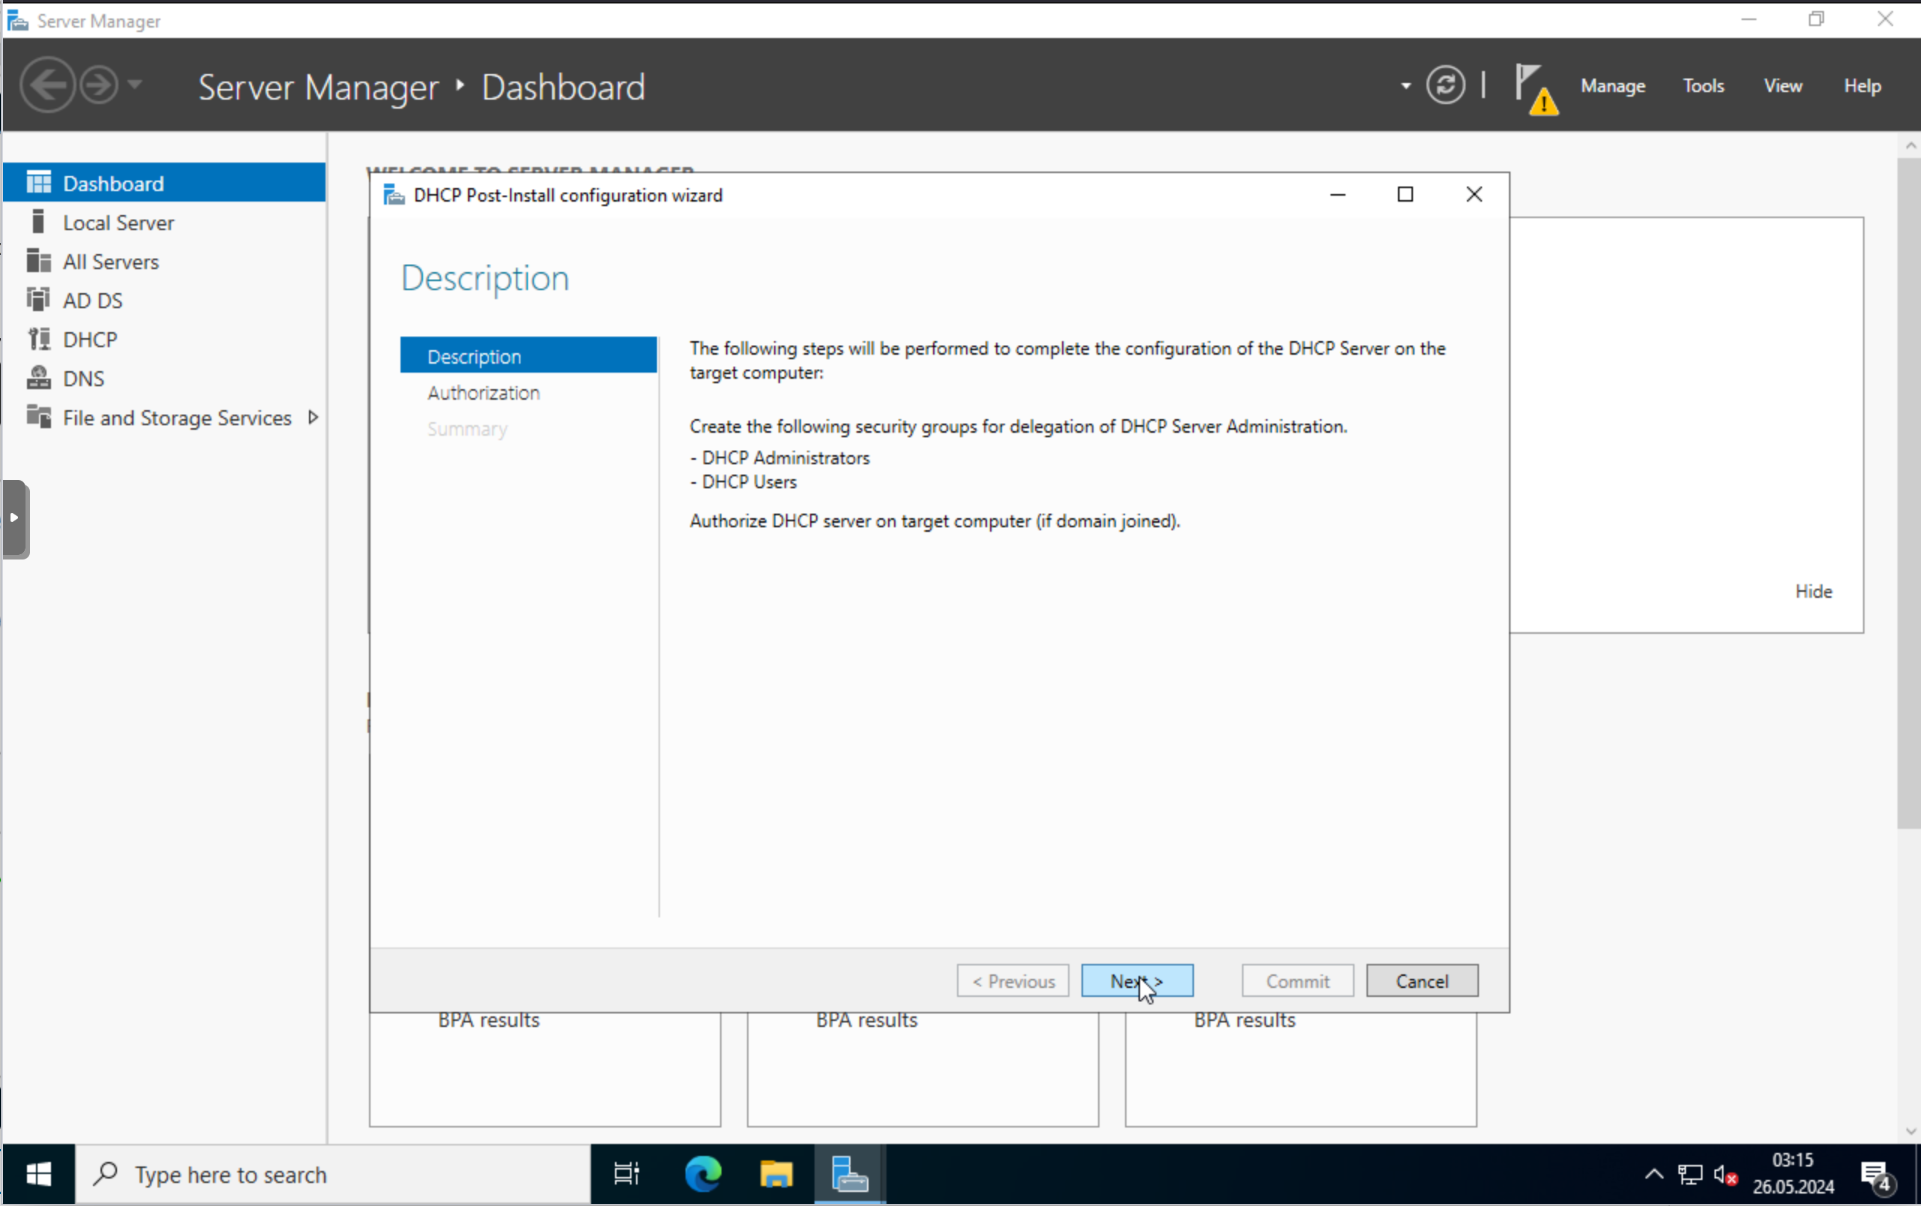
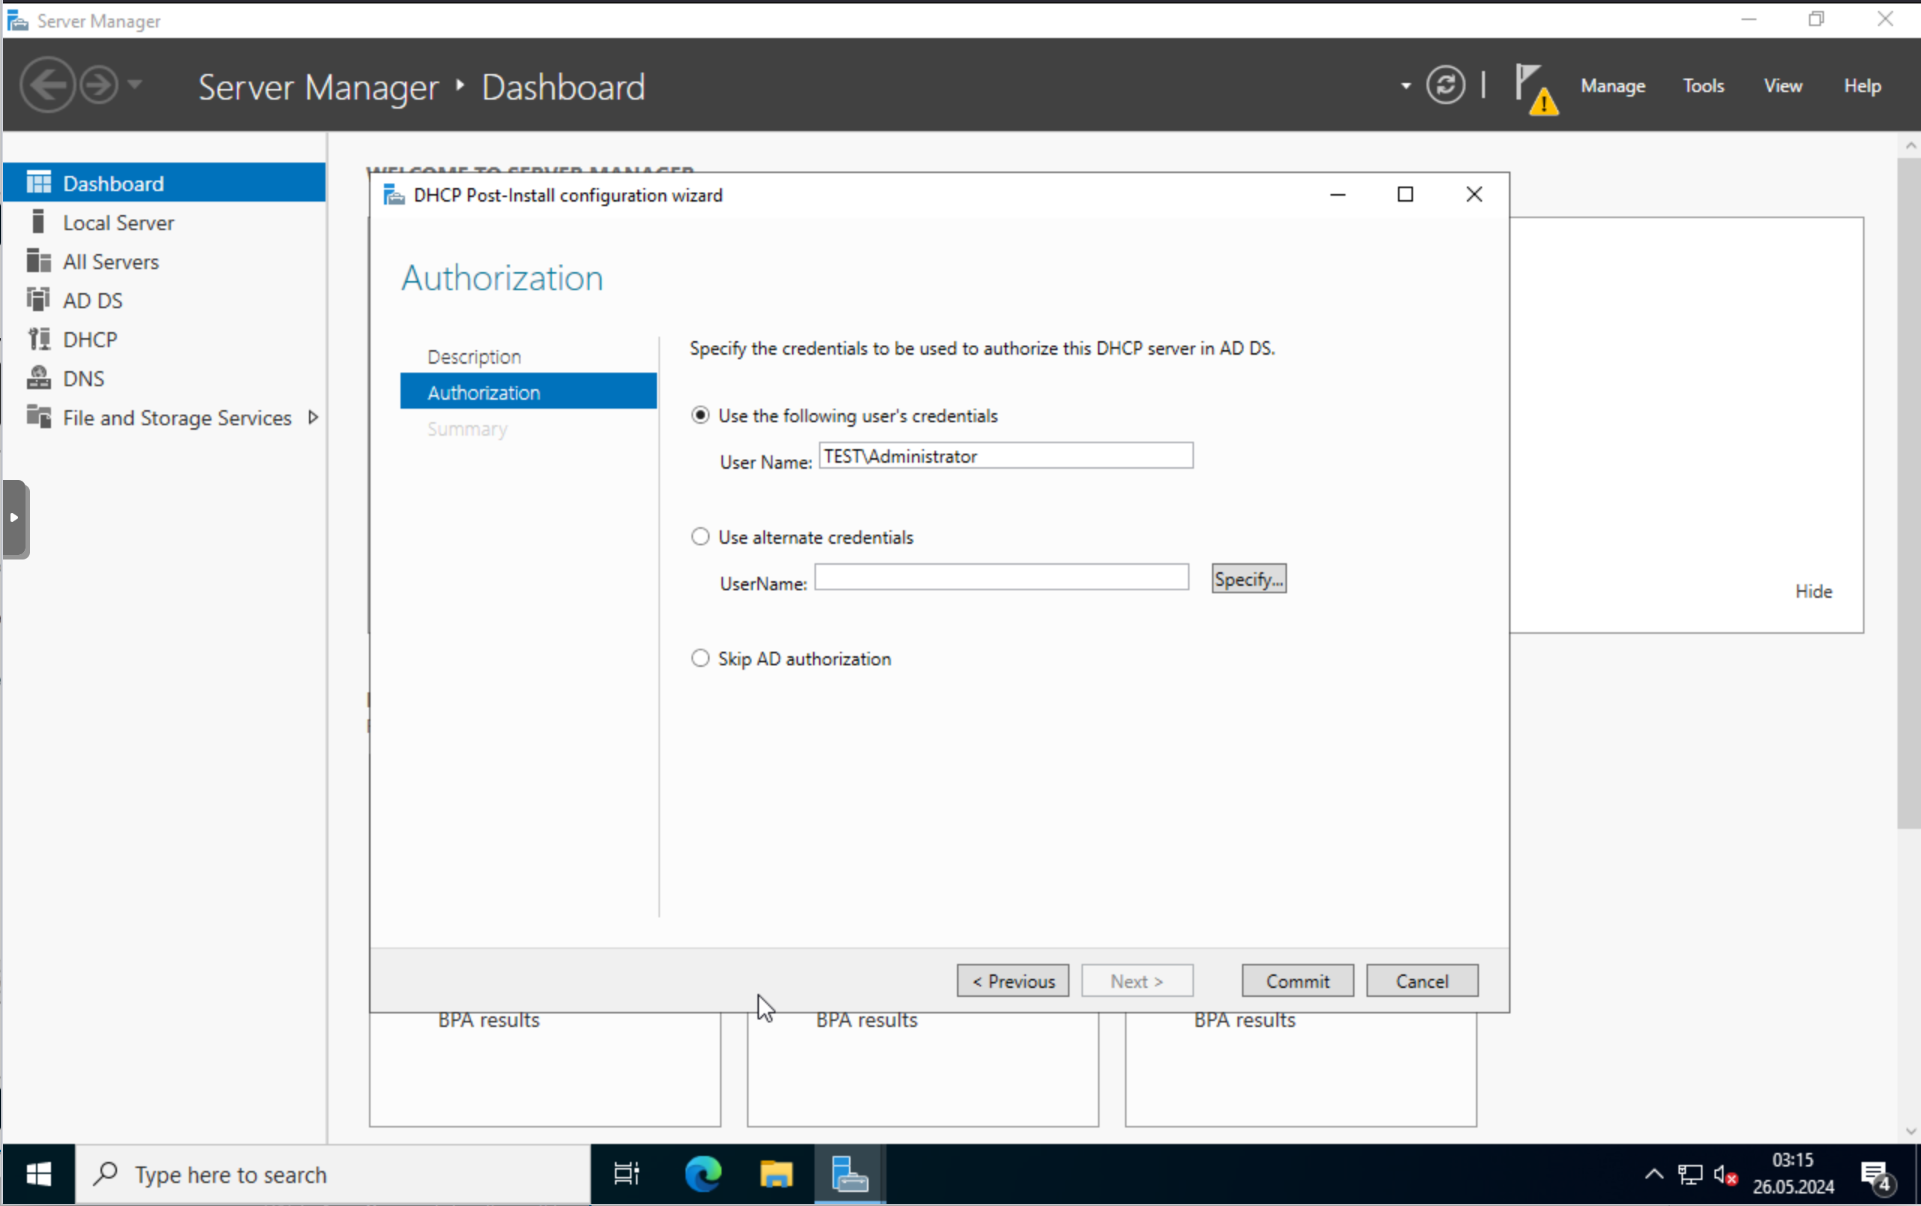
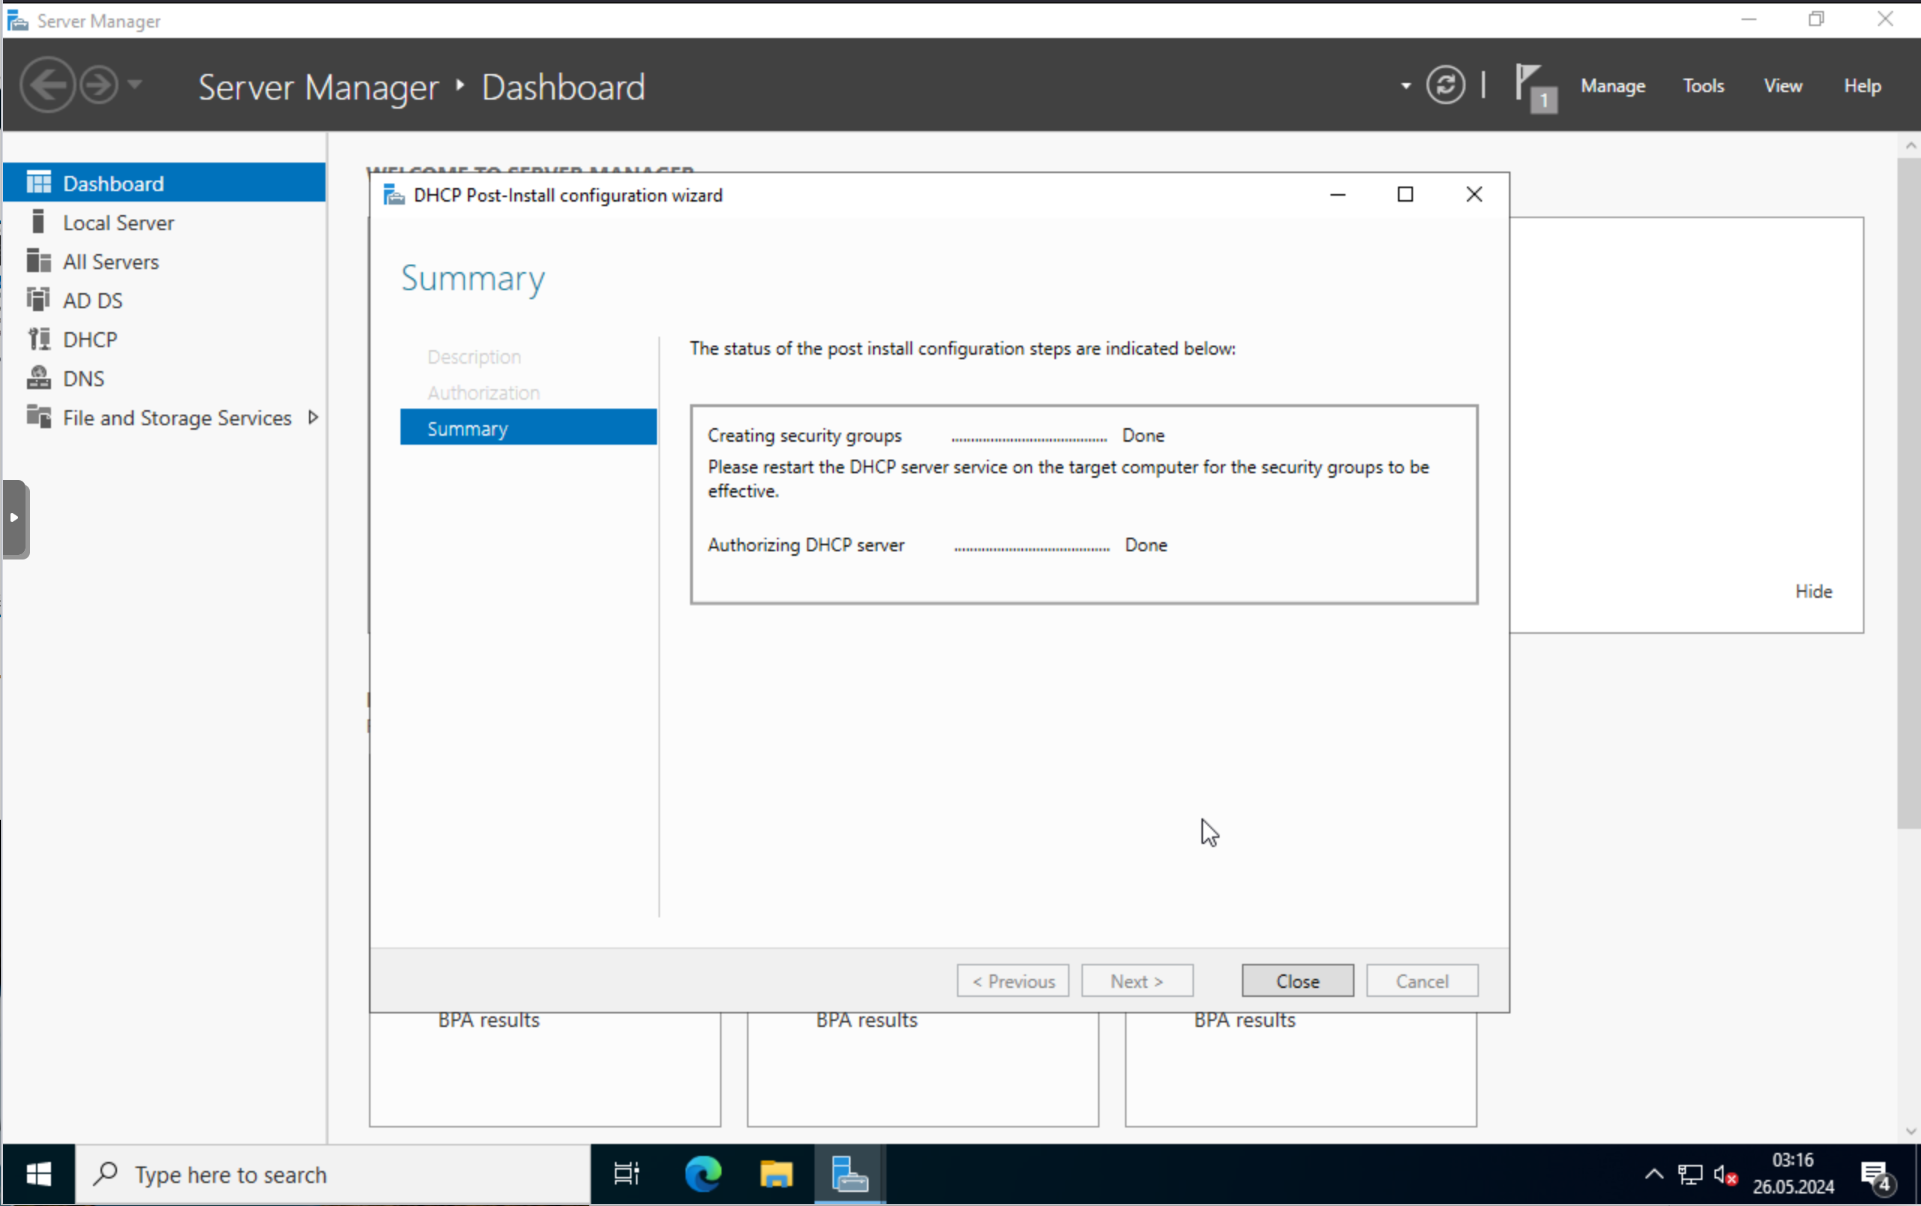
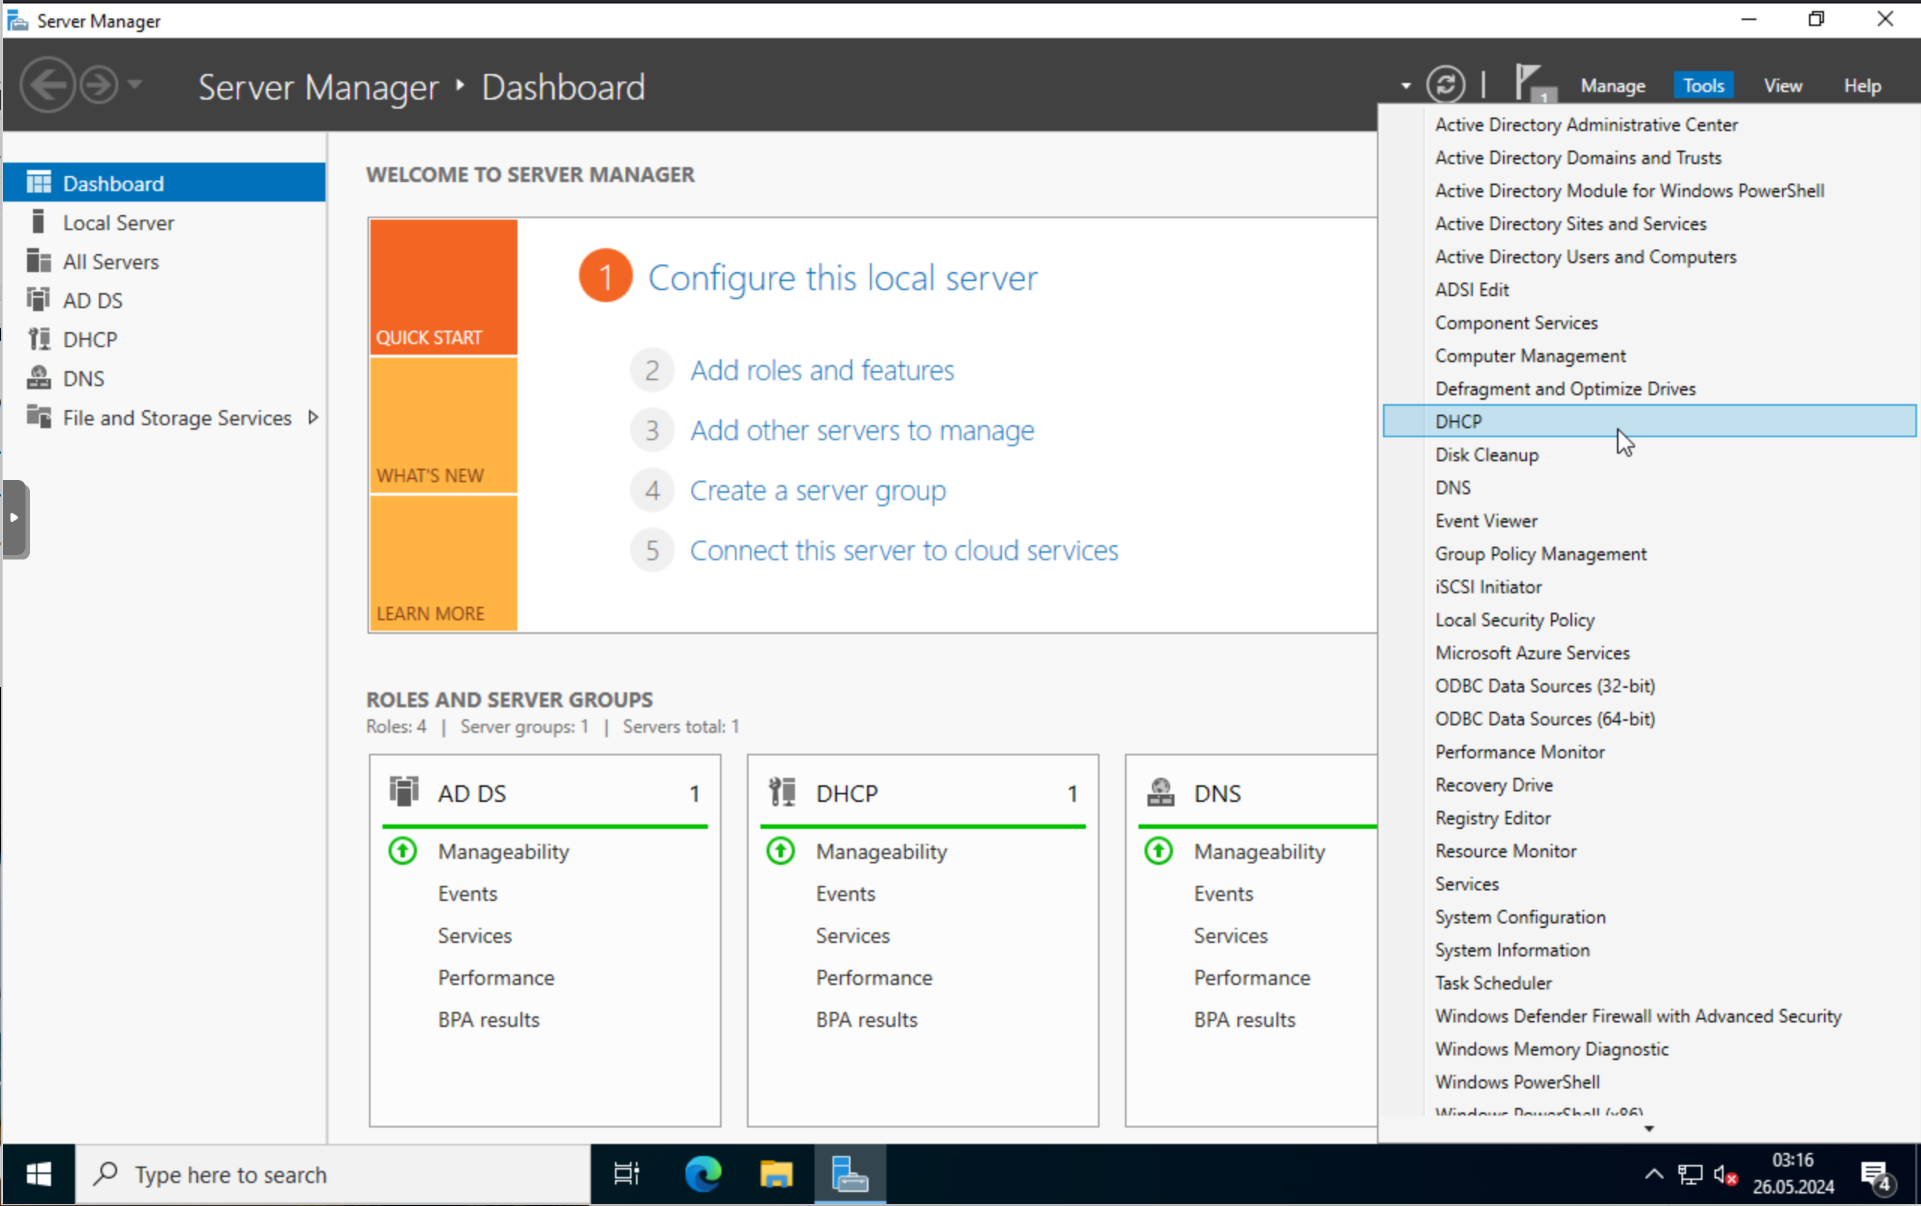
Now, select “Tools” in the “Server Manager” and click on “DHCP”.
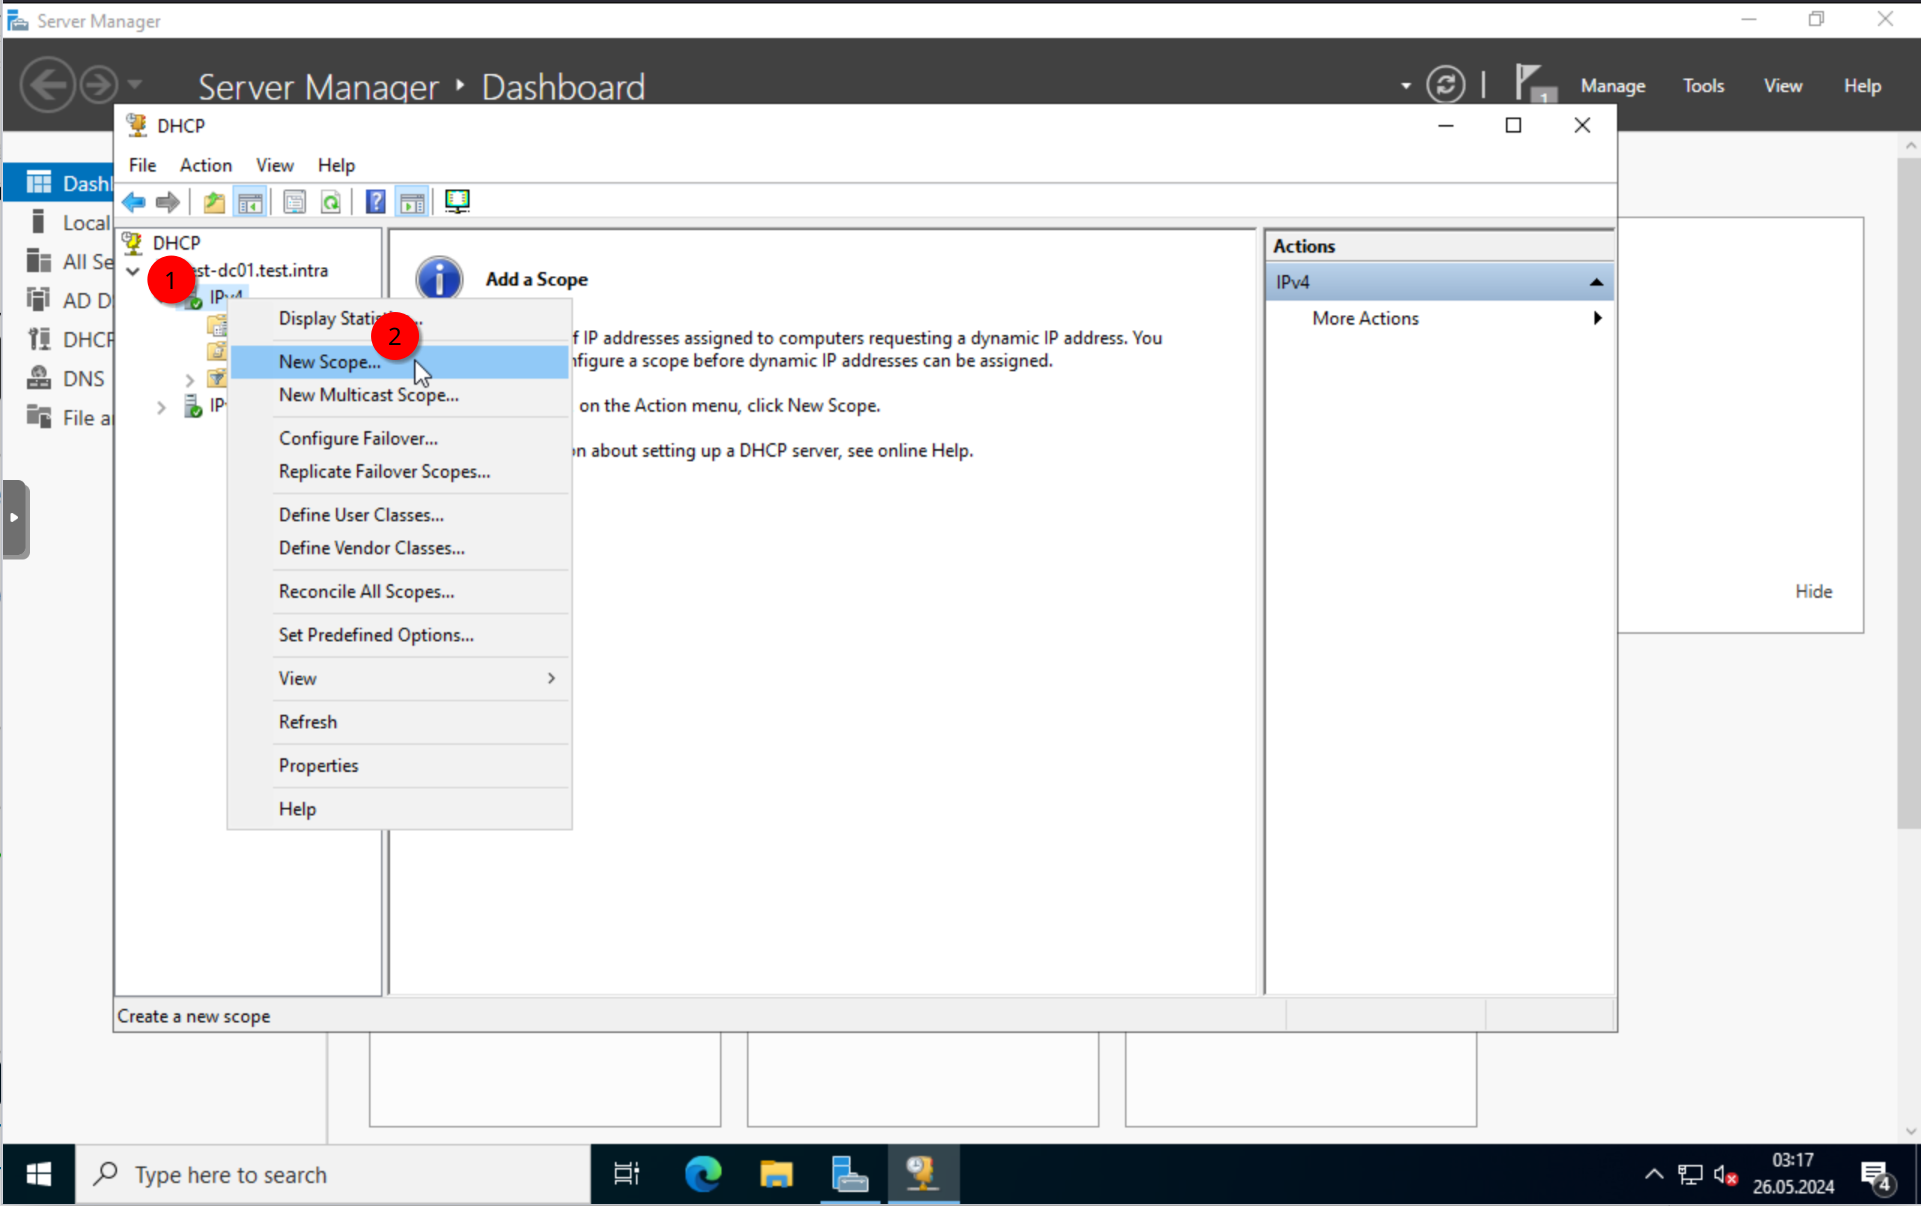
In the new window, right-click on “IPv4” -> “New Scope”.
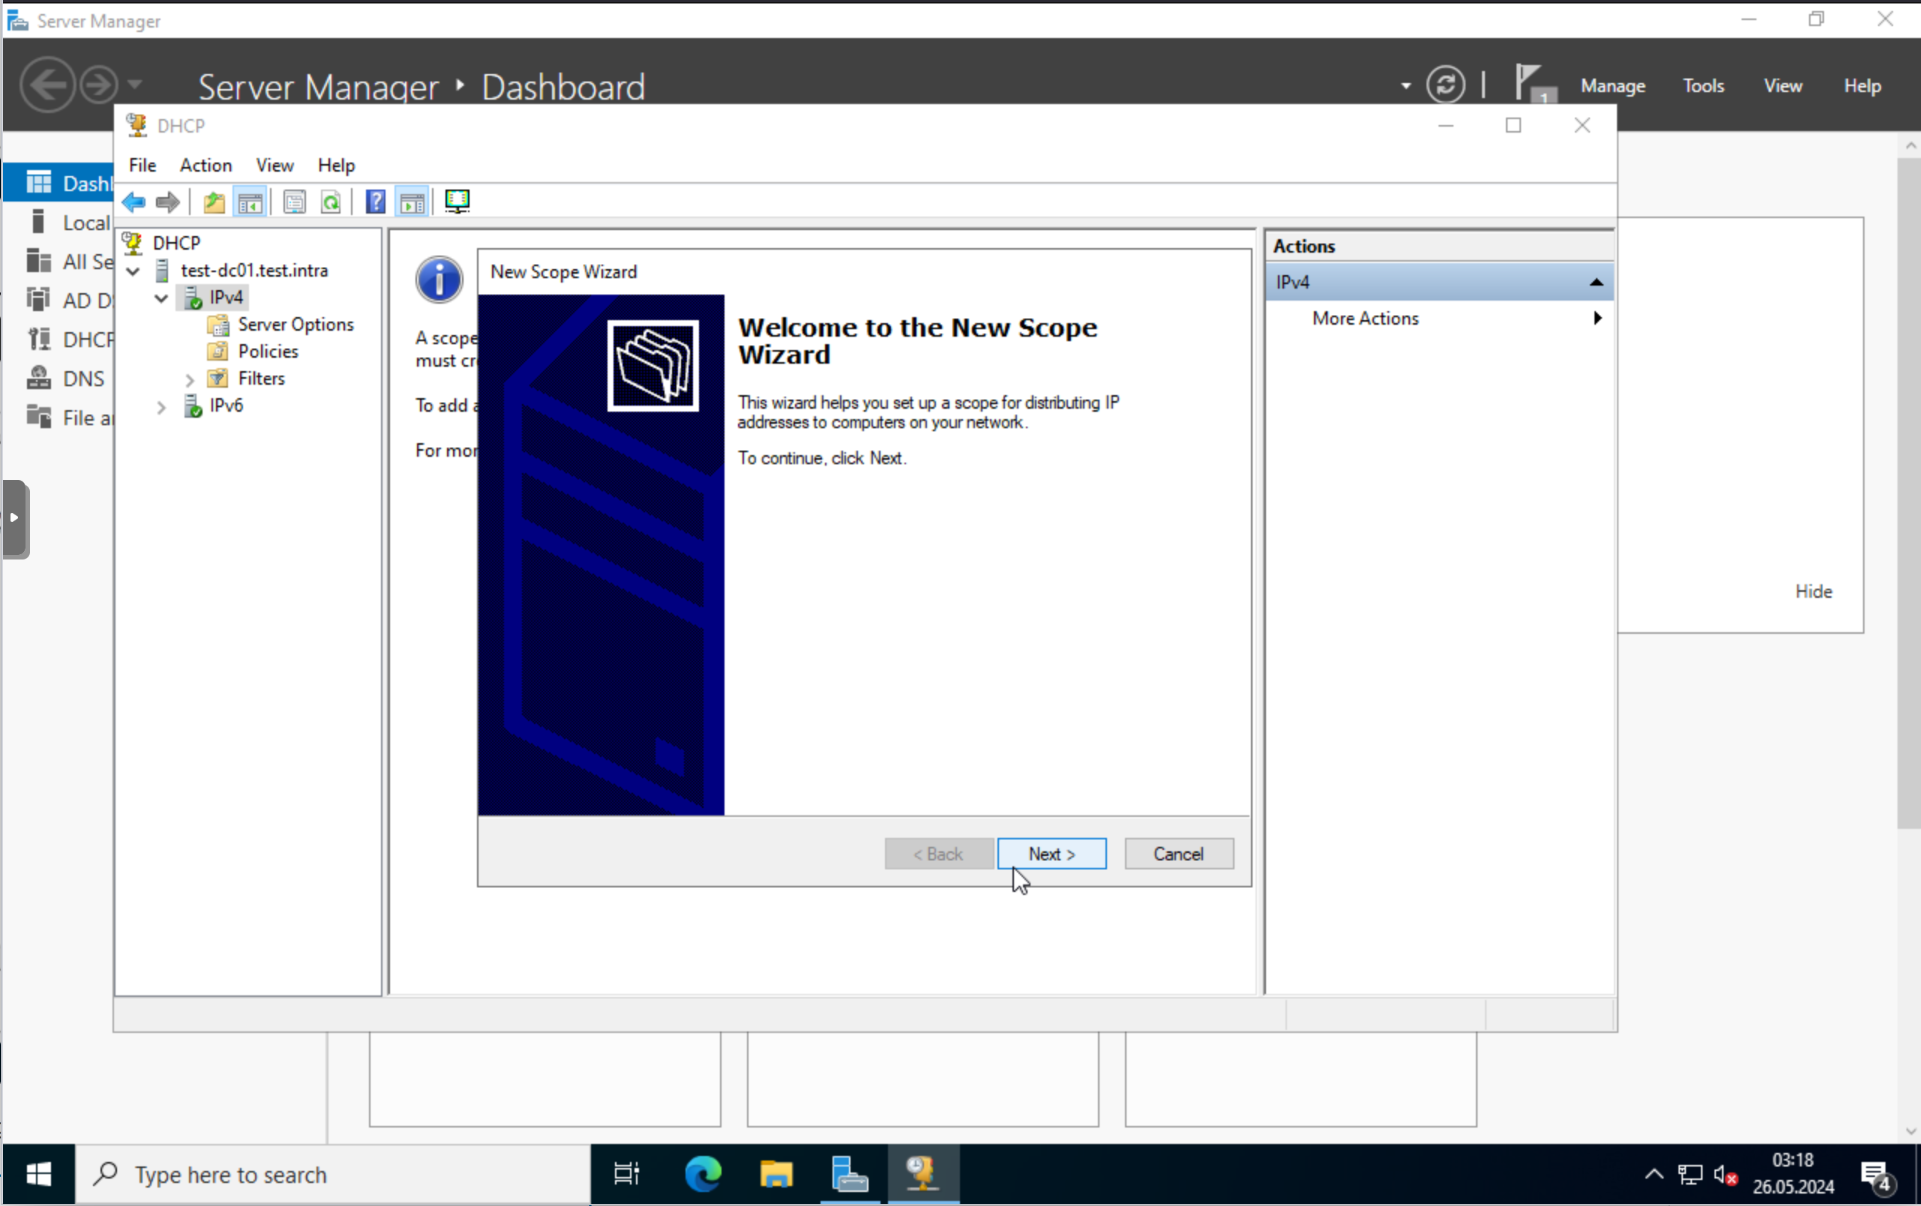
Here, we can configure our scope, which would be our DHCP settings for our network.
Click on “Next”, and give it a good name.
Set the IP range you want. I will use the range from “192.168.152.10 - 192.168.152.150”
I don’t have any exclusions, so will skip the next step.
For the lease duration, I will leave the defaults.
Say, yes to configure these options now.
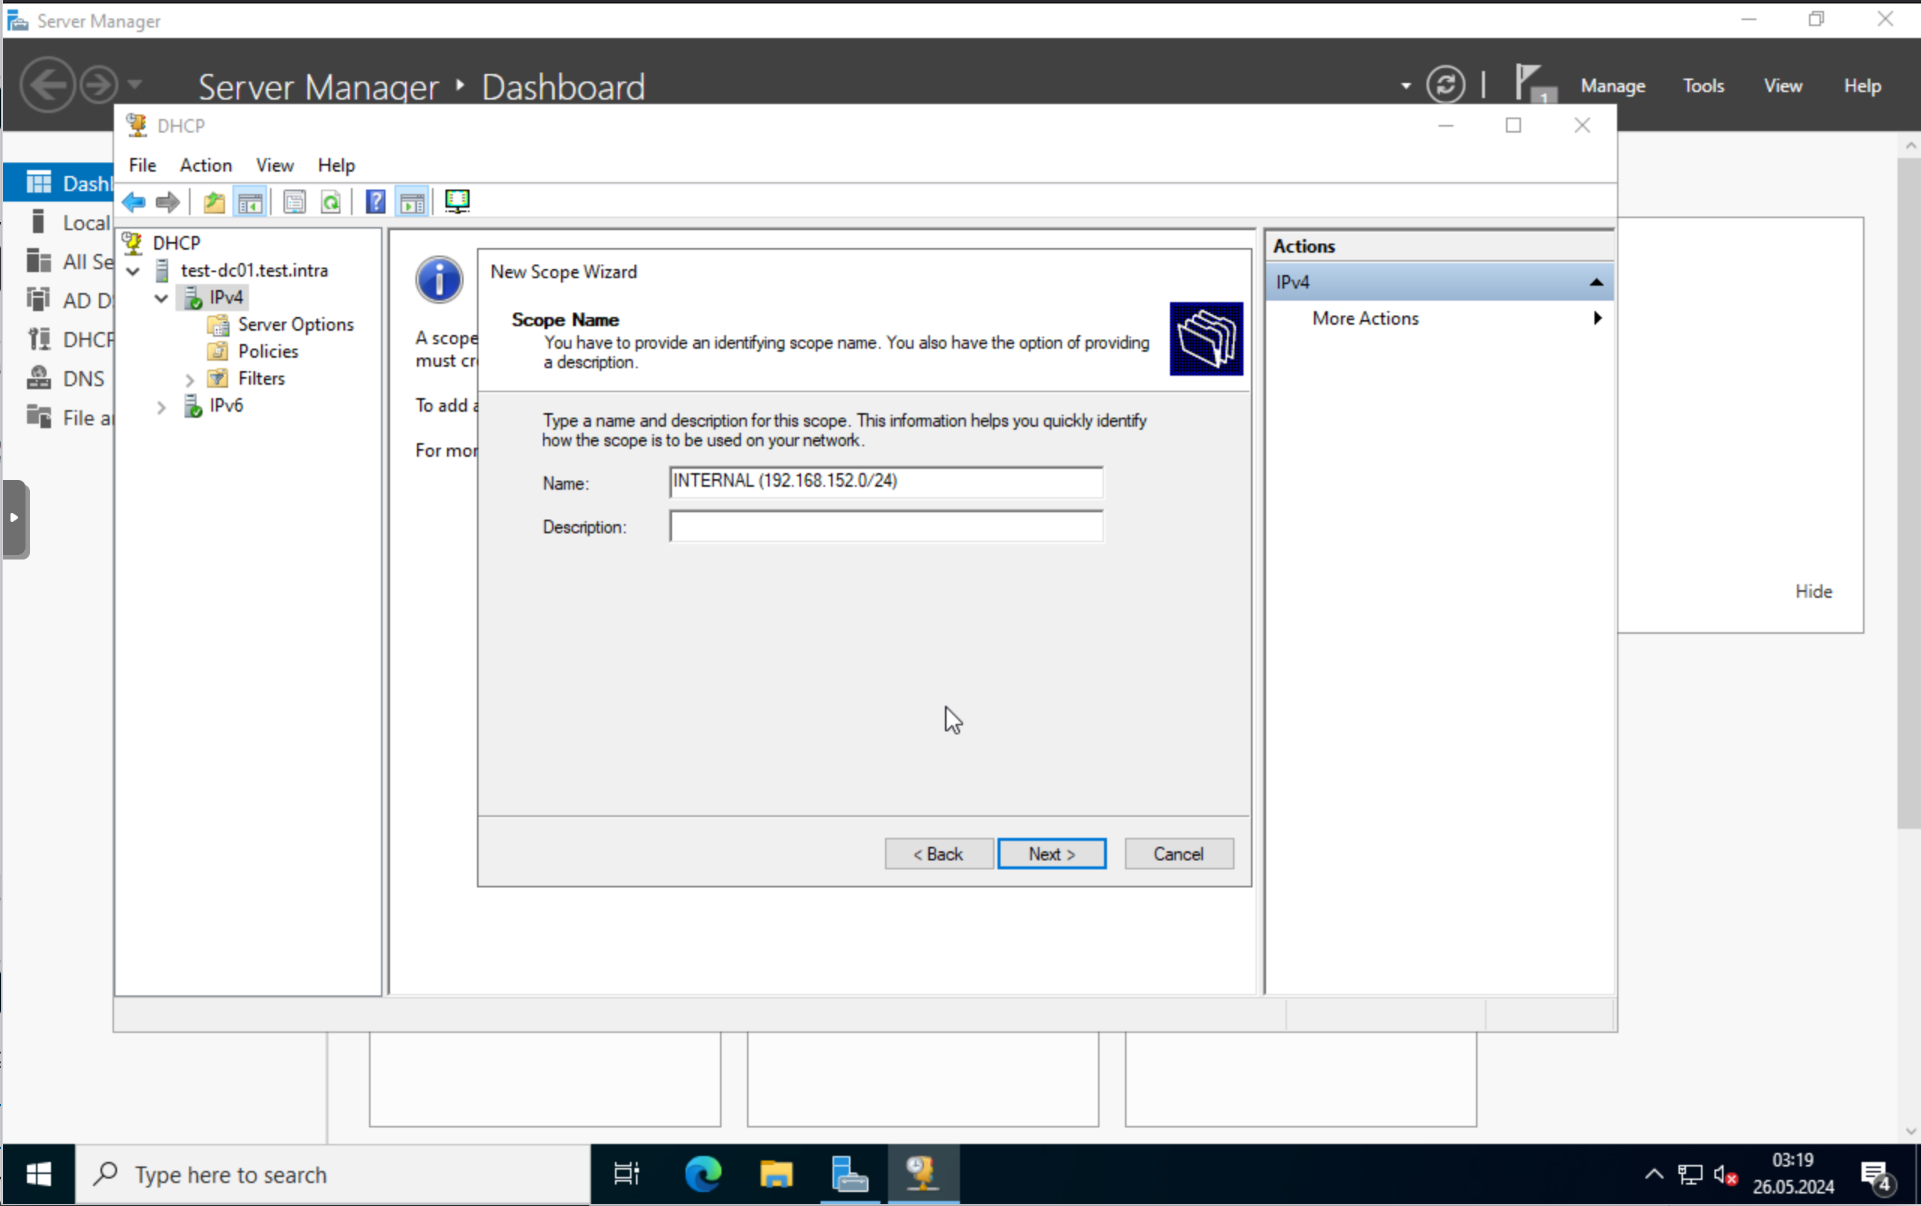
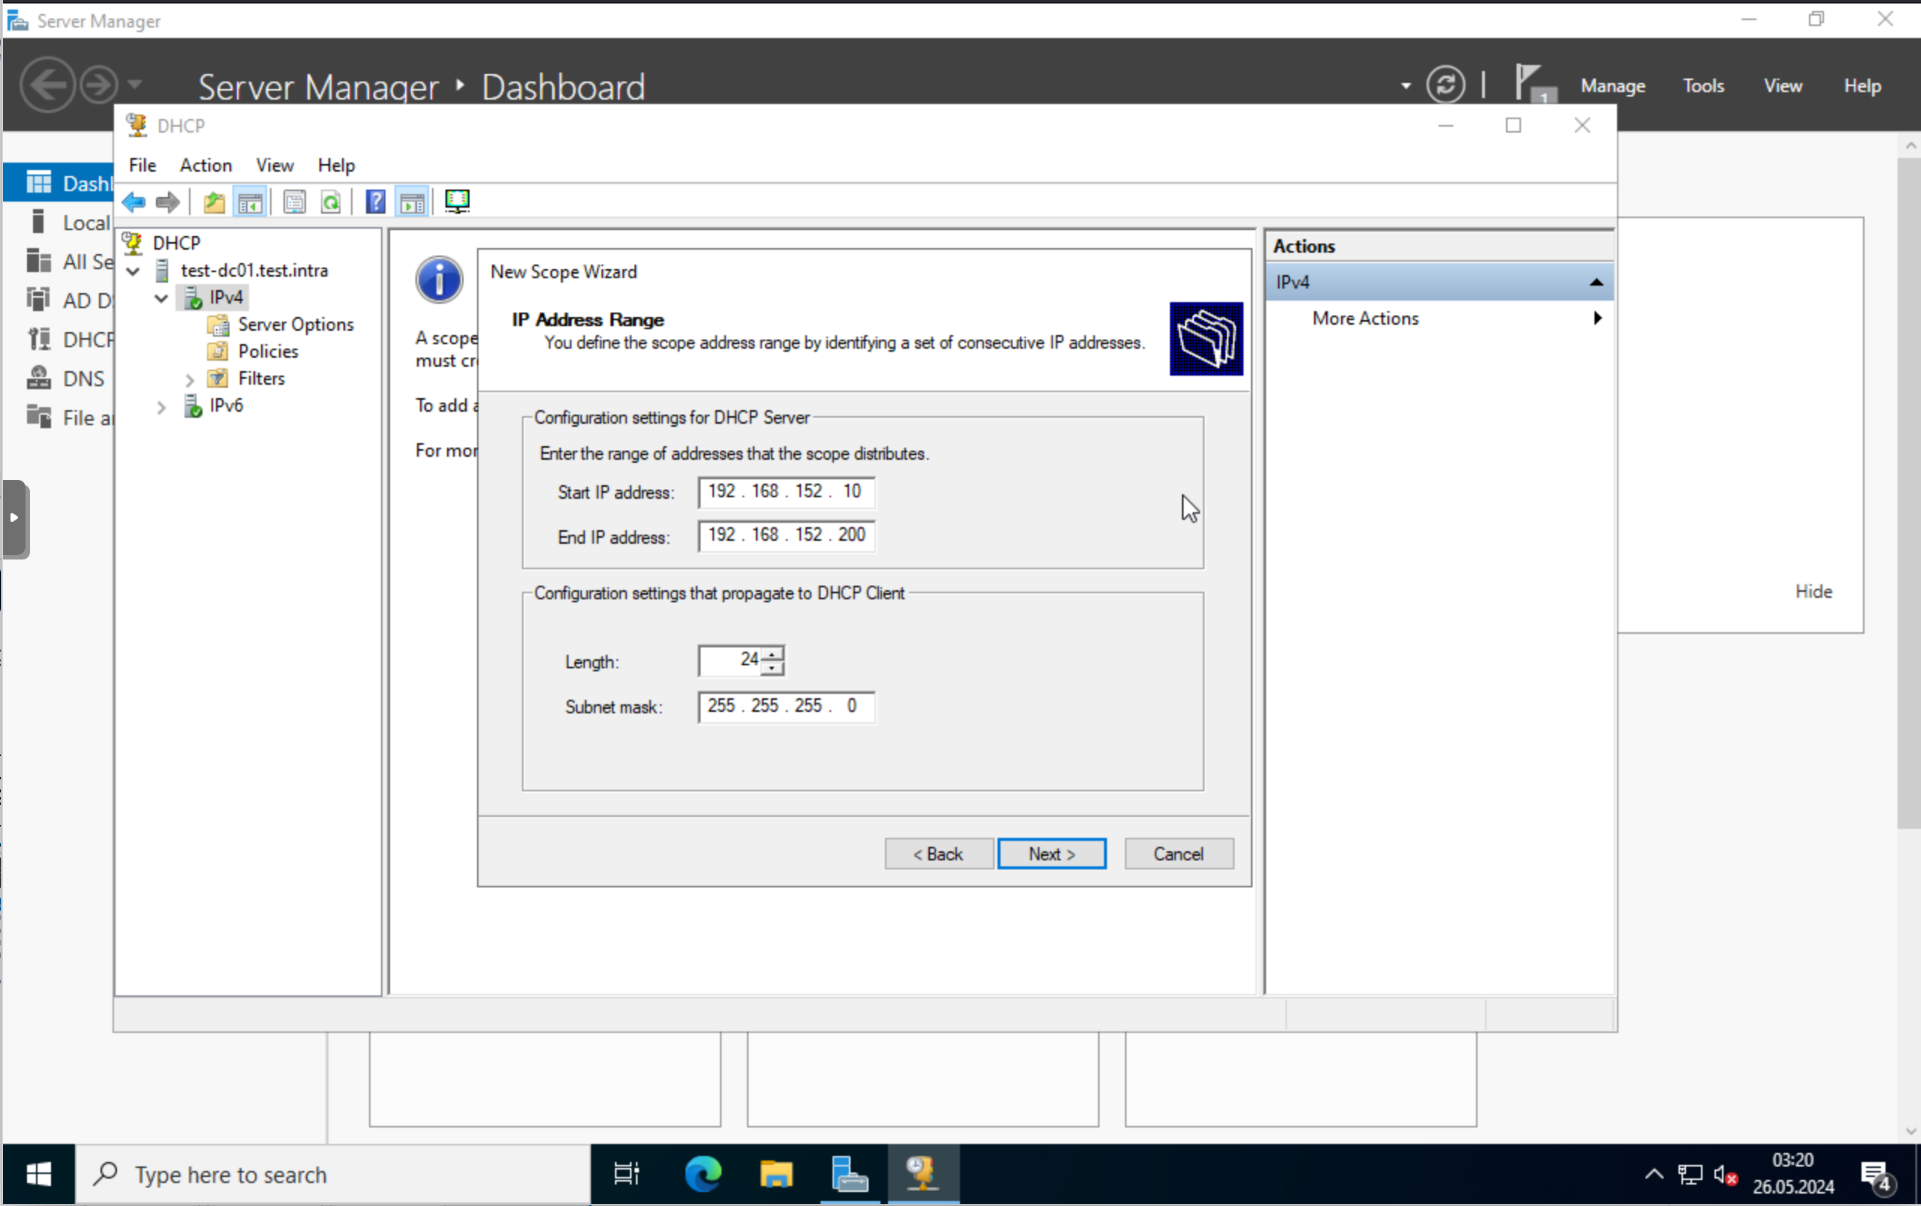
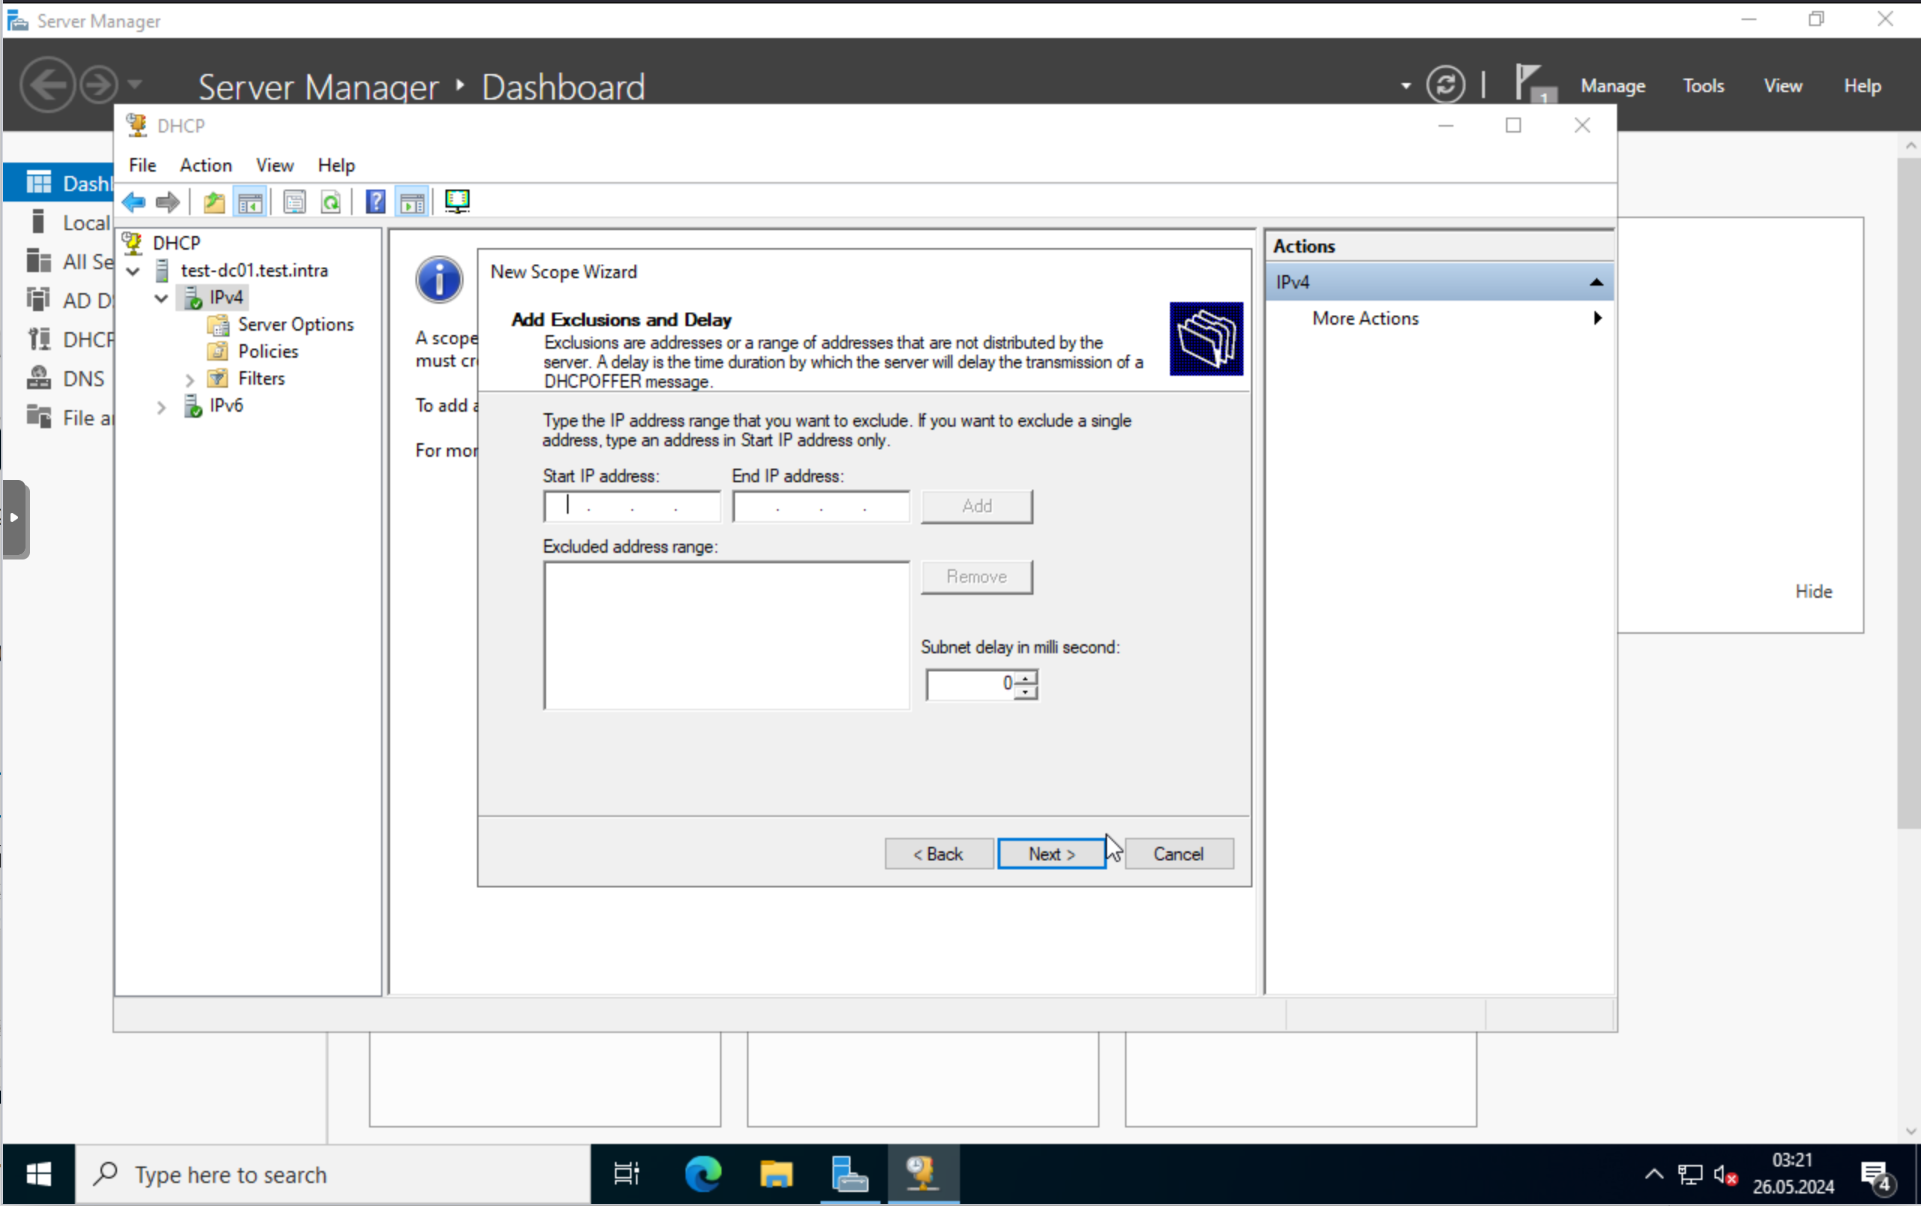
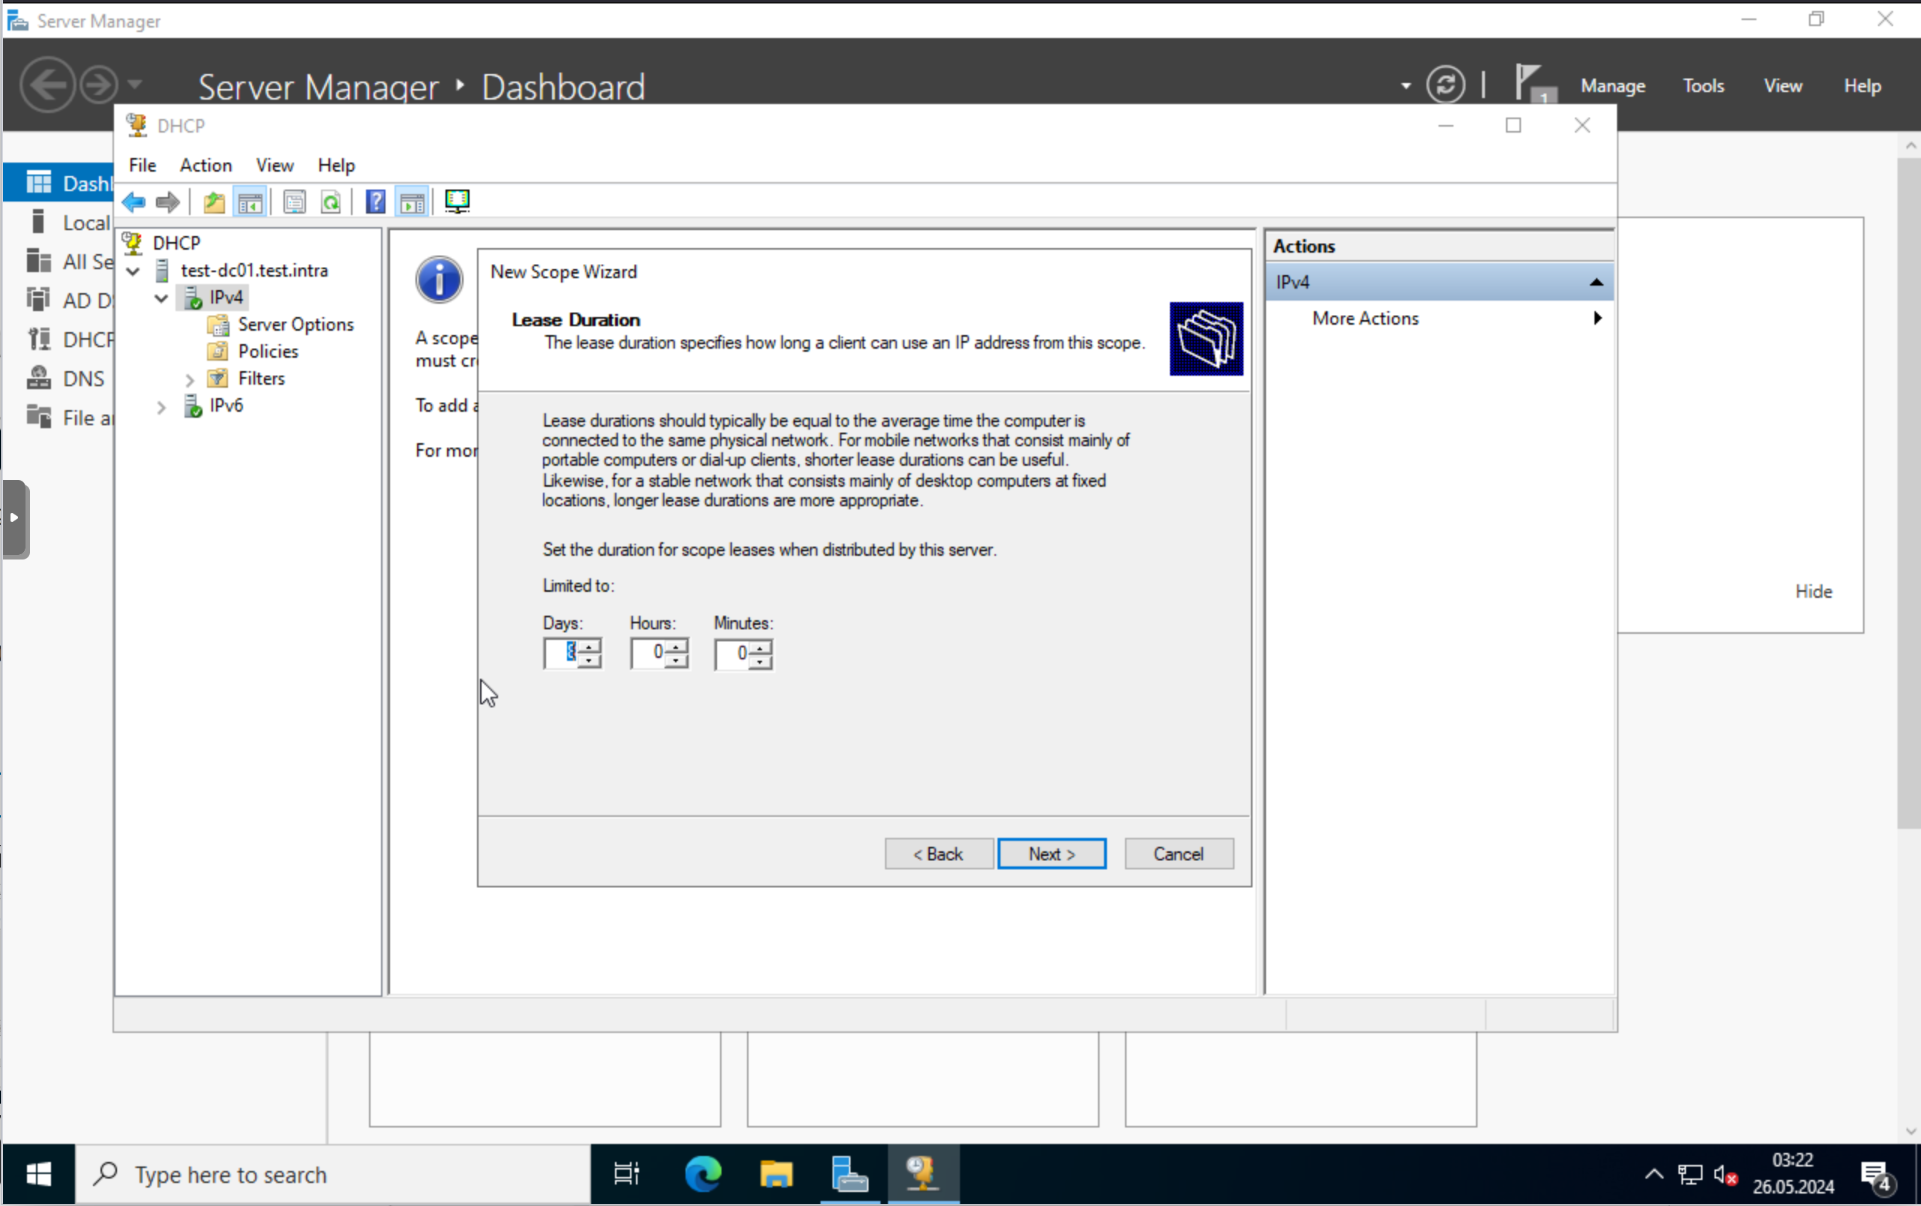
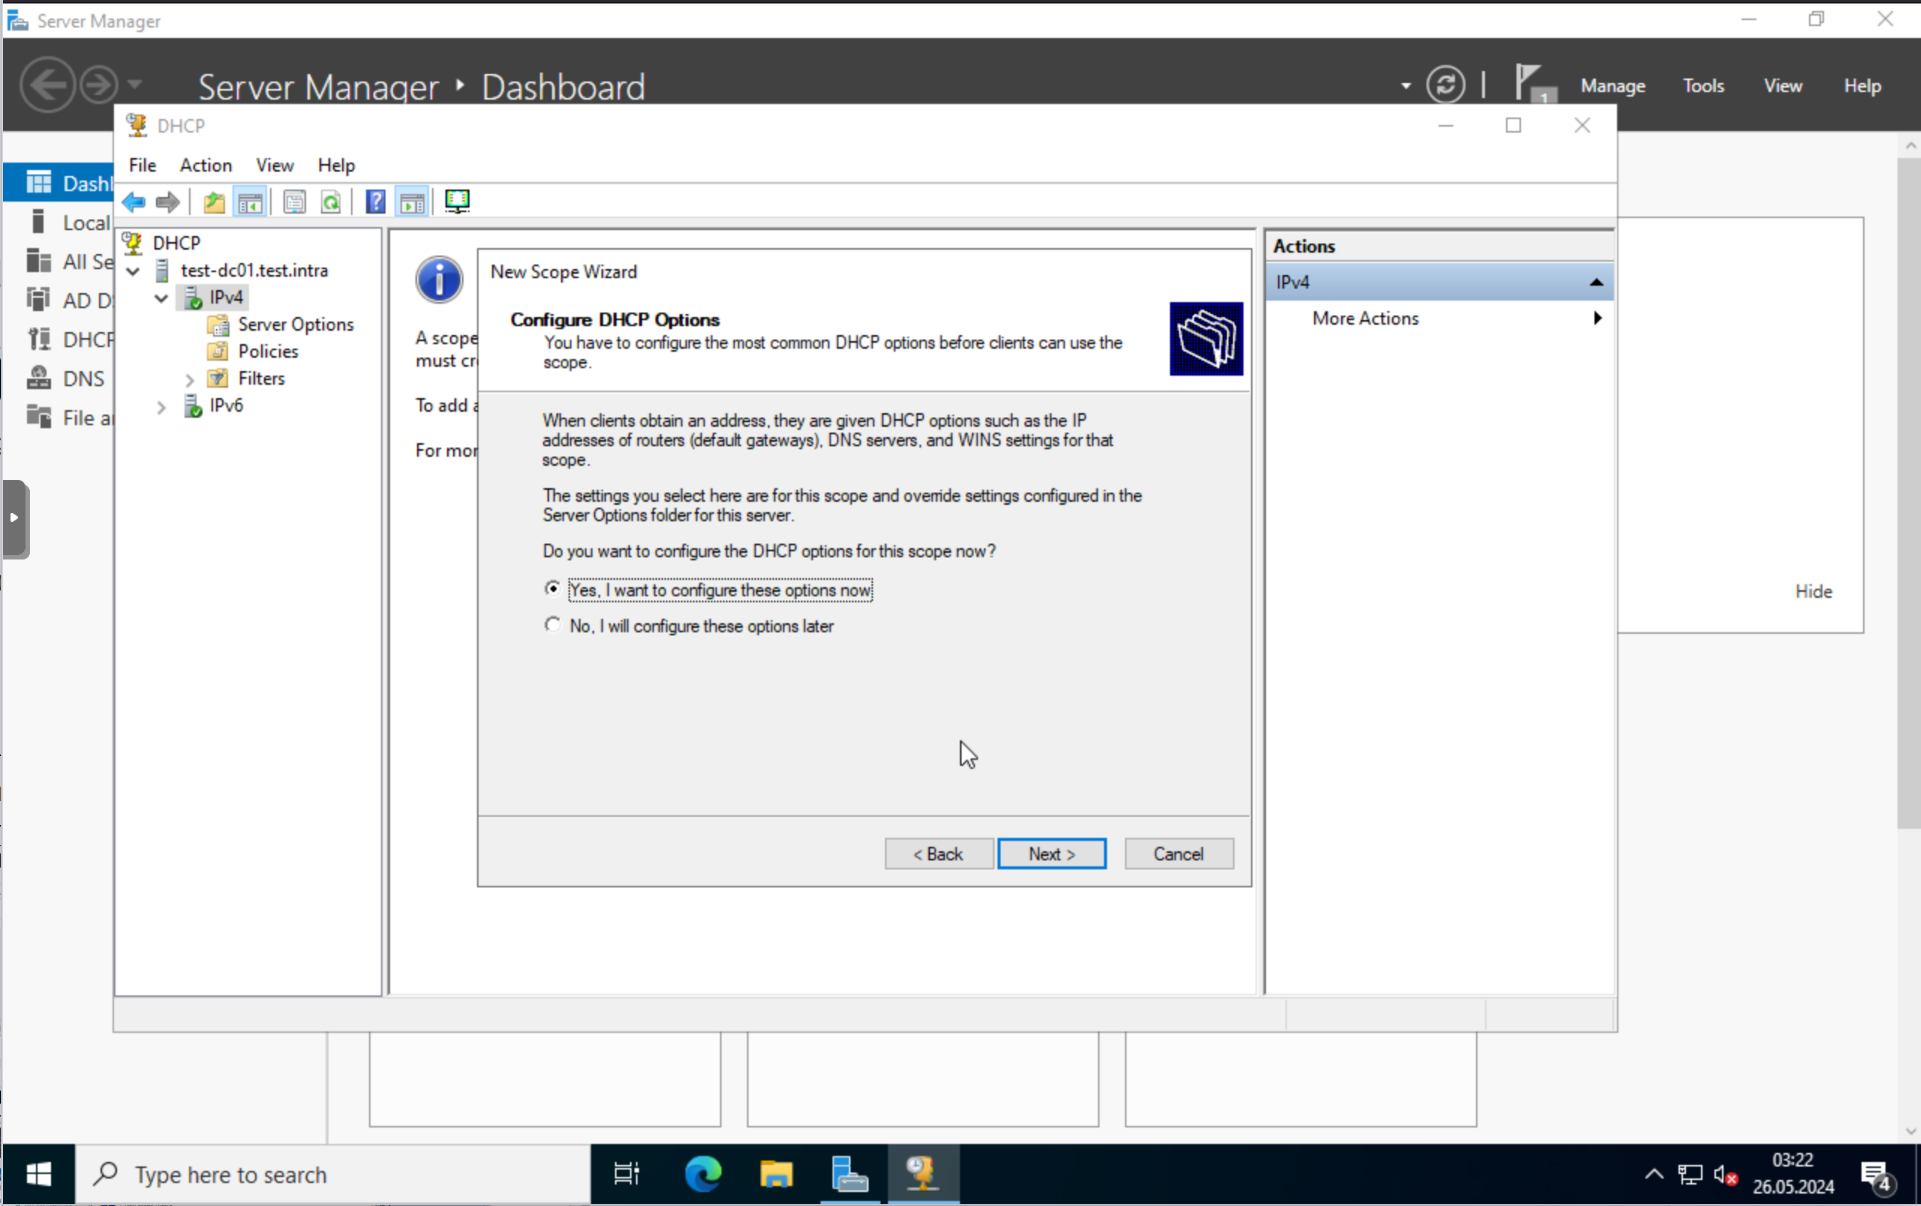
Let’s go through the options.
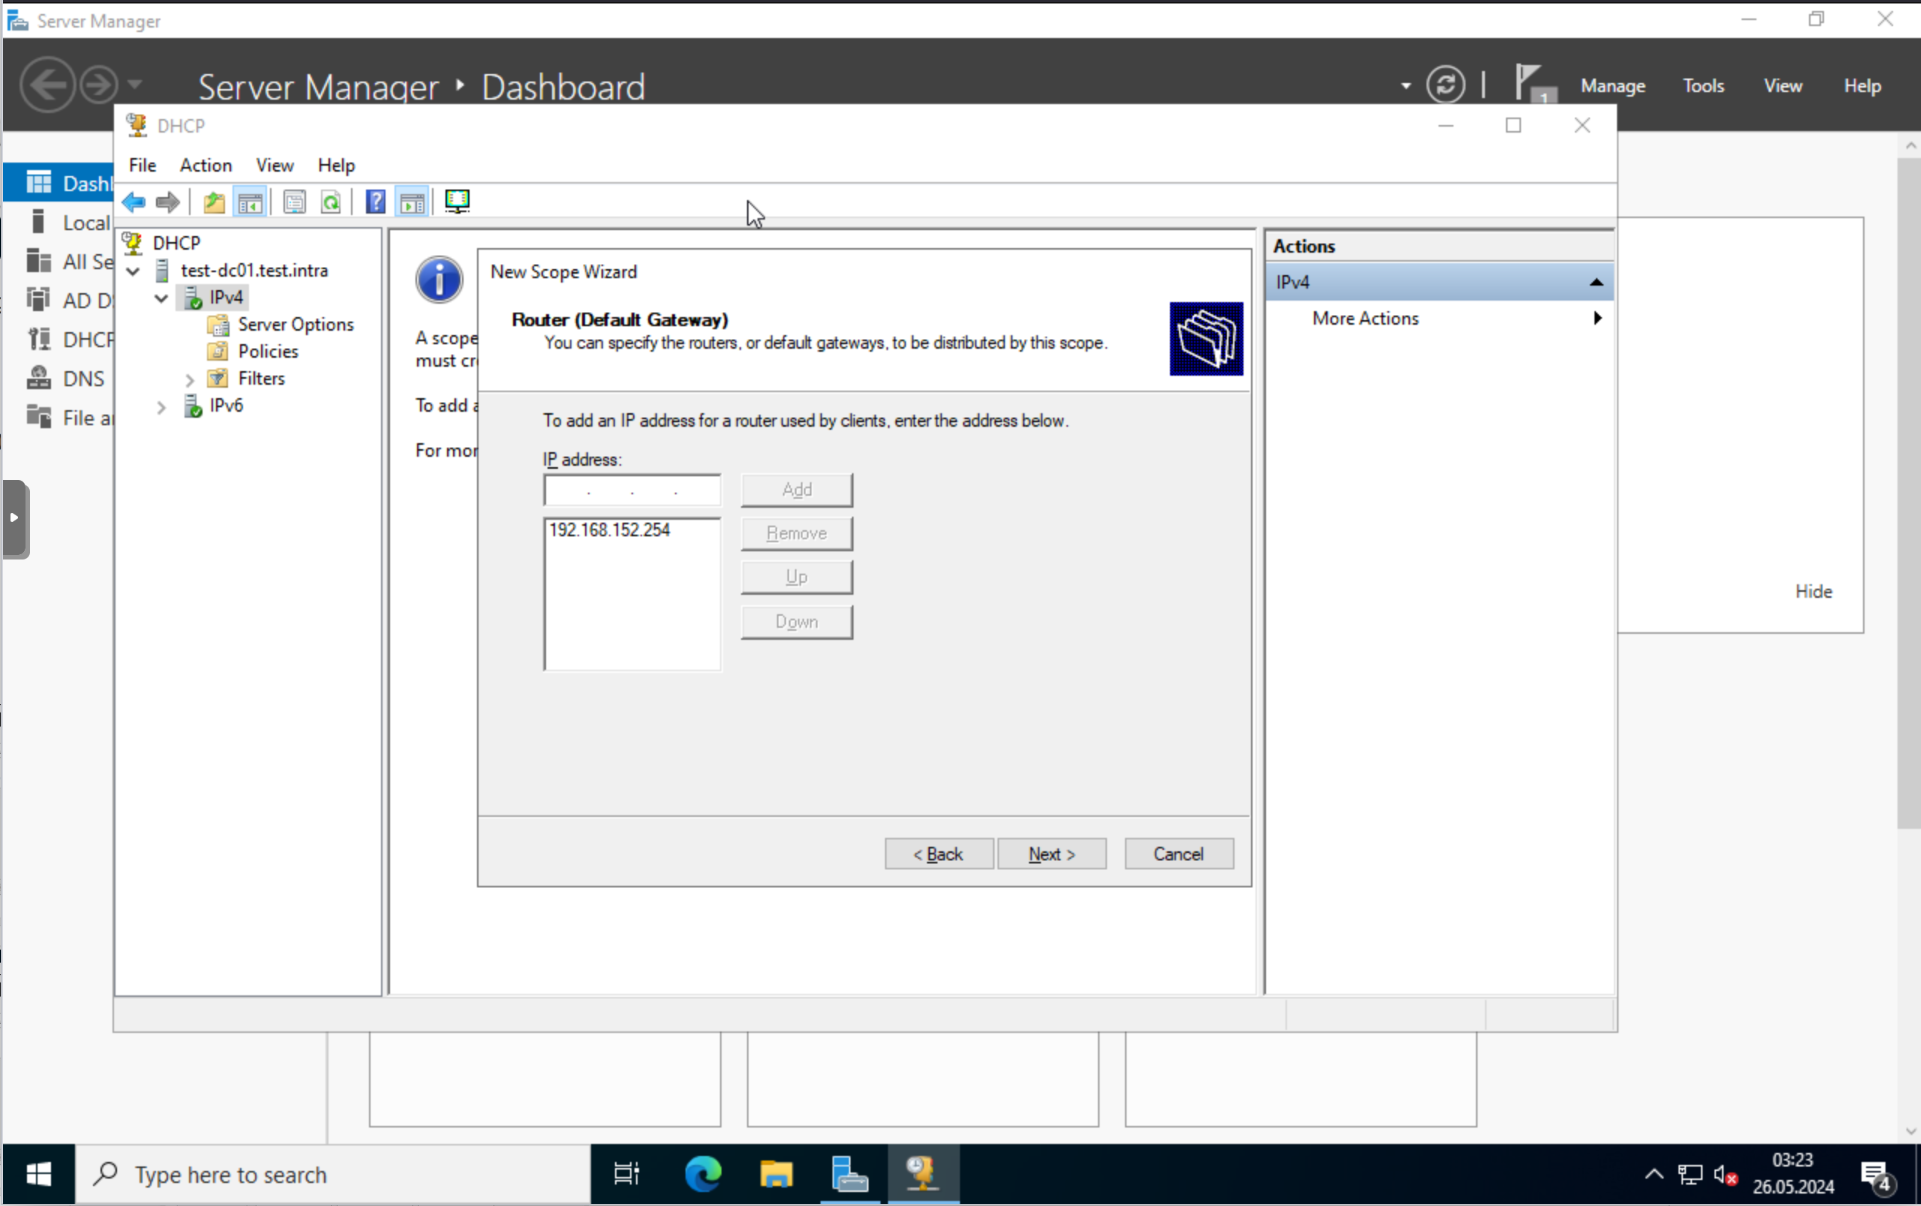
Set the gateway, this would be your router in your network. “192.168.152.254” in my case.
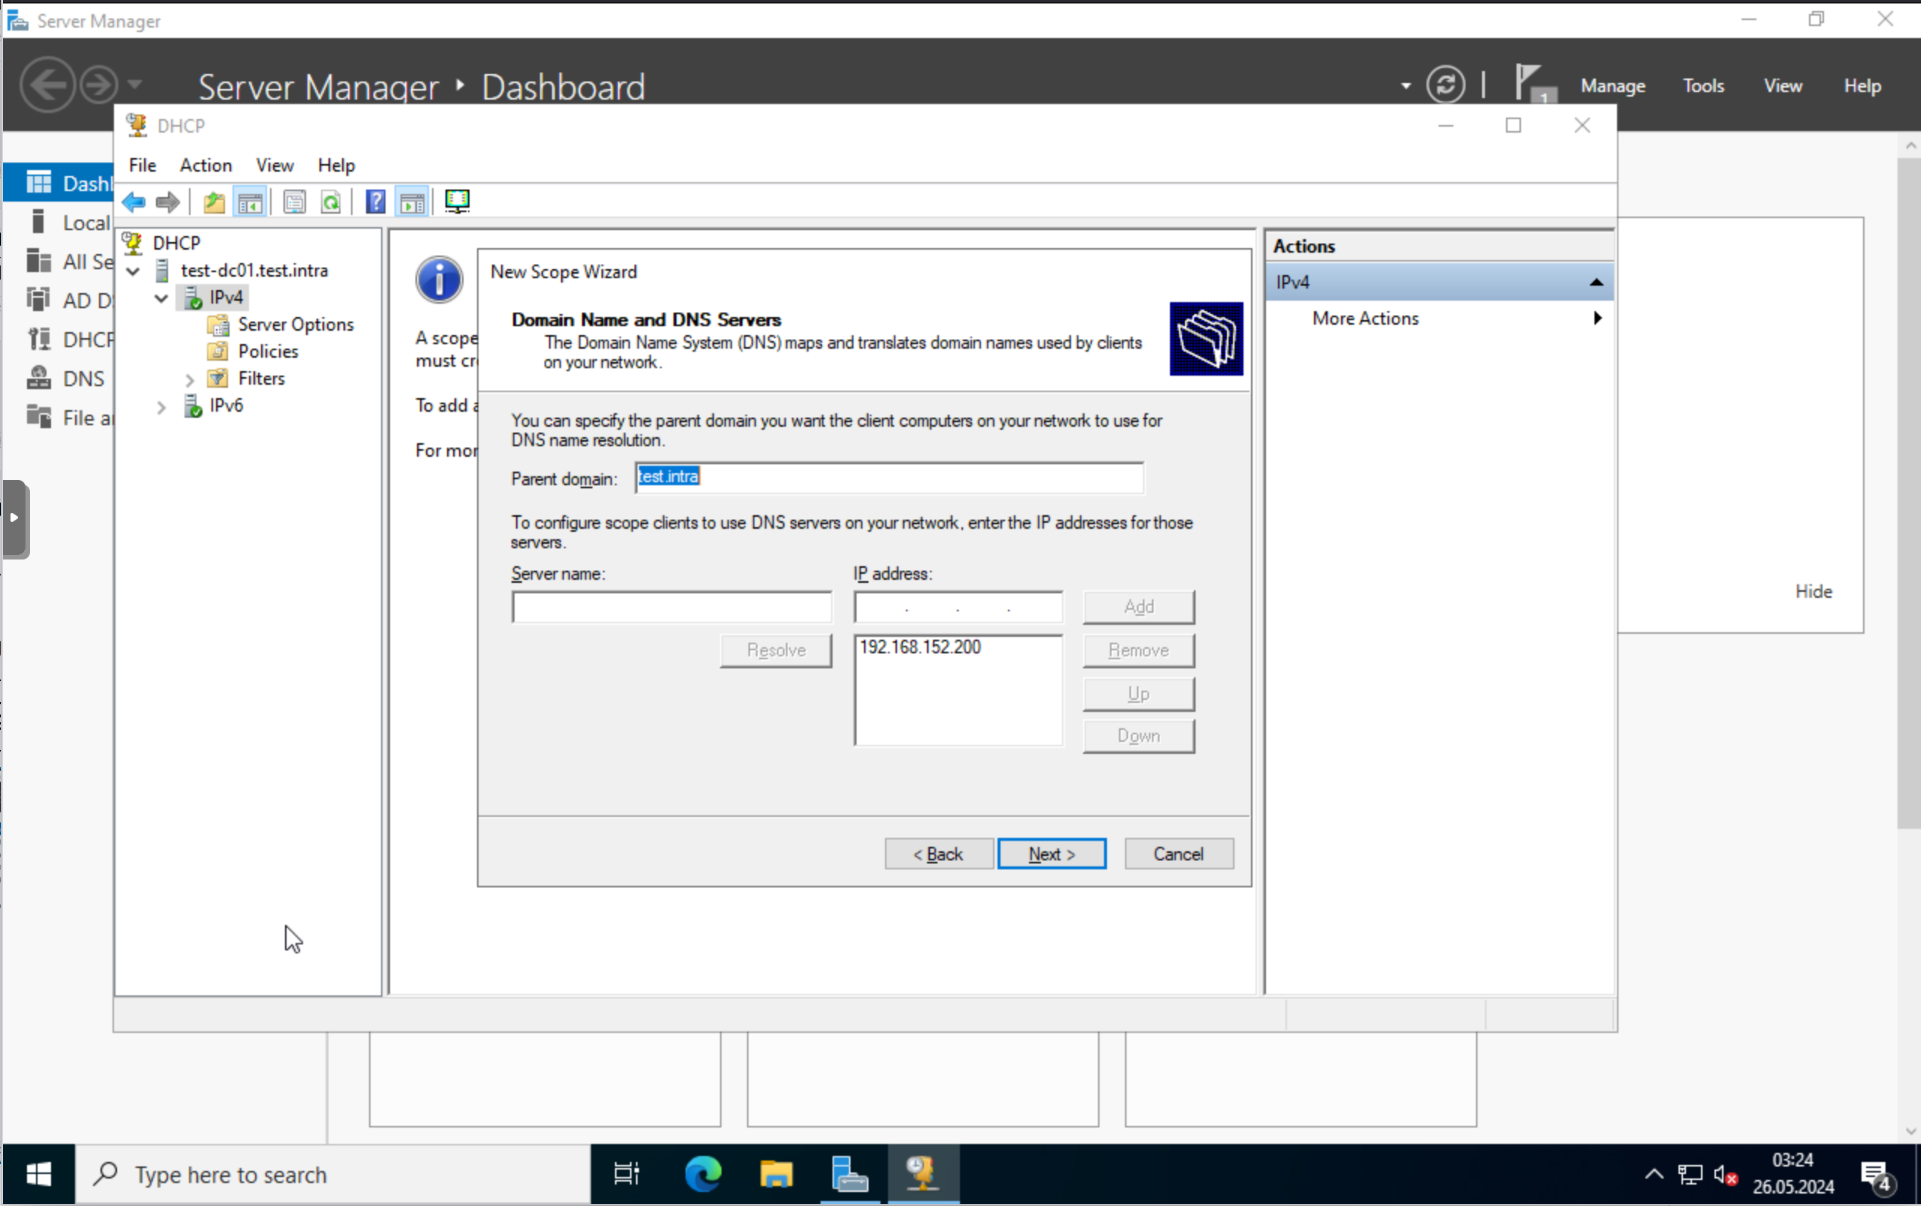
Verify that the domain name and DNS server configuration is correct. It is in my case.
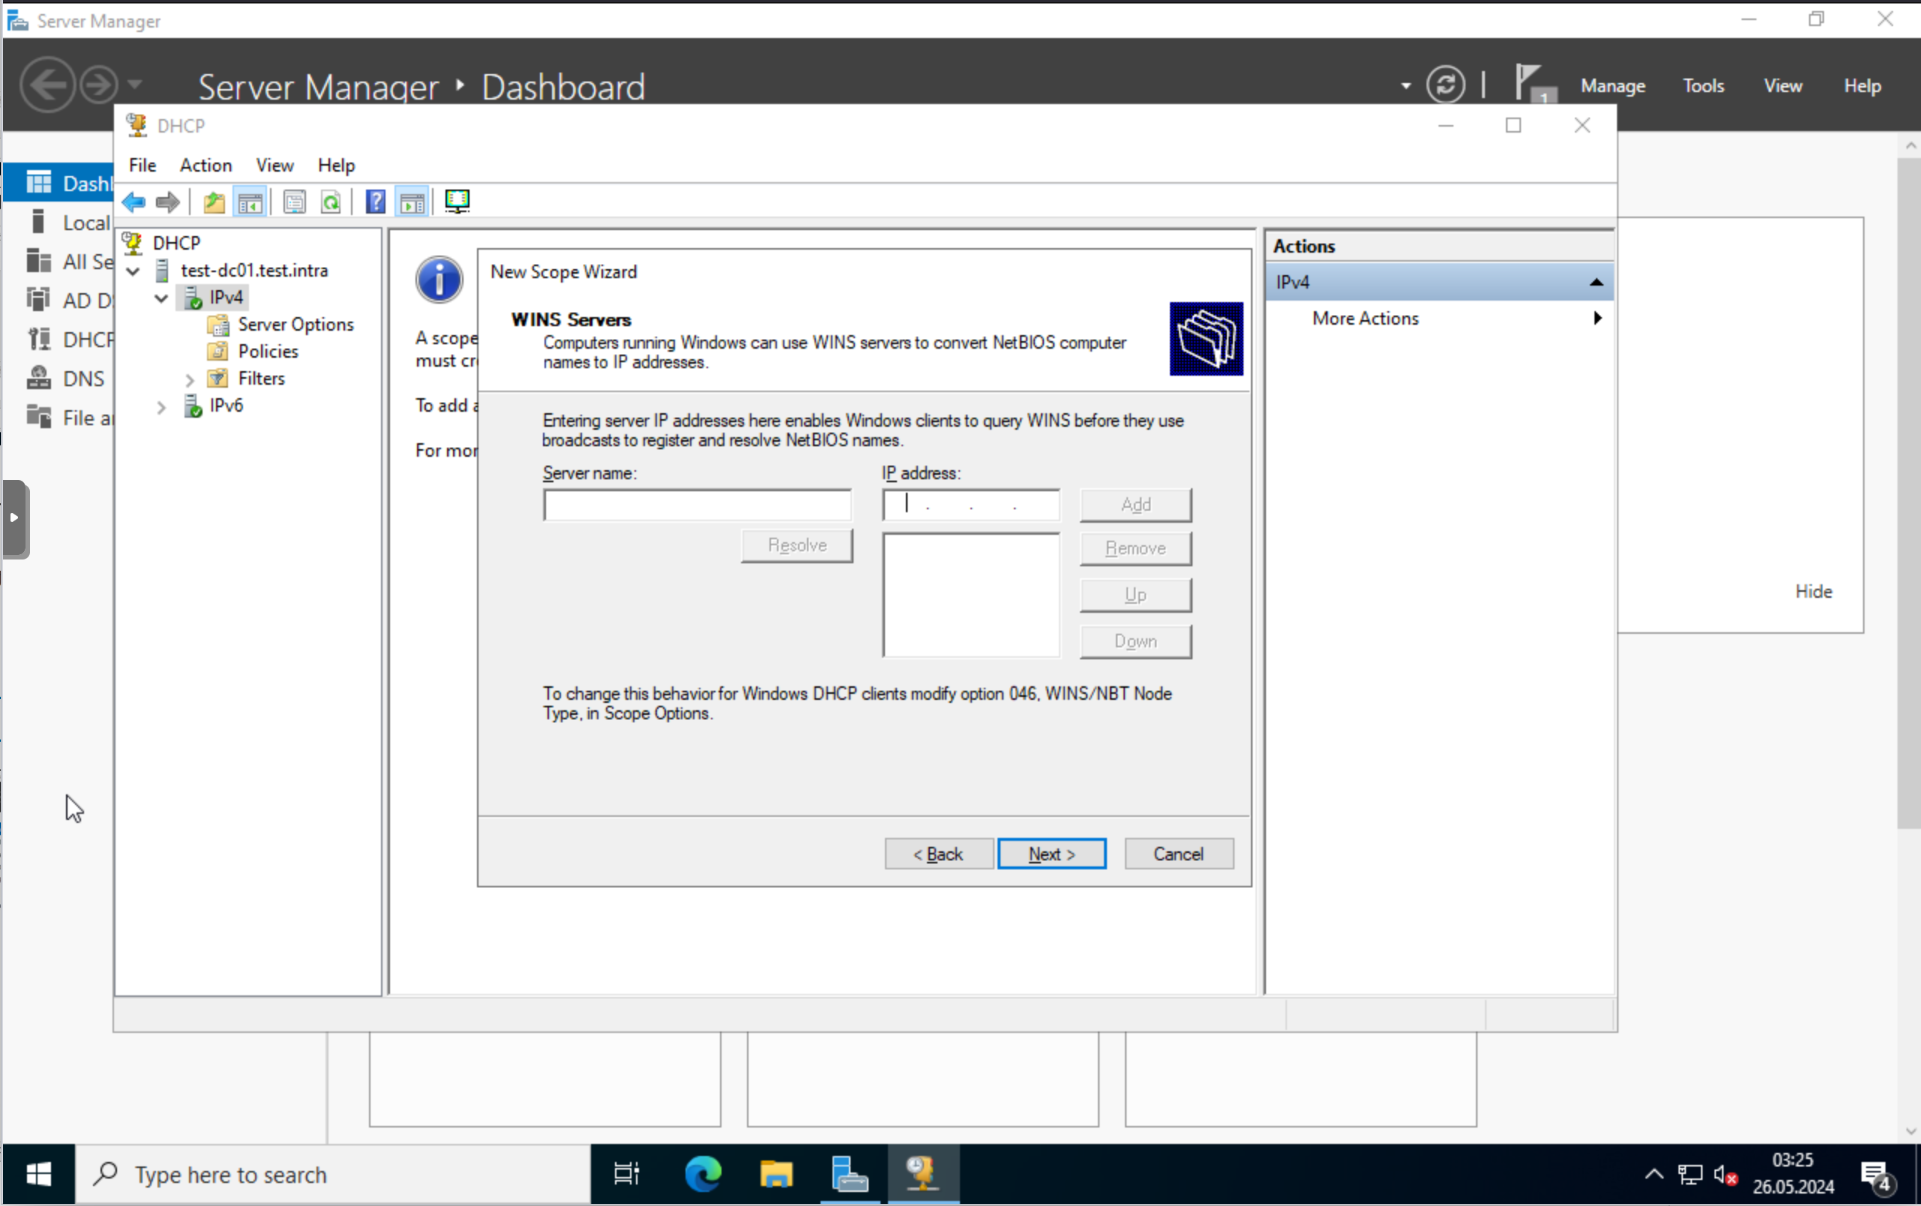
I will skip the WINS Server configuration.
Last but not least, we will activate the scope now.
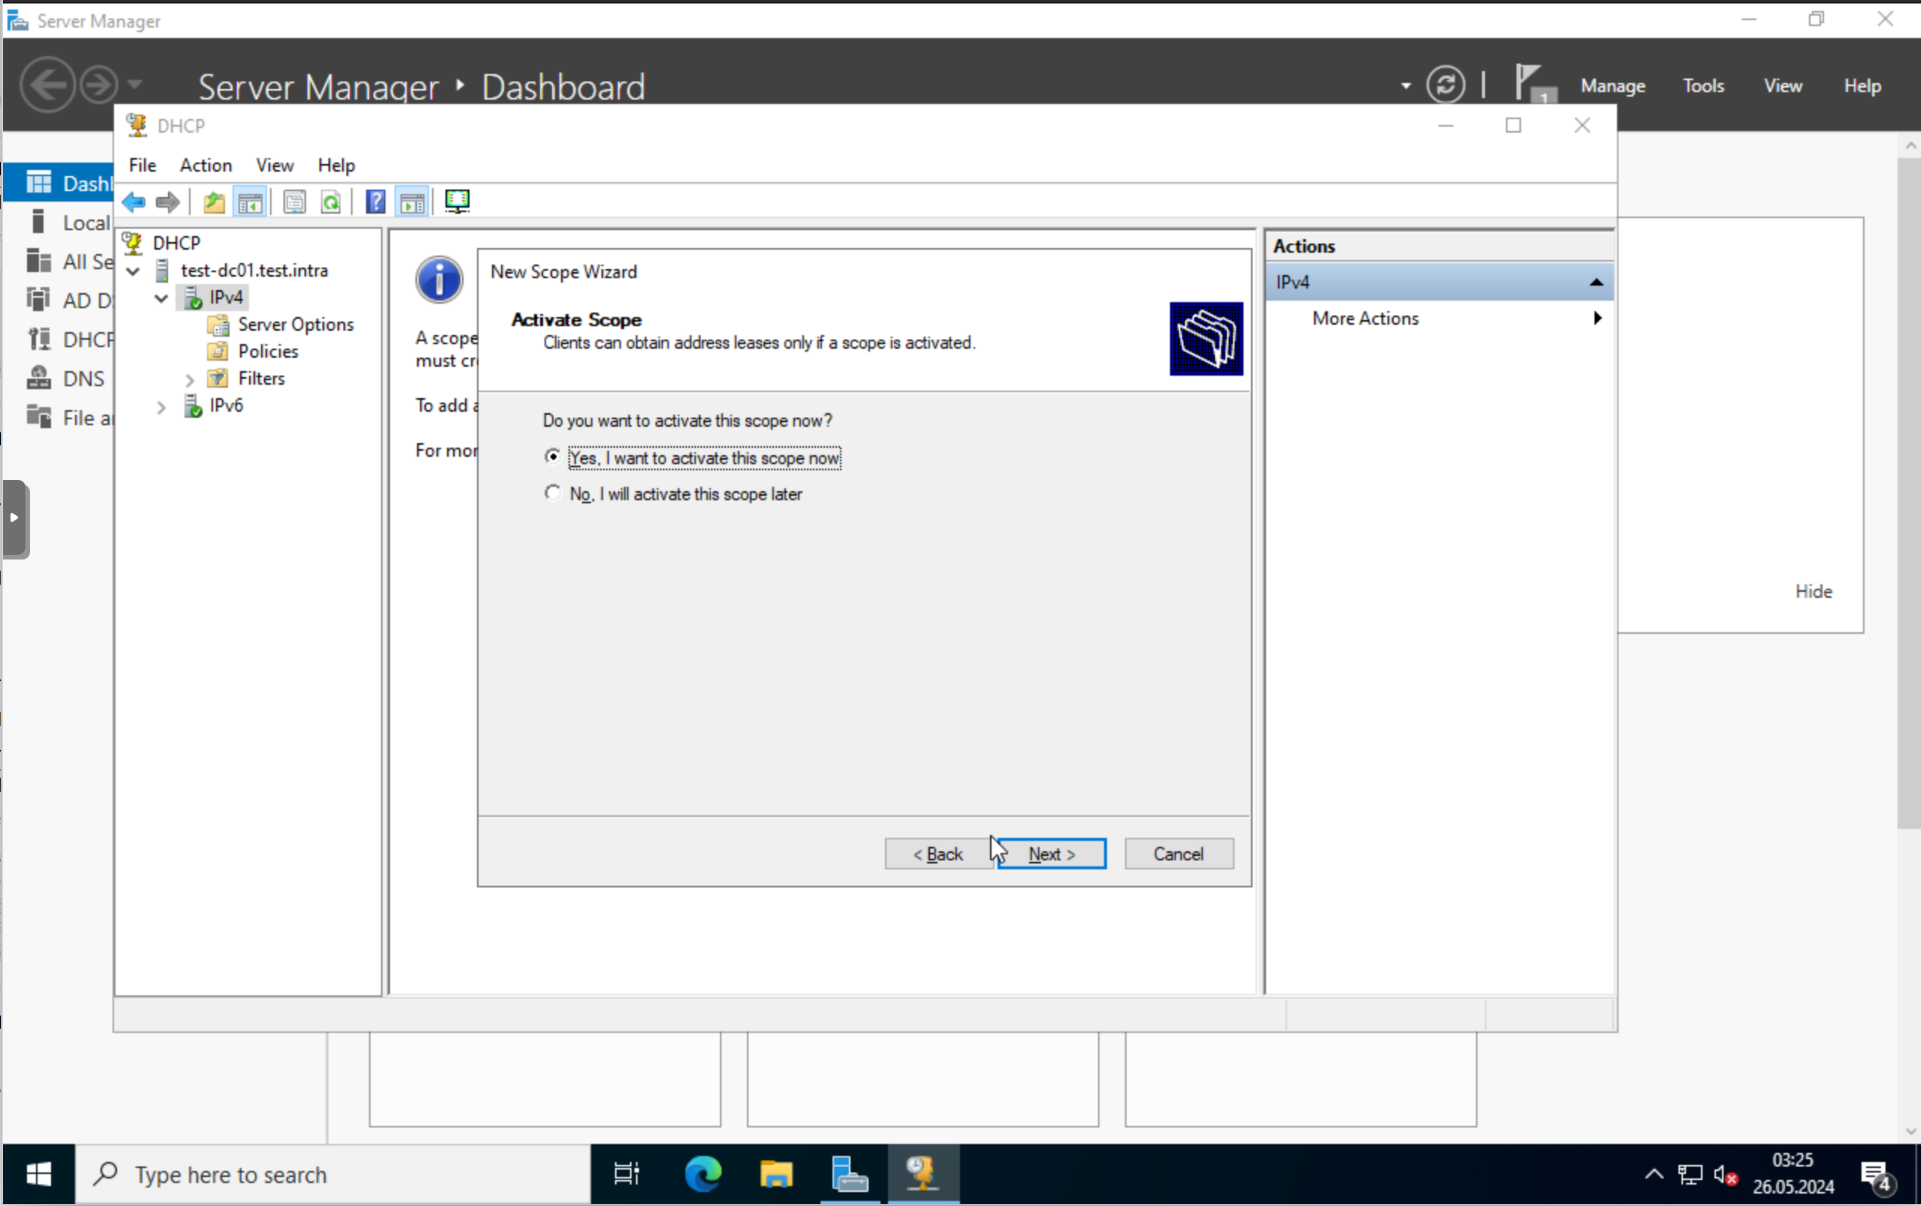
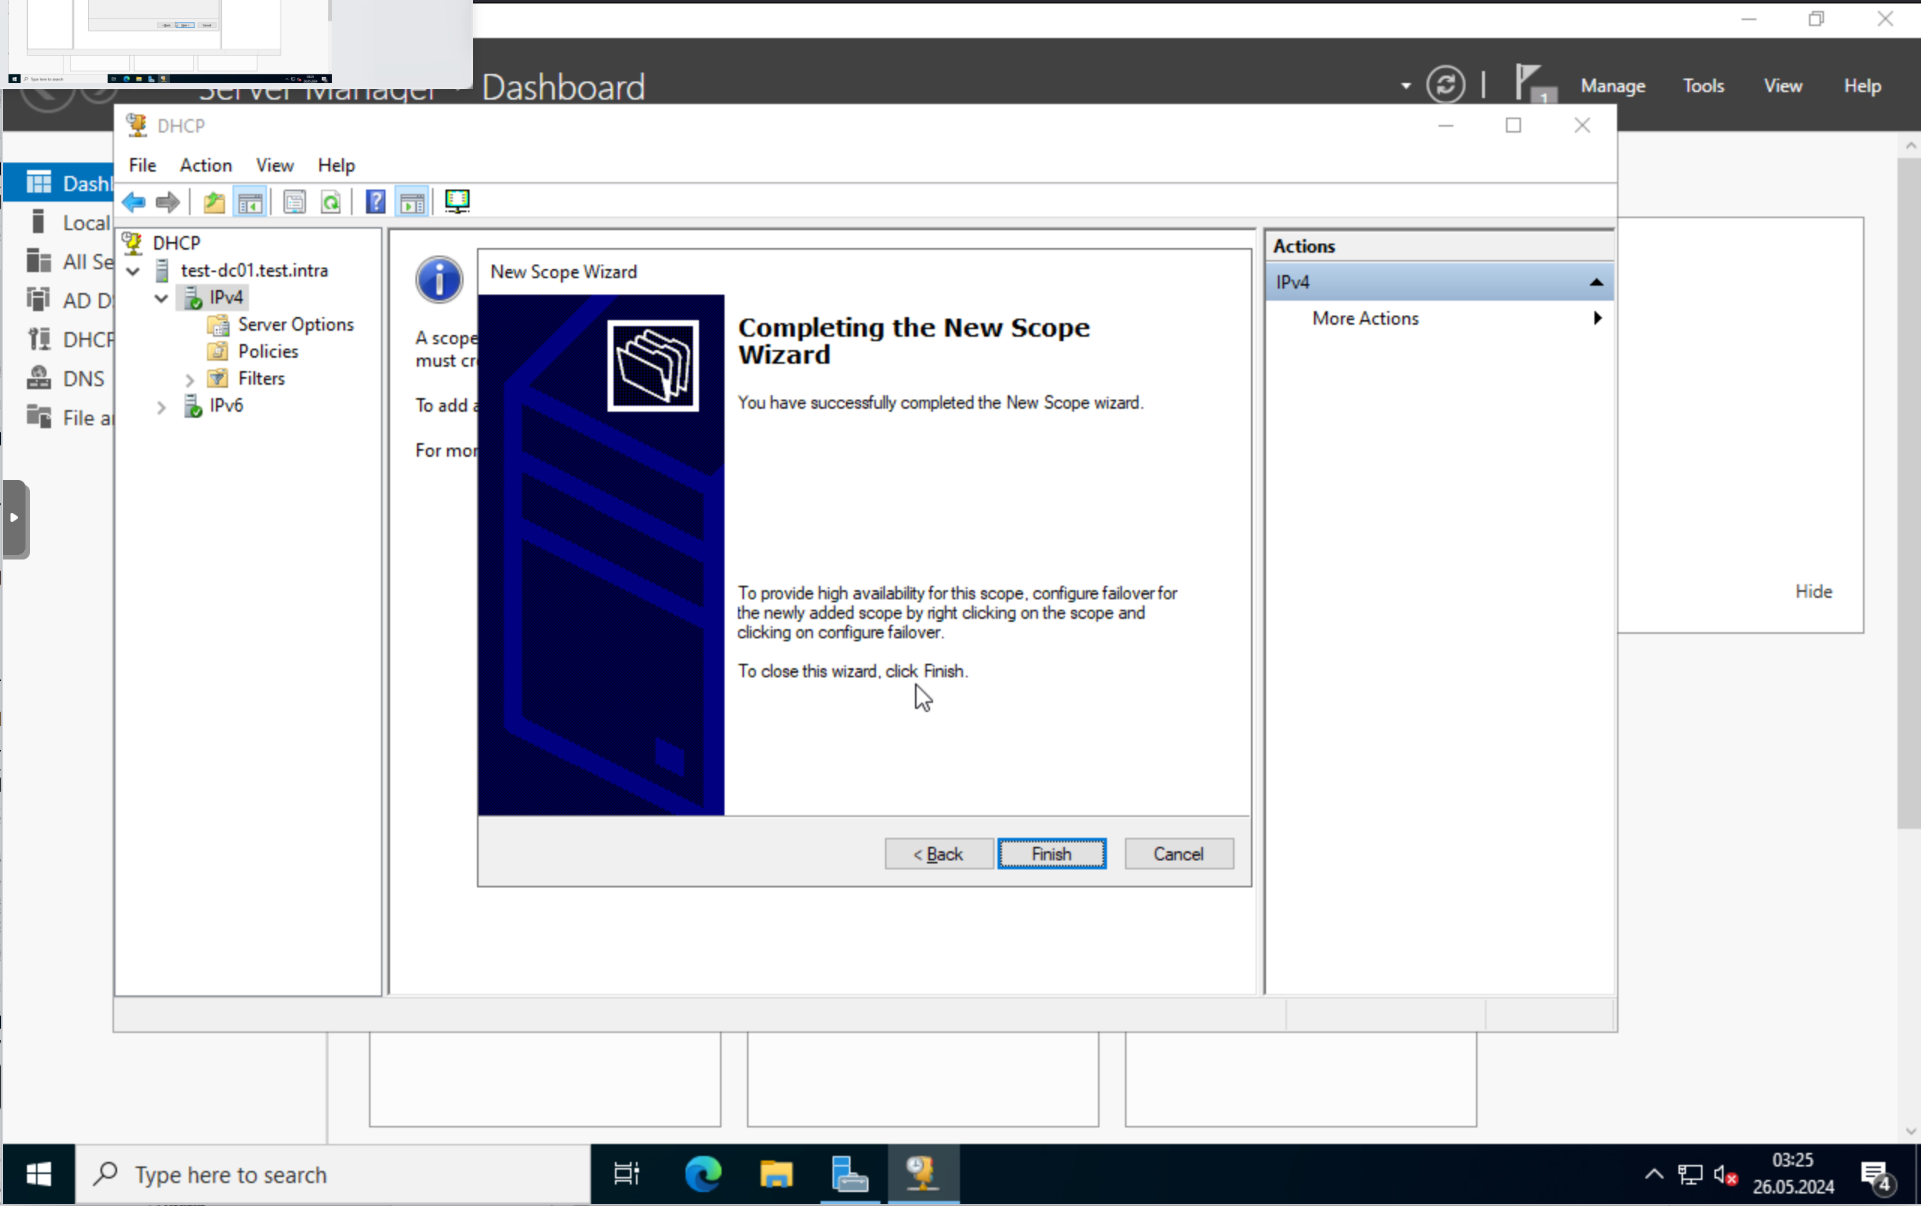
That’s it for the DHCP server.
Creating Users and Groups in Active Directory
Let’s log in to our Windows Domain Controller.
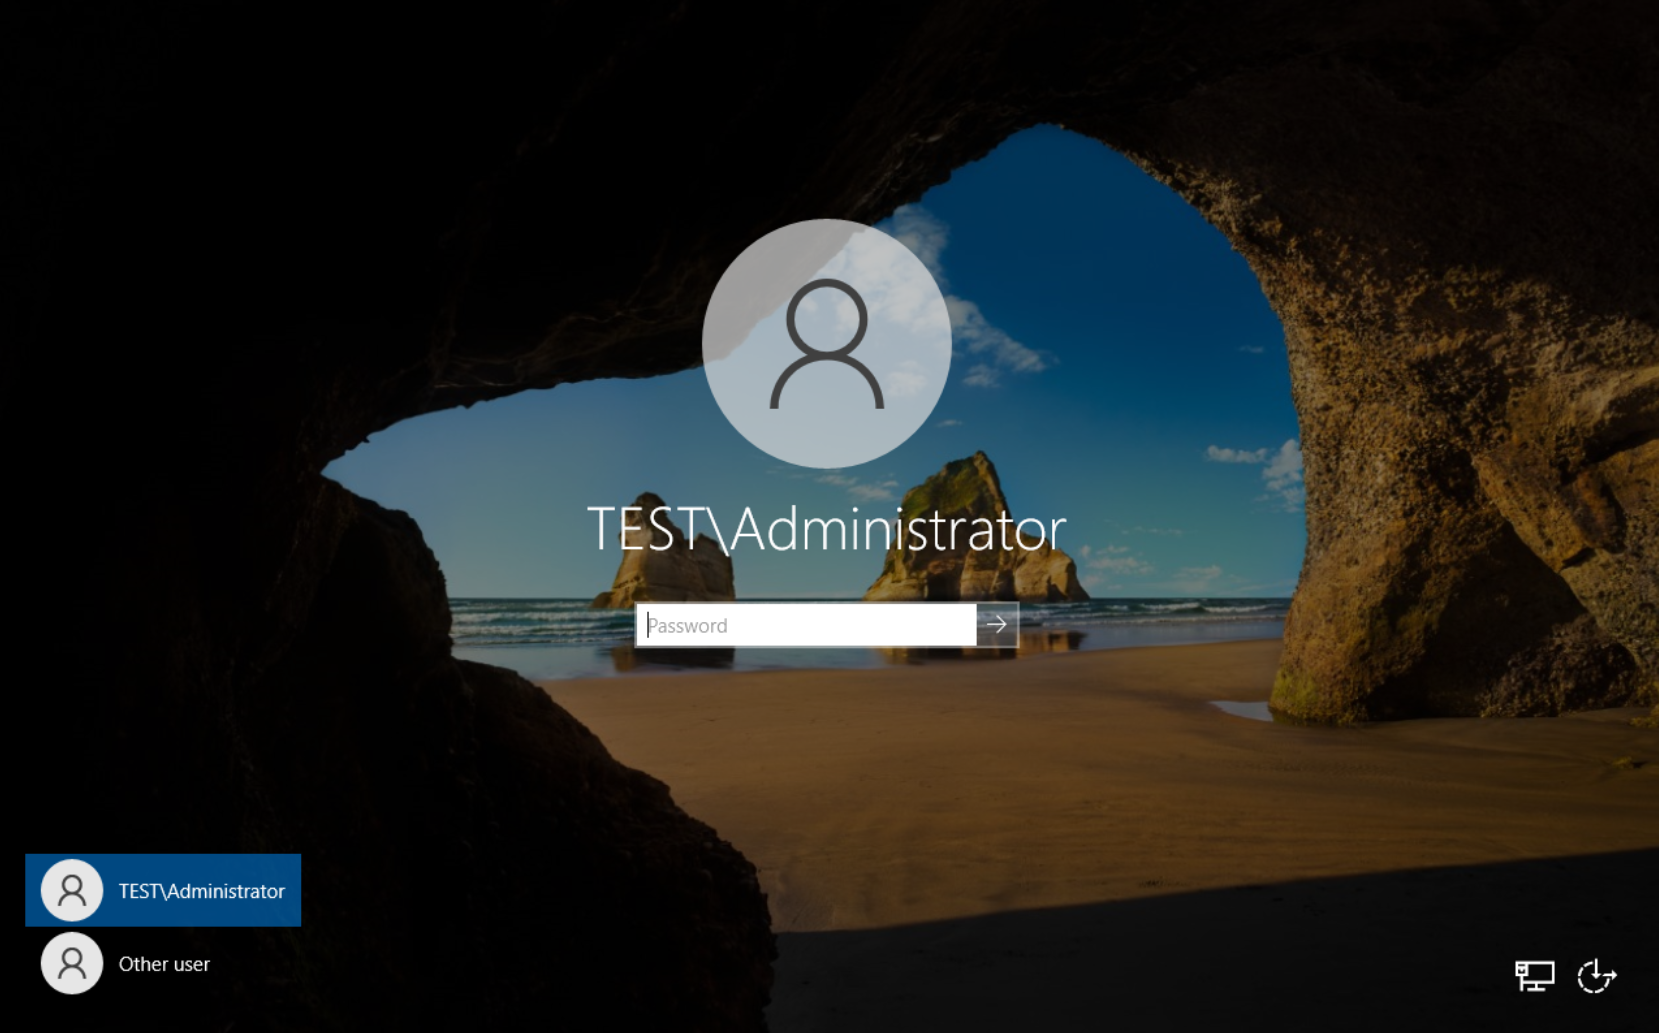
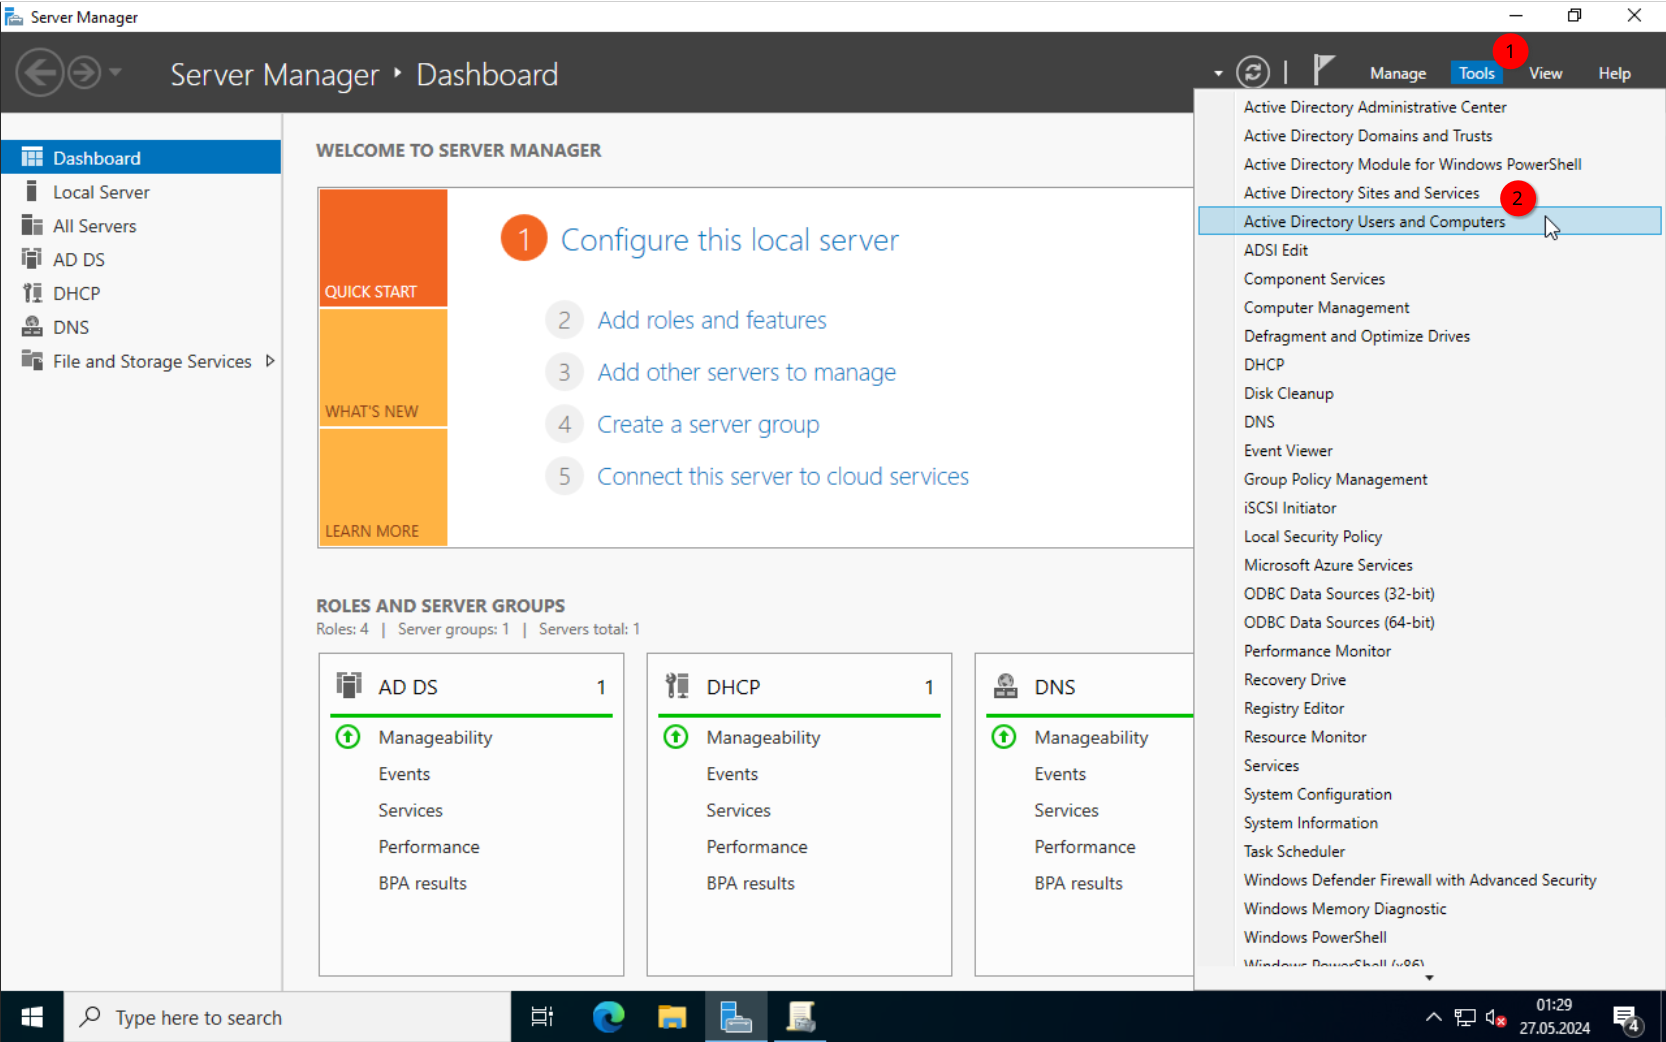
Once in, open the “Server Manager” (this should open automatically), and select the “Tools” in the top right corner. Here we can click on “Active Directory Users and Computers” where we can create new users, organizational units and so on.
Activating “Advanced Features” view
I want to enable the “Advanced Features” first, though. One of the main differences are the options you have in the “Properties” window. Here a side-by-side.
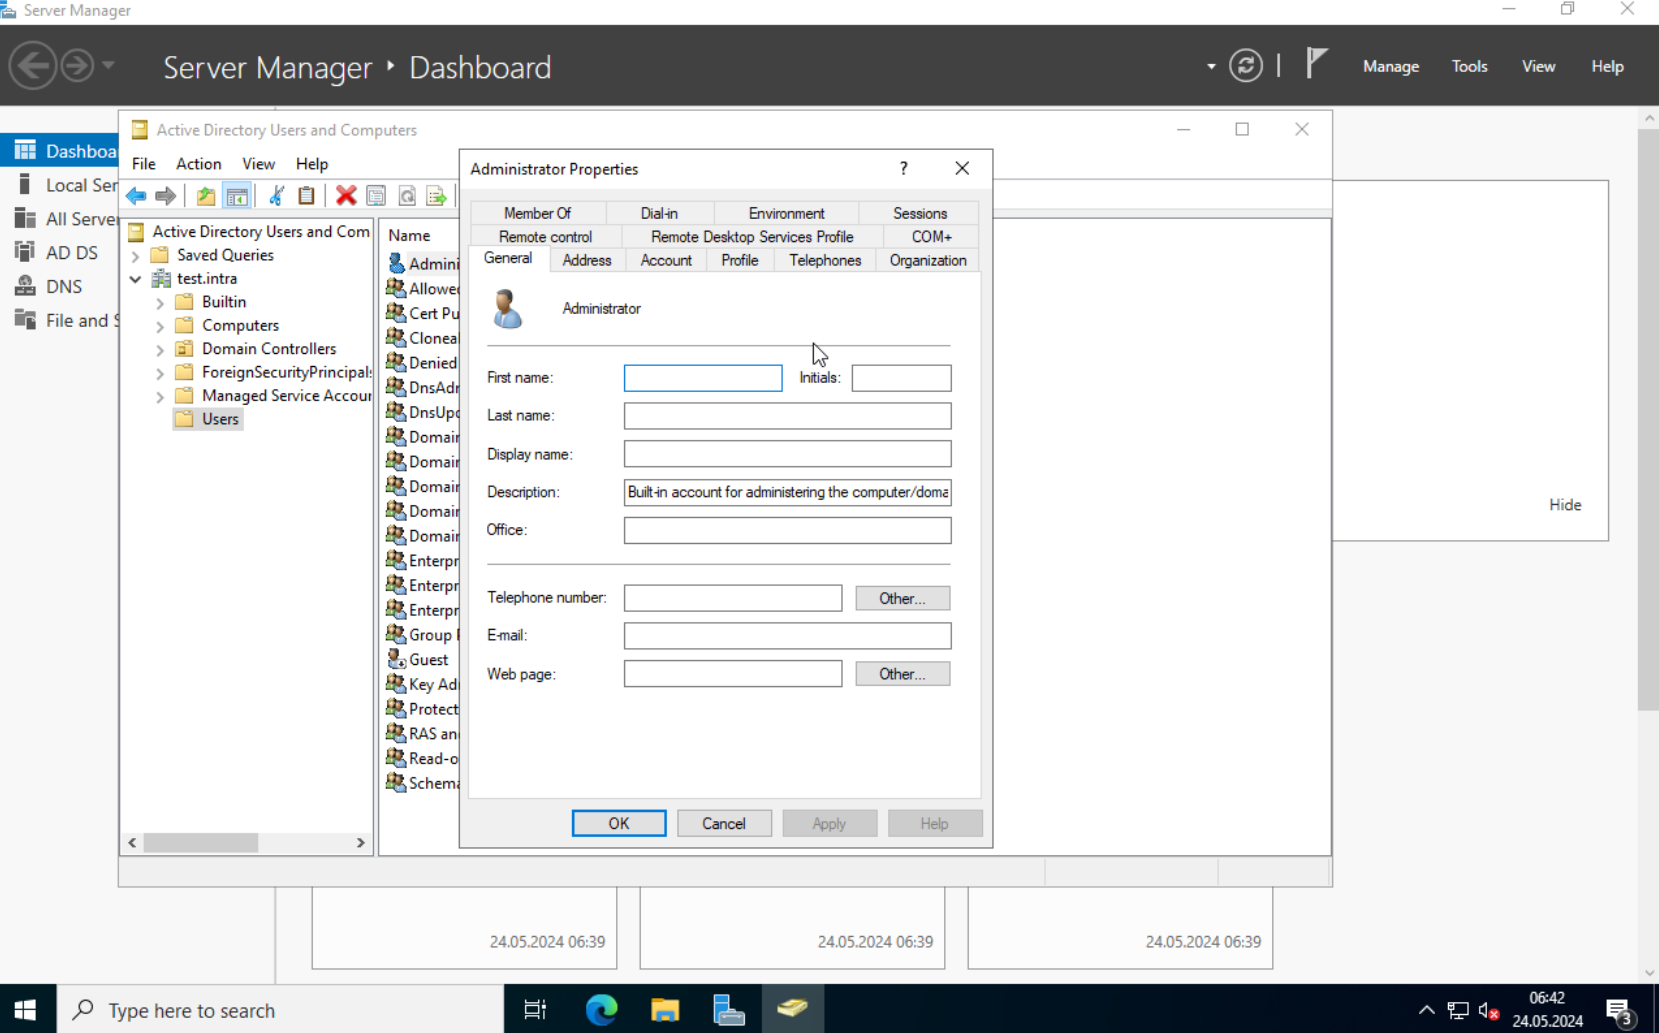
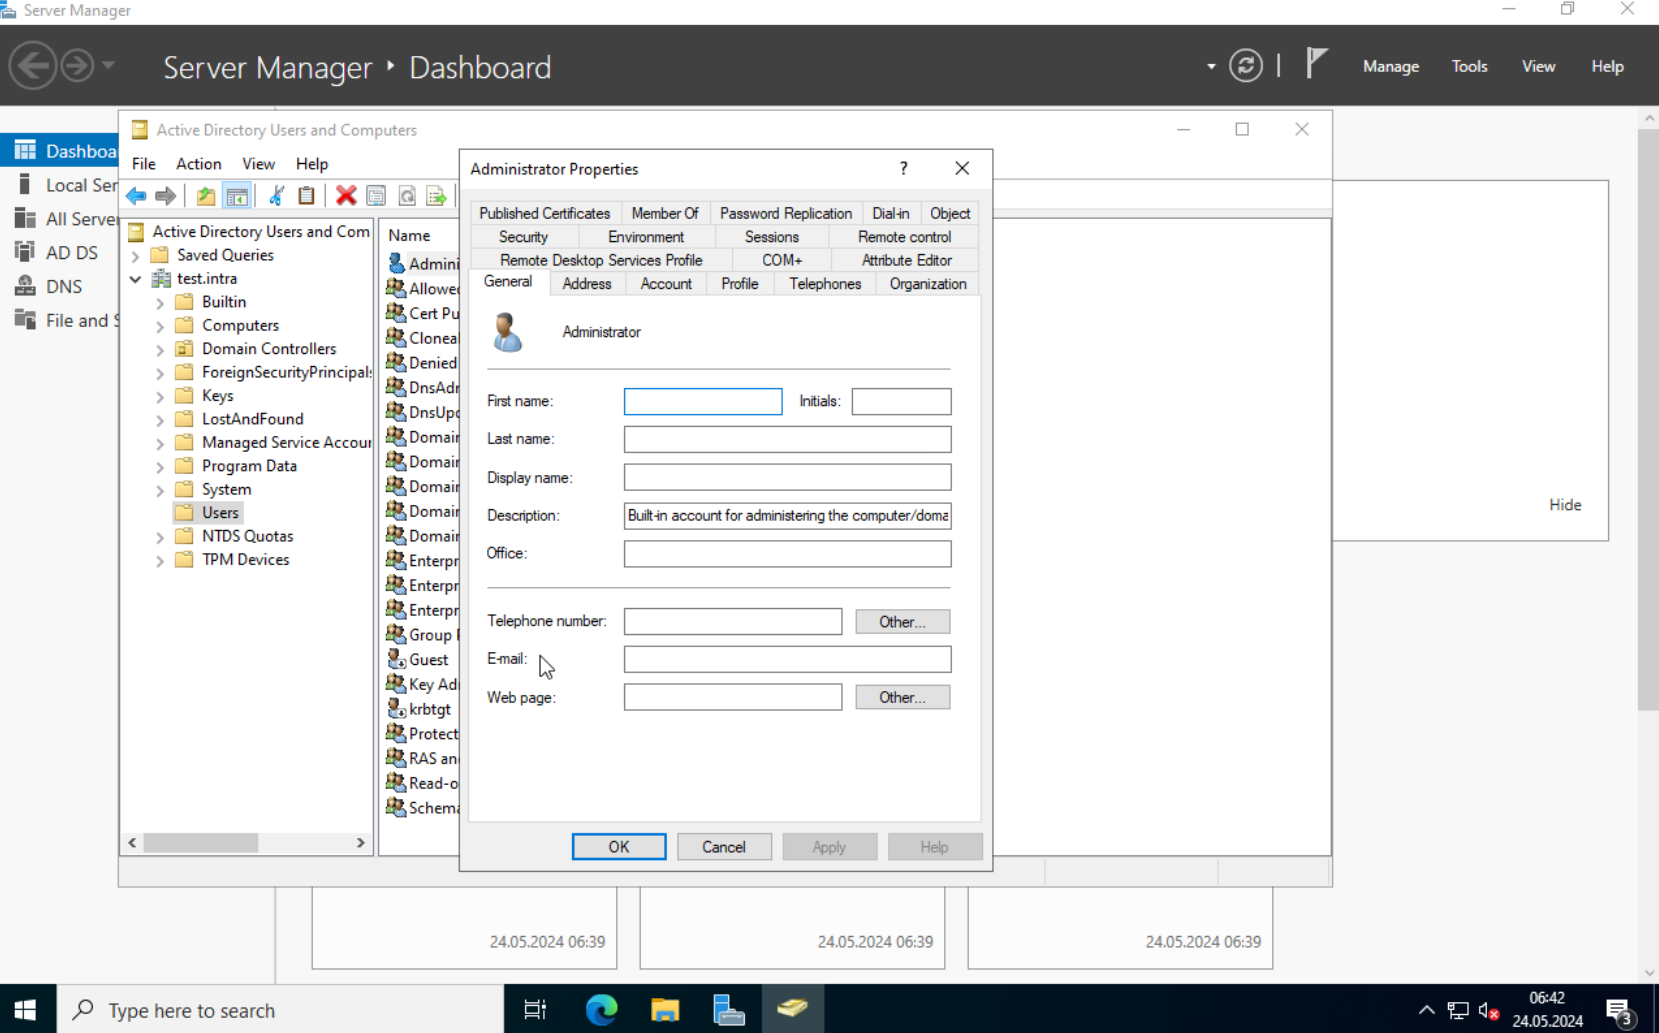
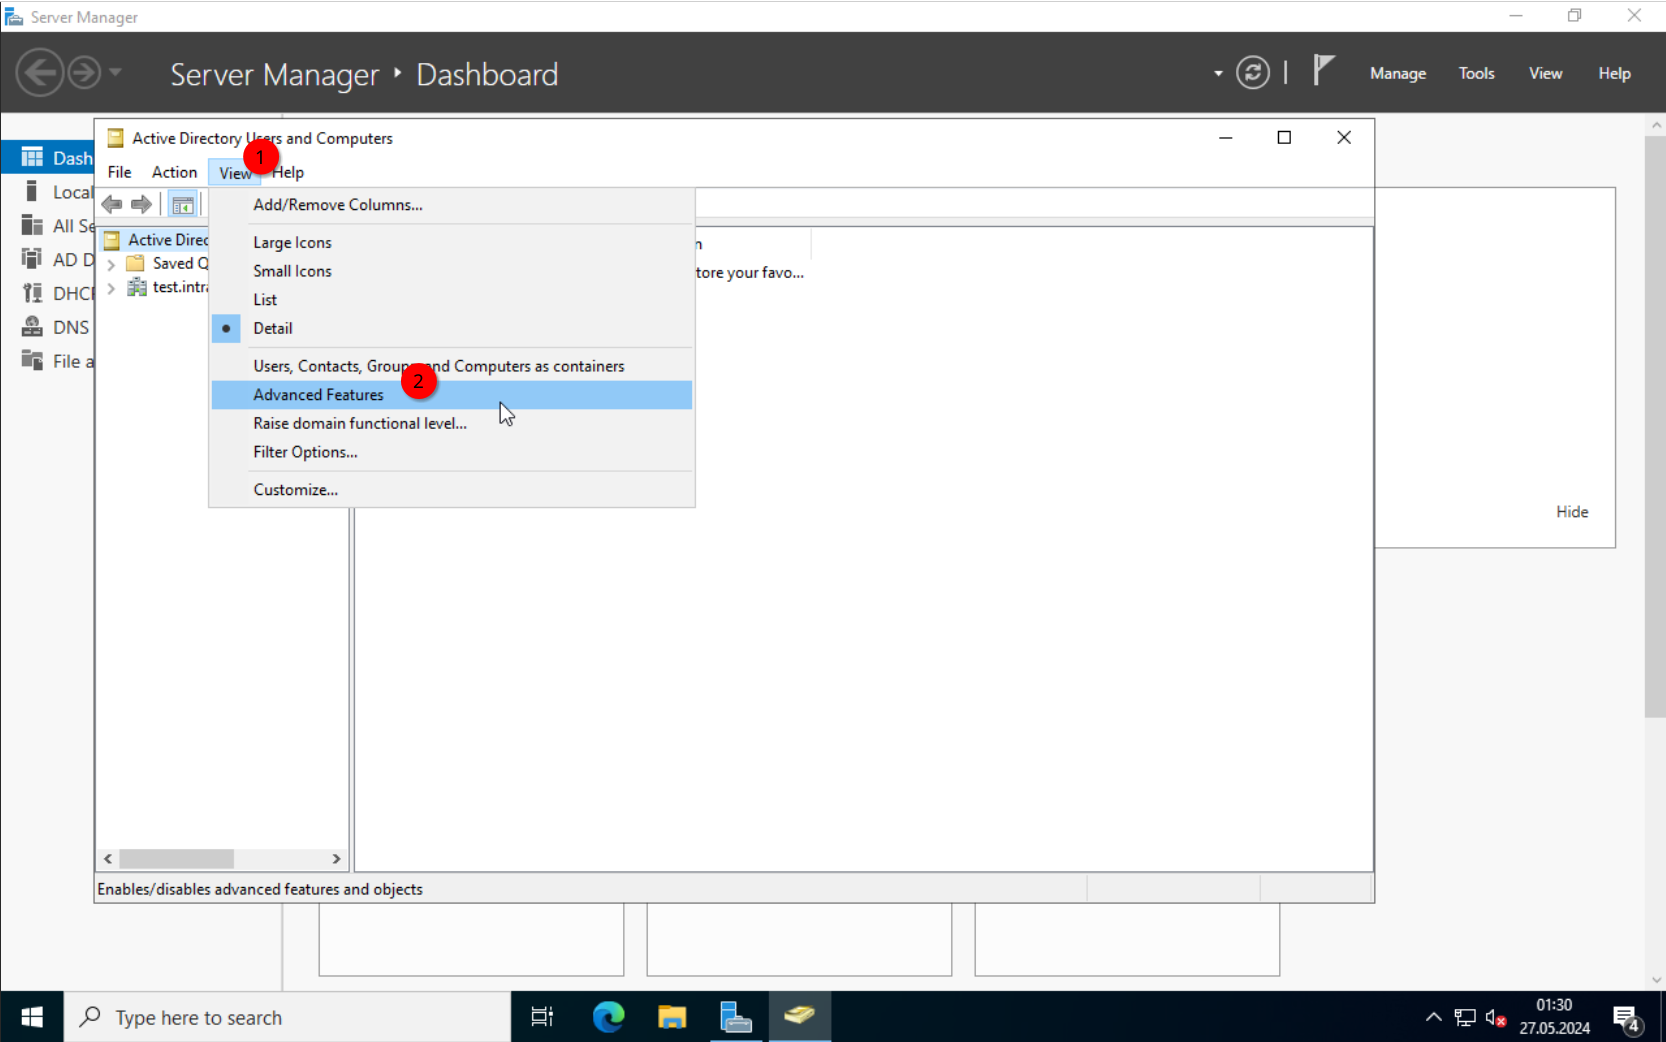
Anyway. To enable it, click on “View” and select “Advanced Features”.
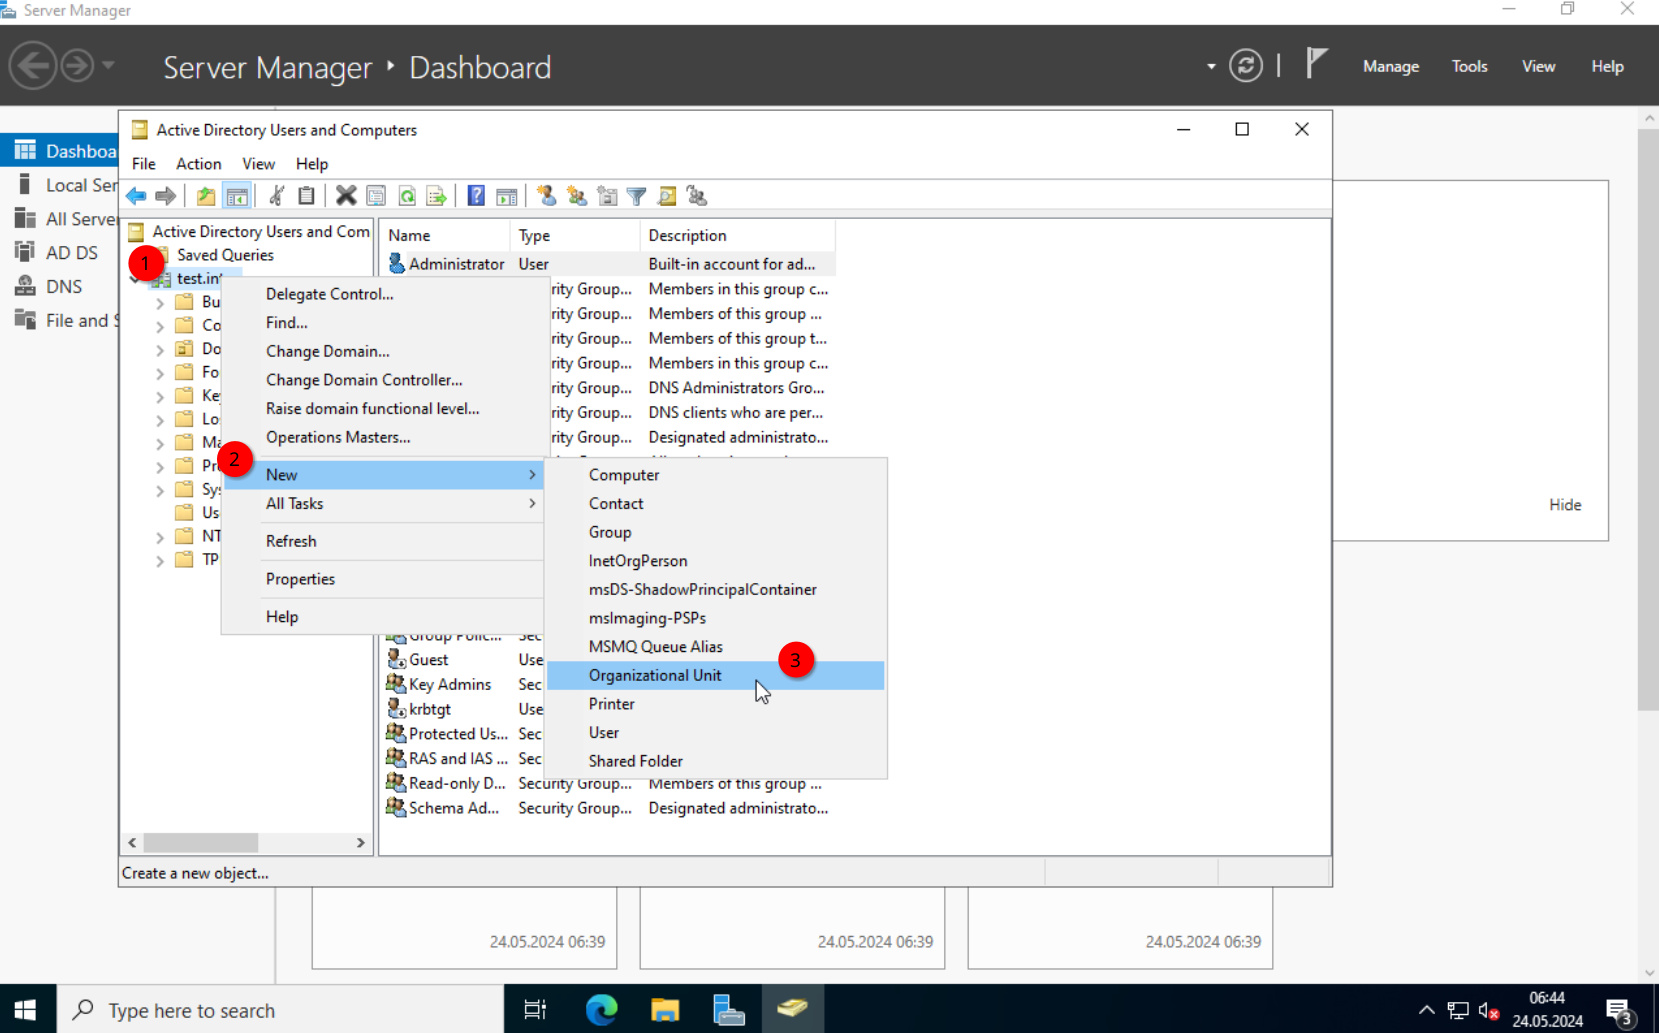
OK. Next, I want to create an organizational unit, this allows us to organize users and computer, which is also used to assign group policies.
Creating Organizational Units
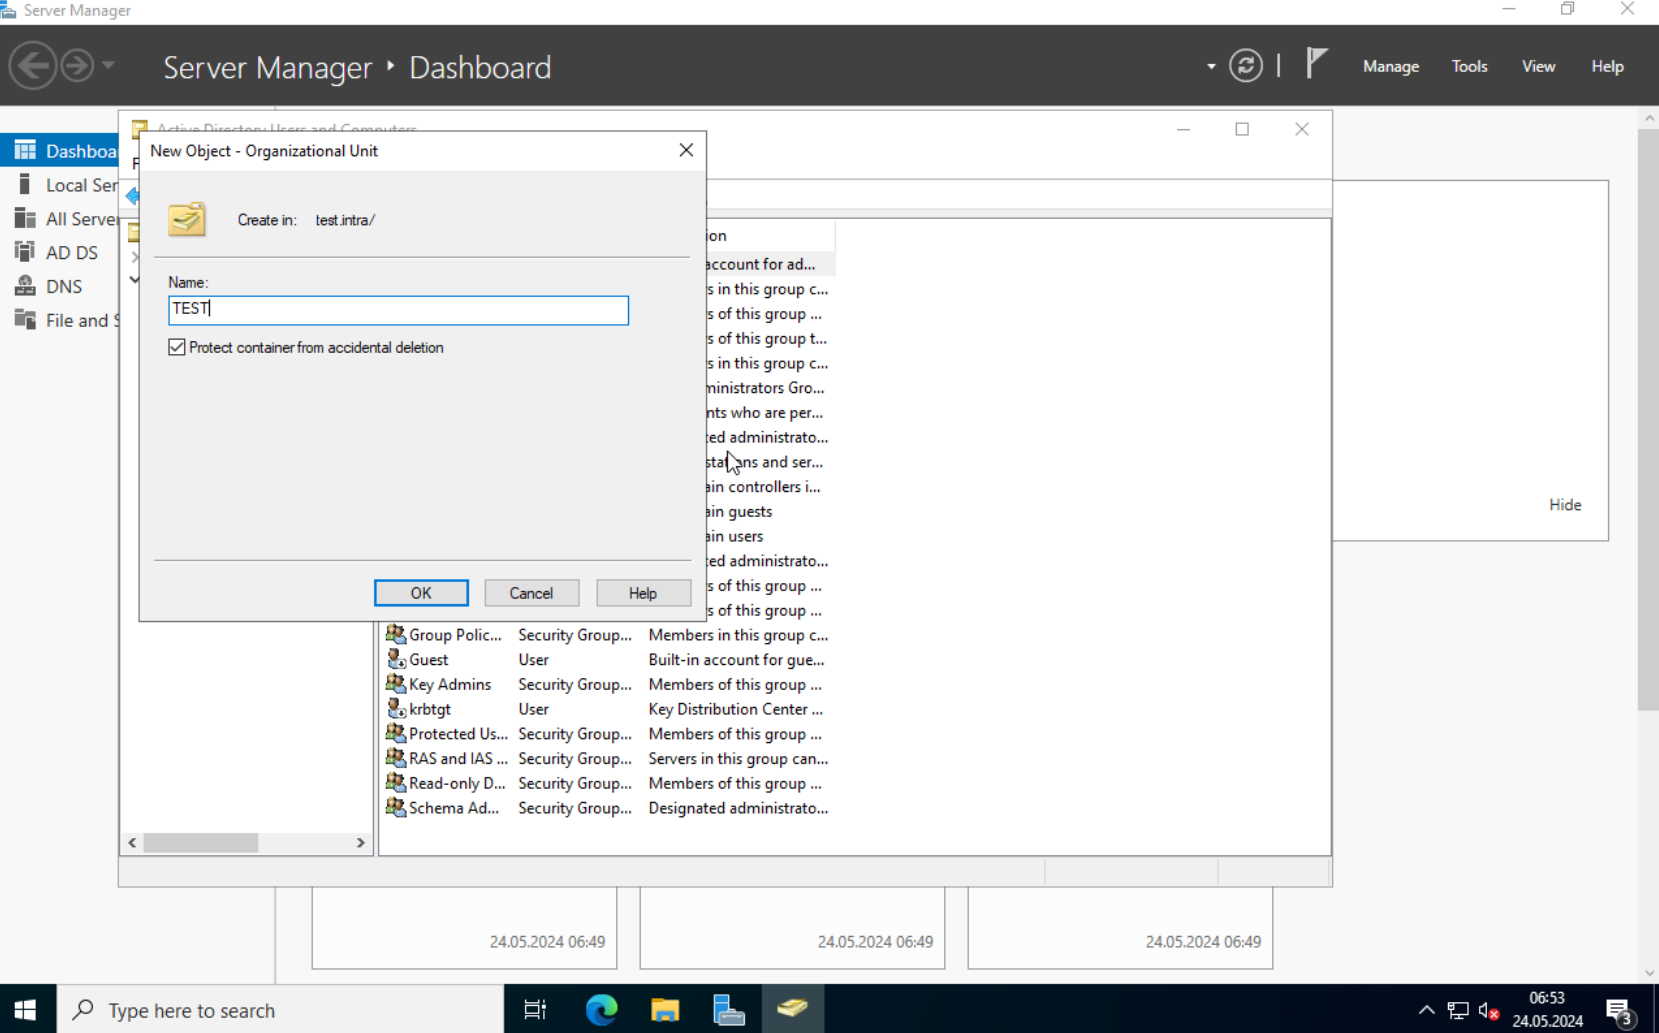
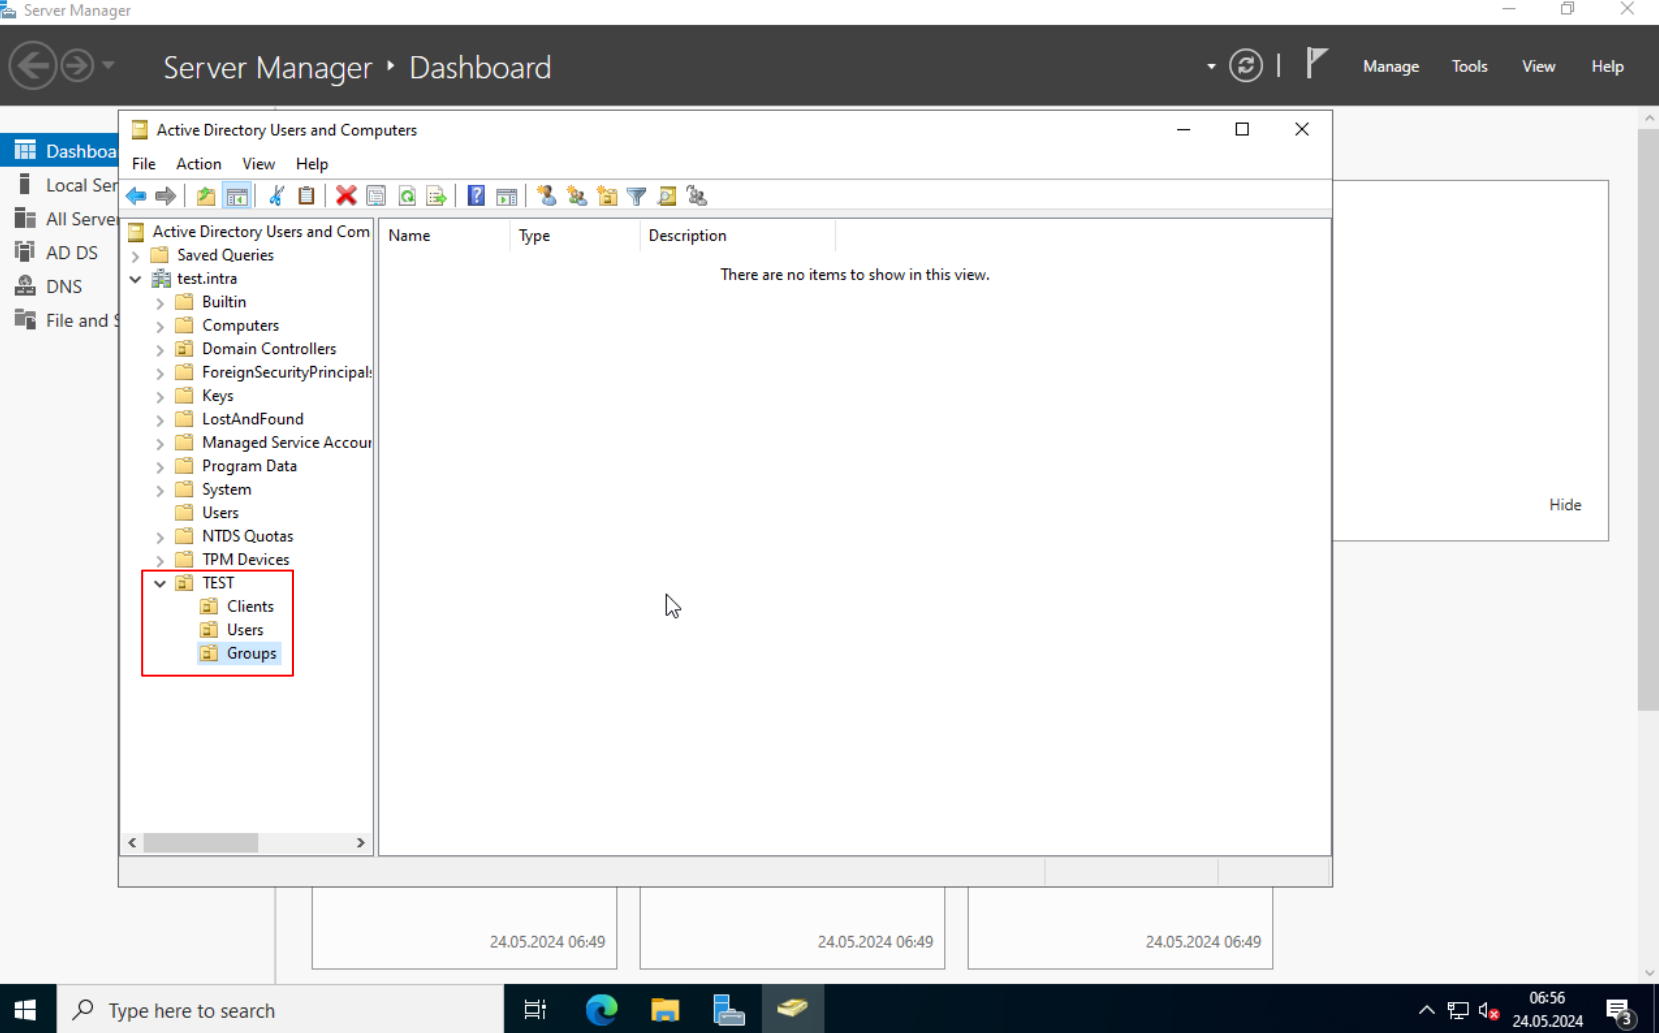
I will create a top OU (organizational unit) “TEST” and 3 additional OUs “Users”, “Clients”, “Groups” within the “TEST” OU.
Creating groups
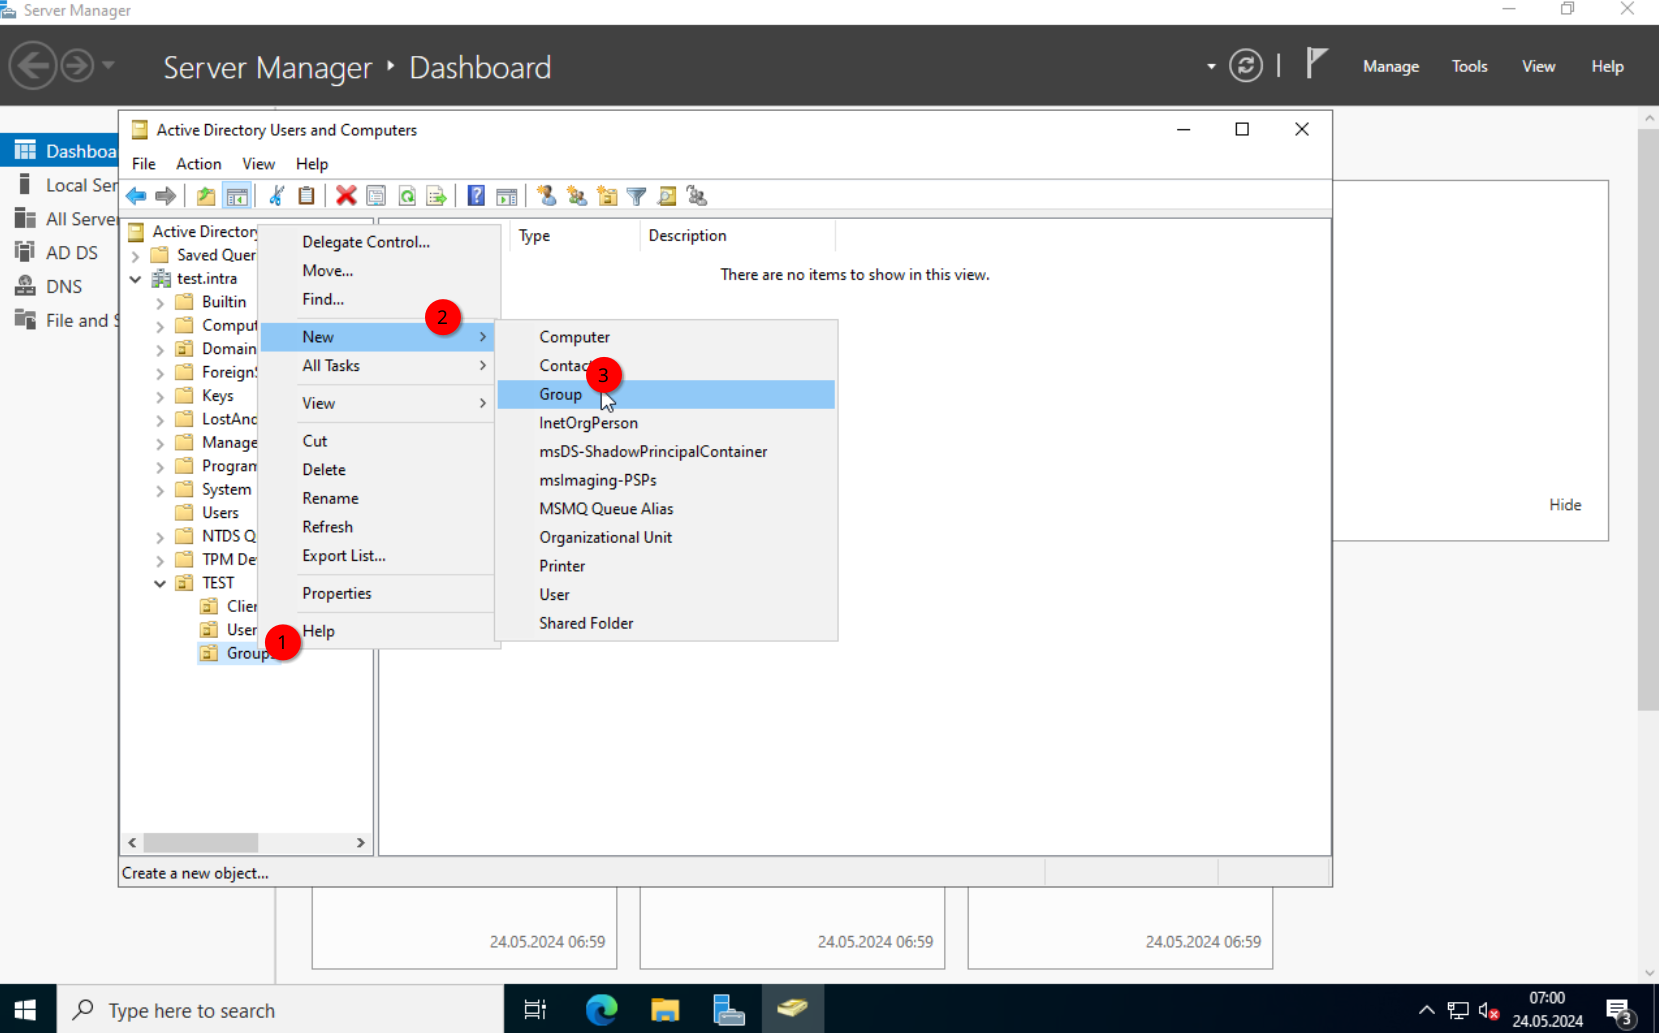
Next, we create a group. For this, right-click on the “Groups” OU and select New -> Group.
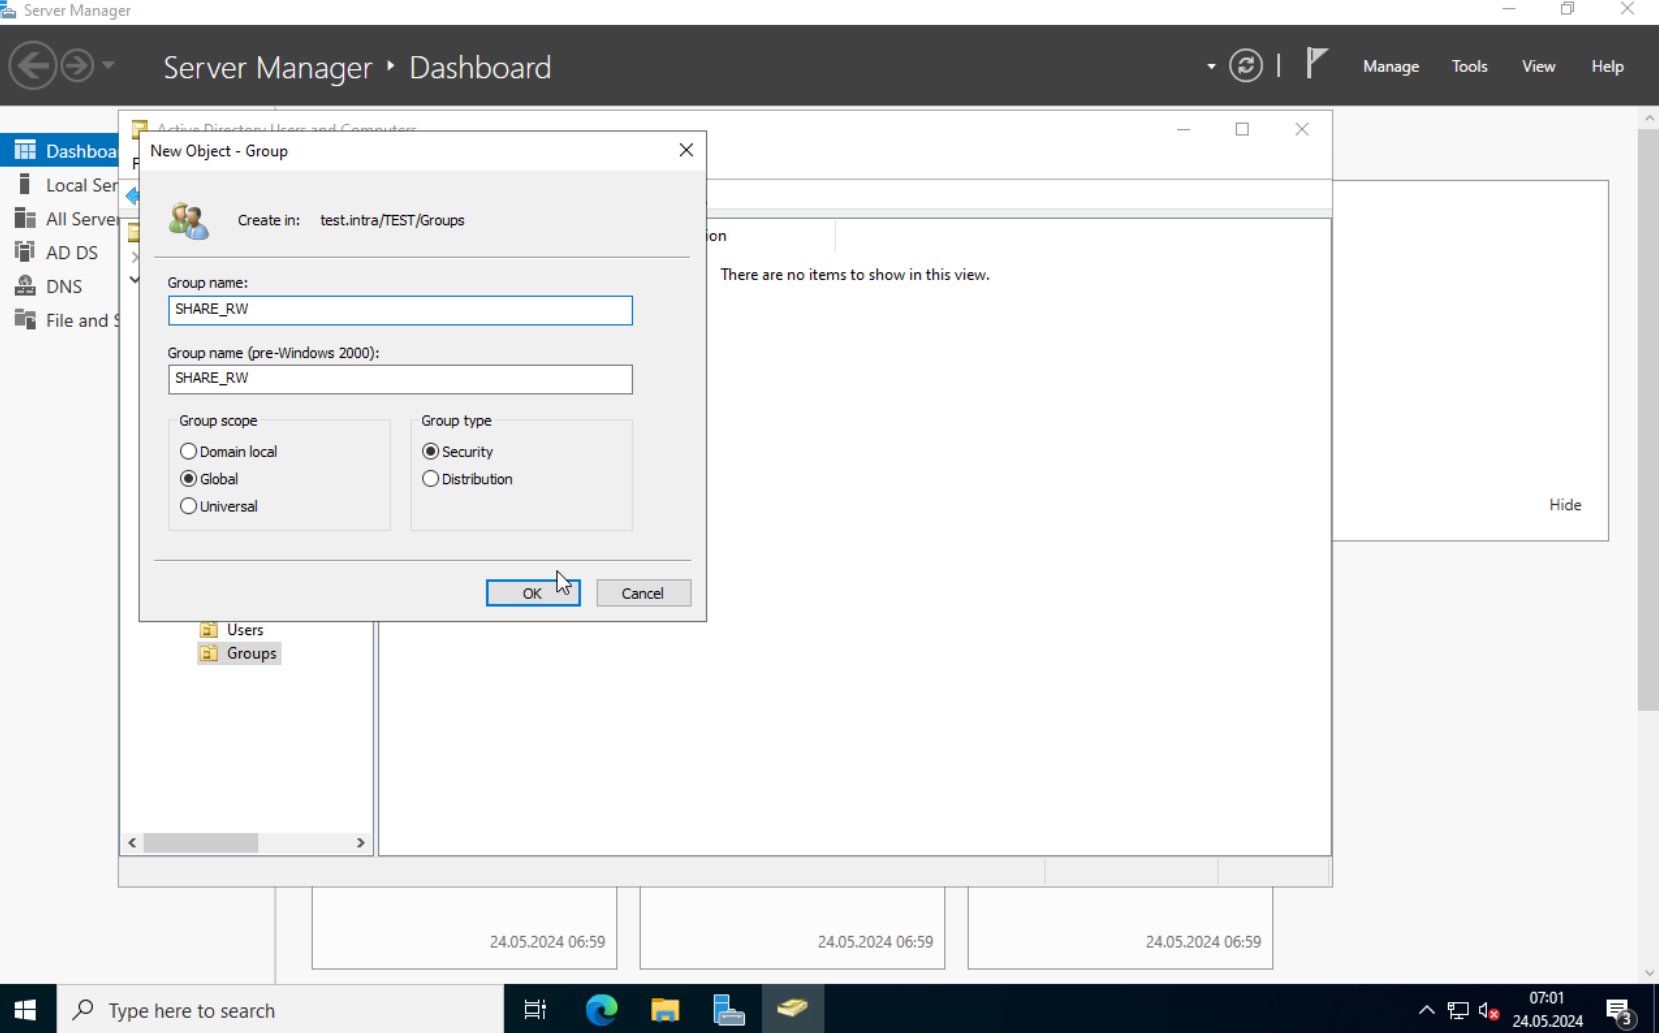
We will create a security group, for the file server access. I will name it “SHARE_RW”.
Creating Users
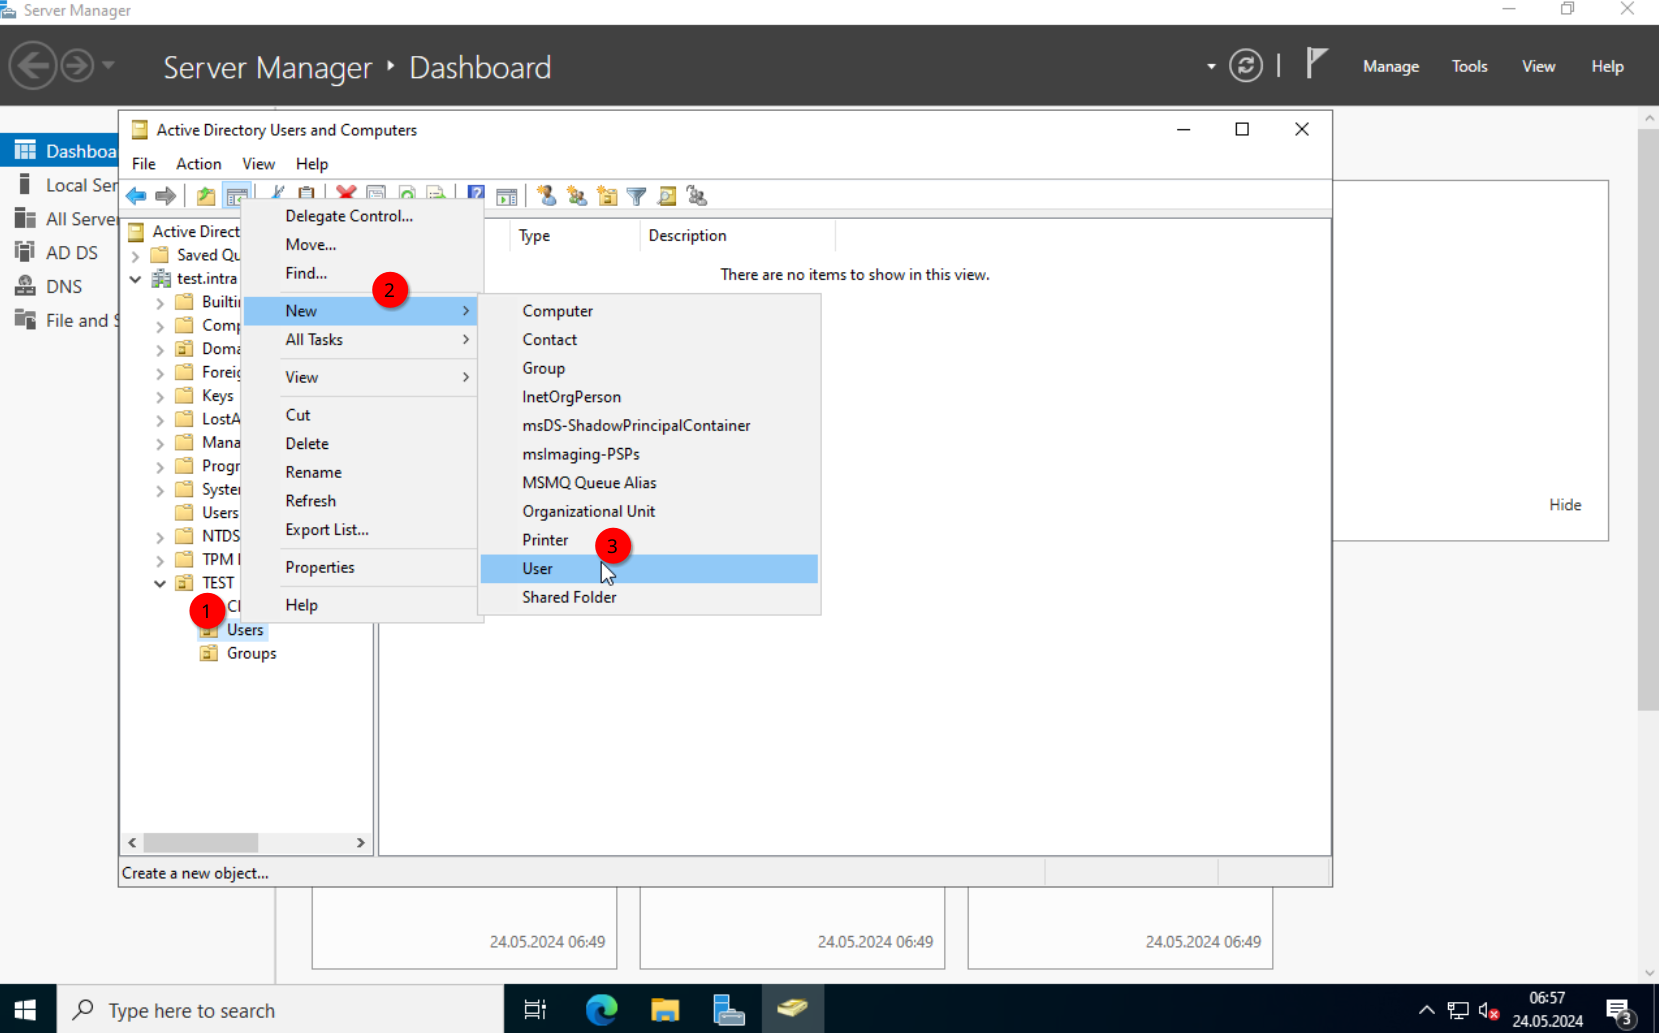
Alright. Now in the “Users” OU we create a couple of users. “Jon Doe” and “Max Mustermann”.
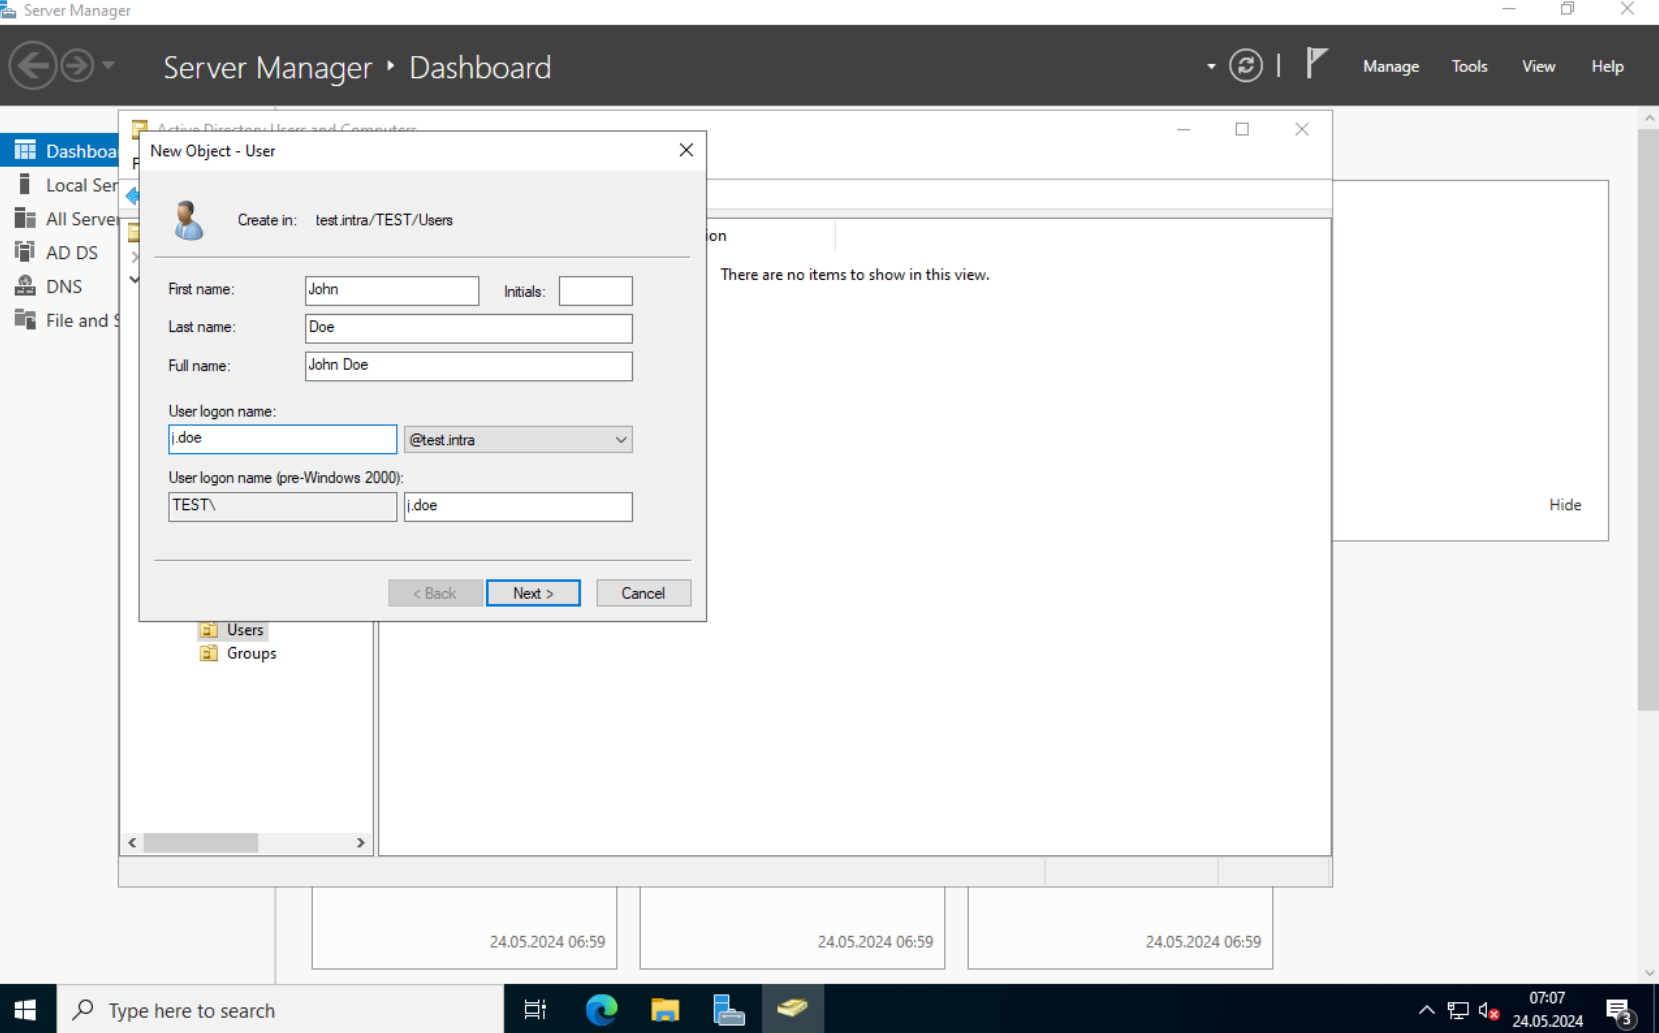
I will deselect the “User must change password at next login” and select “Password never expires”.
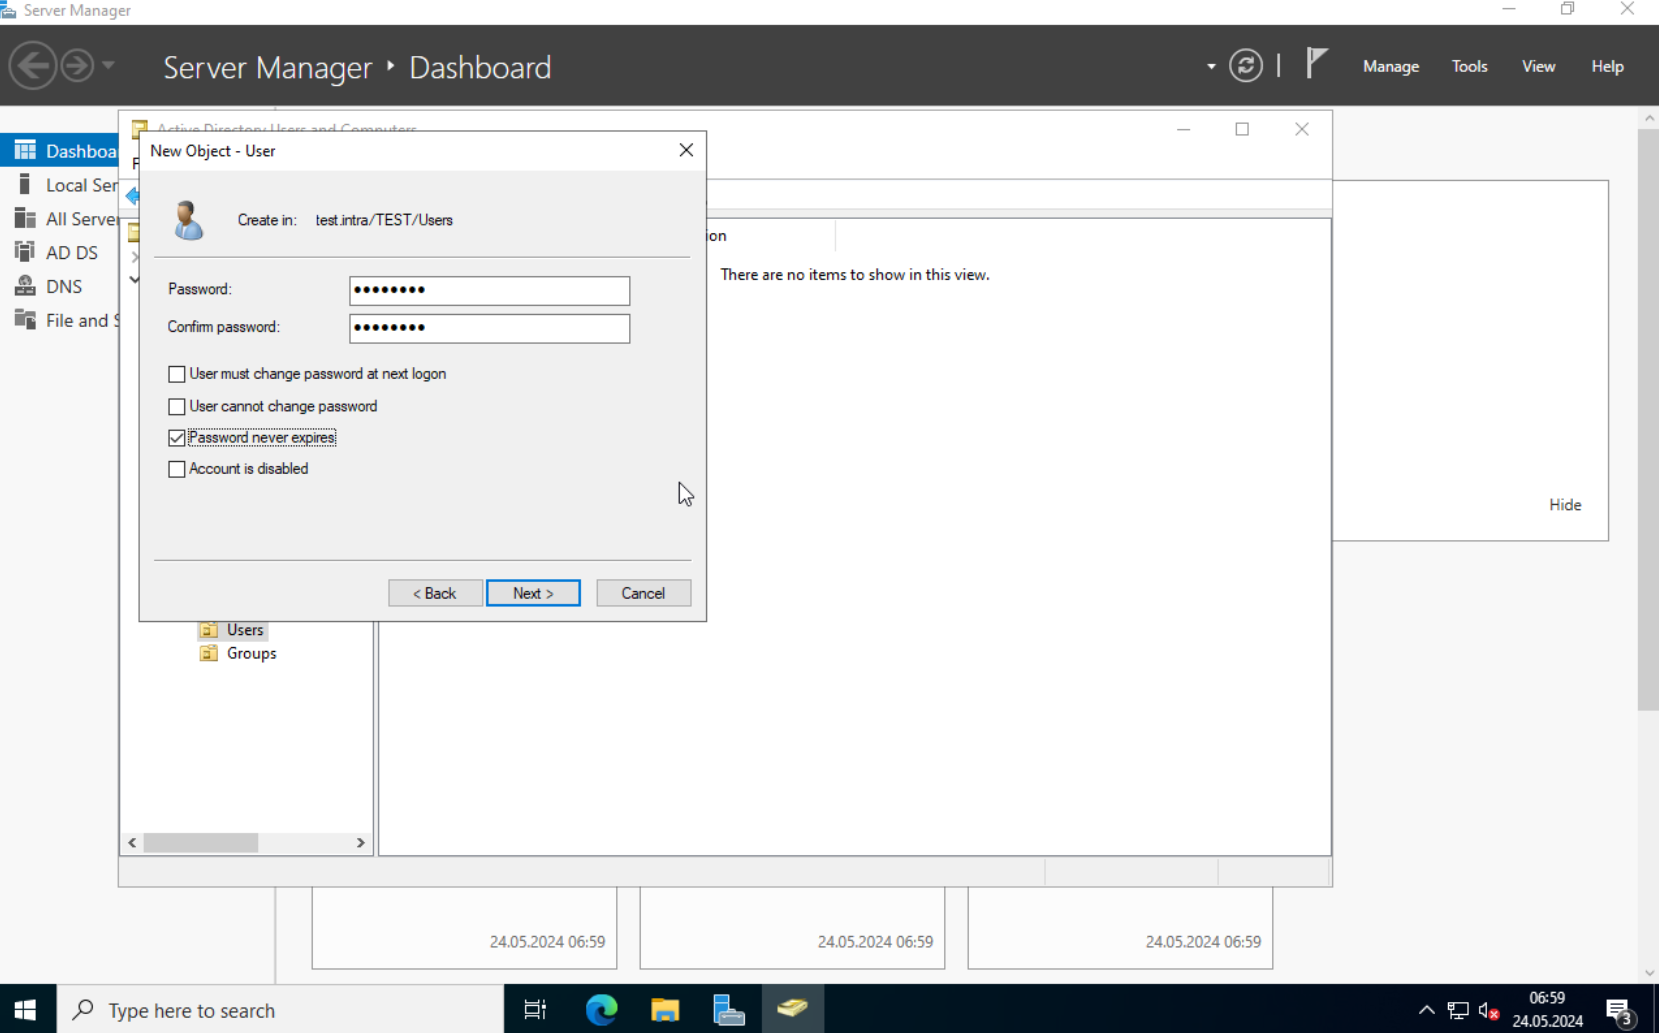
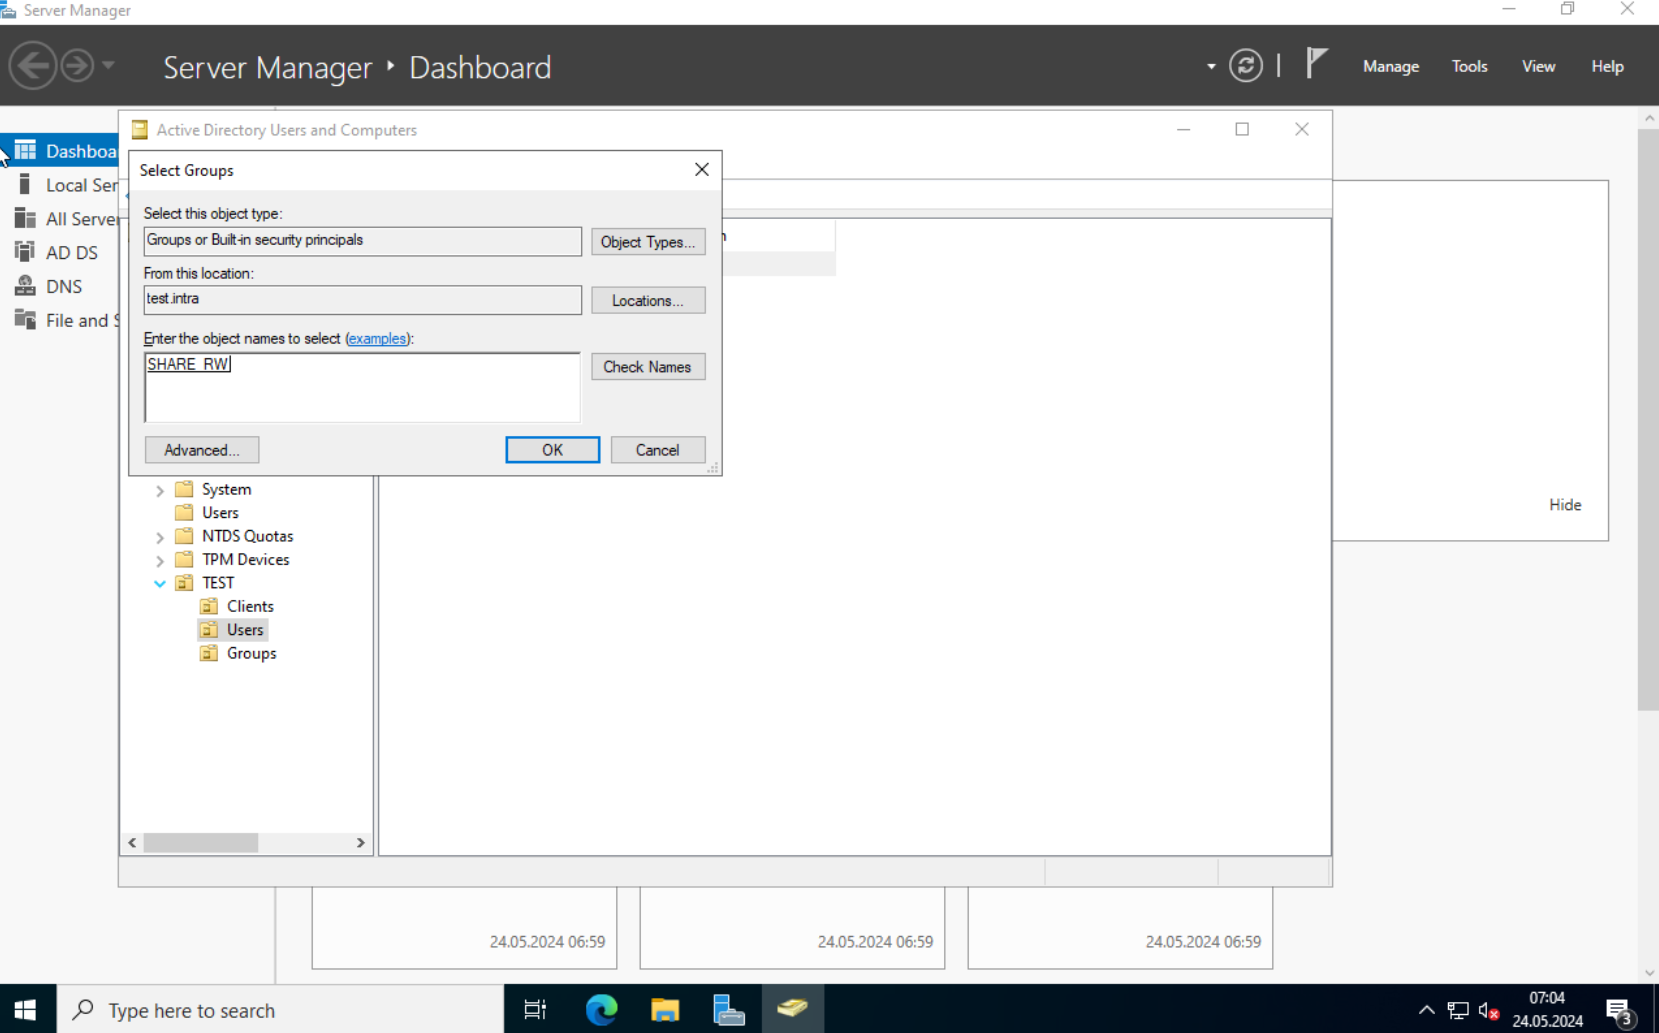
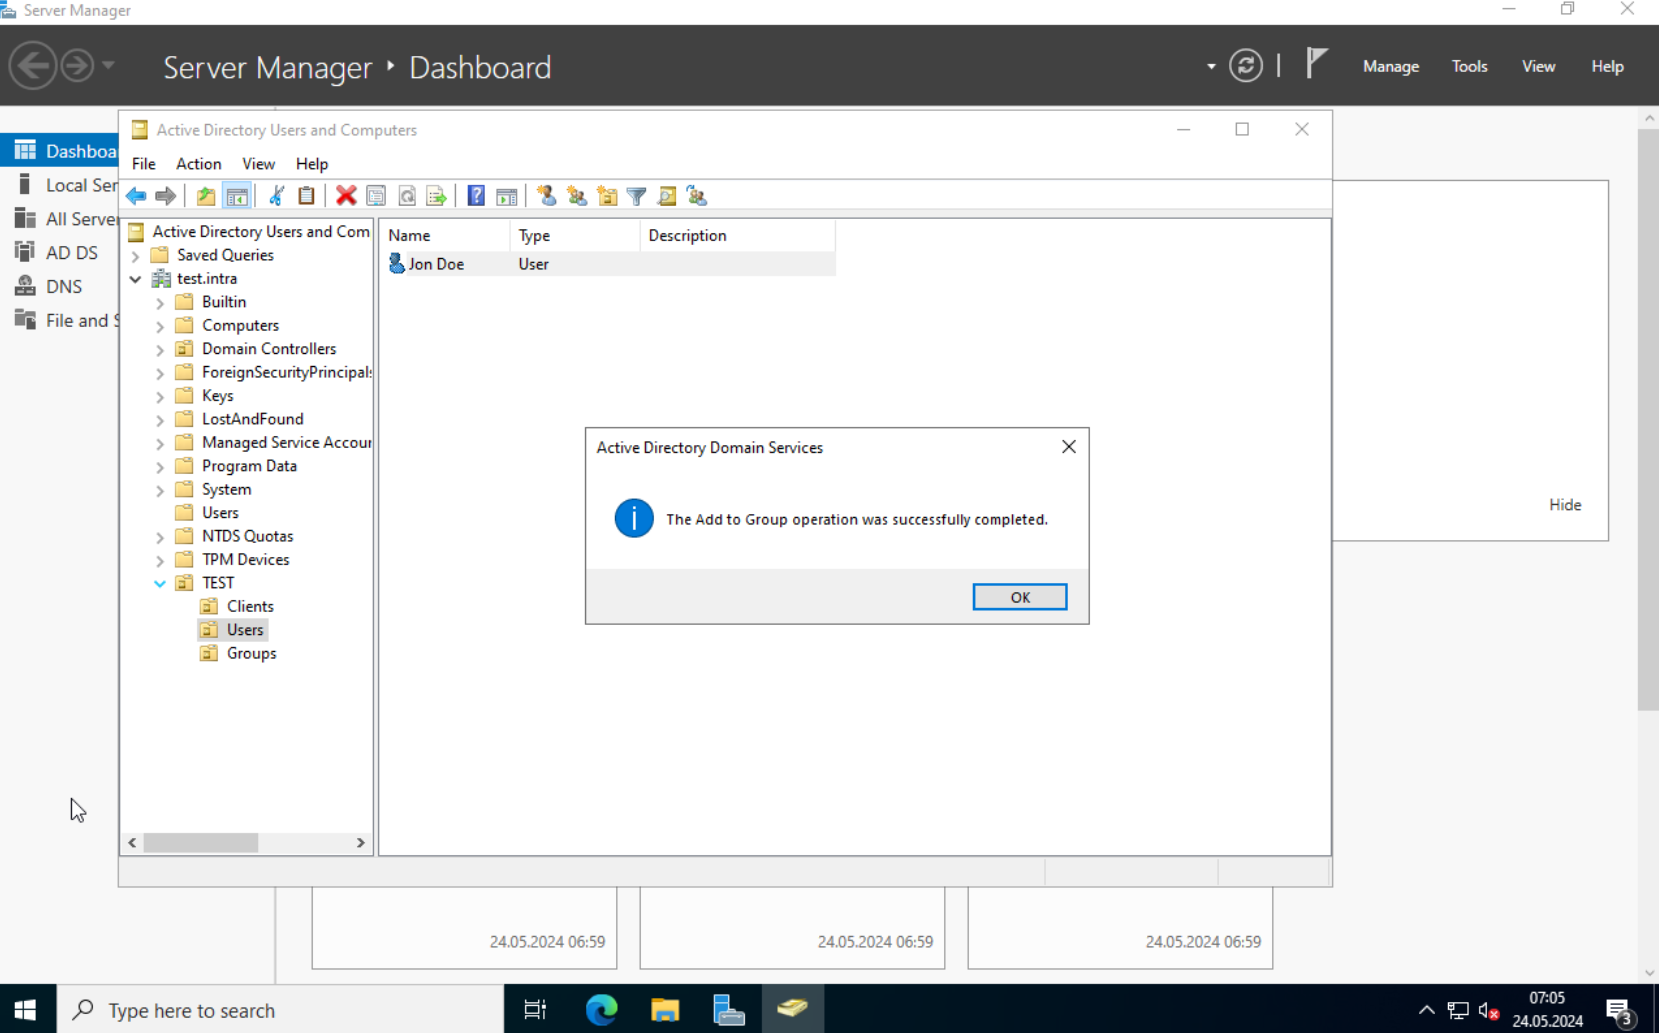
Add the user to the newly created group. Right-click on the user and select “Add to a group…”. Type in the group name and click on “Check Name”.
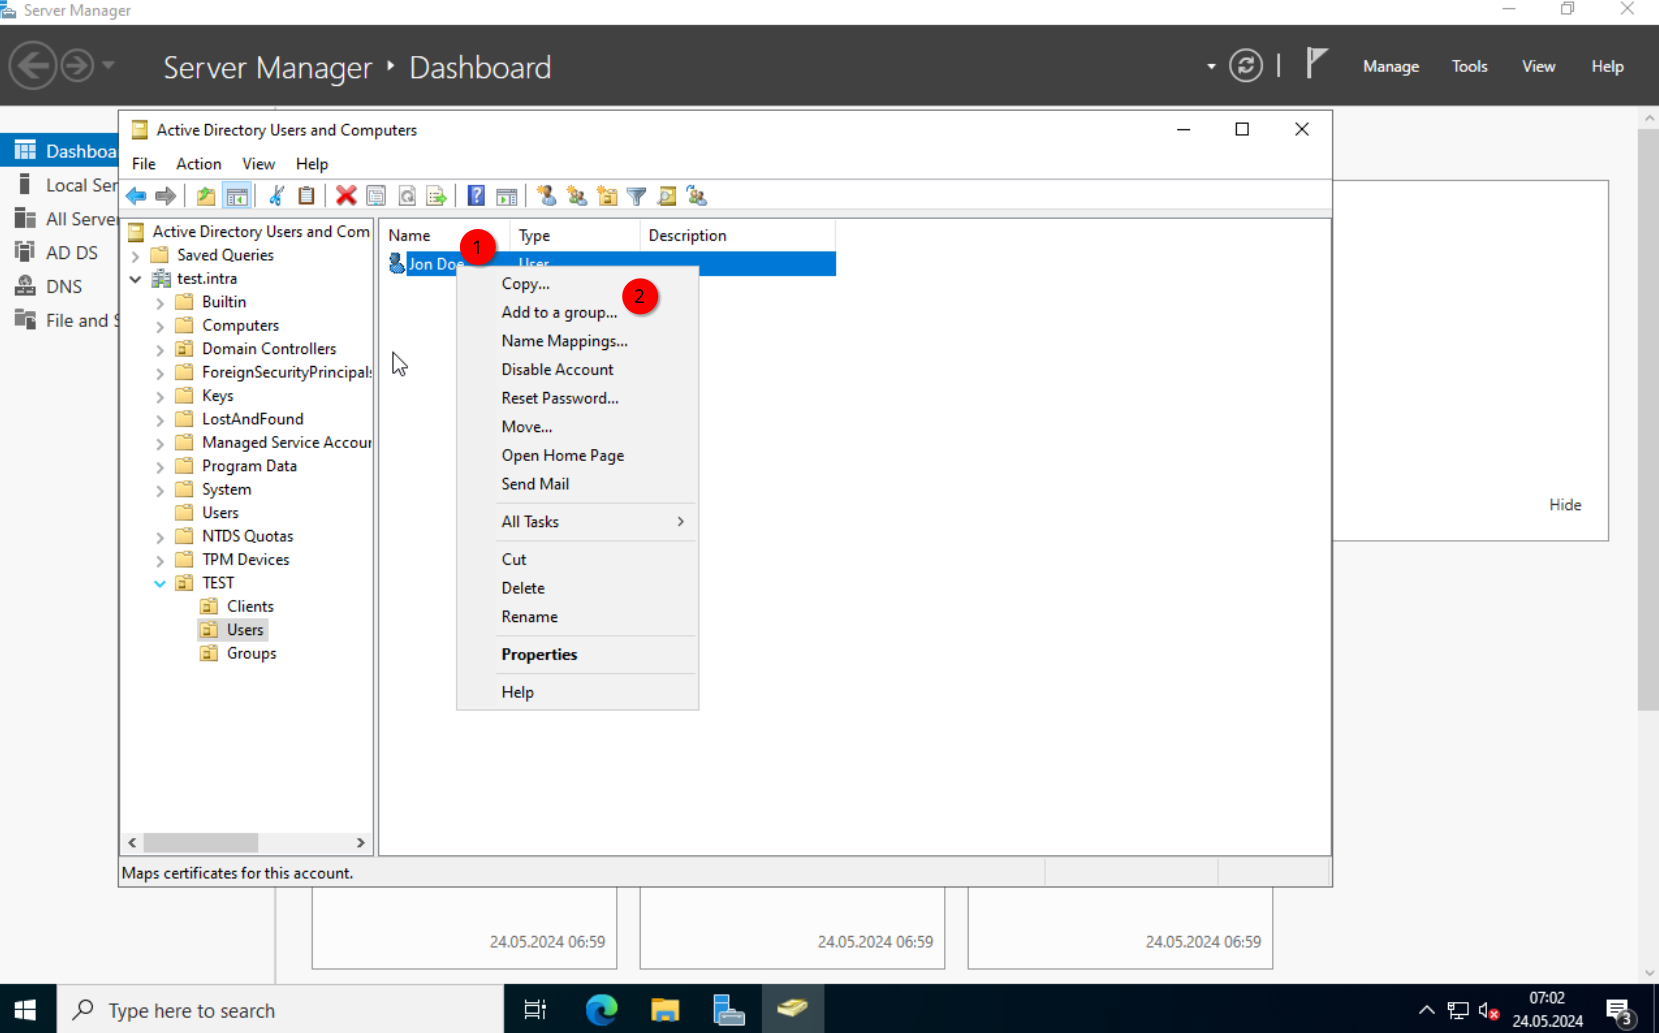
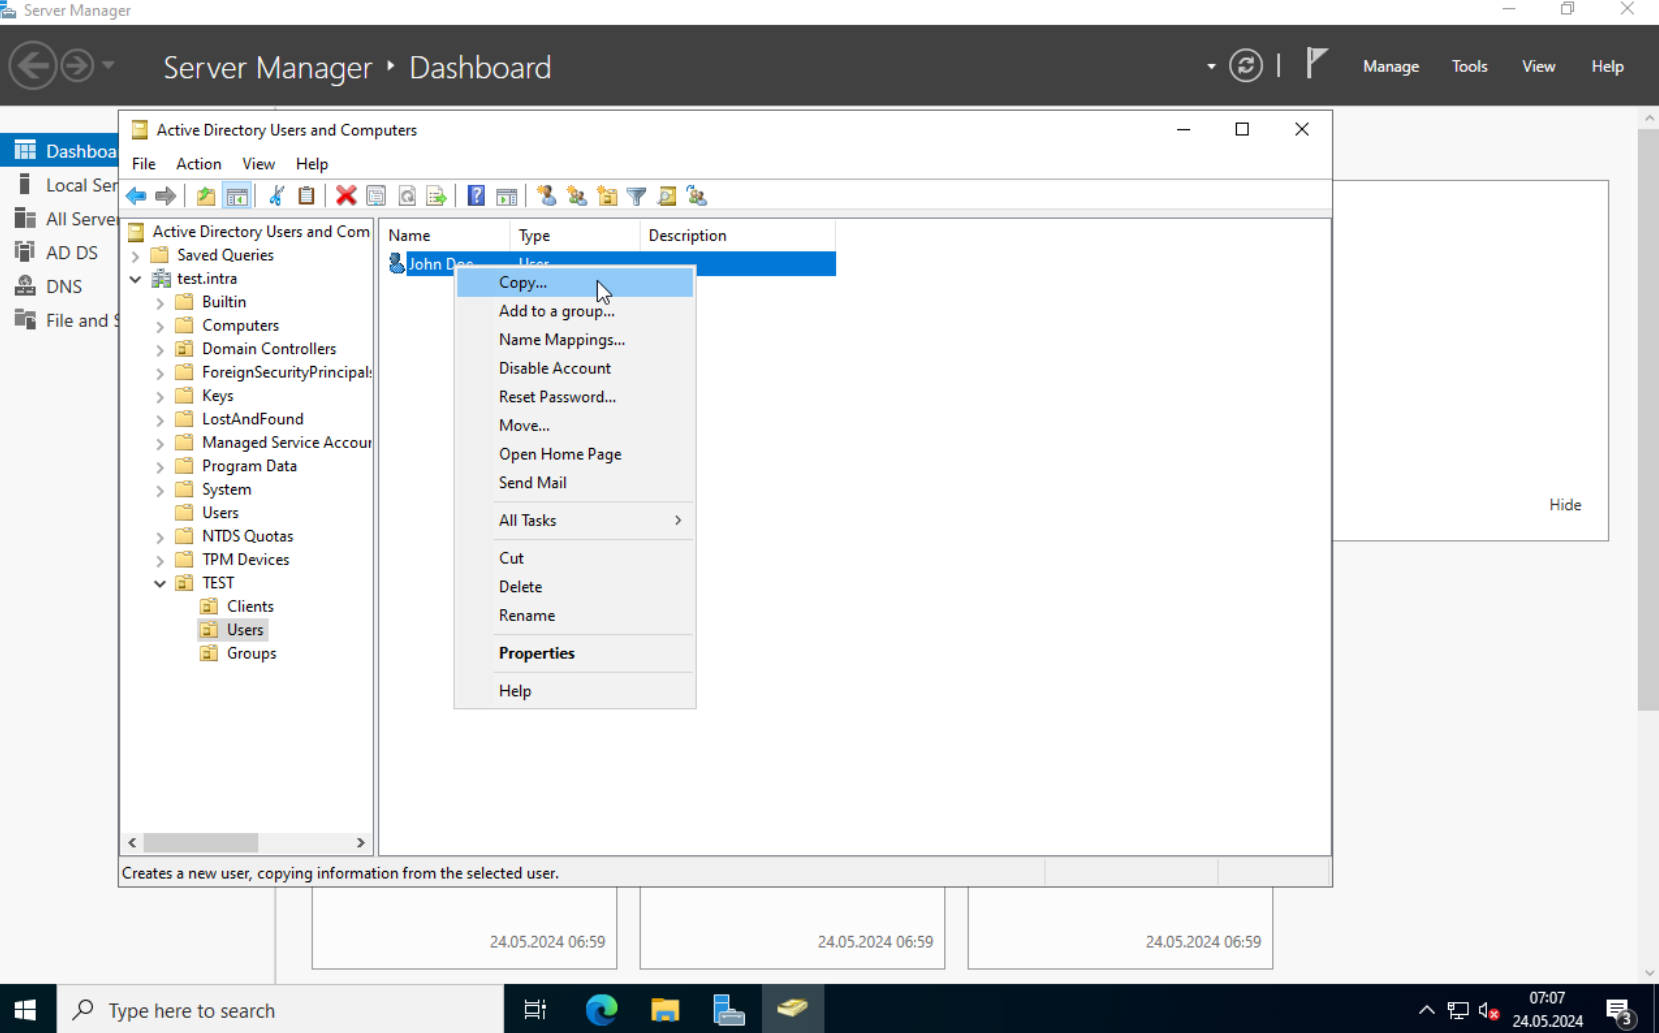
OK. I want to show a different way to create new users. Let’s say, we know that “Max Mustermann” has the same permissions as “John Doe”. We can just copy the user and use it as a template for the new one.
Right-click on the user and select “Copy”.
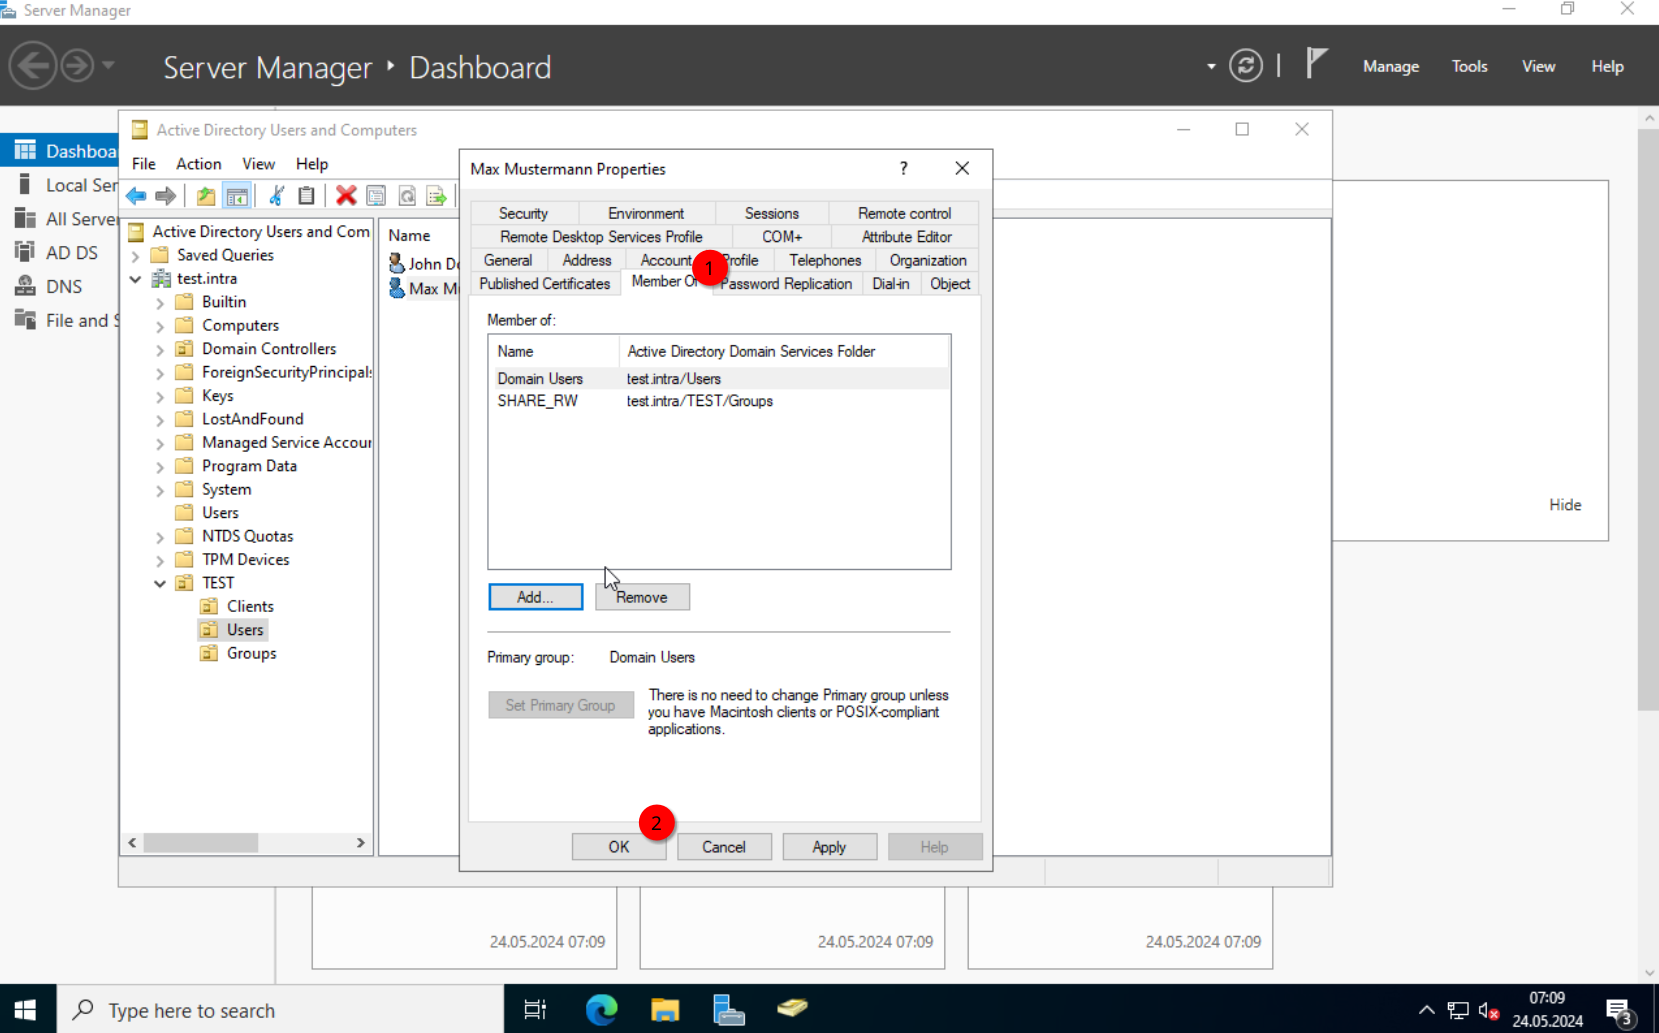
The next steps are identical. Once the user is created, right-click on it and select “Properties”. We can see under the “Member Of” tab the groups the user is a member of.
OK. The preparations are done. Next we will set up our File Server. For this, I prepared another Windows Server 2022.
Windows File Services
Add the Server to the Domain
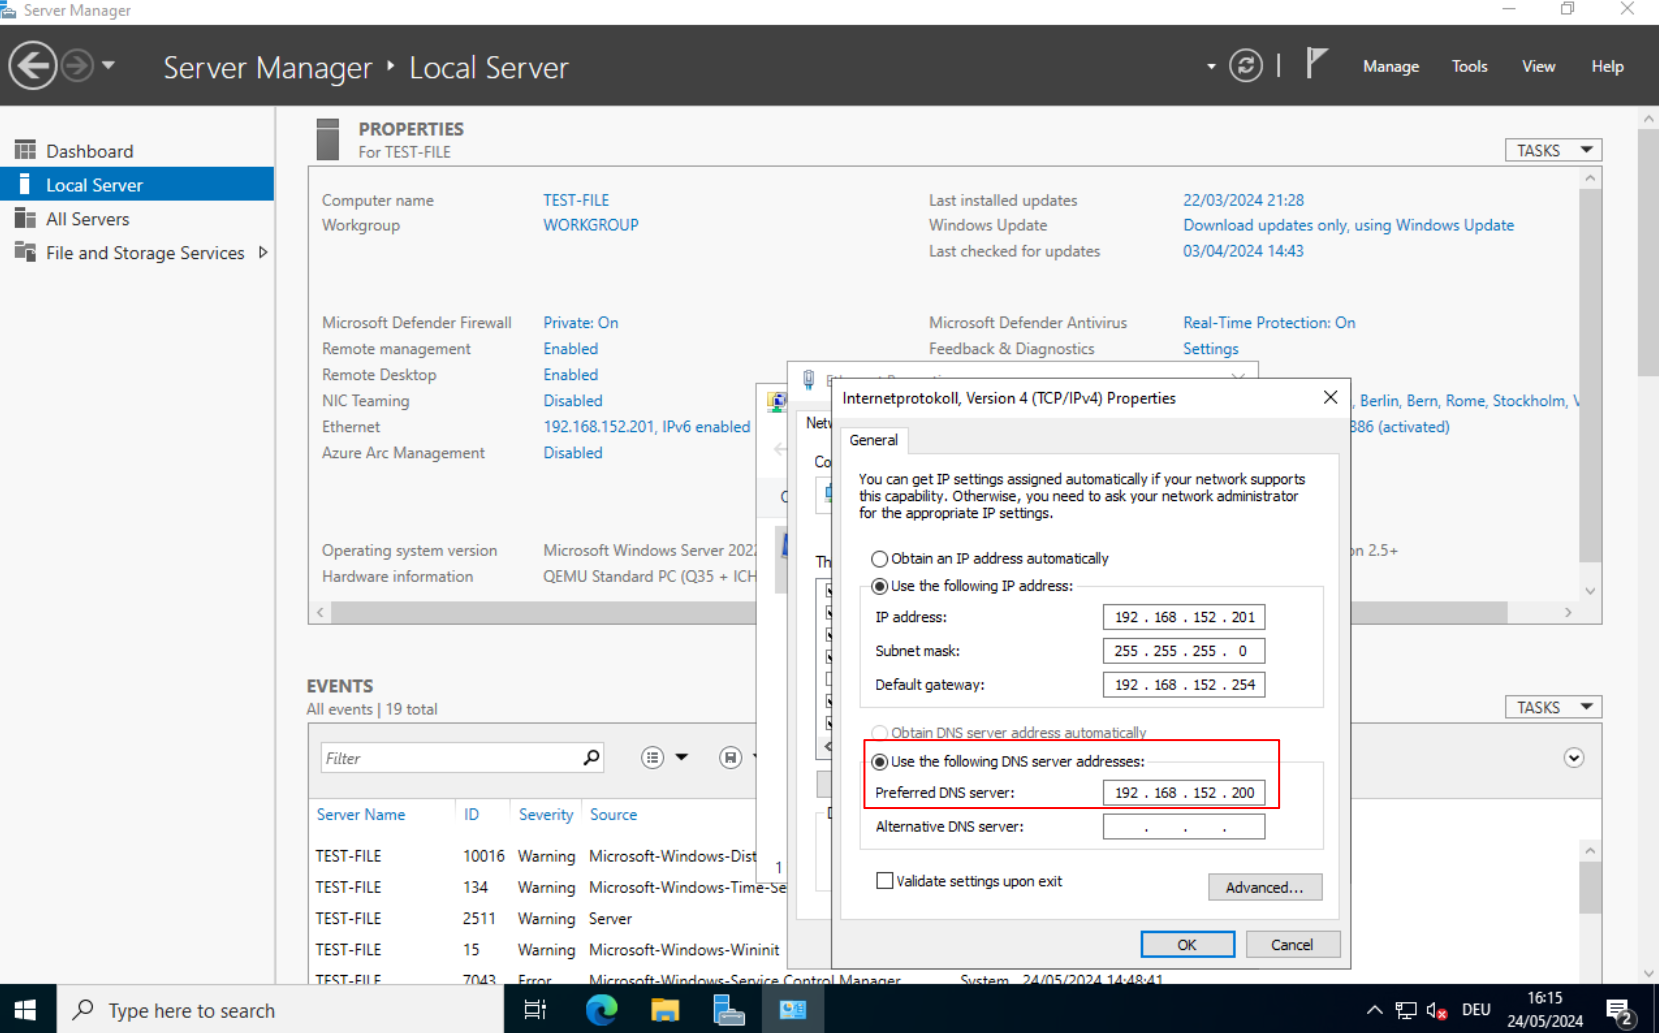
I set the hostname to “TEST-FILE”, enabled RDP and set a static IP, but we have to make one adjustment. Currently, the DNS server points at the gateway, so we have to change this.
Open the “Ethernet” configuration in the “Server Manager”, navigate to the IP configuration and set the preferred DNS server to the IP of the “TEST-DC01” server, this will be 192.168.152.200 in my case.
Next, click on the “Workgroup”, click on “Change…” and select “Domain”. Here, we type in the domain we created in part 1. test.intra in my case. Type in your credentials and confirm, afterwards you should receive a “Welcome to the
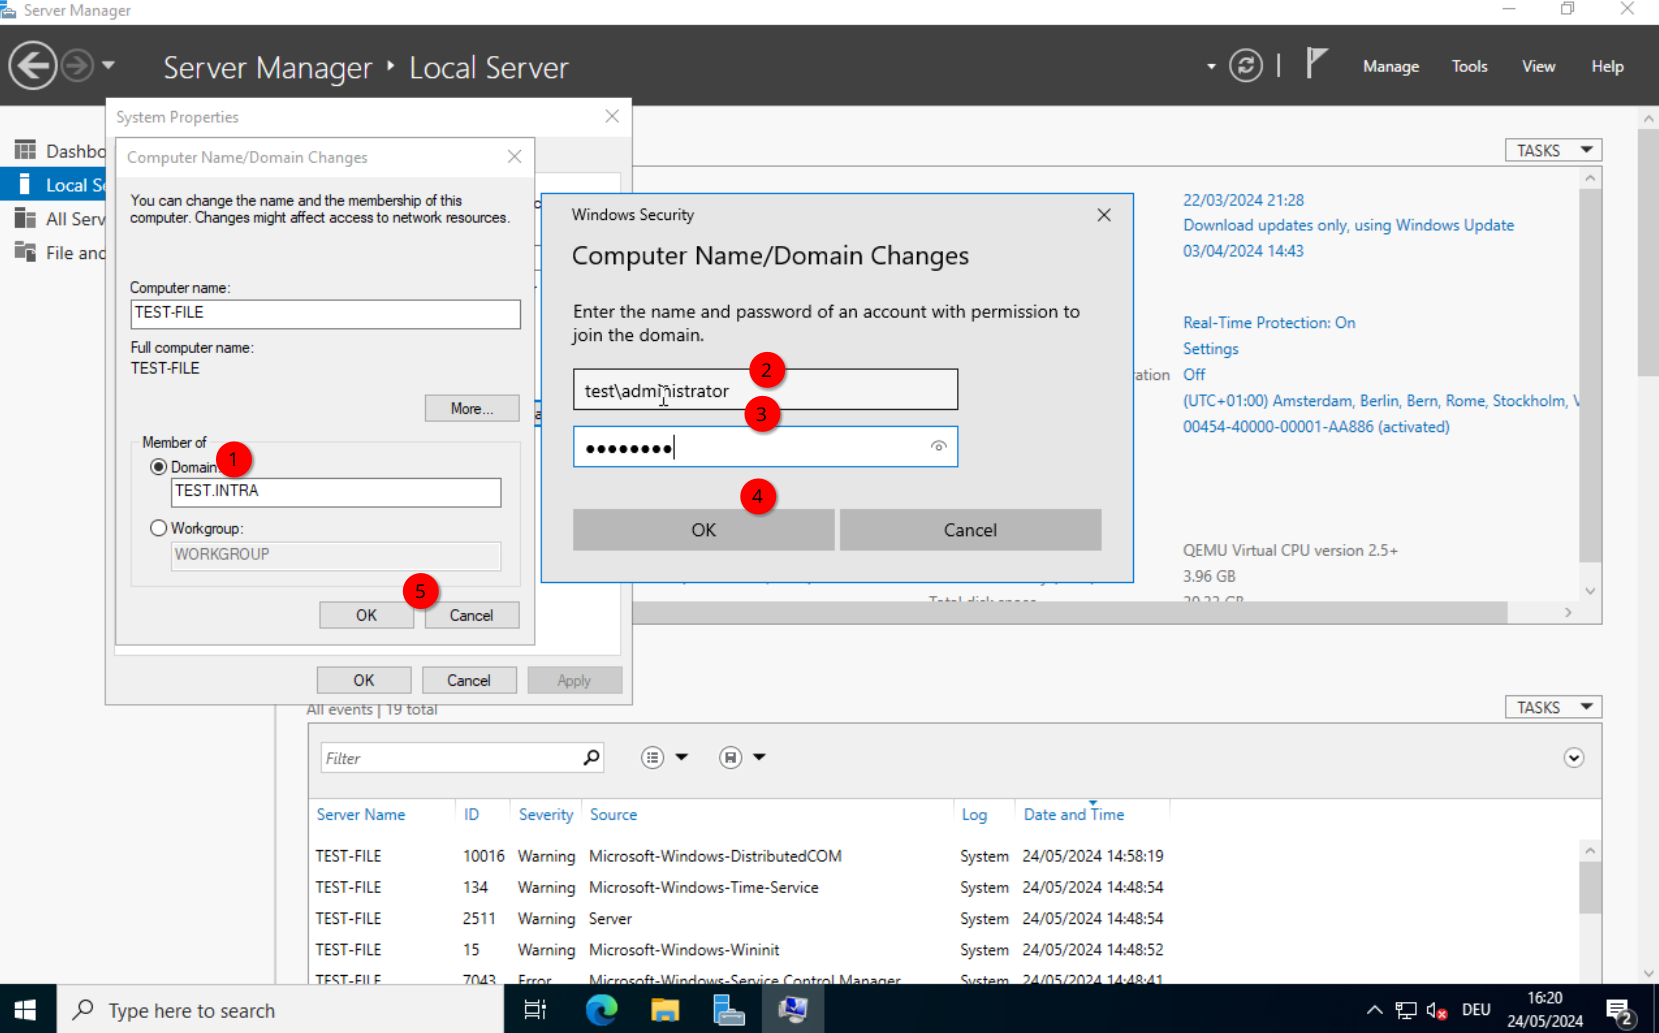
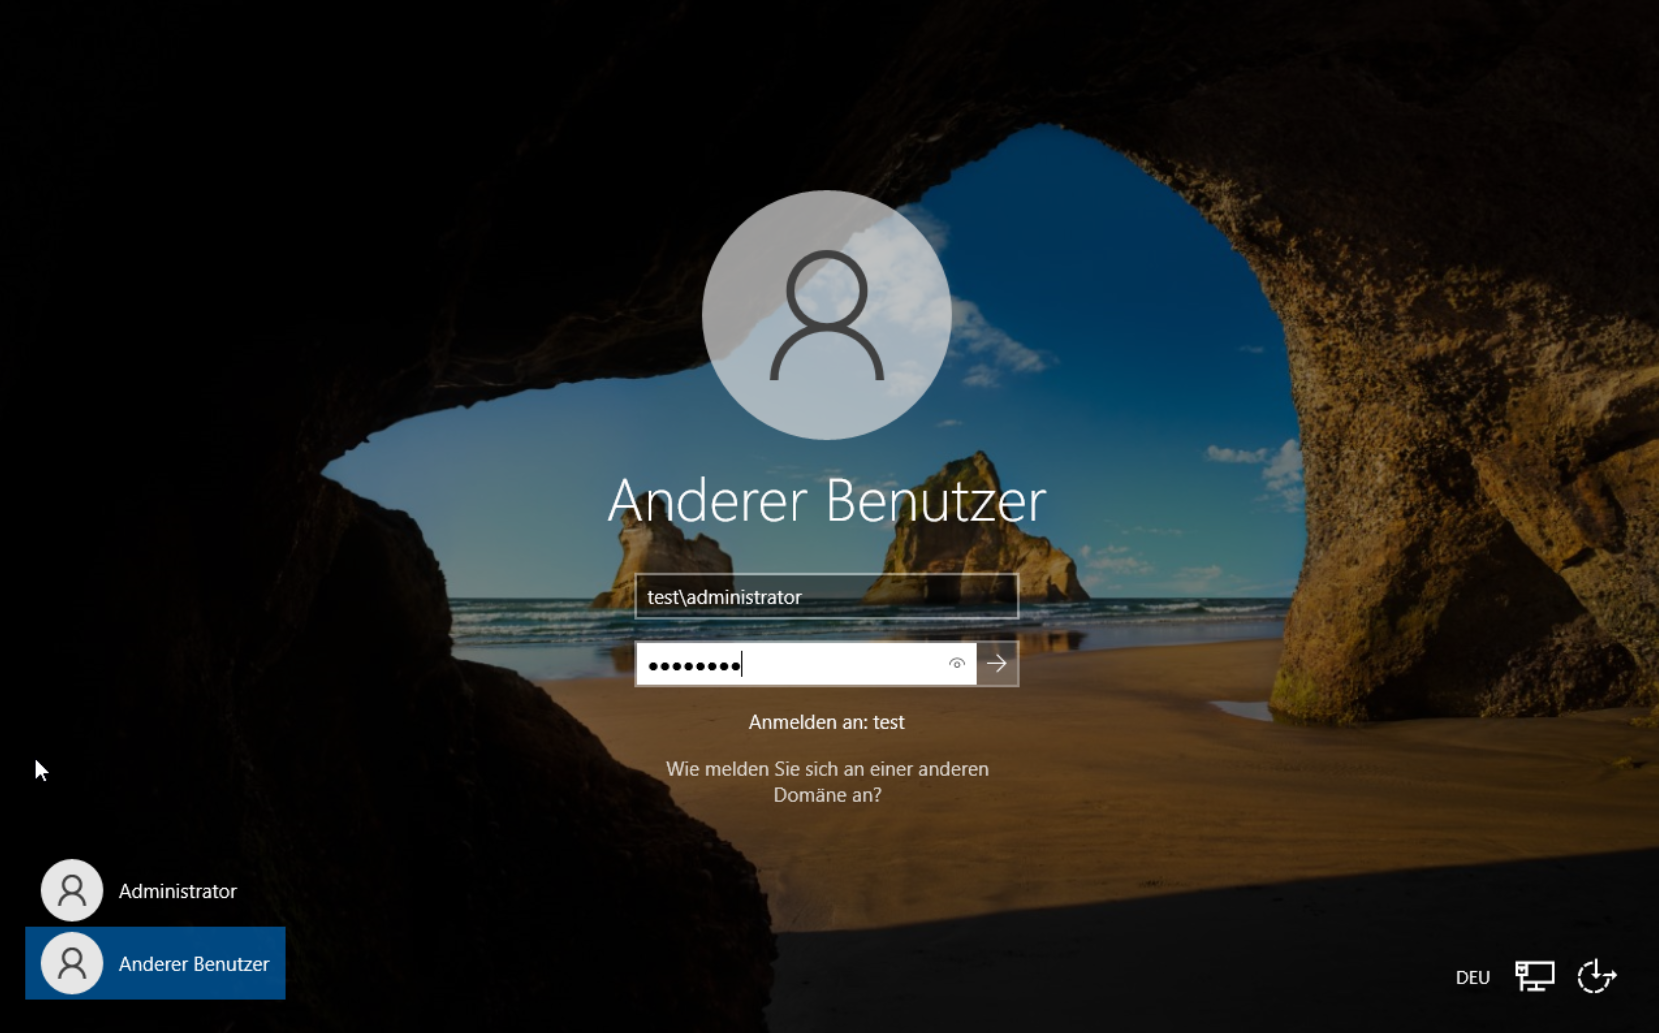
After that, we should restart.
Log back in with the domain administrator. For this, type in either “administrator@
Configuring an SMB Share.
I attached an additional disk to the server through Proxmox. But first, we have to enable it. Search for “Computer Management” start the application.
Select “Disk Management”, right-click on the new disk and select “Online”.
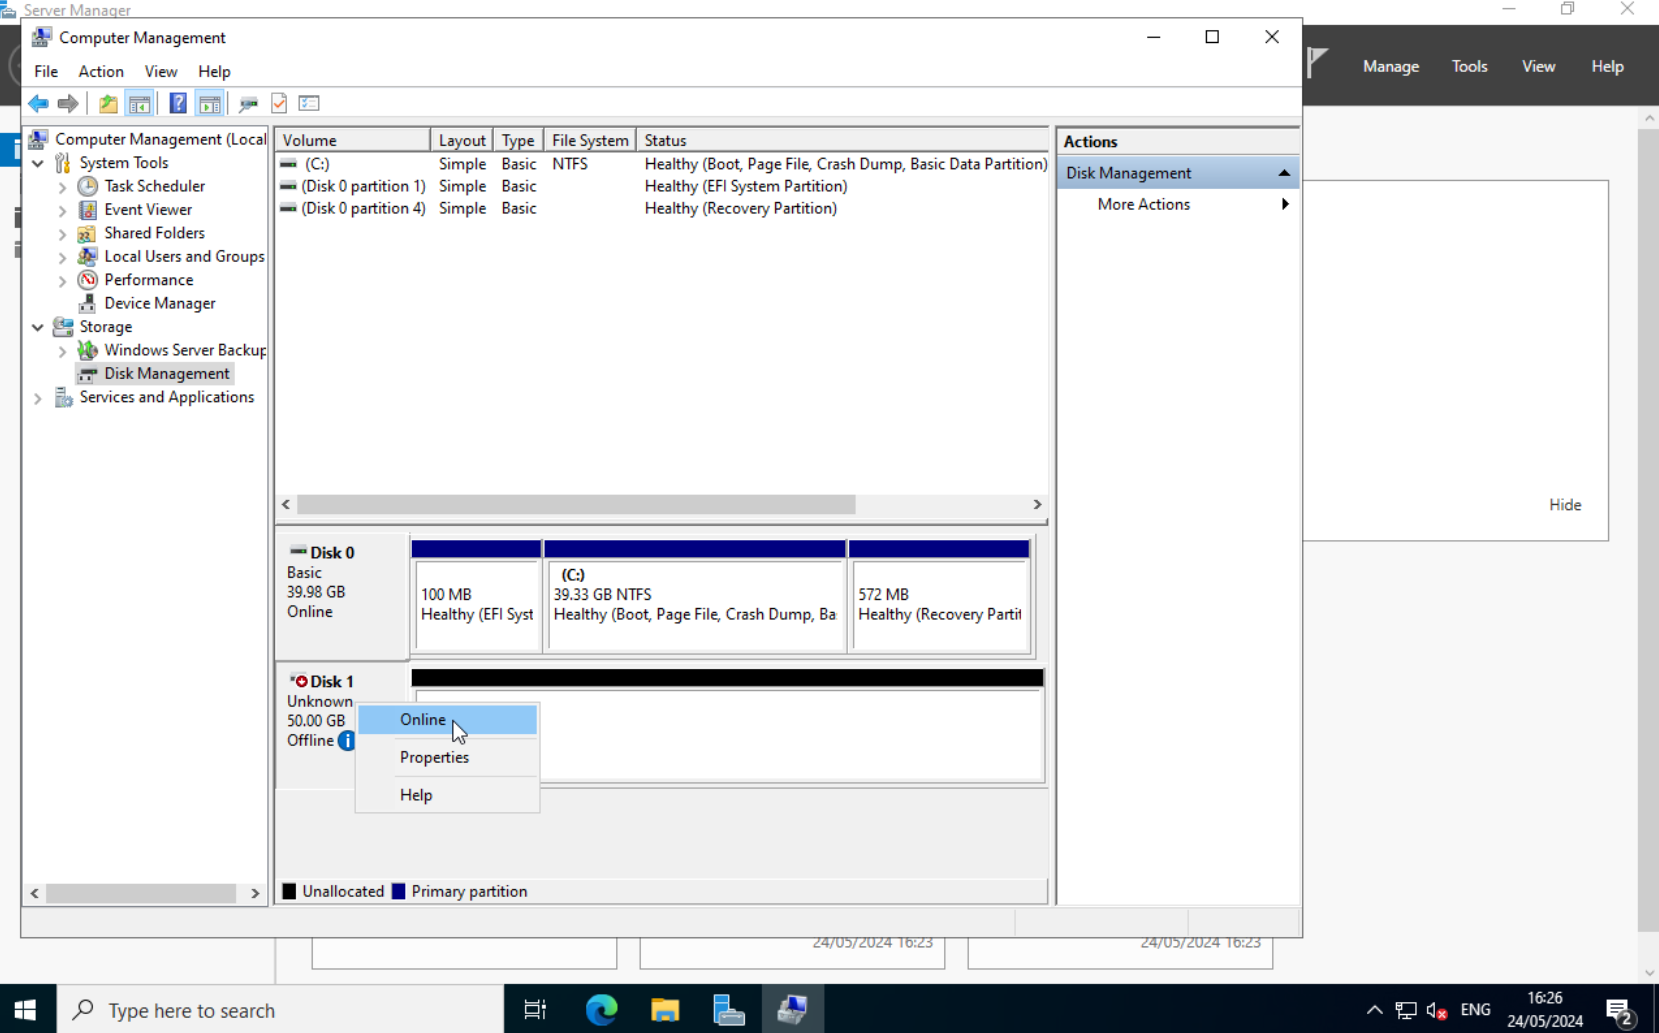
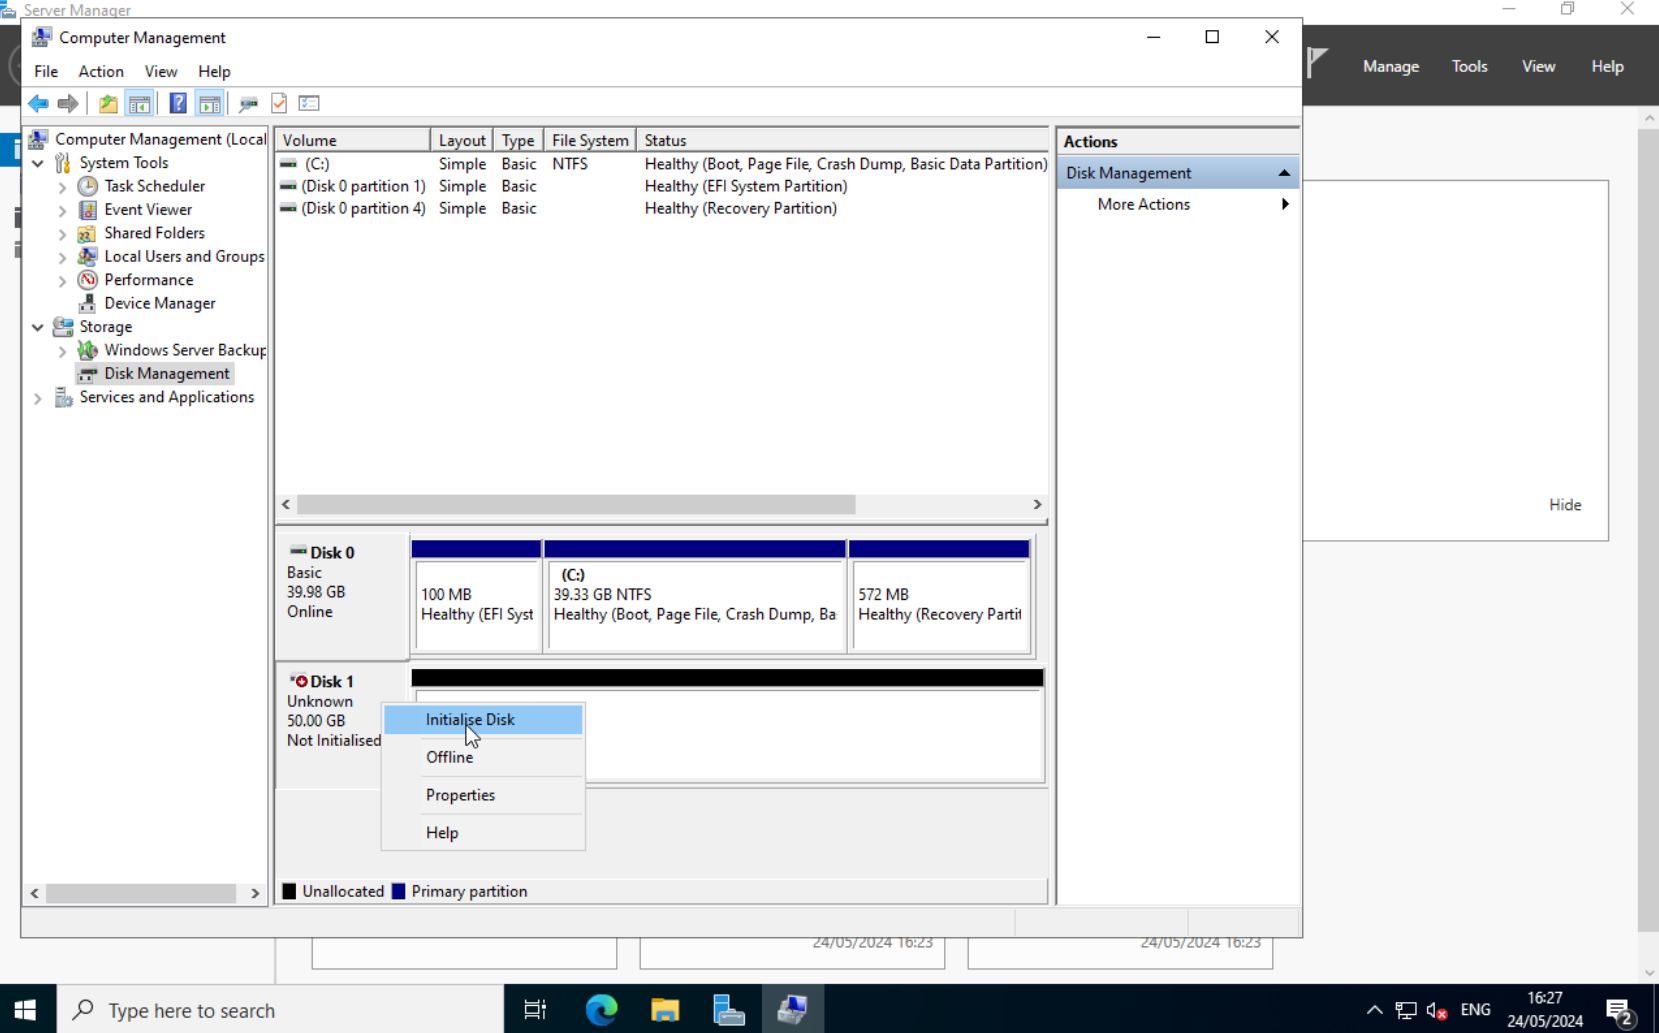
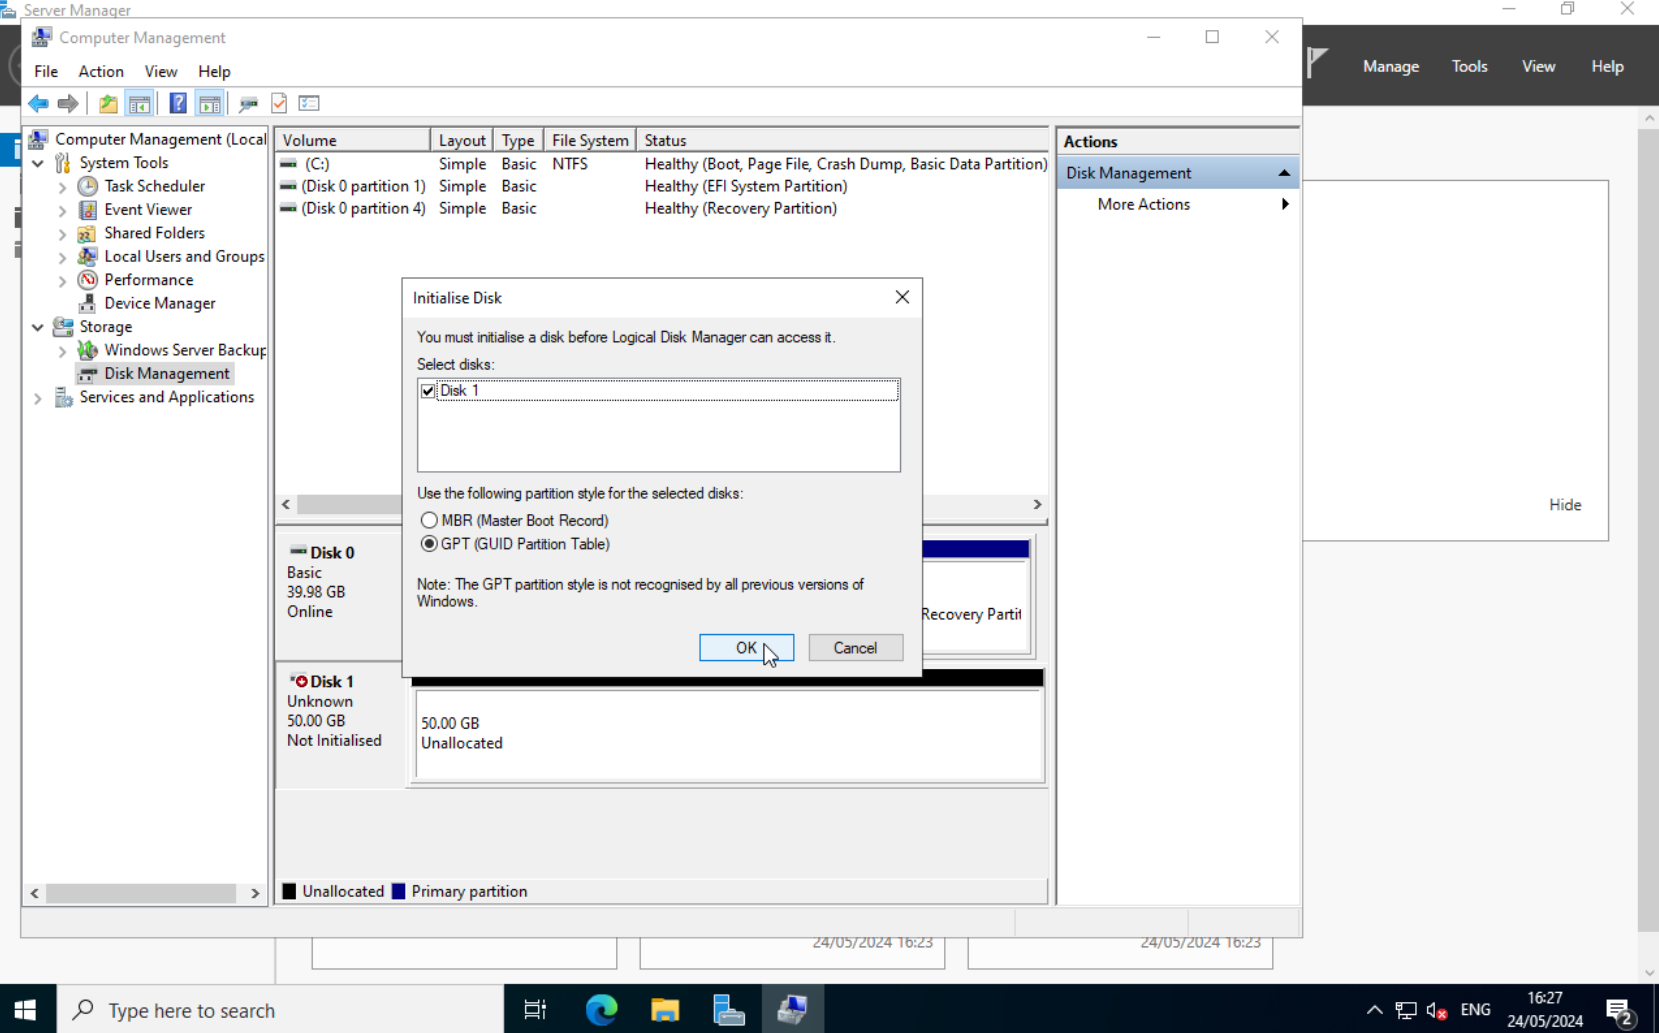
Again, right-click and select “Initialize Disk”. Select GPT and click on “OK”.
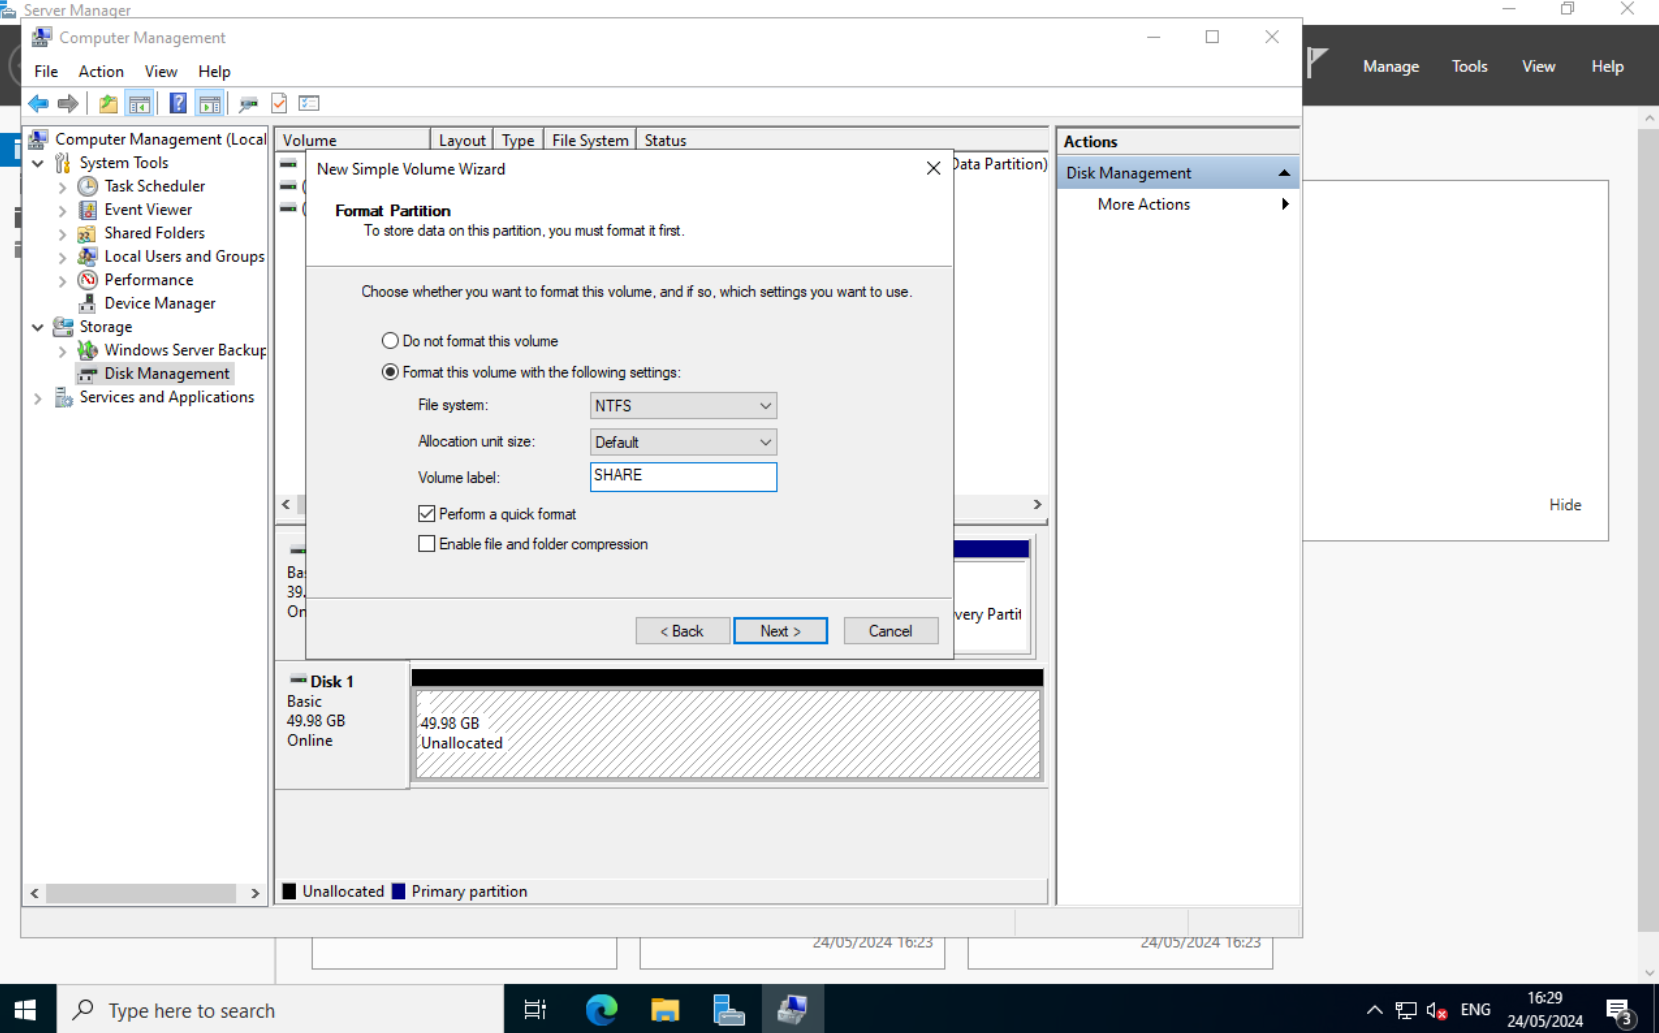
Right-click on the “Unallocated” partition and select “New Simple Volume”. In the new window, just keep clicking “Next” until you reach the “Format Partition” tab. Here we can set the volume name. We leave the rest at its defaults.
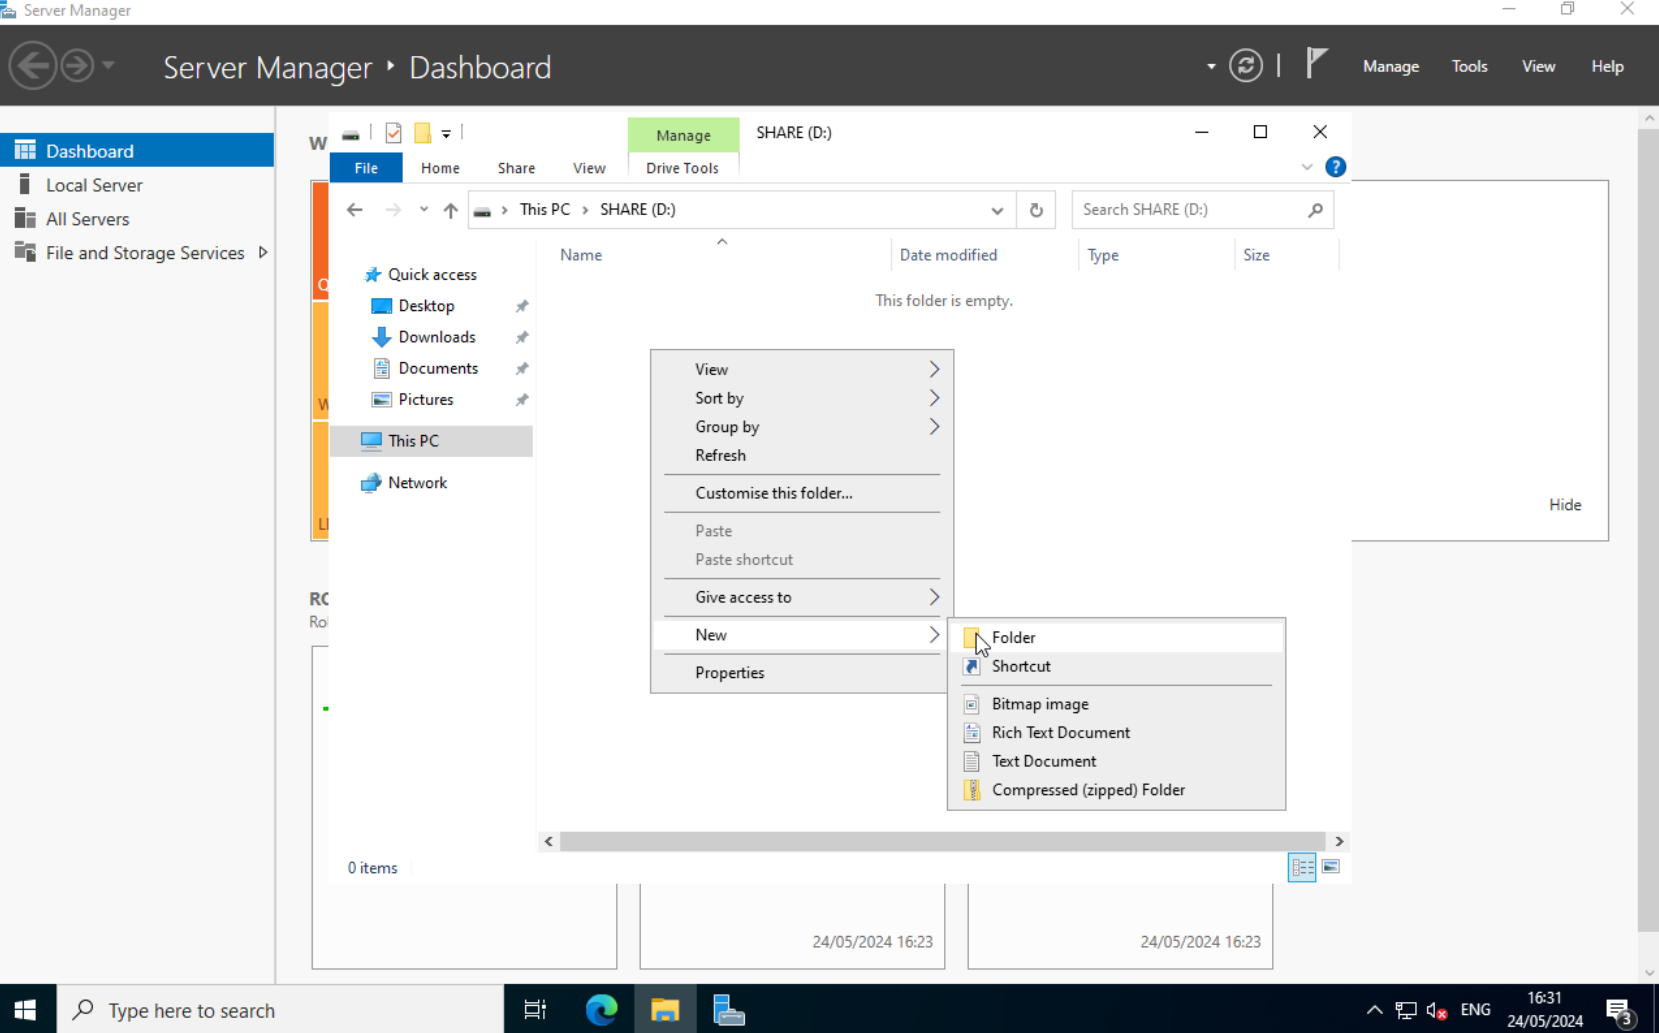
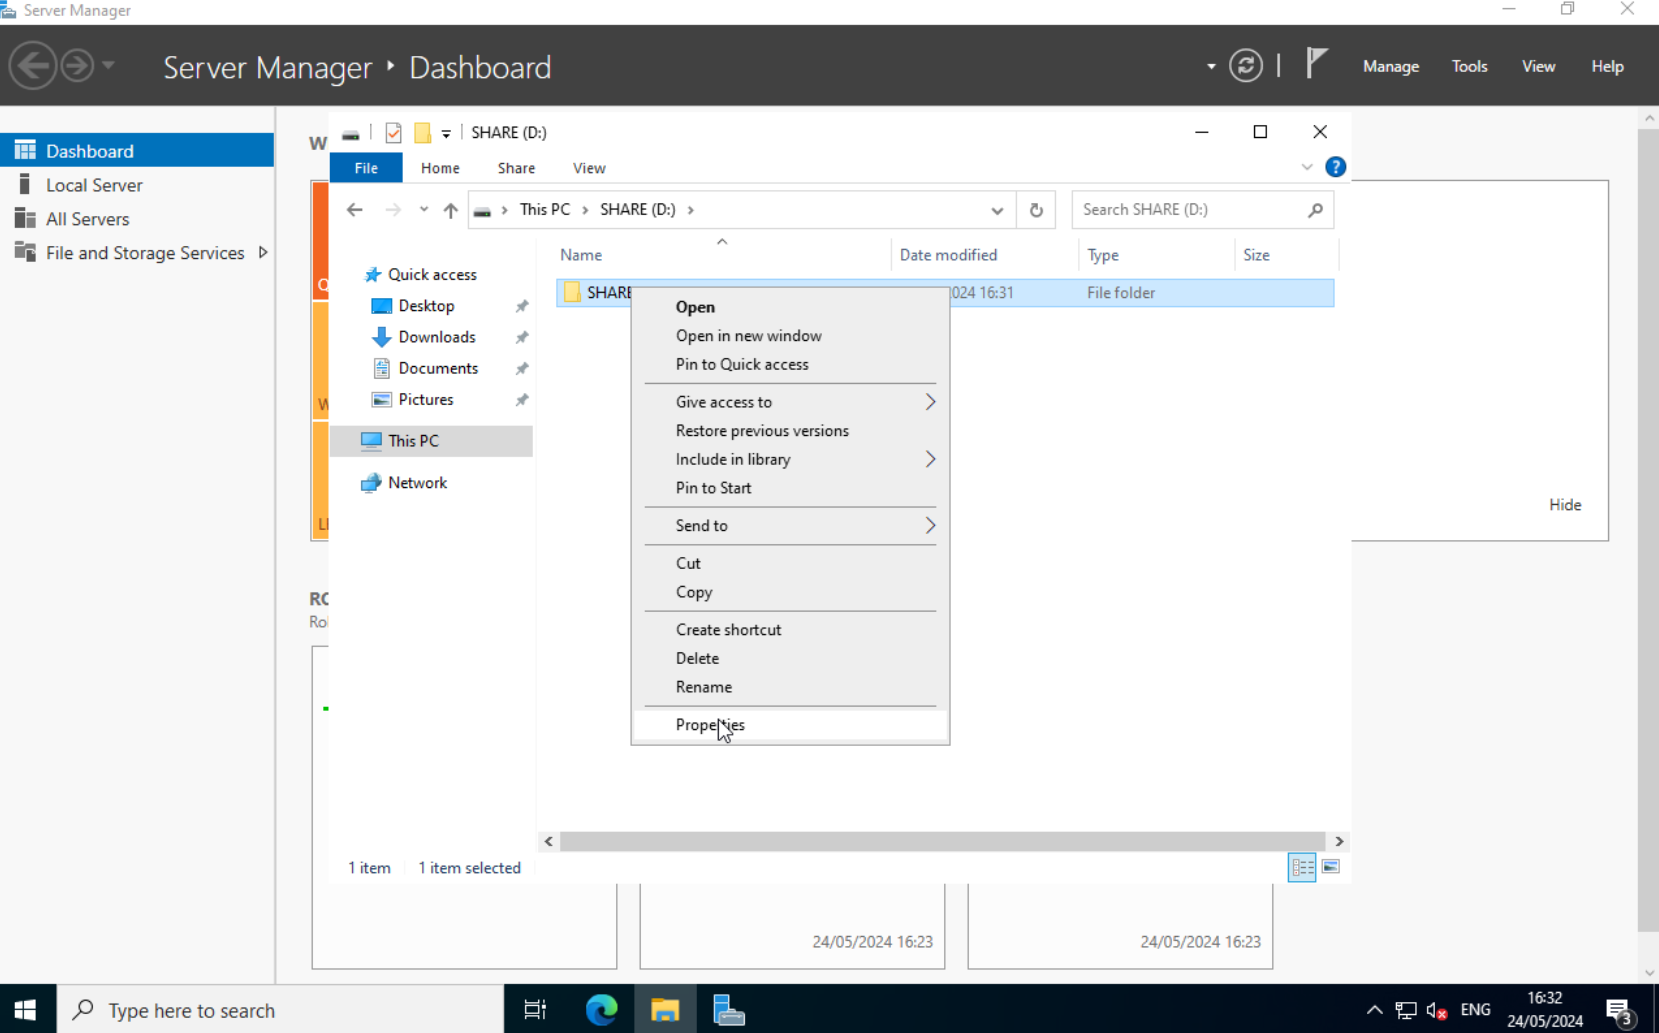
OK. Open the file explorer and navigate to the new disk. First, we create a new folder. I will call it “SHARE”.
Right-click on the newly created folder and select “Properties”.
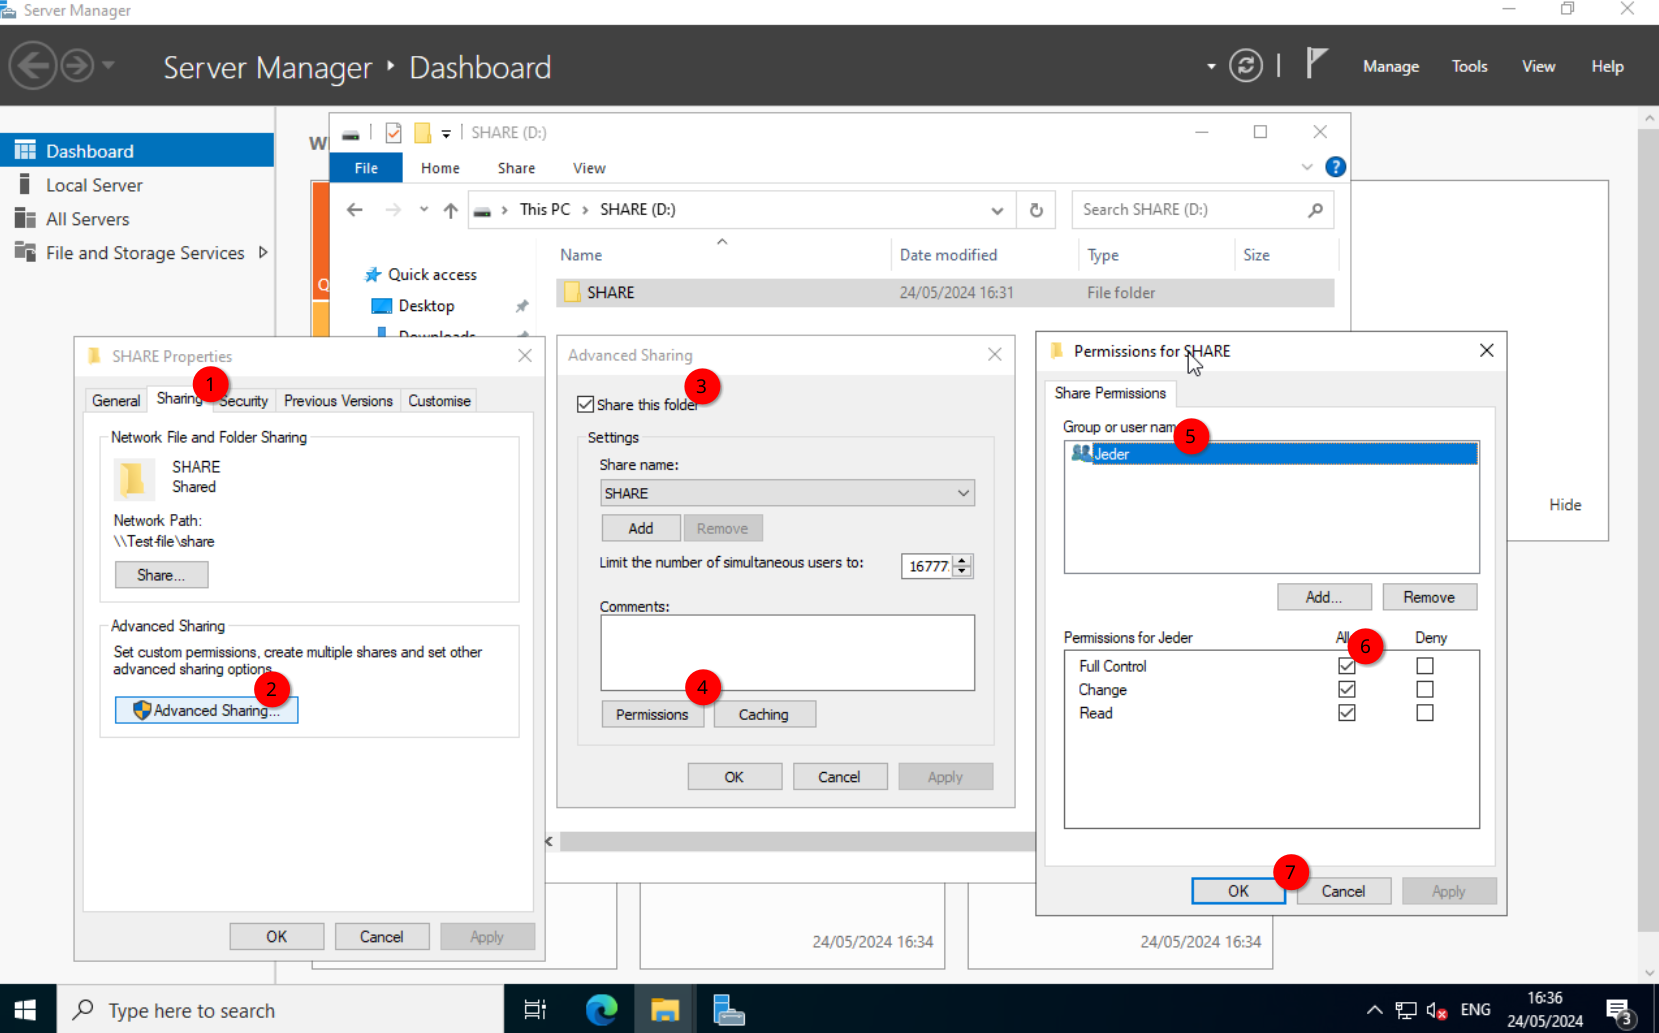
Select the “Sharing” tab and click on “Advanced Sharing”. Select “Share this folder” and click on Permissions.
Default is “everyone” with read only permissions. You could limit this to specific users, but I will leave the default group and extend the permissions to “Full Control”. Keep in mind that this is not the file permission. This refers to the SMB permissions, meaning this defines who can actually access the SMB share through the network. We will limit the file permission in the next step.
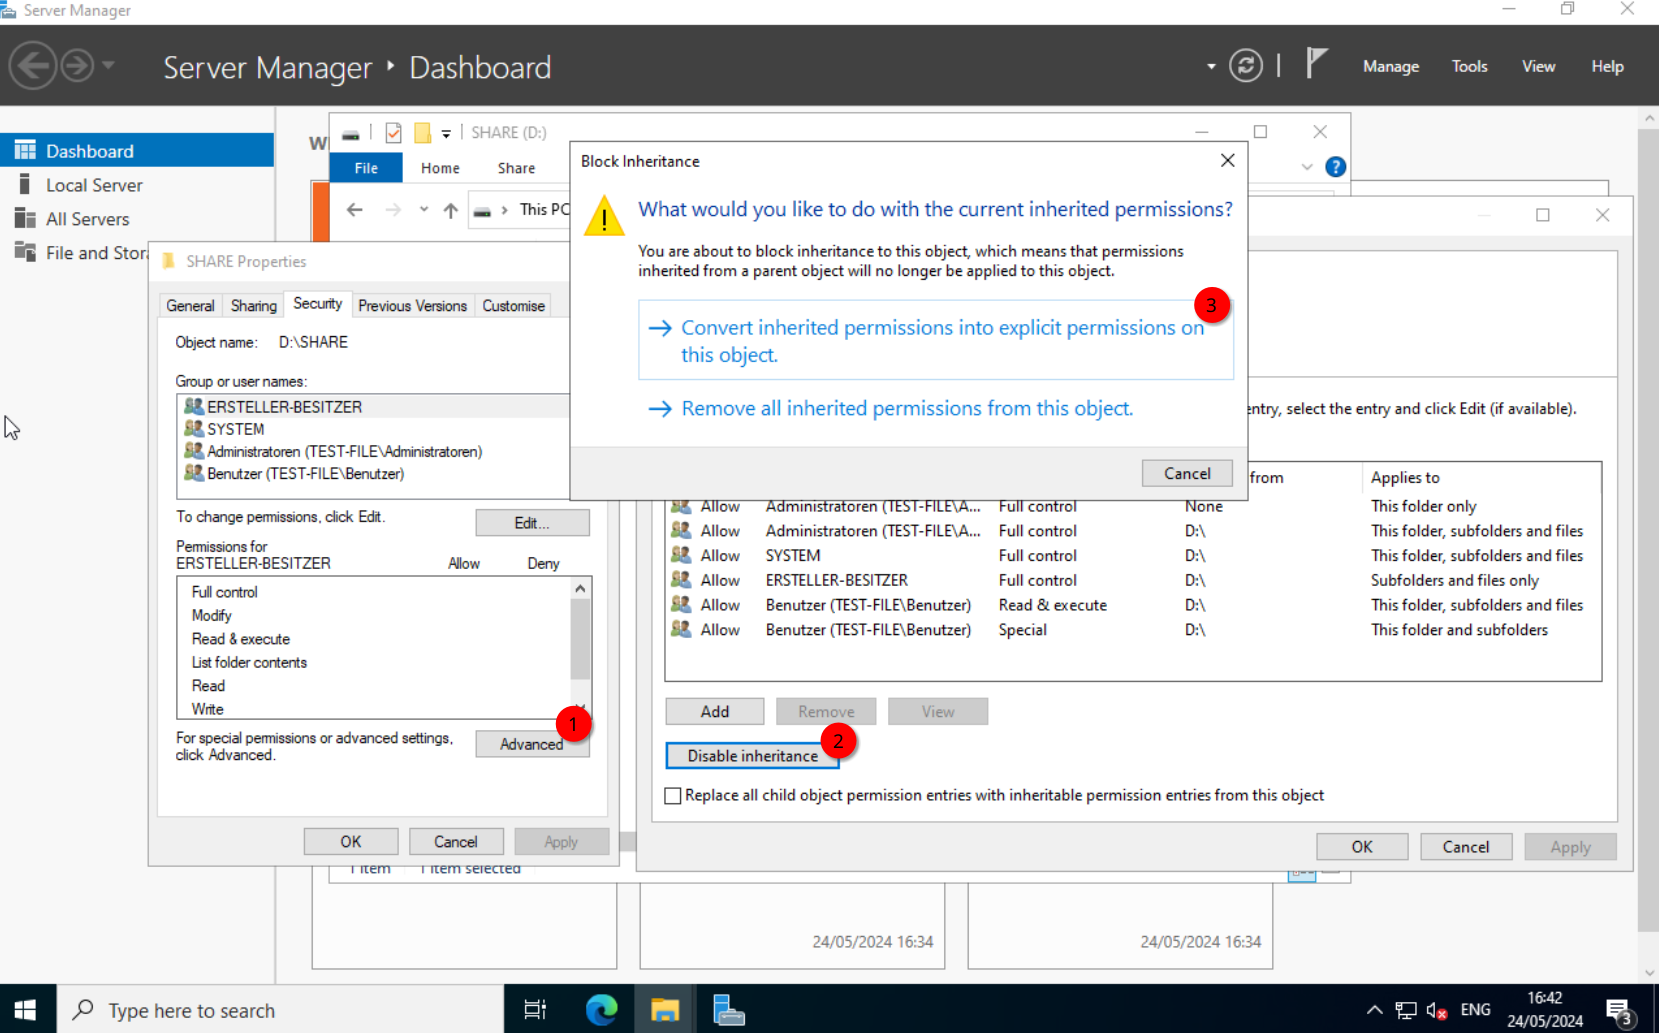
While still in the “Properties” select the “Security” tab. Here we define the file permissions. This is where we limit the access to specific users.
Click on “Advanced” and select “Disable inheritance”. This allows us to actually change the permissions of that folder. Otherwise, the permission from the folder above will be used. Once selected, it will ask us what we want to do with the current permissions. I recommend converting the inherited permissions. We can remove them later.
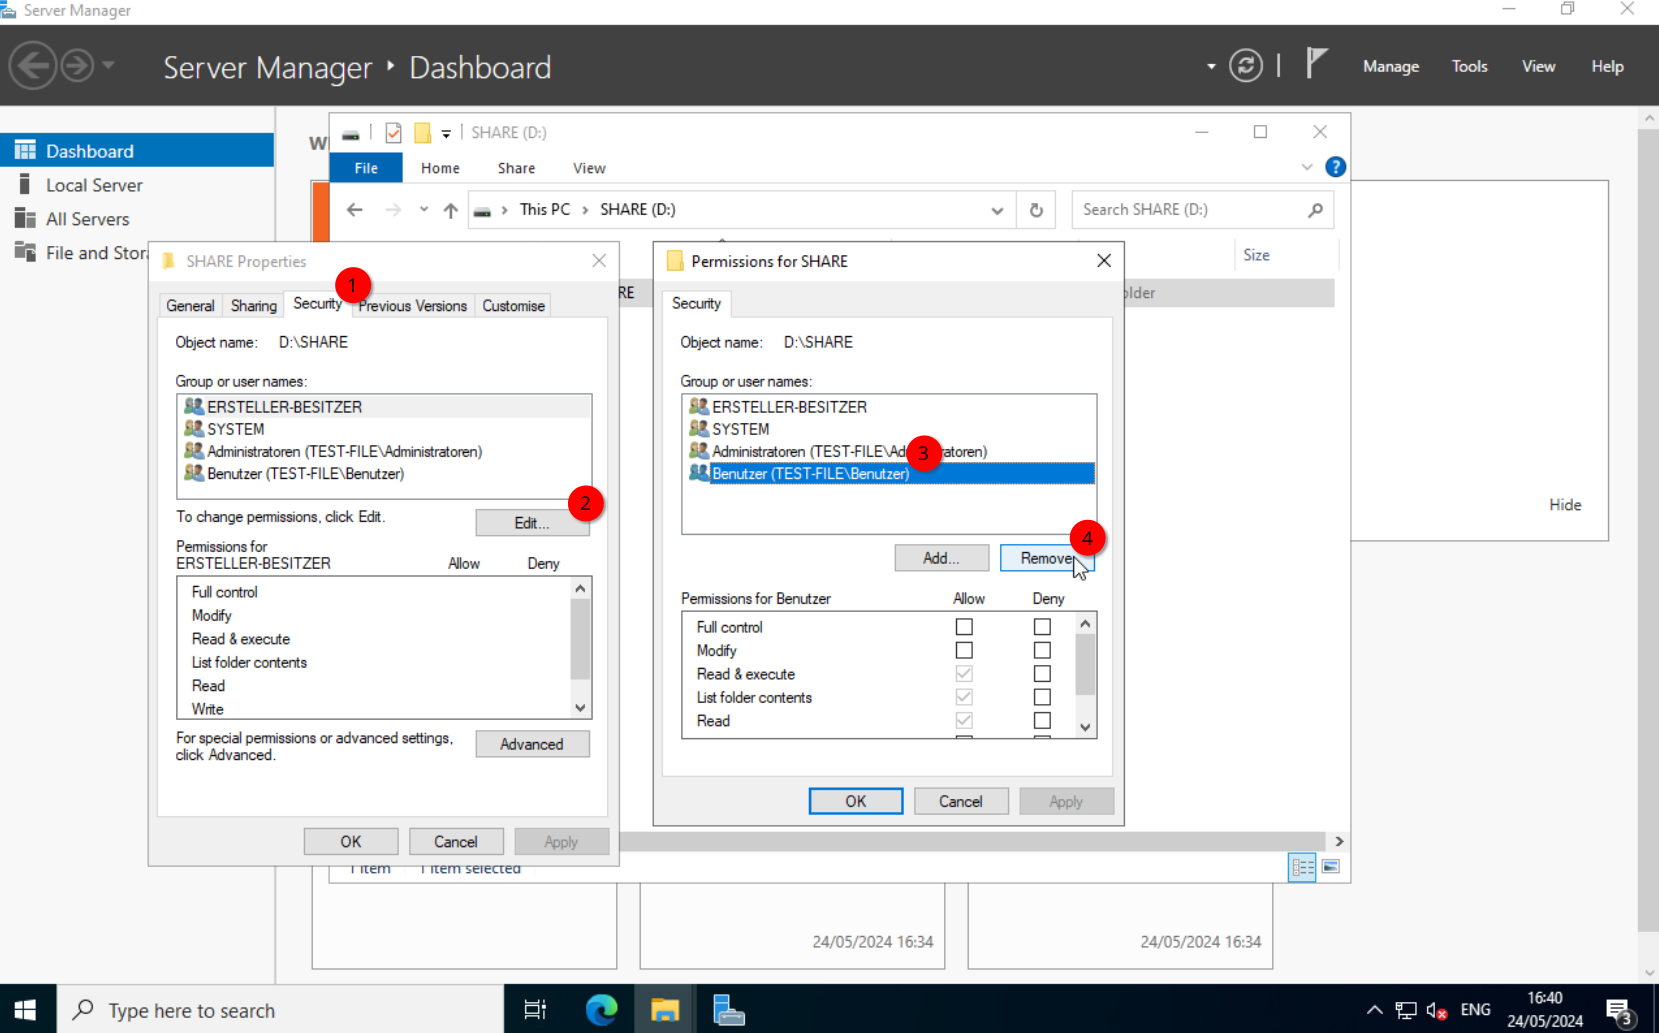
Close the “Advanced Security Settings” and click on “Edit”. Remove the “Users (TEST-FILE\Users)” group.
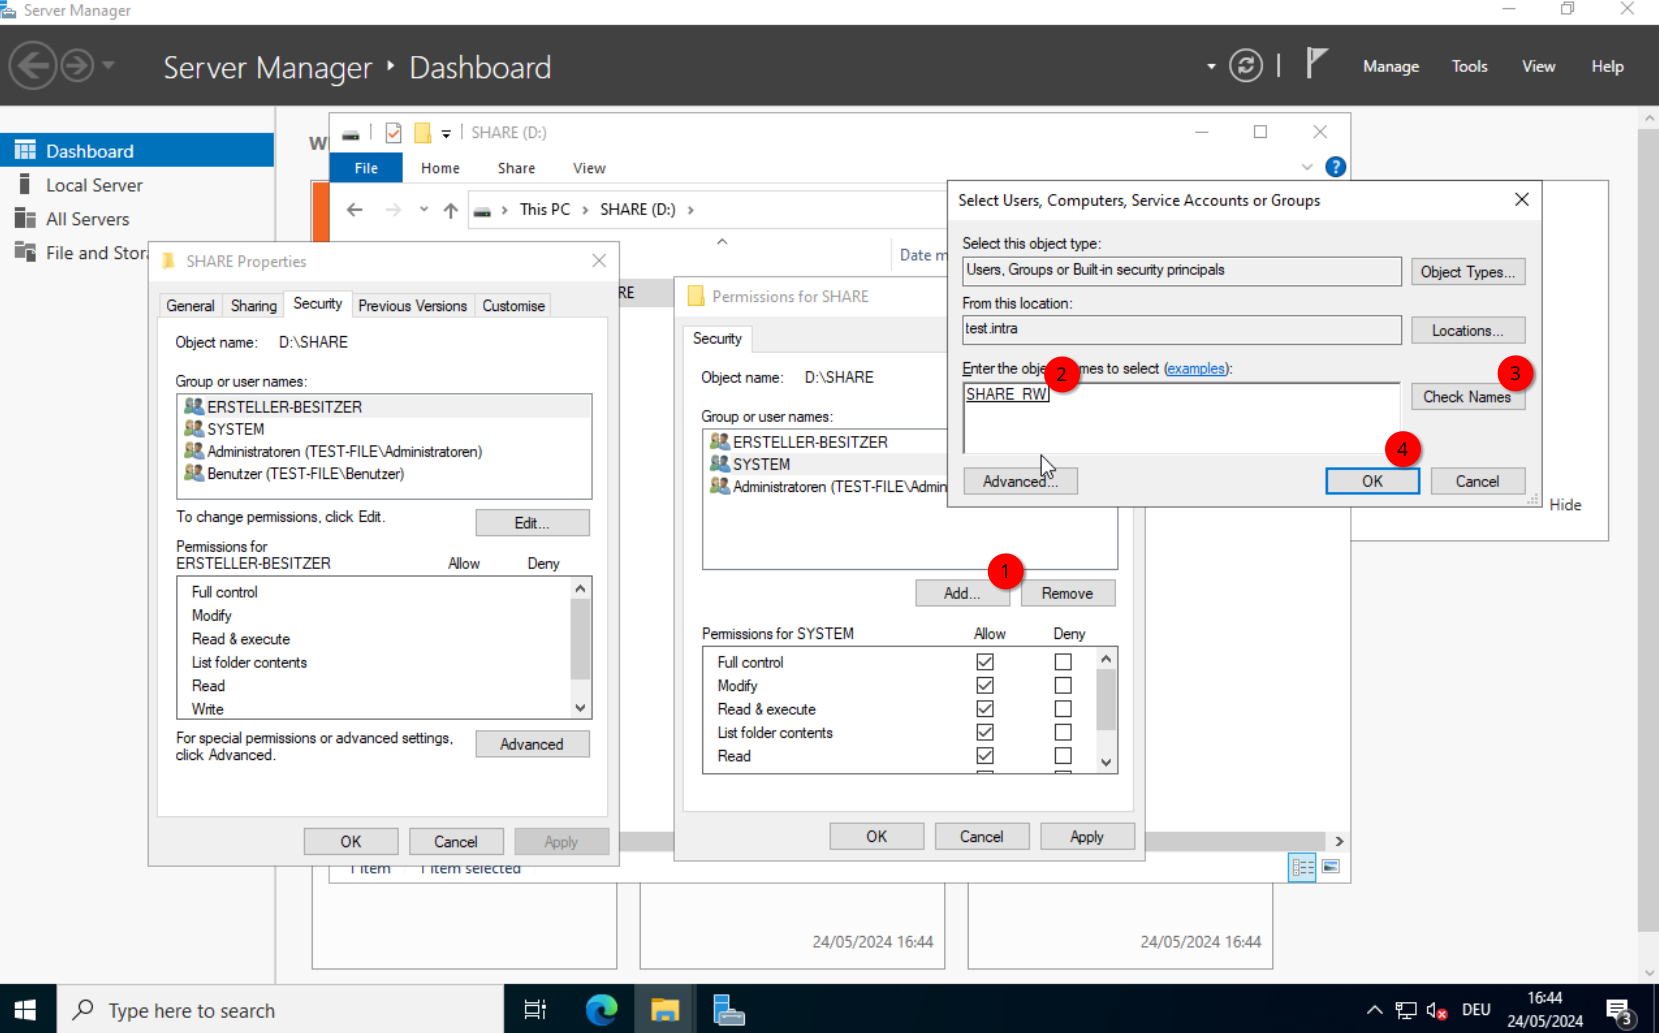
Now, click on “Add...” and search for the “SHARE_RW” group, we created earlier.
Give it the desired permissions, I will leave it at the defaults, and close the windows by clicking on “OK”.
At this point, we could manually add the share to one of our system (if we had any) in our domain, but it would be nicer to automate this process. So let’s do that.
We will continue with the group policies.
Configuring Group Policies
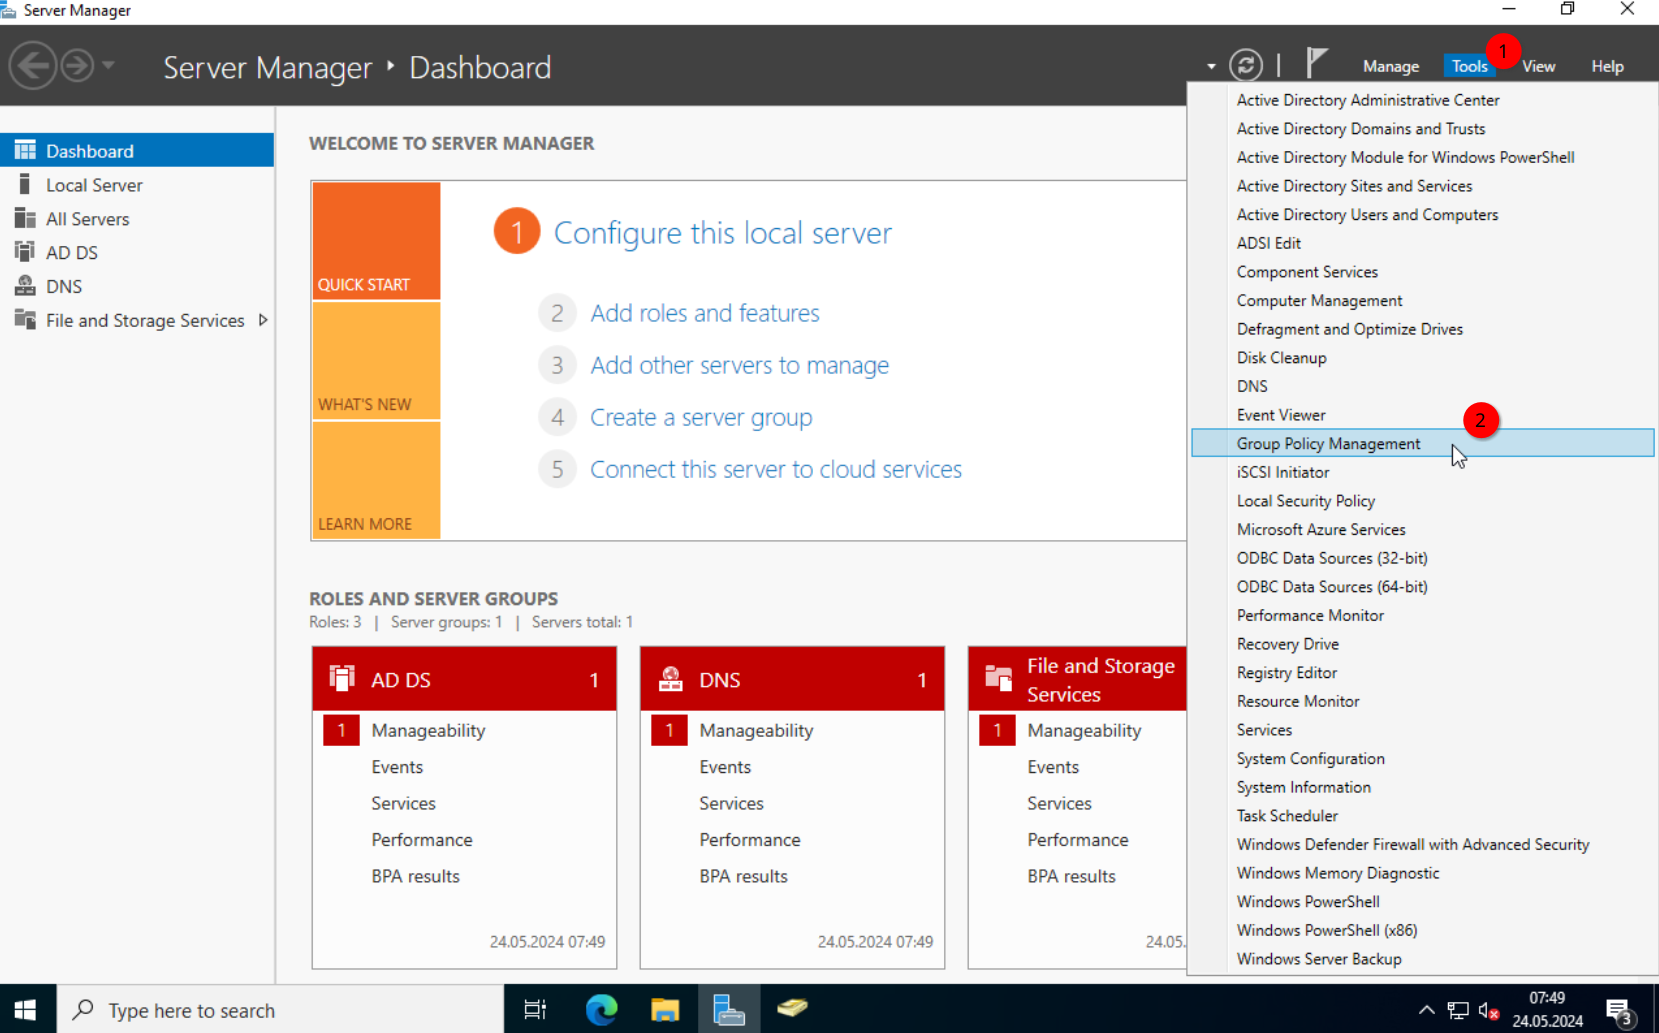
On the TEST-DC01, open the “Server Manager” and select “Group Policy Management” from the “Tools” drop-down.
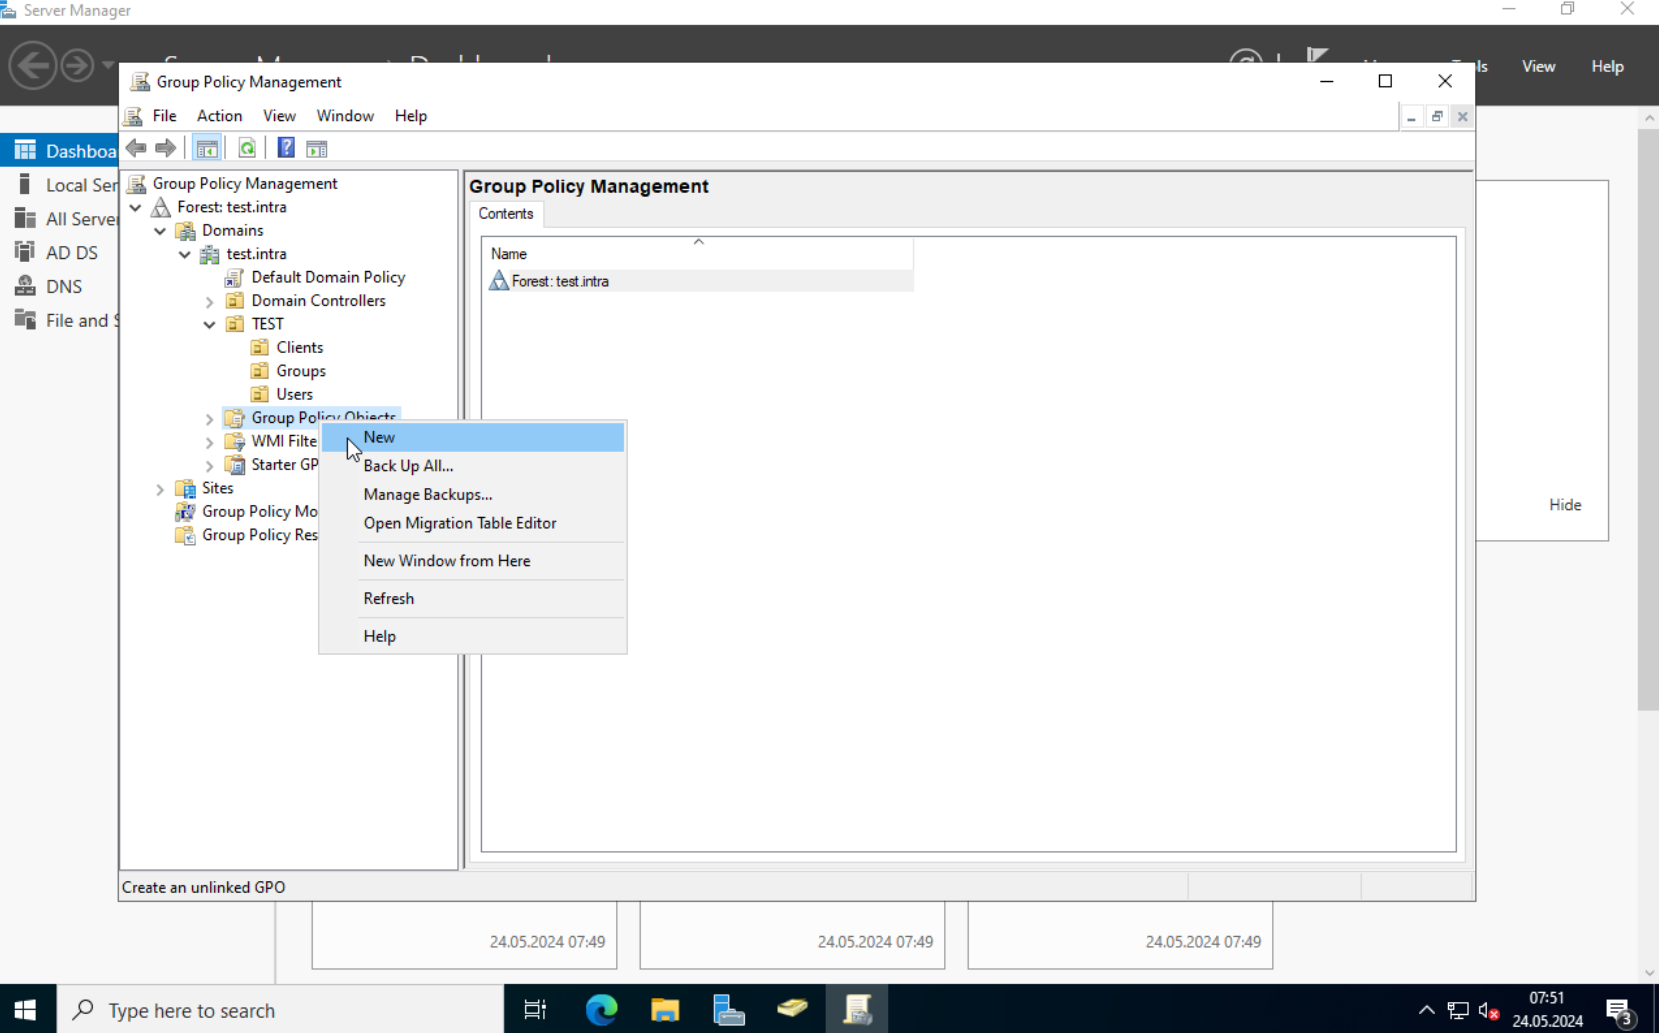
Currently, we only have the “Default Domain Policy” and the “Default Domain Controller Policy”. I would recommend not to change those. We will create a new one.
Right-click on “Group Policy Objects” and select “New”. Give the new policy a nice name and click on OK.
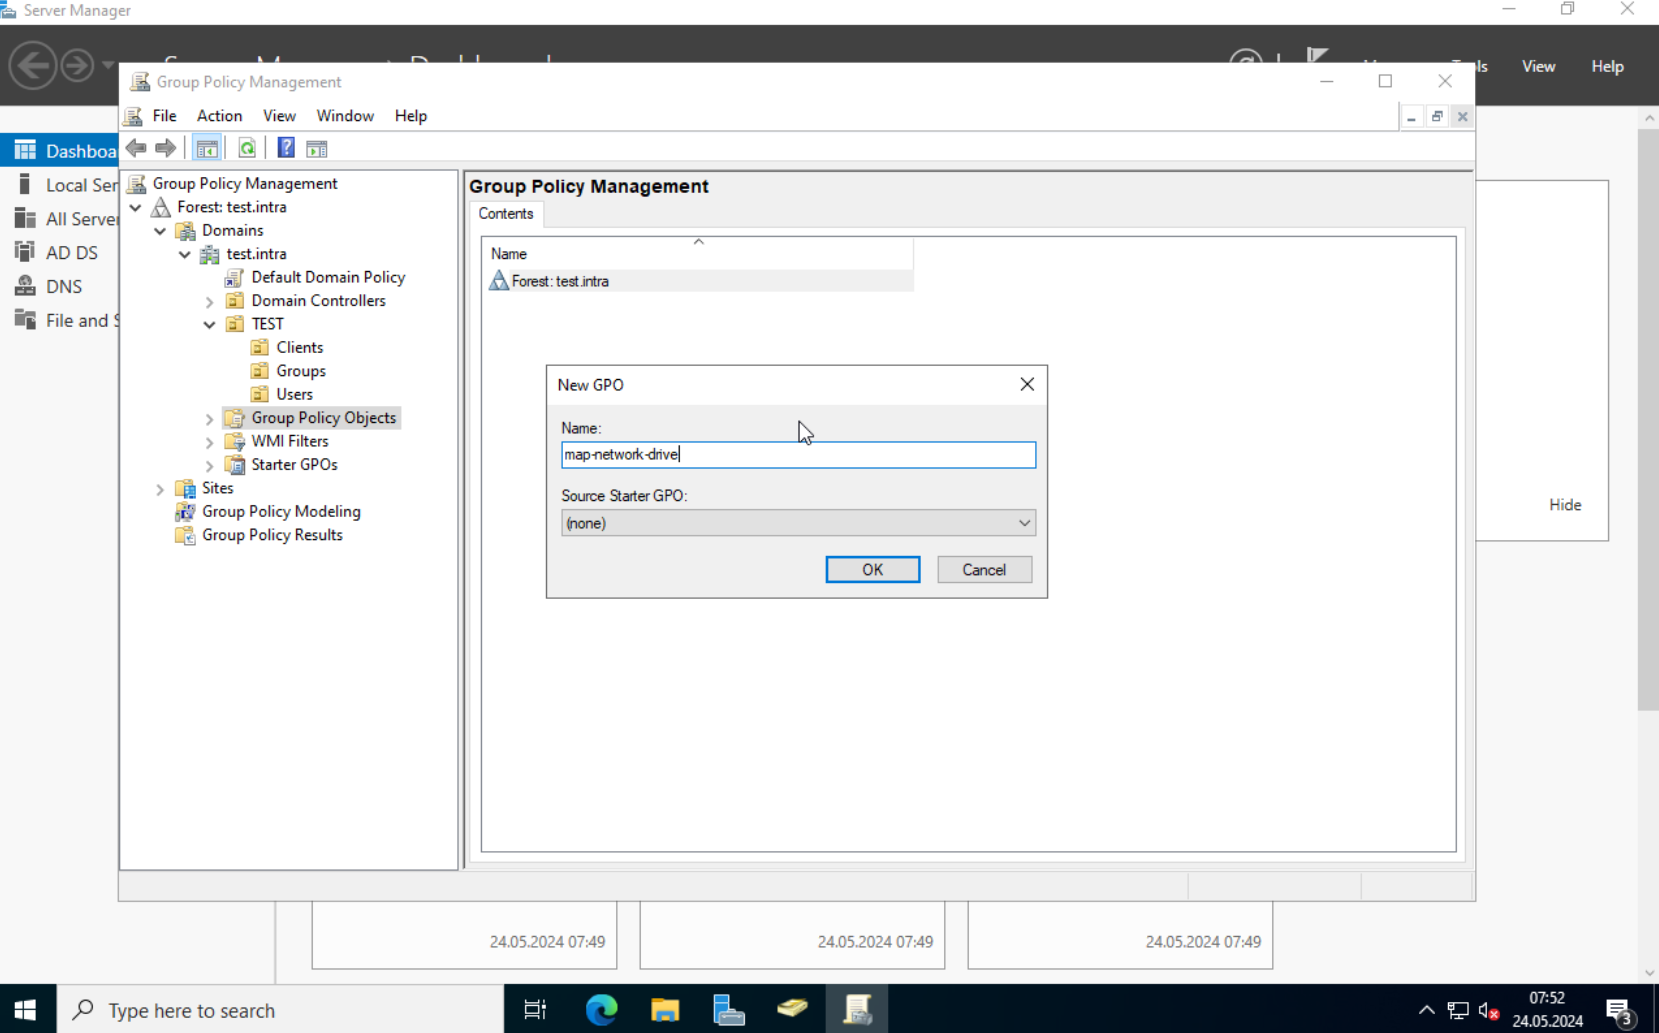
This will create a new object, which we can edit.
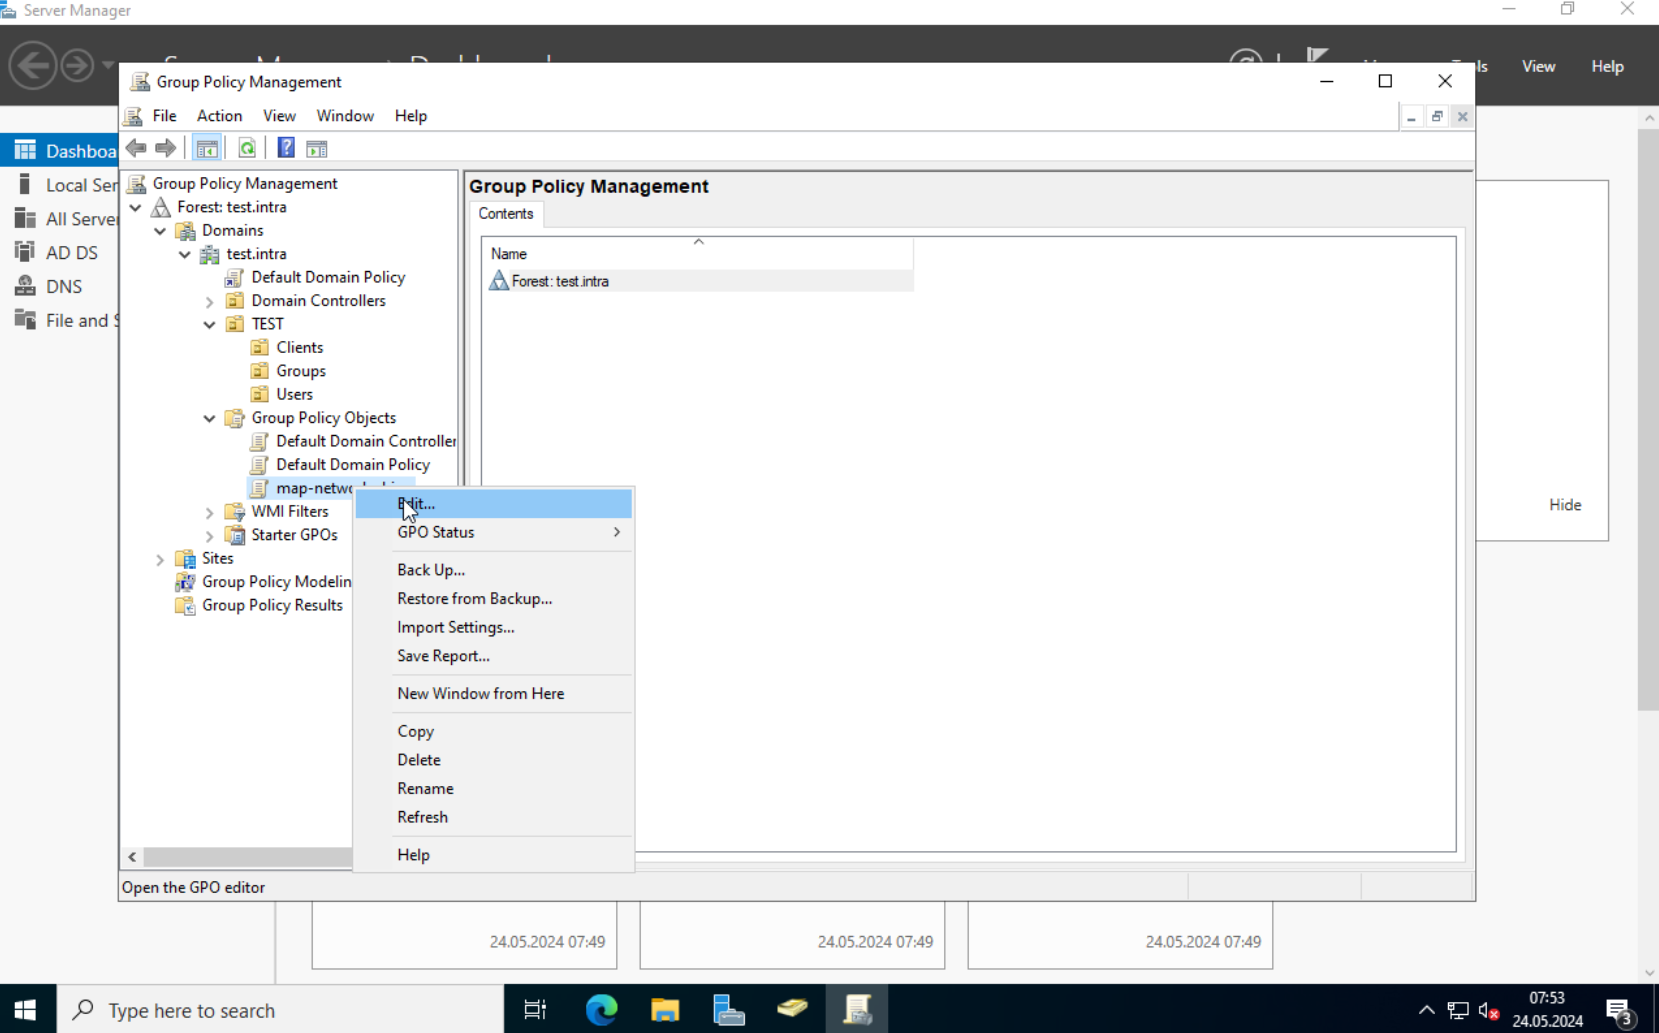
We want to assign network folders to specific users / groups, so we navigate to “User Configuration” -> “Preferences” -> “Windows Settings” -> “Drive Maps”. Right-click on the right blank field and select “New” -> “Mapped Drive”.
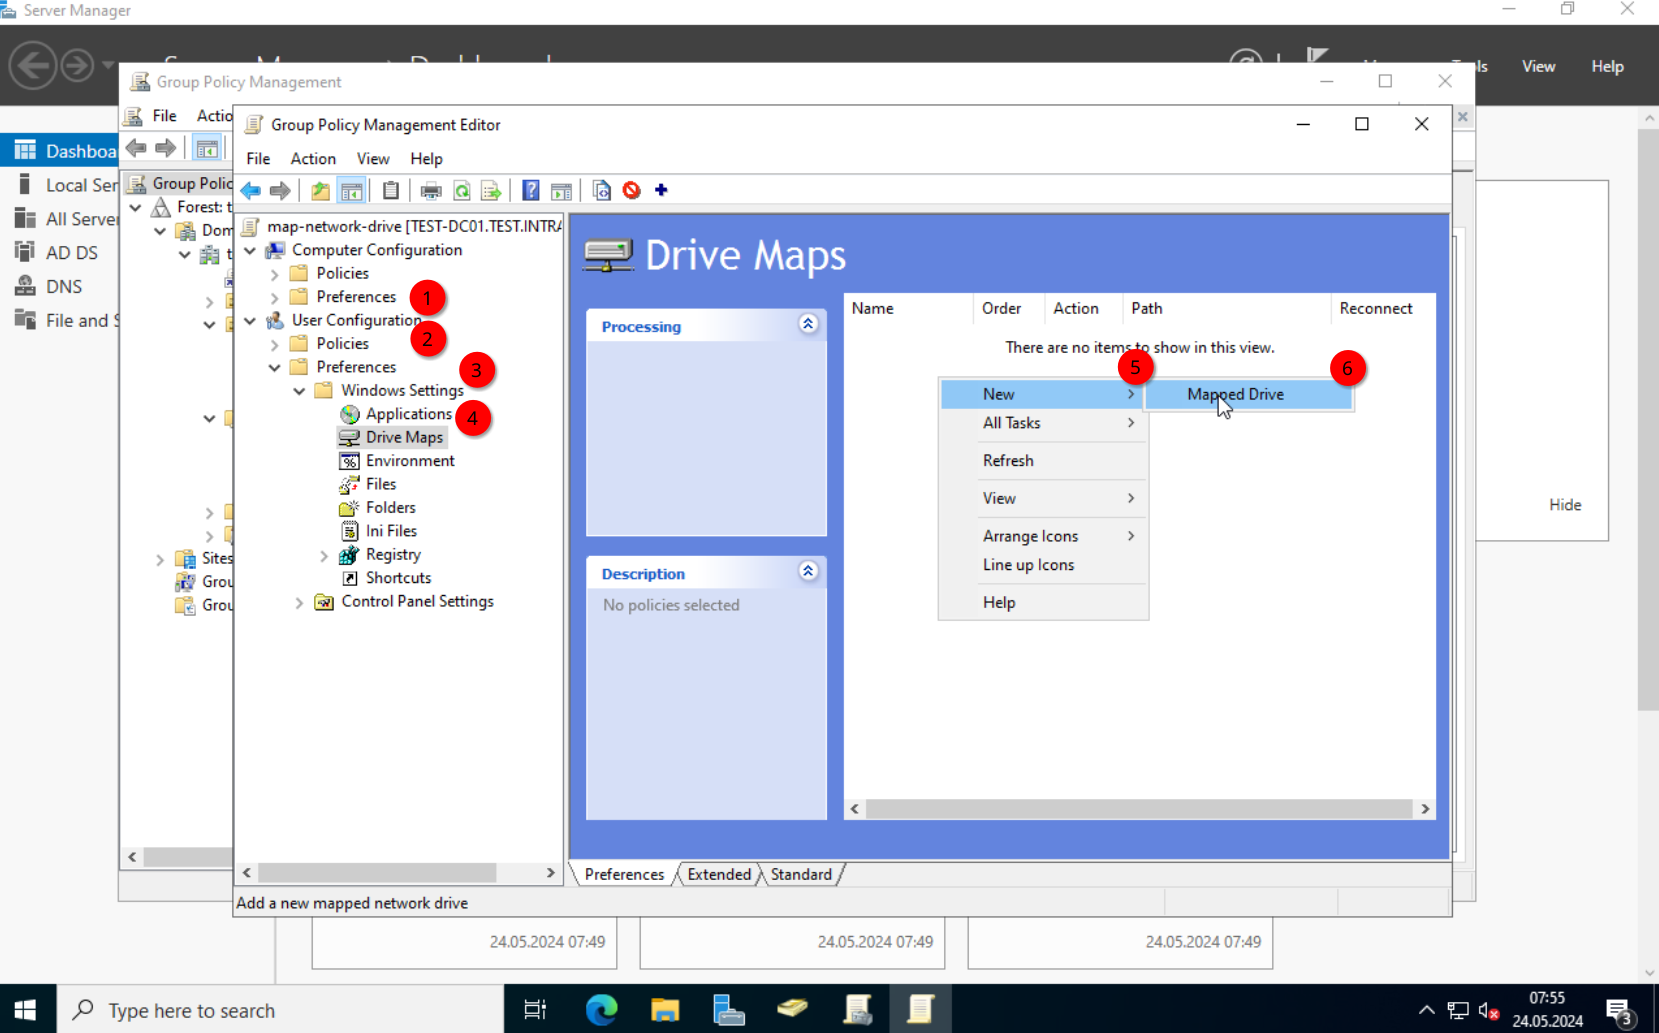
Here we can specify the properties. In the action dropdown, select “Create”. The location is the network path to the share. “\\TEST-FILE\SHARE”.
The Label defines what the user will see for a name. “SHARE” in my case. Select a drive letter you prefer. I will use “S”.
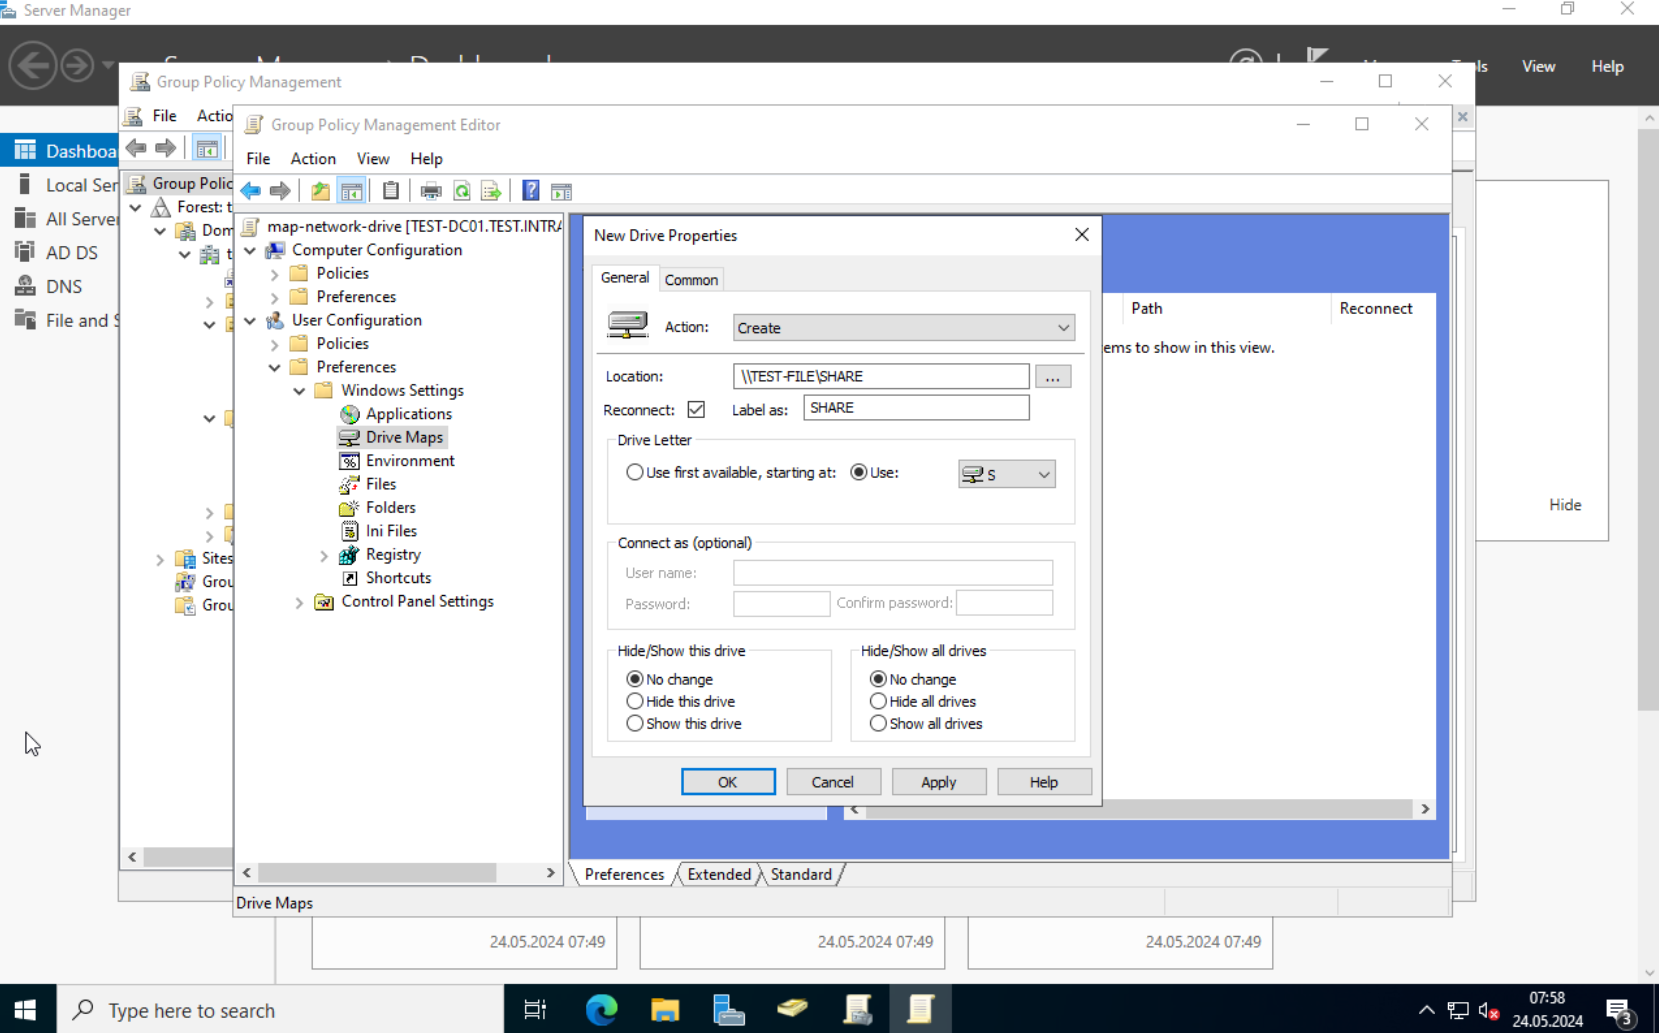
Next, click on the “Common” tab. Select “Item-level targeting” and click on “Targeting...”. Select “New Item” in the new window and click on “Security Group”.
Click on the “…”, (do not type in the group name in the “Group” field), and search for the group we created.
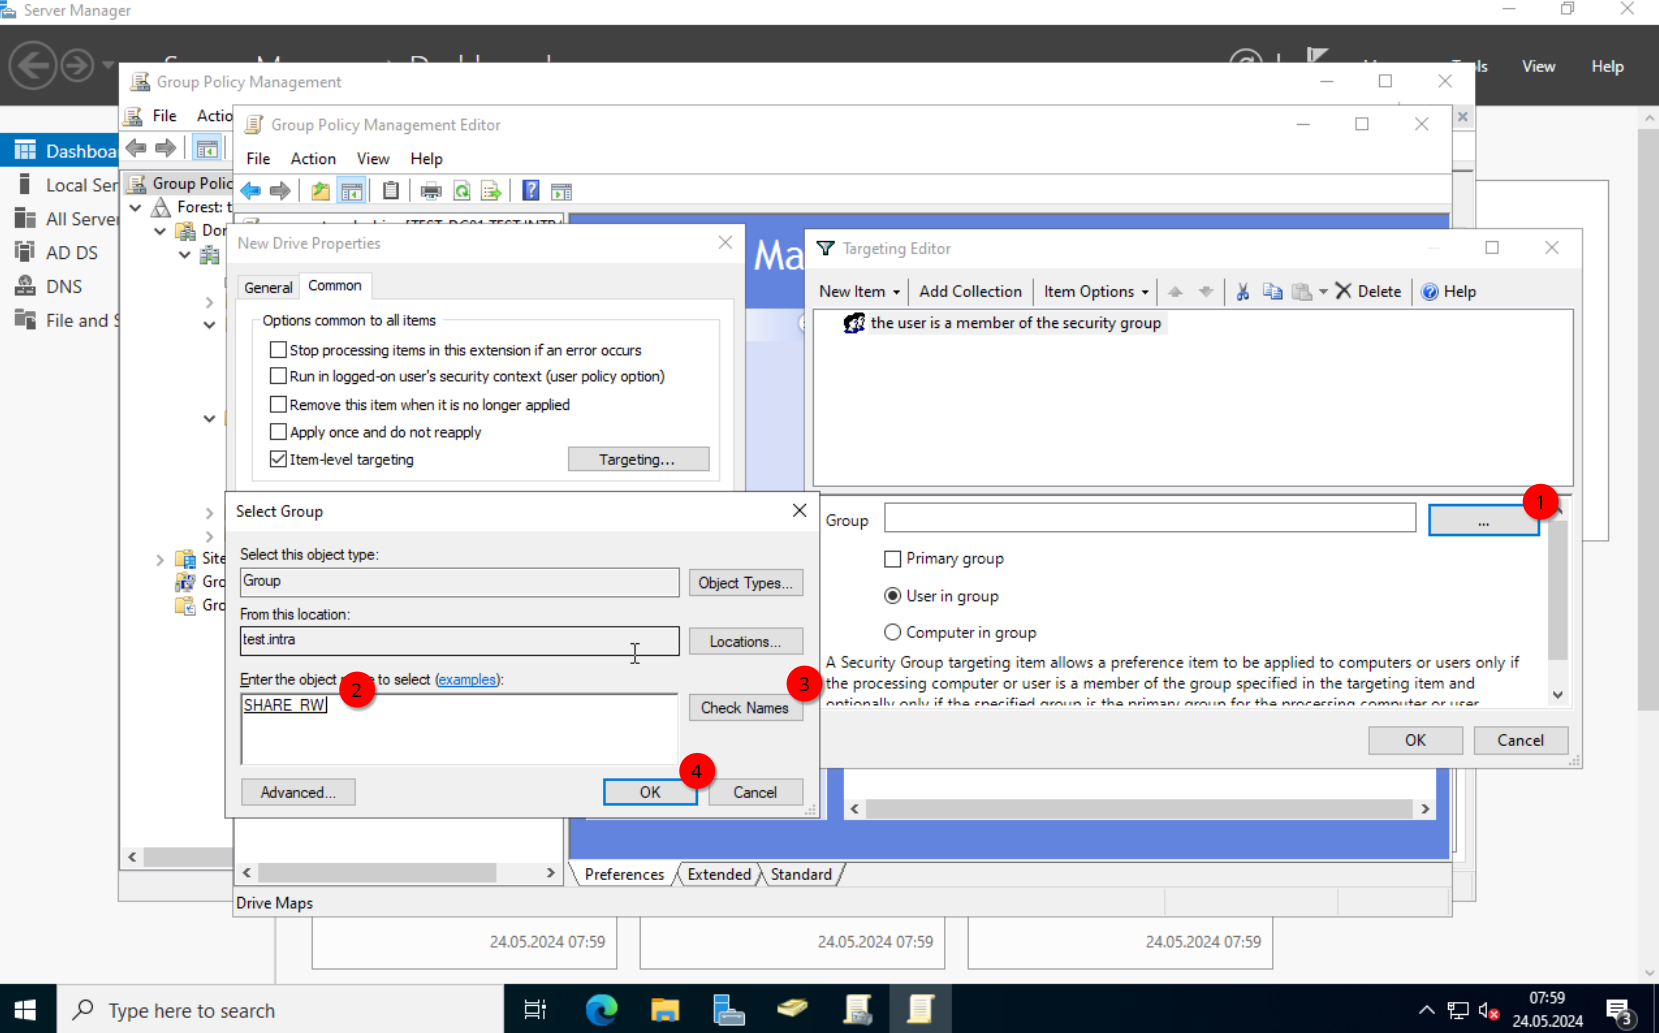
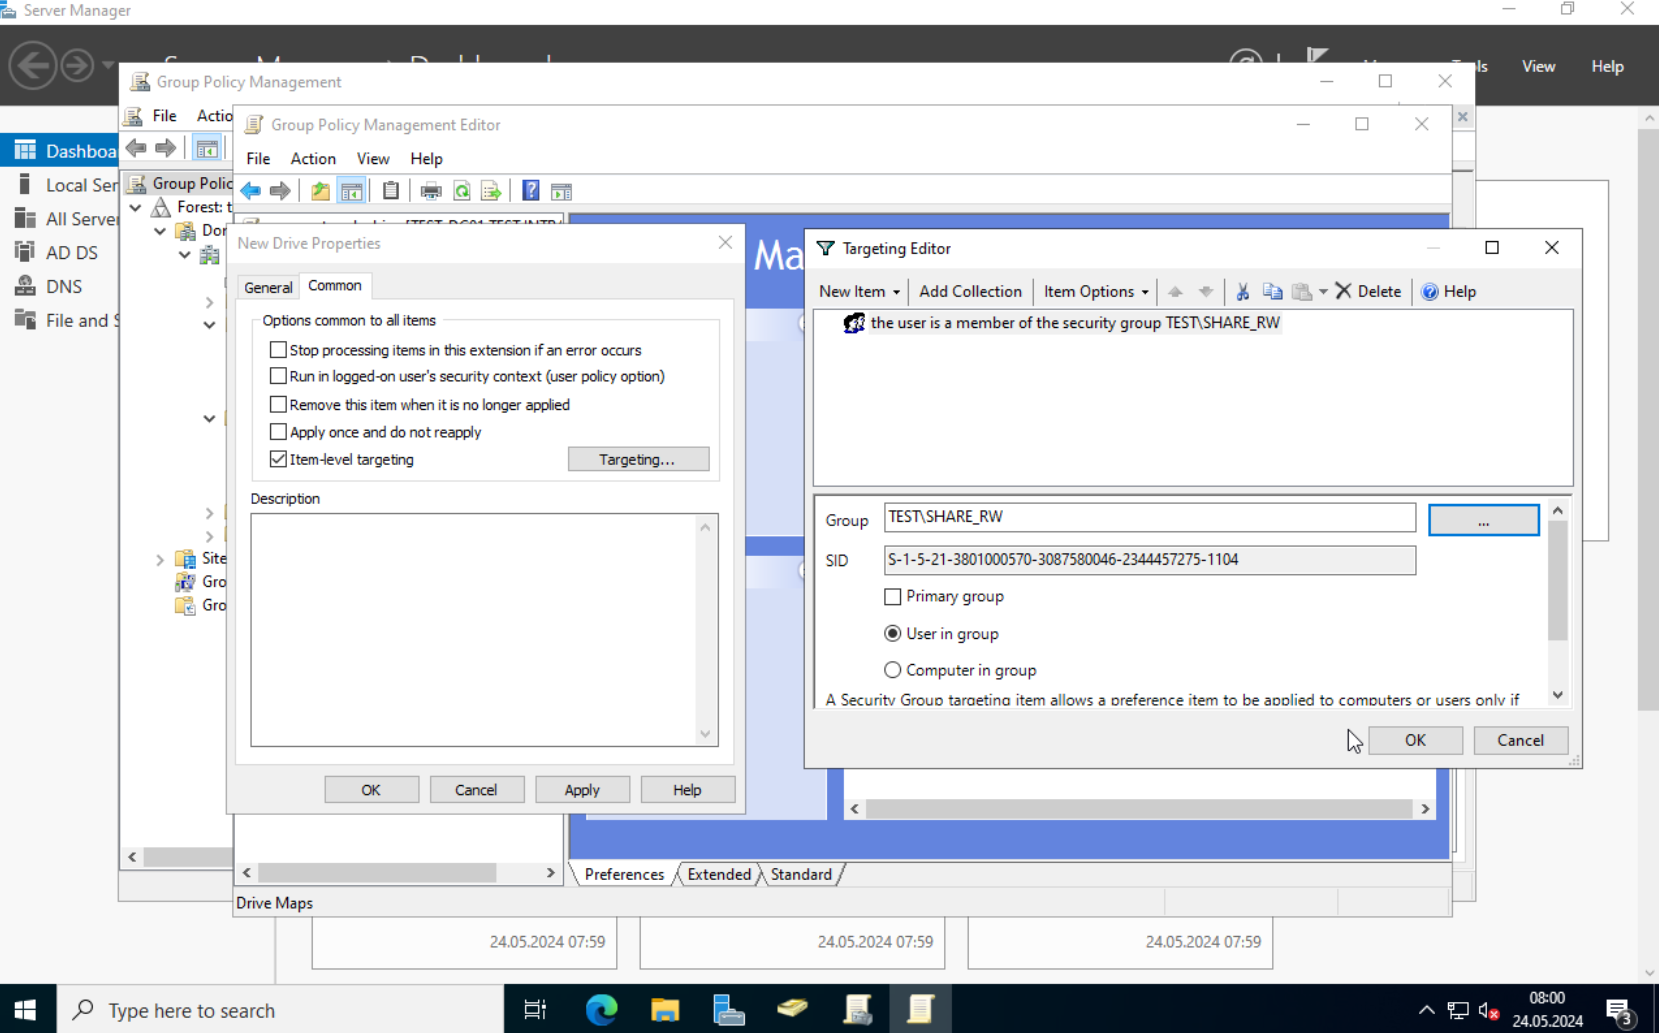
Save the configuration. Once that’s done, you should see a new entry.
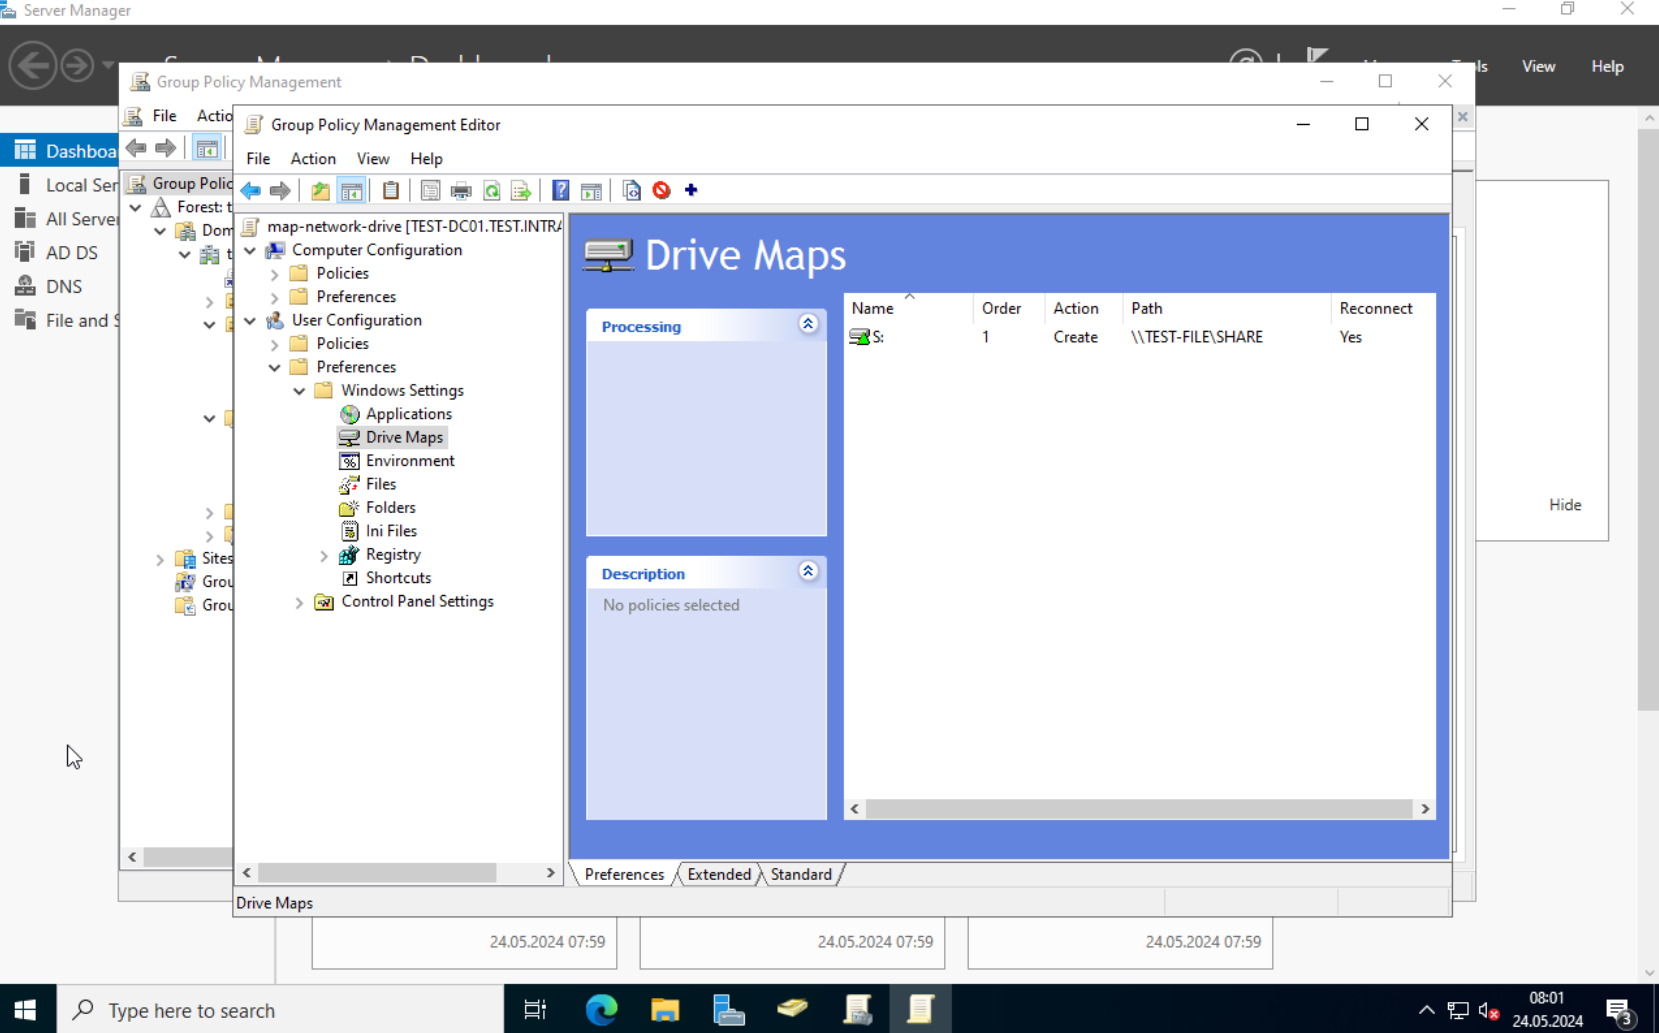
Next, we have to assign the new policy to one of our OUs. Close the “Group Policy Management Editor” and switch back to the “Group Policy Management”.
In here, right-click on the OU we want to assign the policy to. Since this is a “User Configuration” with a group specific targeting, I will select the “Users” OU. Right-click on the “Users” OU and select “link an existing GPO”
Choose the policy we just created, and click on OK.
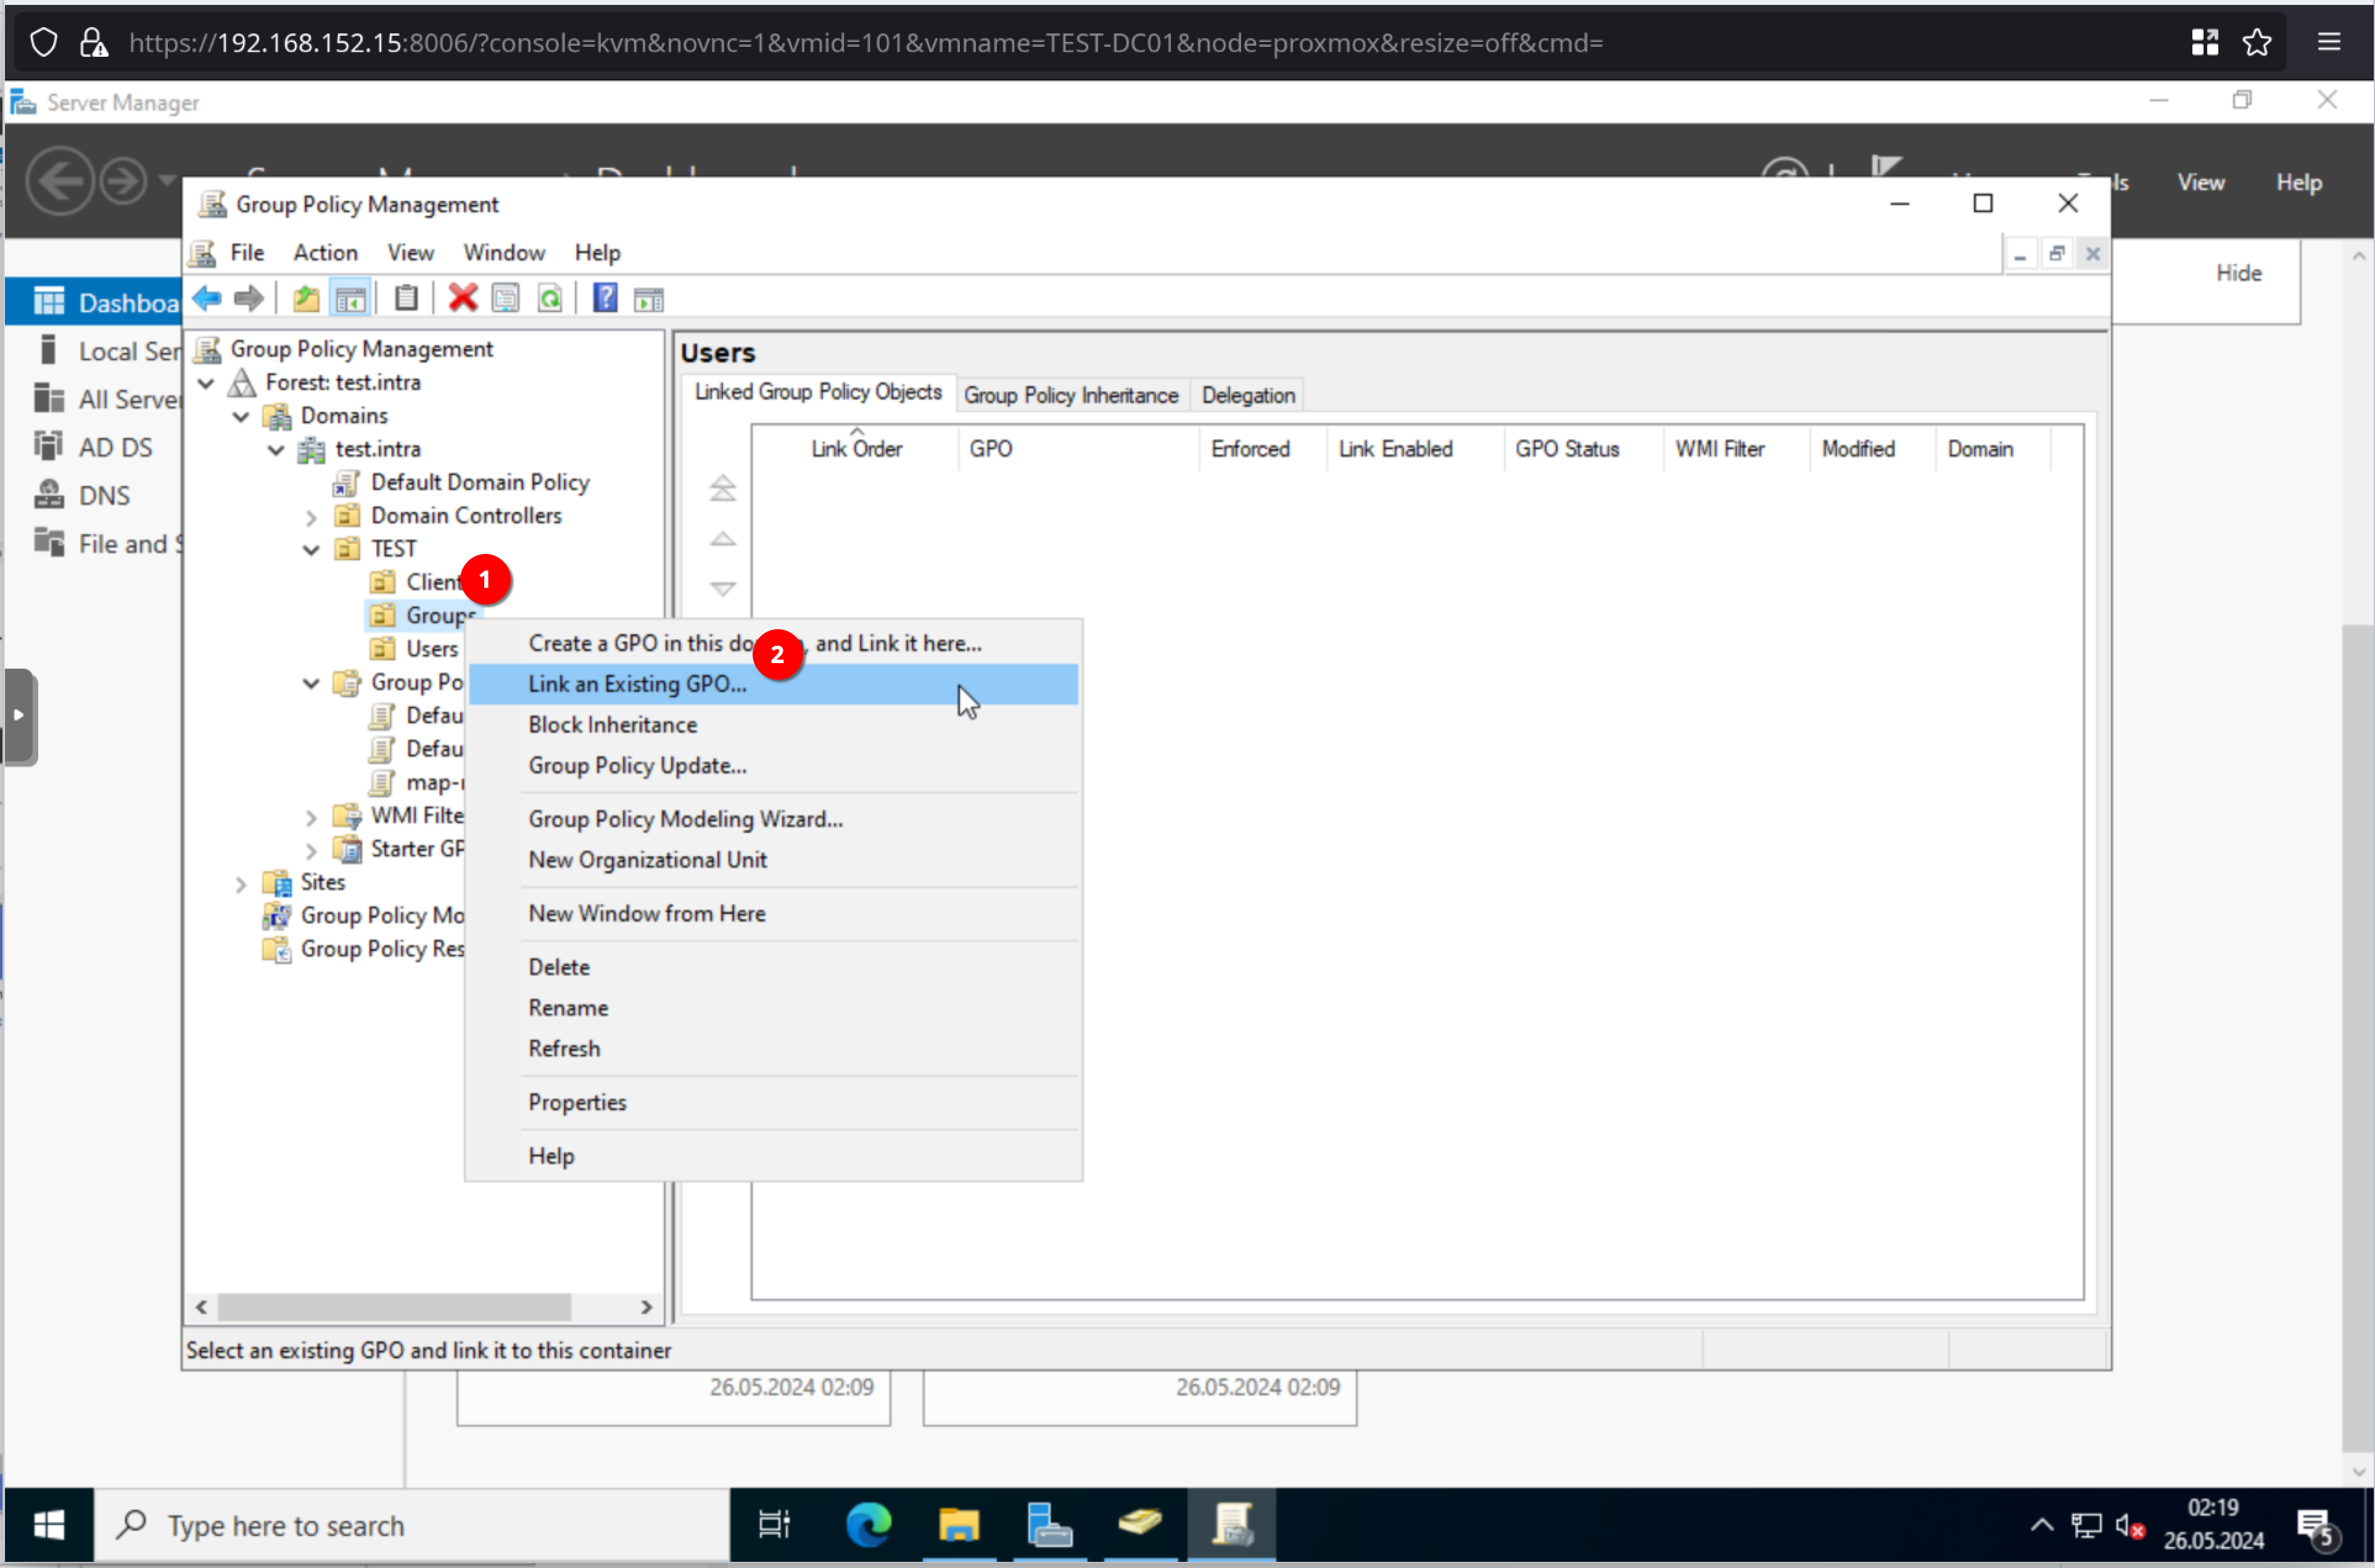
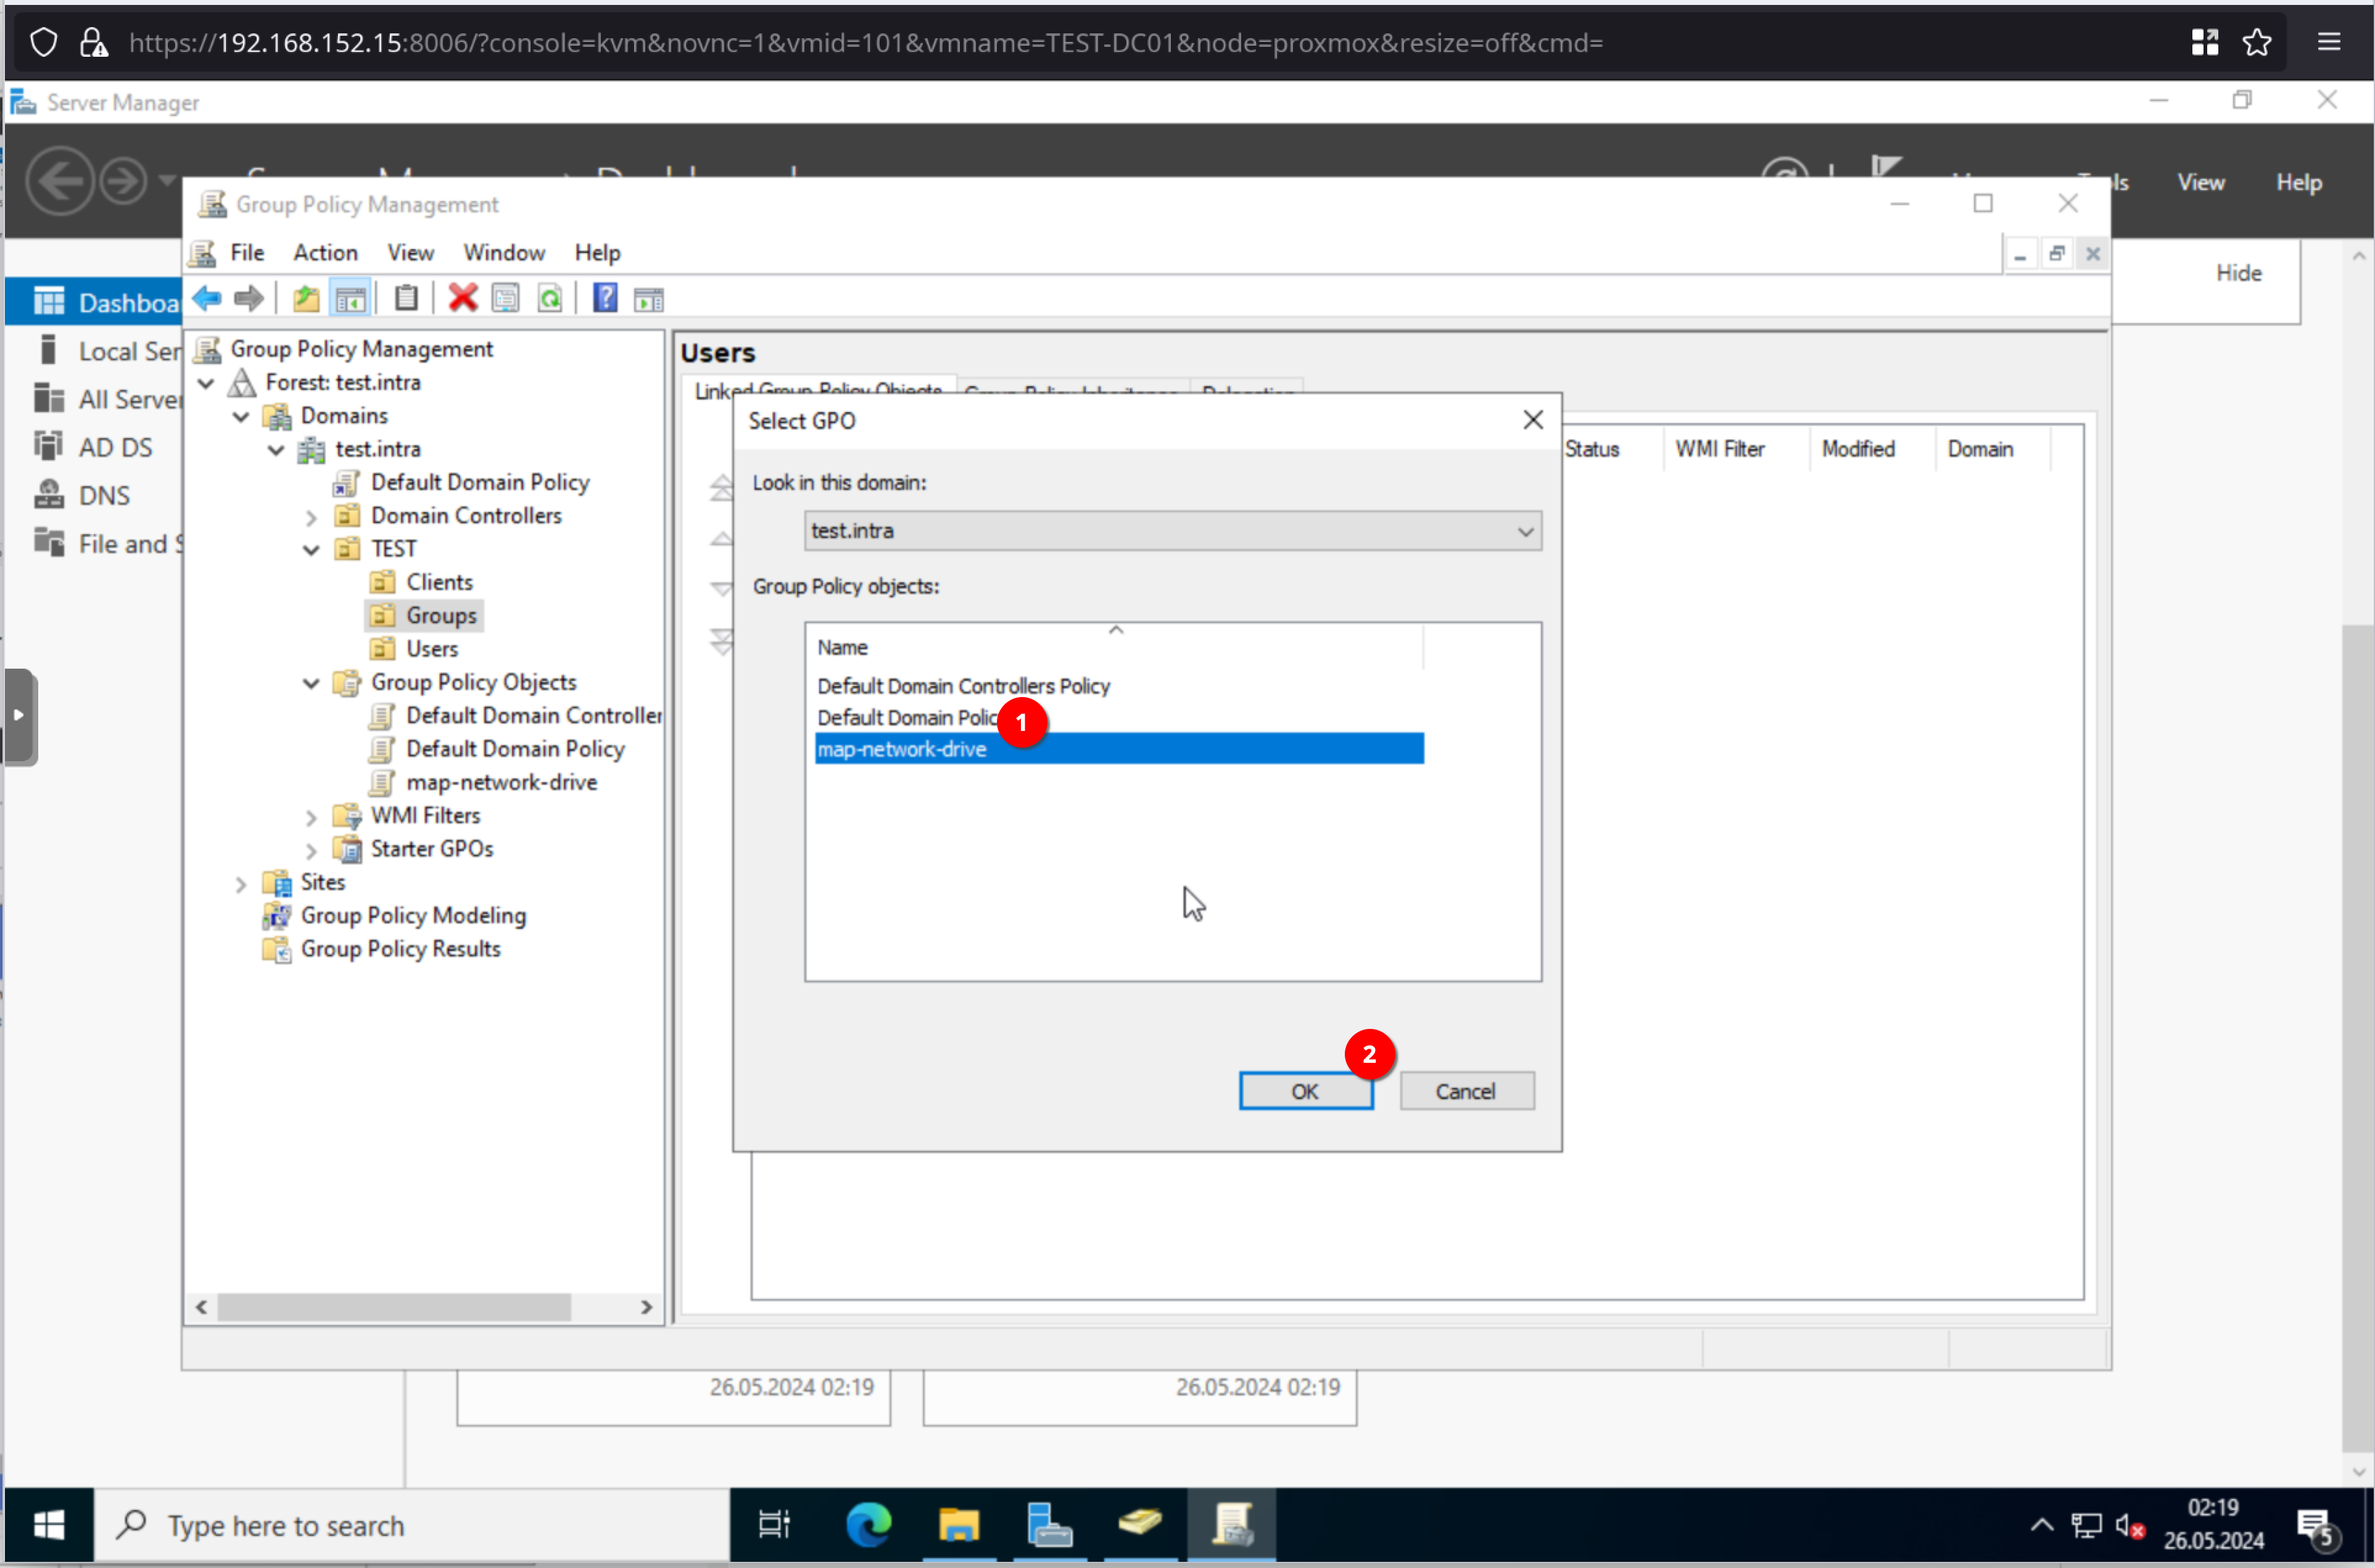
Great. We have our first group policy. Let’s test it.
Testing the Policy
I deployed a Windows 11 VM on the Proxmox Server, which we will join into the domain and test the policy with.
Side Note | Bypass Windows 11 forced network
If you want to bypass the Windows 11 “Let’s connect you to a network” and create an actual local account. Type in the following.
SHIFT + F10 (This will open a command-line)
oobe\bypassnro
Now, quickly on how to join a Windows 11 client to the domain.
Open the “Settings”, select “System”, scroll to the bottom and click on “About”. Here, we will scroll to around the middle of the page. There should be a link with “Domain or workgroup”. Select it, and we should see a familiar window. Click on “Change” and join the client to the
If you get an error message, trying to join the domain. Verify that your DNS server correctly points to the TEST-DC01 server.
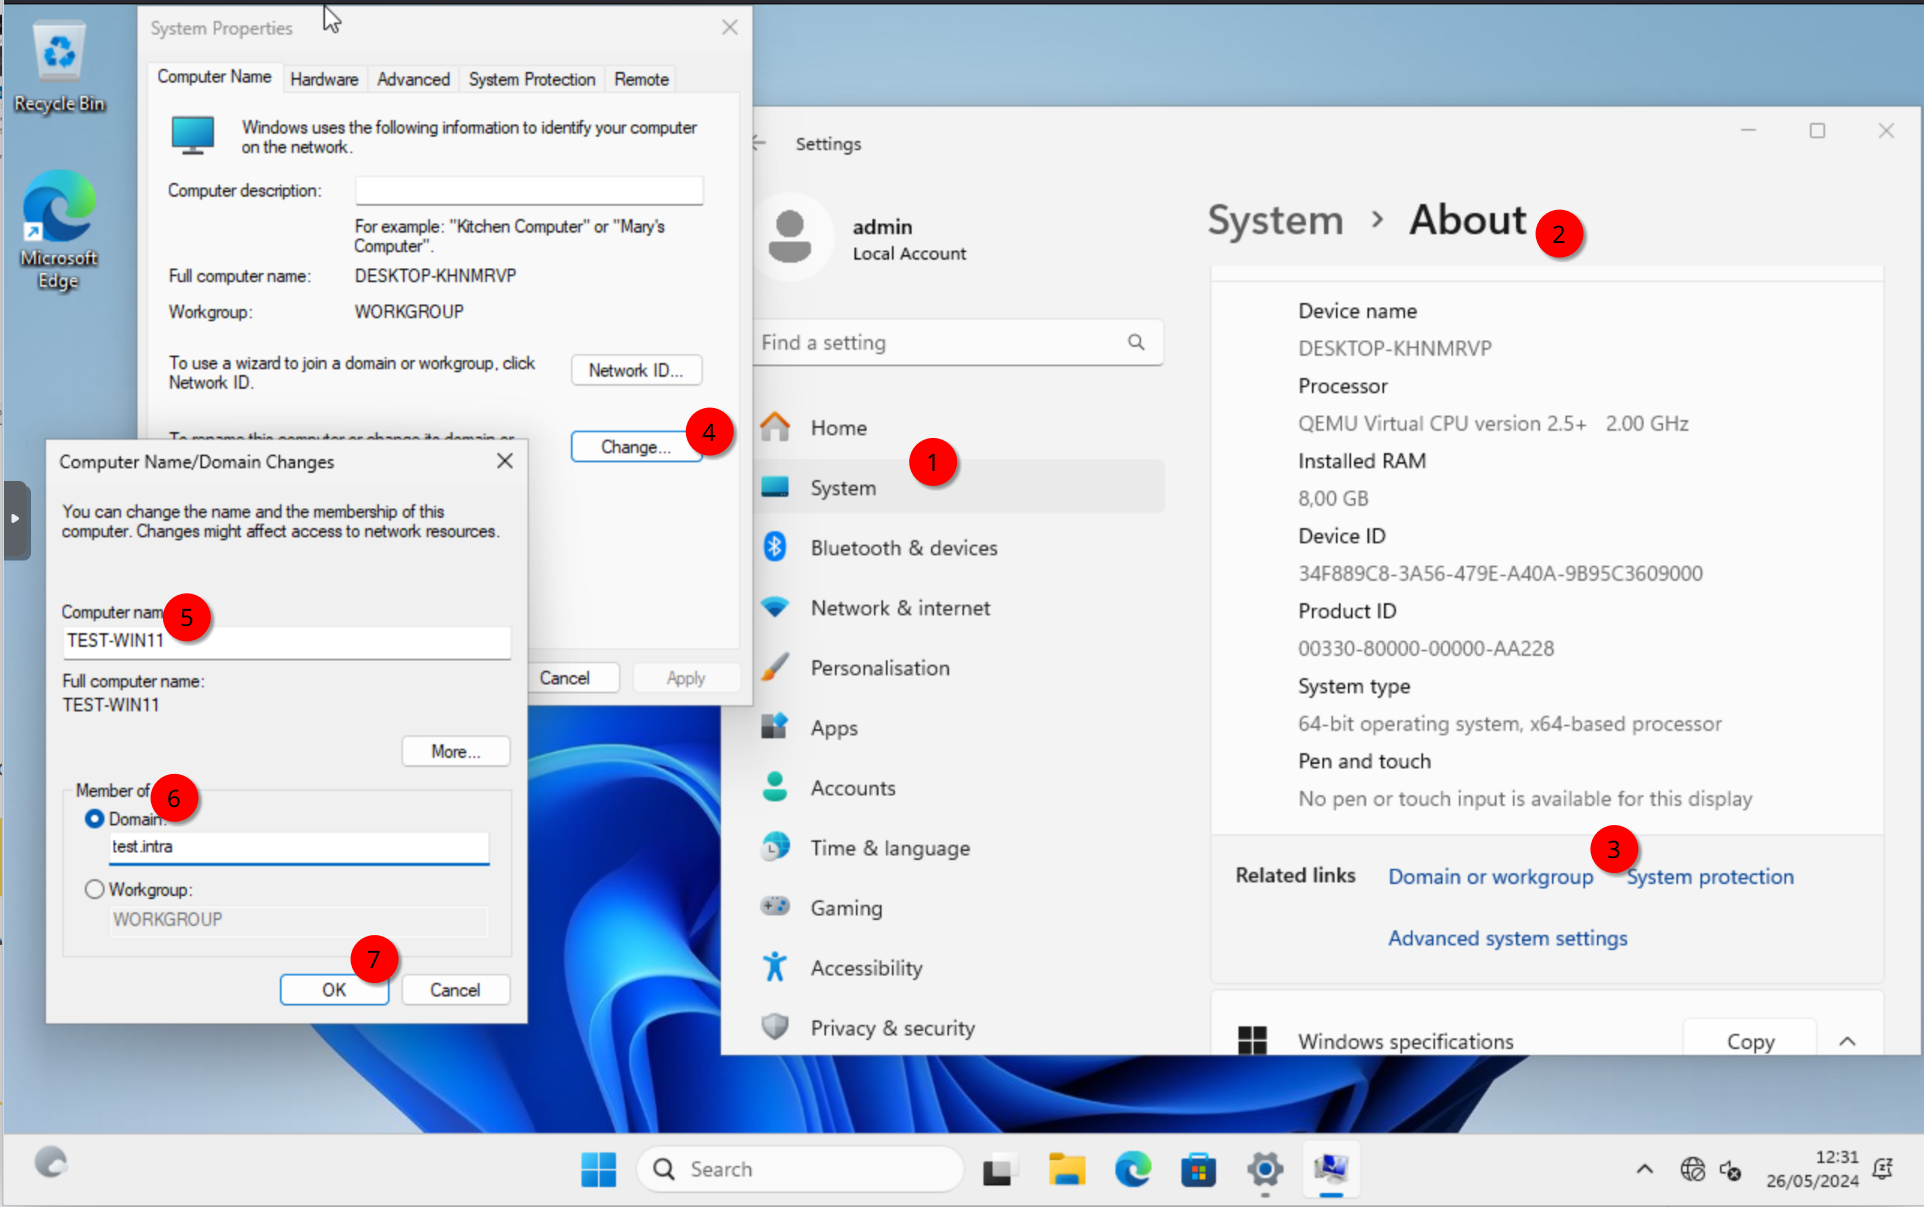
Reboot the client.
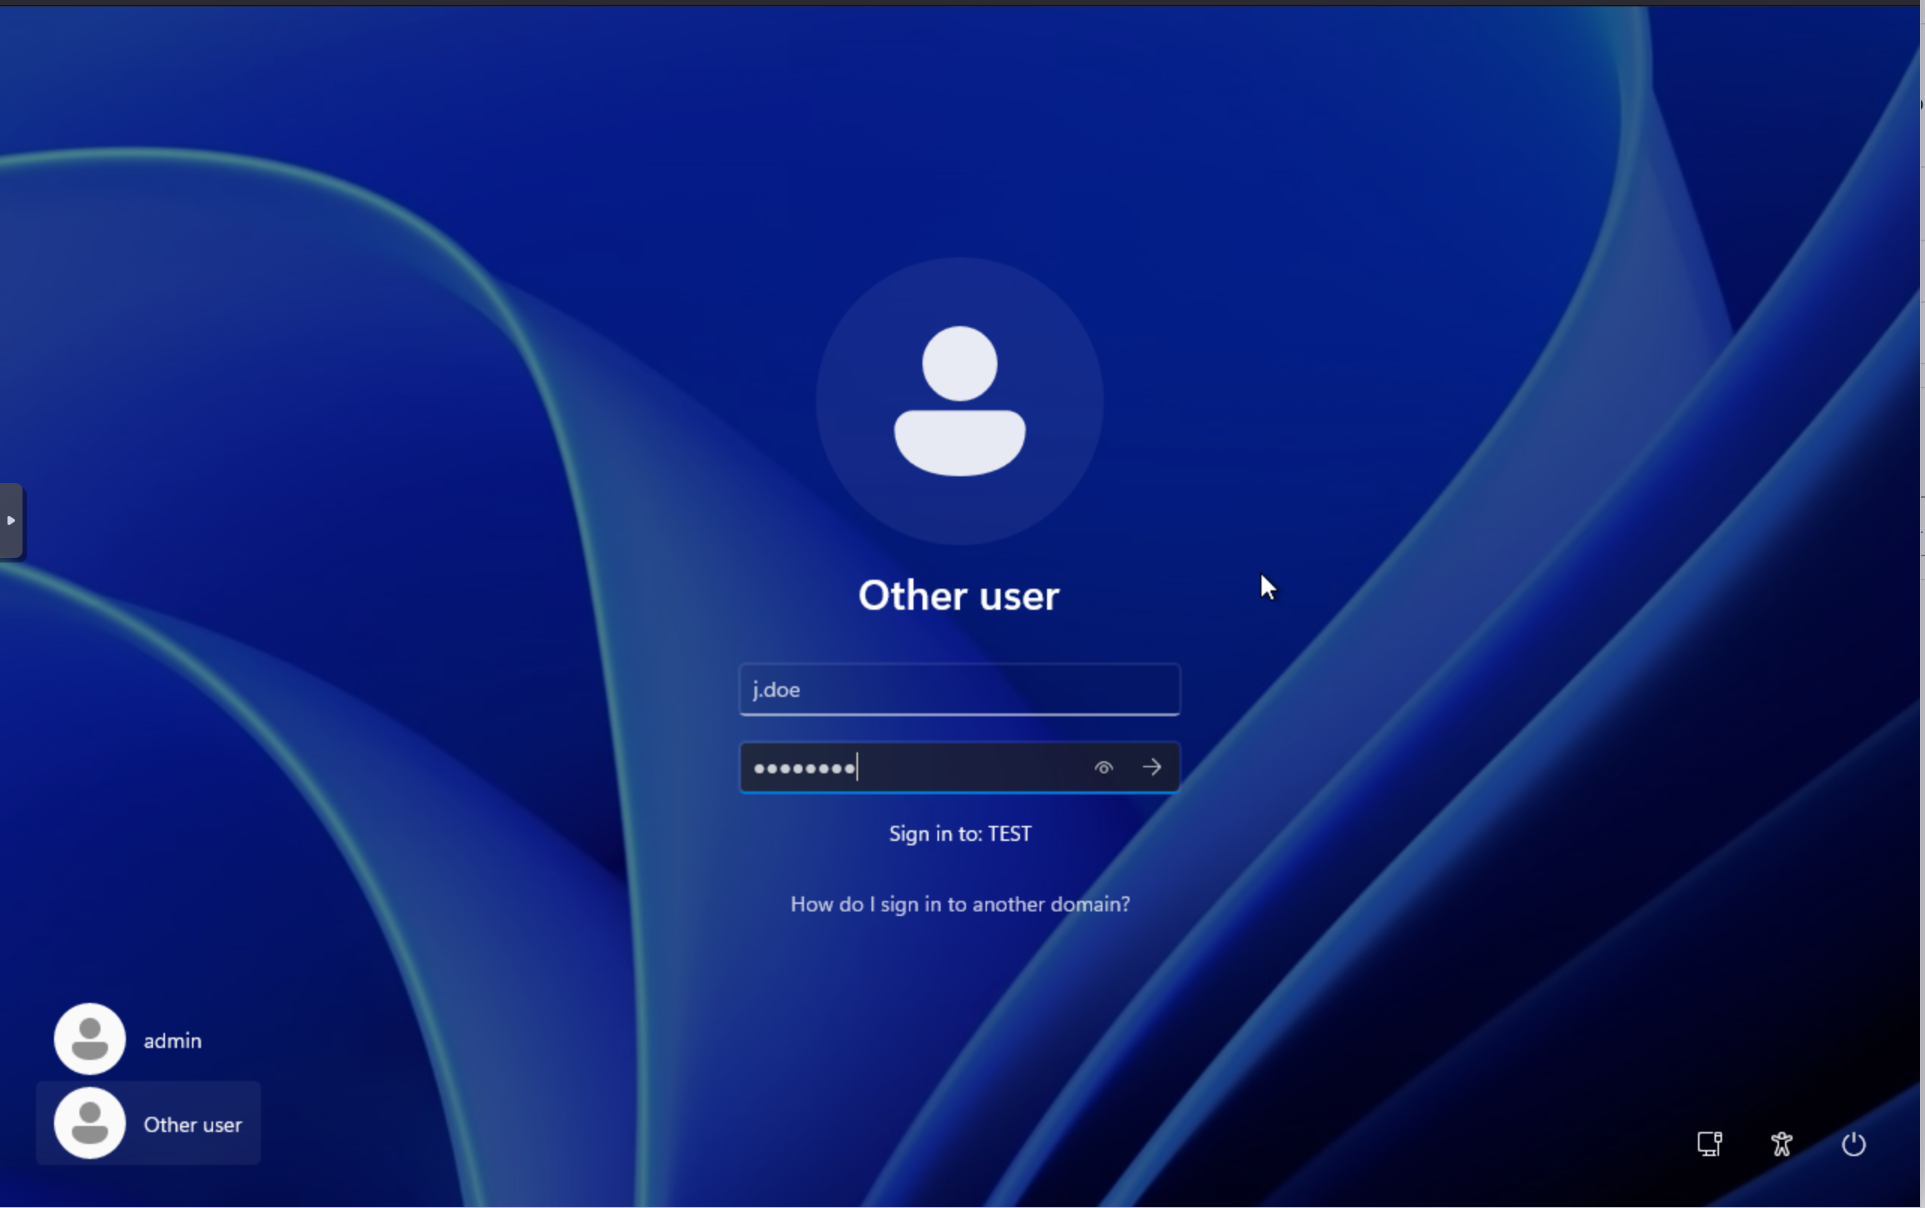
Once up, login with one of the users we created earlier. I will use John Doe.
Make sure, it says “Sign in to:
Now, open the file explorer and if everything worked correctly, we should see the network share.
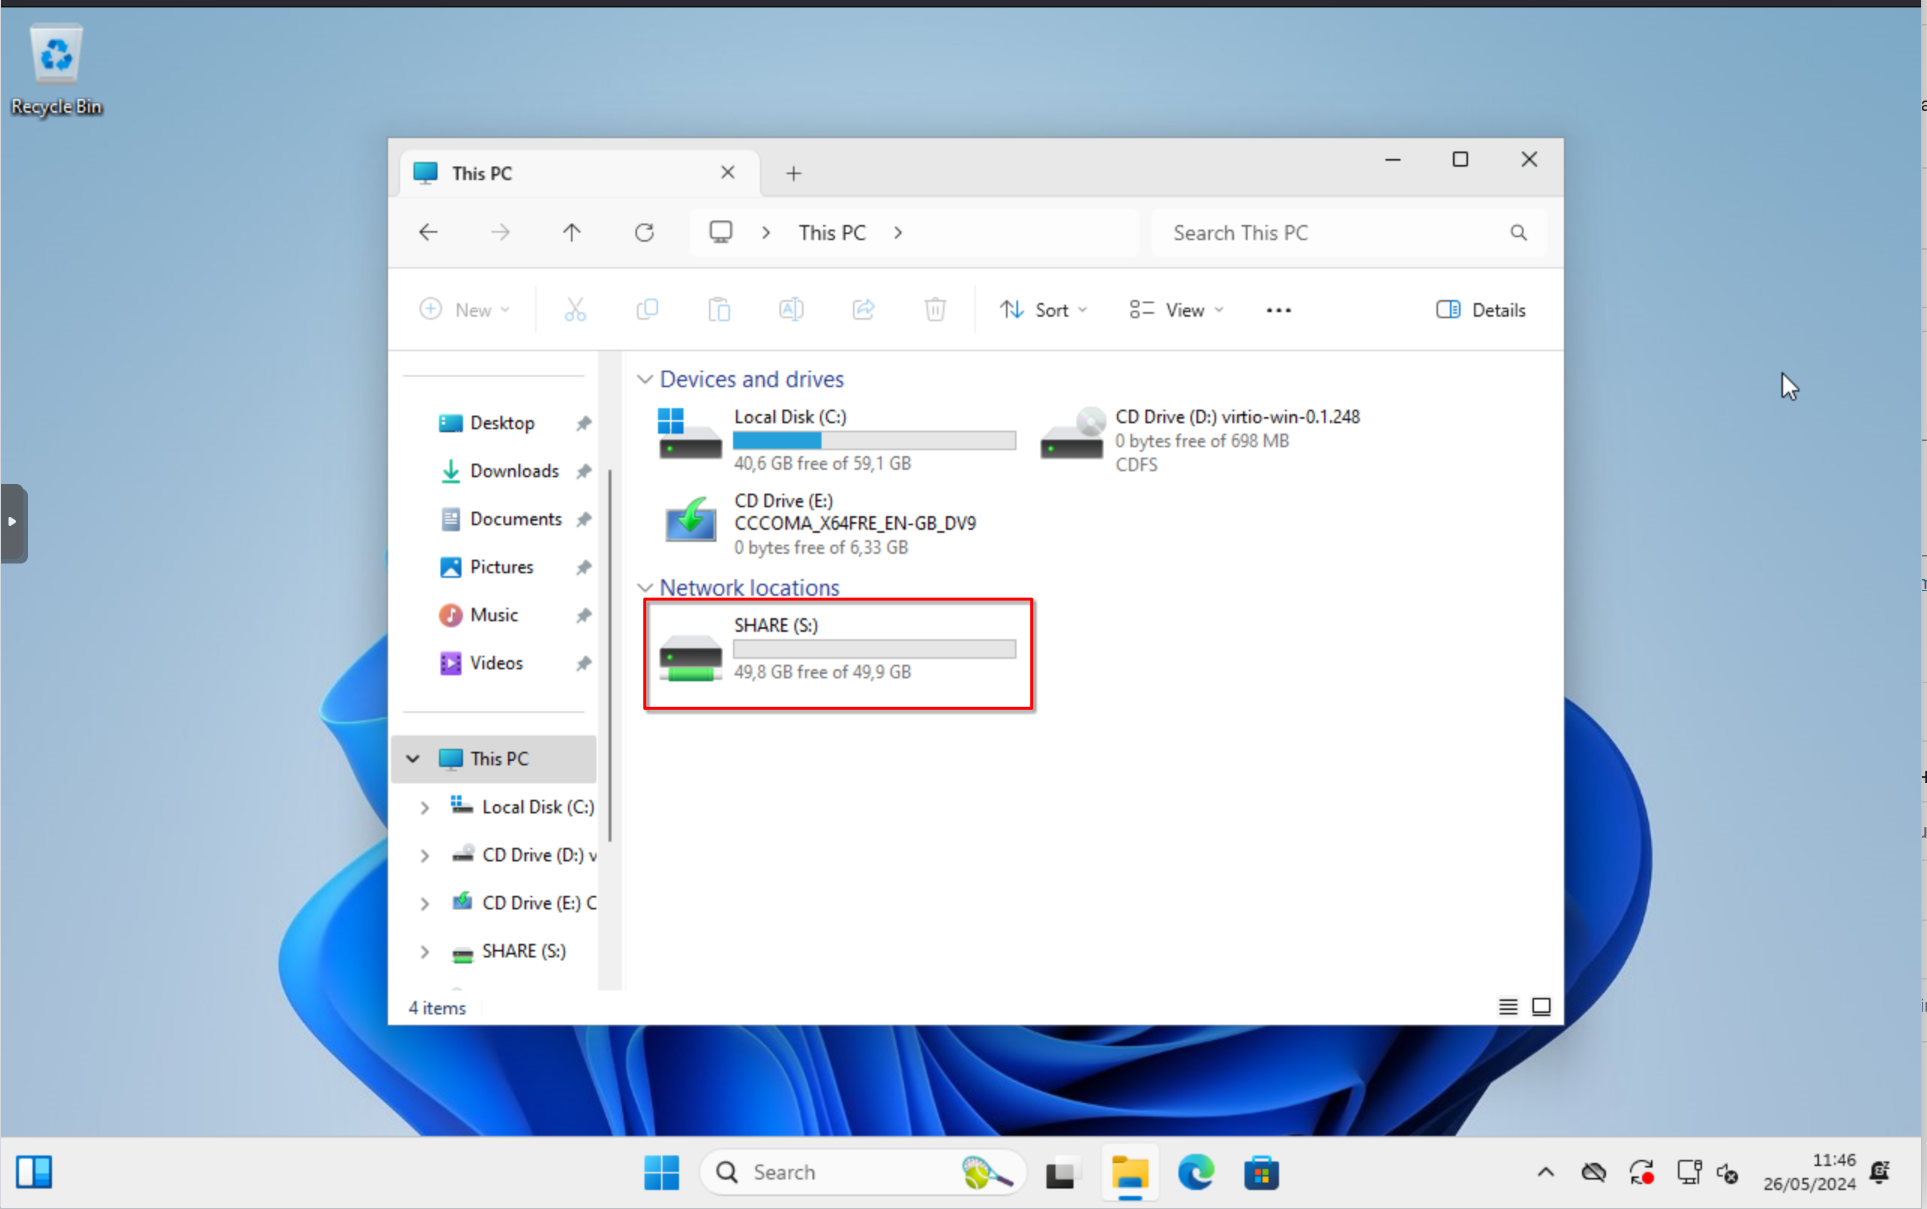
If it doesn’t show up, check the if the user is in the correct group and if you assigned the policy to the correct OU.
Moving Client to correct OU
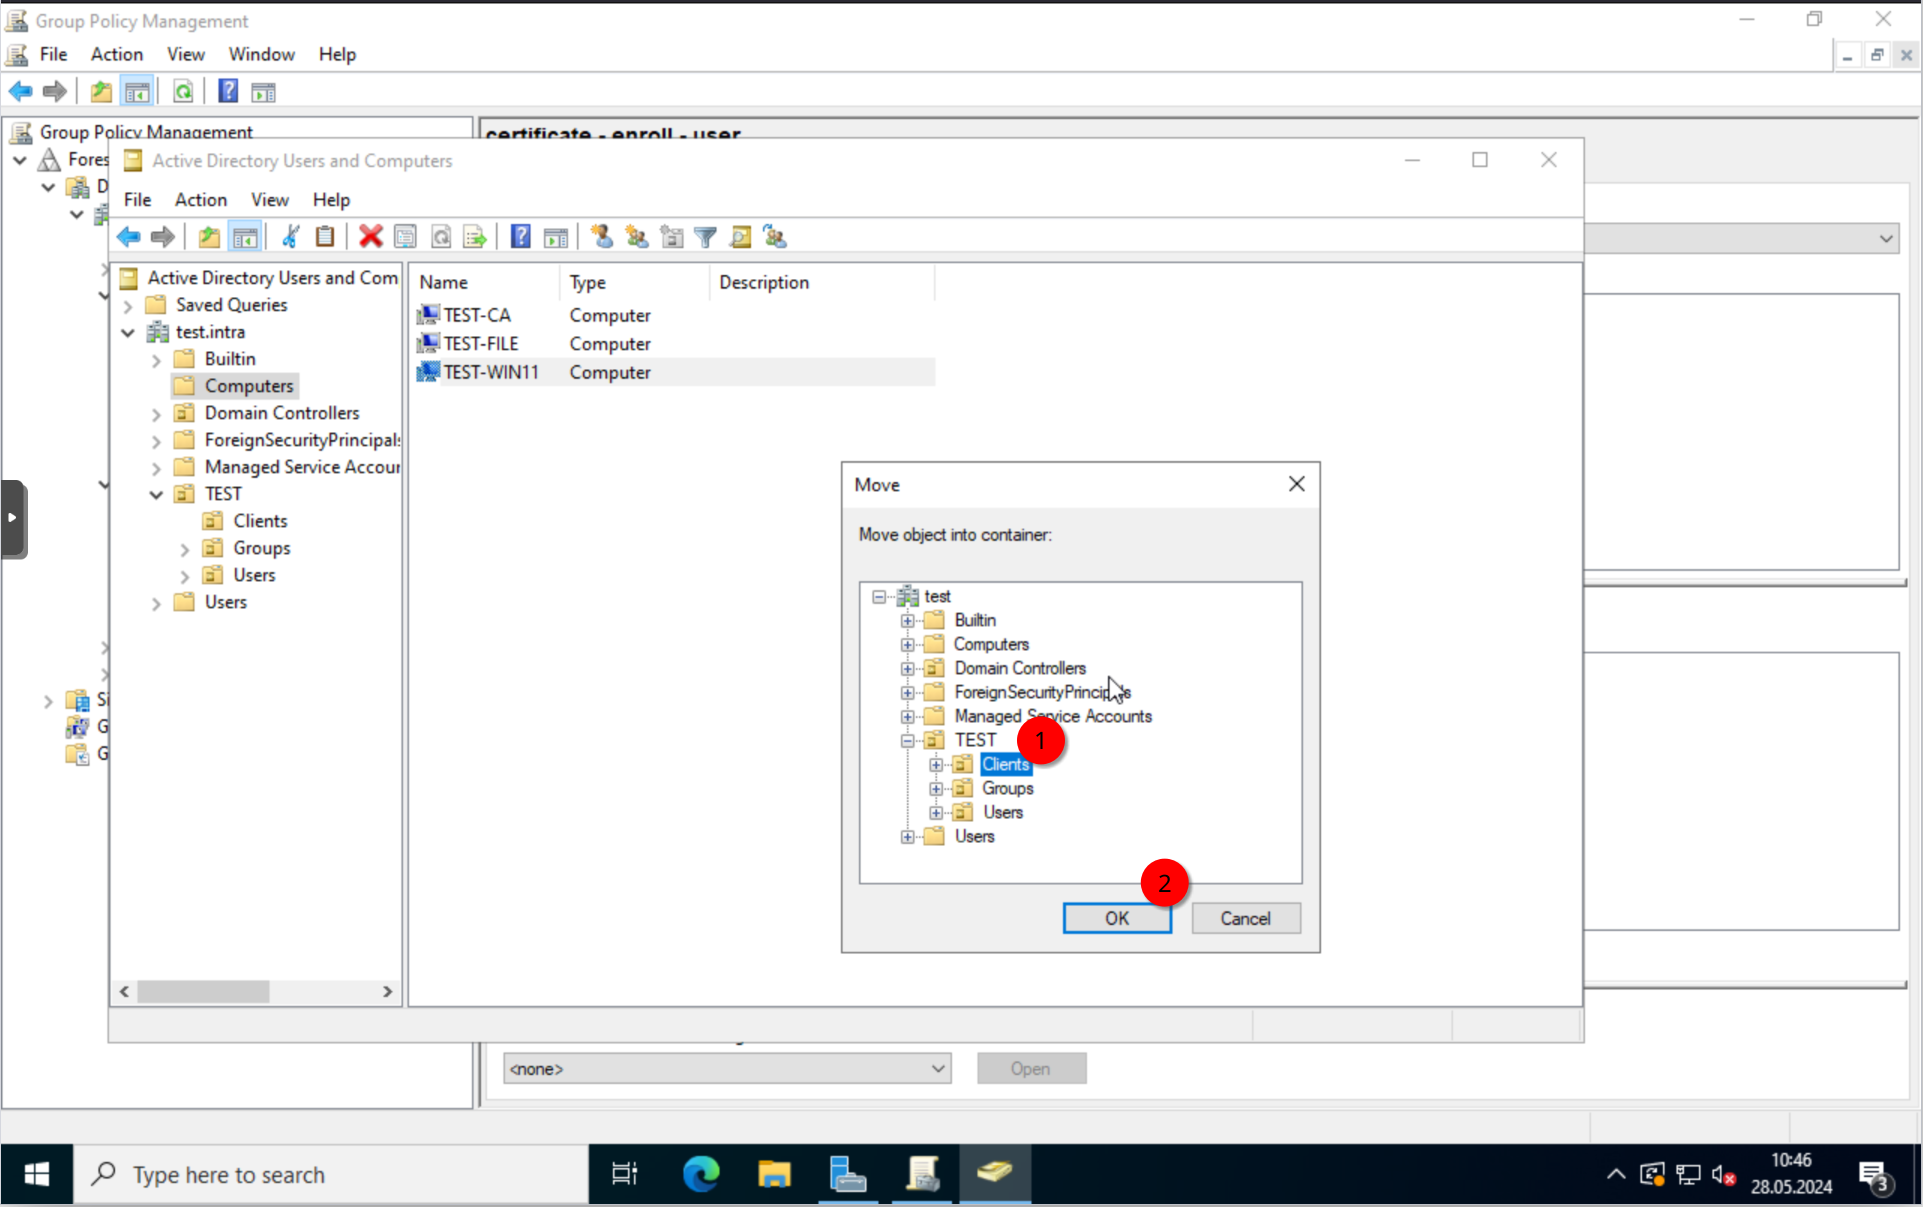
One more thing before we finish up. Move the computer object to the correct OU. We will need this in the next post, once we assign policies to computers.
For this, log into the Domain Controller and open the “Active Directory Users and Computers” and navigate to the system folder “Computers”. This should contain the computer object.
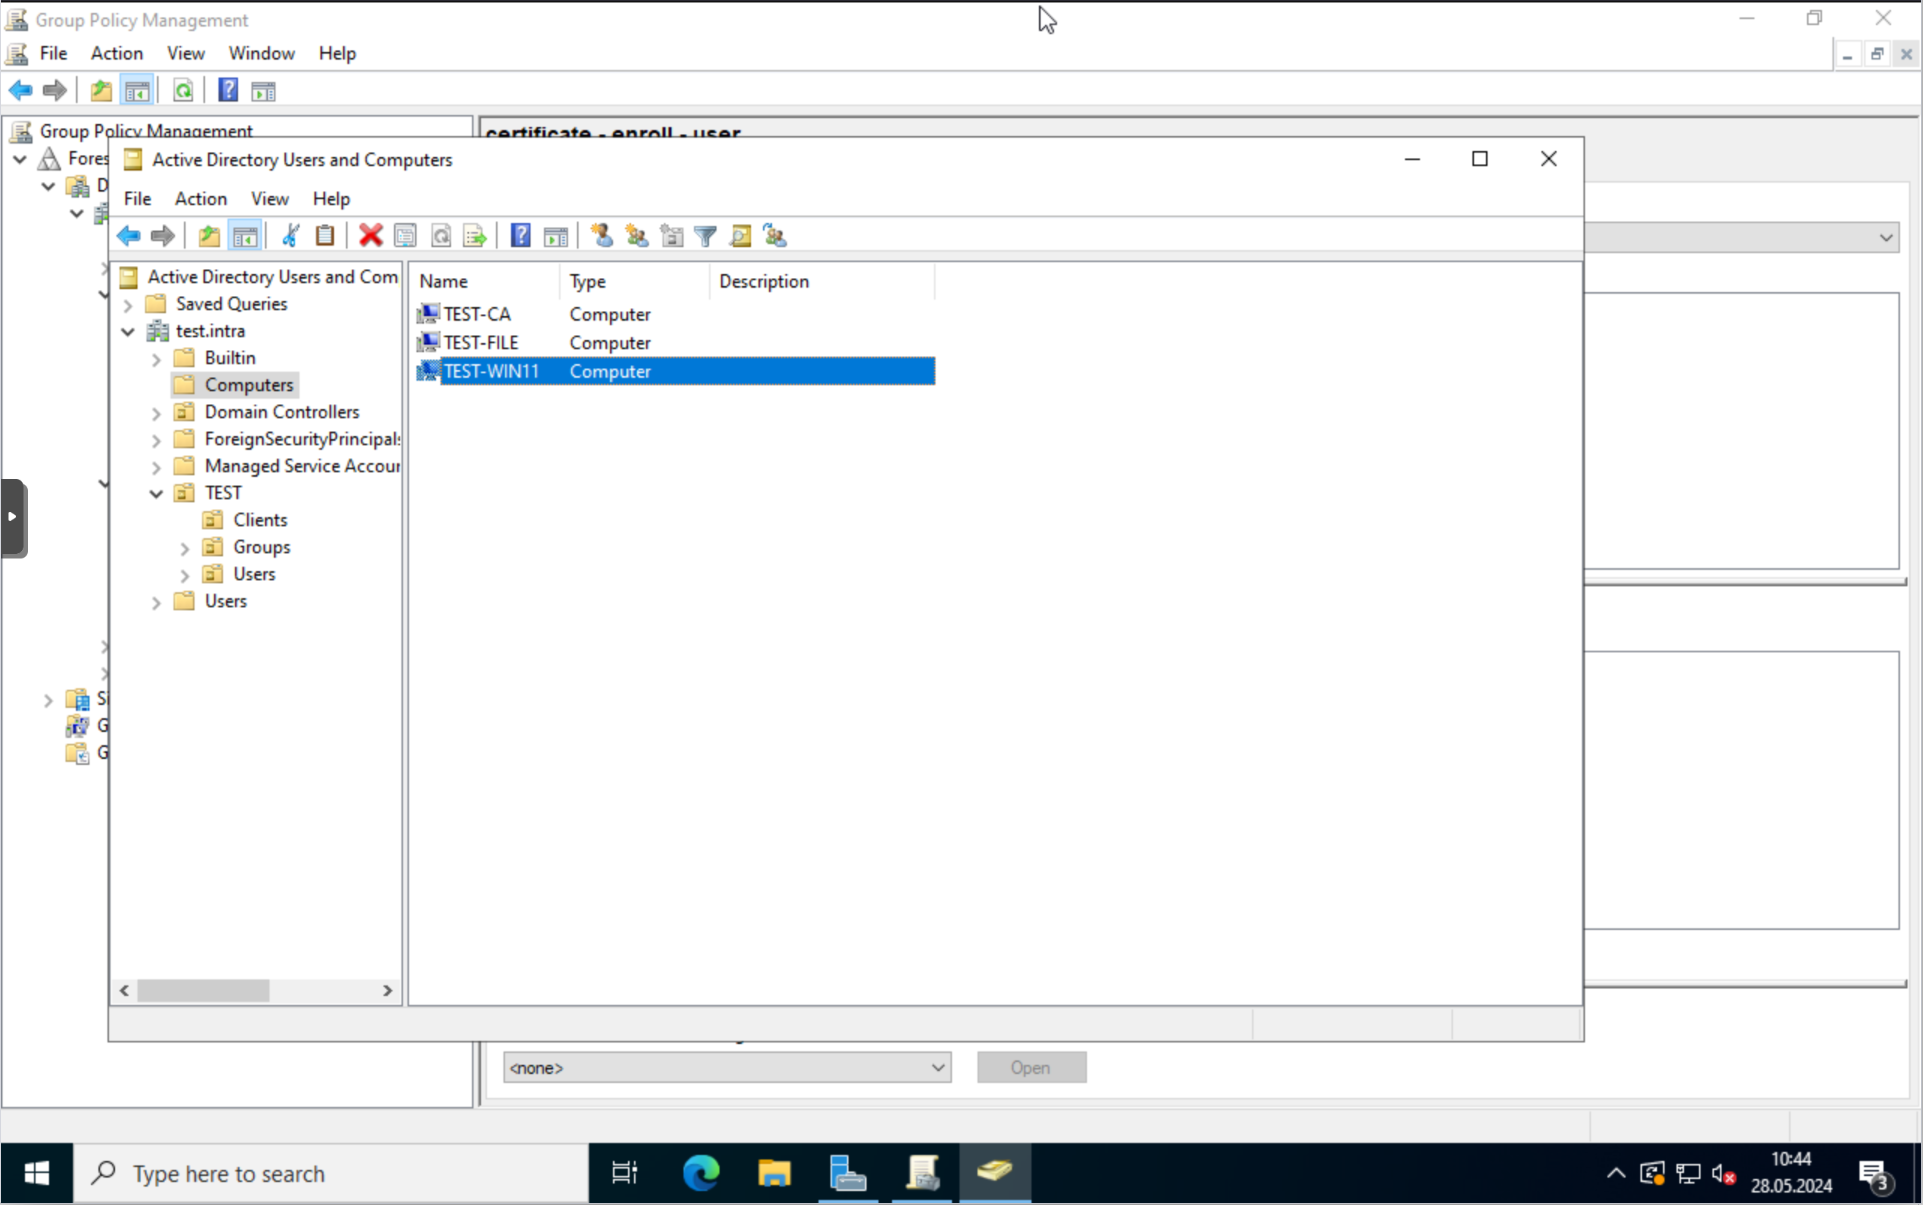
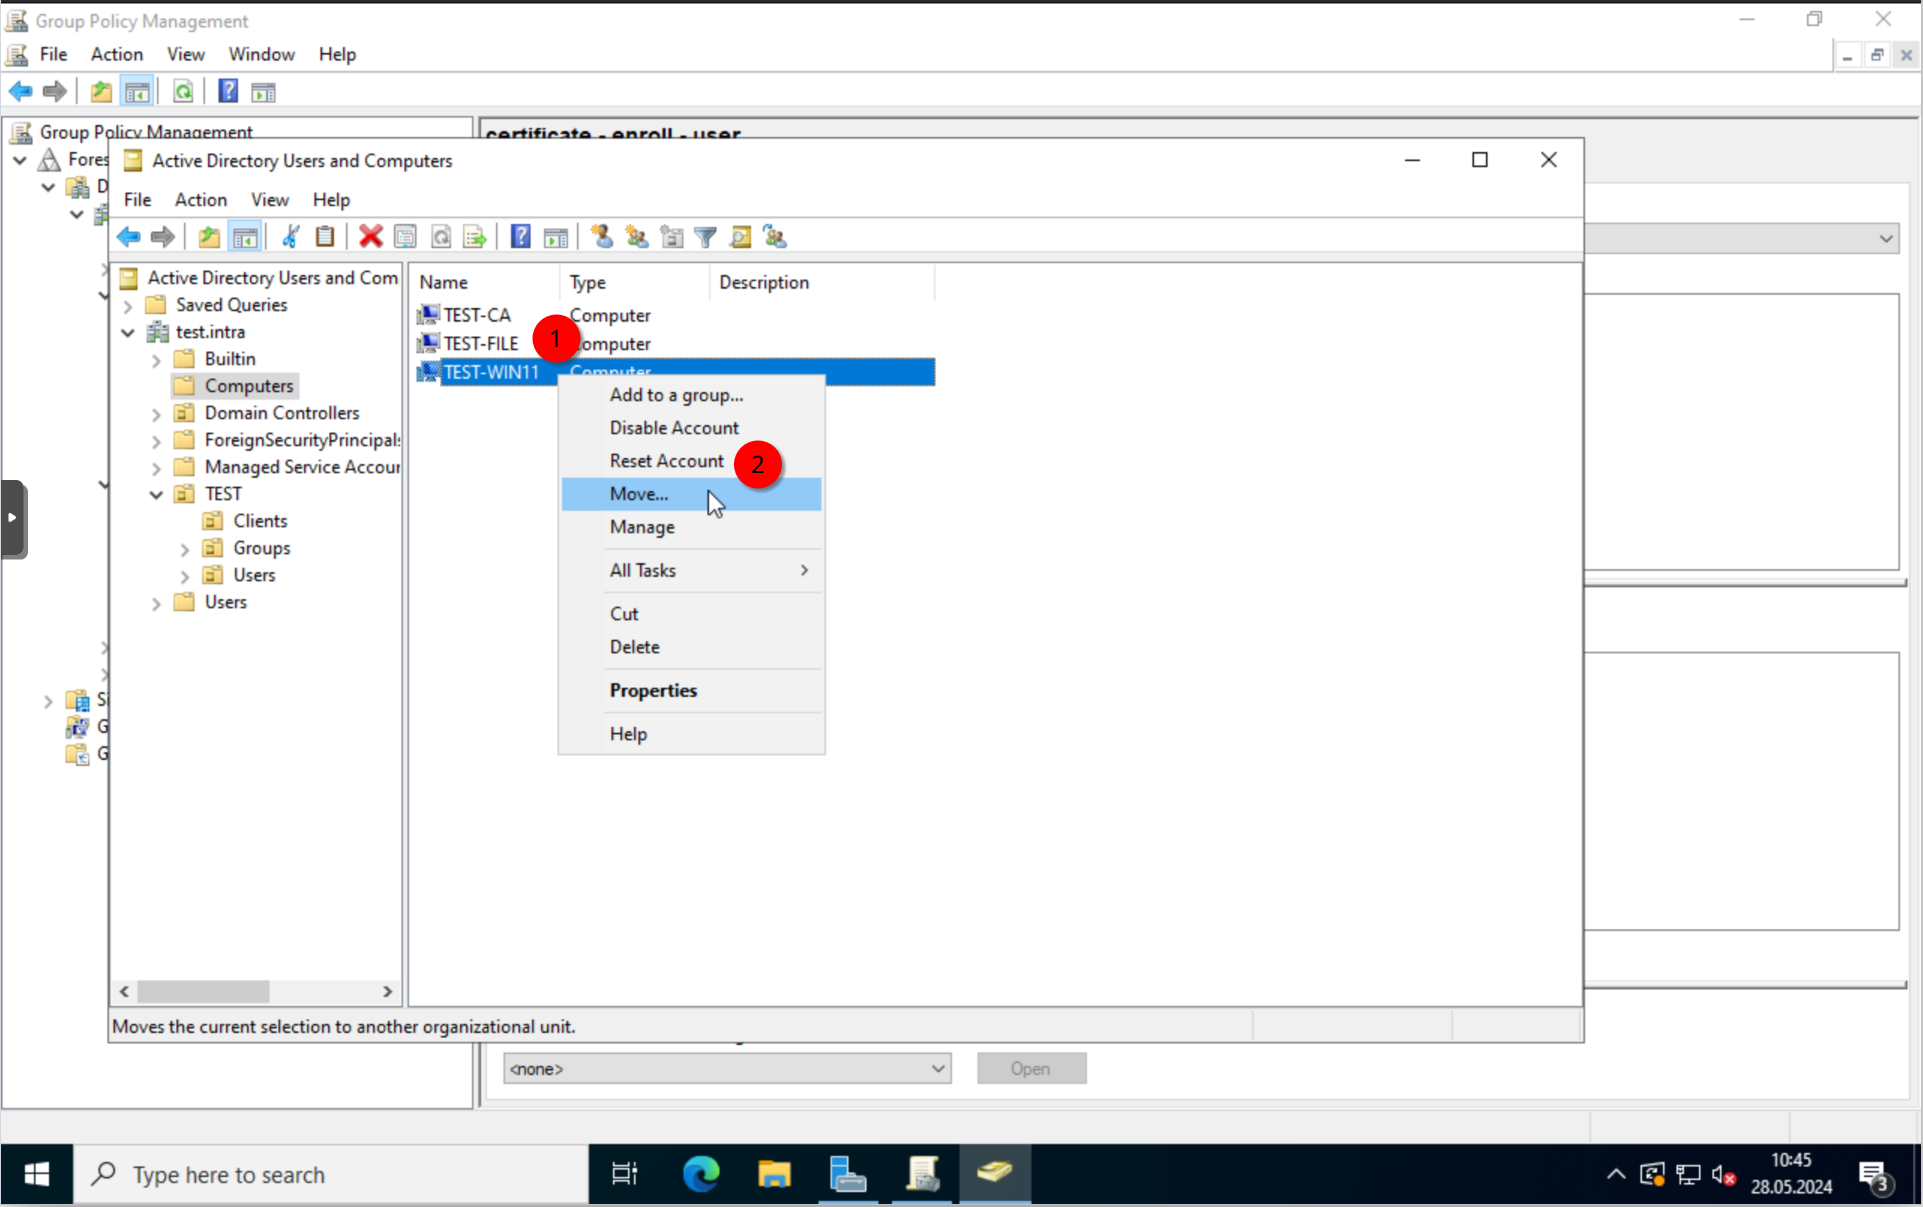
Either drag and drop the client to the OU we created in the last post, ("Clients" in my case) or right click on the computer object and select “move..”.
Alright. That’s it for now.
We setup a DHCP server, so our clients can get an IP address automatically, configured a file server, created a couple of users and a group policy to assign a network drive to those users. We also specified the group the policy should affect.
Overall a good start I think.
Comments