Deploying and configuring the NPS Server, Setting up Aruba Virtual Controller for Radius authentication
Hi there,
this will probably the last part in this series. Today we will deploy and configure the NPS Server, using the certificate we generated in the previous post, for the authentication of the end users.
We will also go over the configuration of an Aruba Access Point, using the radius server for the authentication.
System Information
| Hostname | IP | Function |
|---|---|---|
| TEST-DC01 | 192.168.152.200/24 | Domain Controller / Active Directory / DNS / DHCP |
| TEST-FILE | 192.168.152.201/24 | File Services |
| TEST-CA | 192.168.152.202/24 | Certificate Authority |
| TEST-RADIUS | 192.168.152.203/24 | NPS Server, Radius Server |
Network Information
| Network | 192.168.152.0 |
|---|---|
| Subnet | 255.255.255.0 |
| Gateway | 192.168.152.254 |
Installing and configuring the NPS Server
Installing the Radius Server
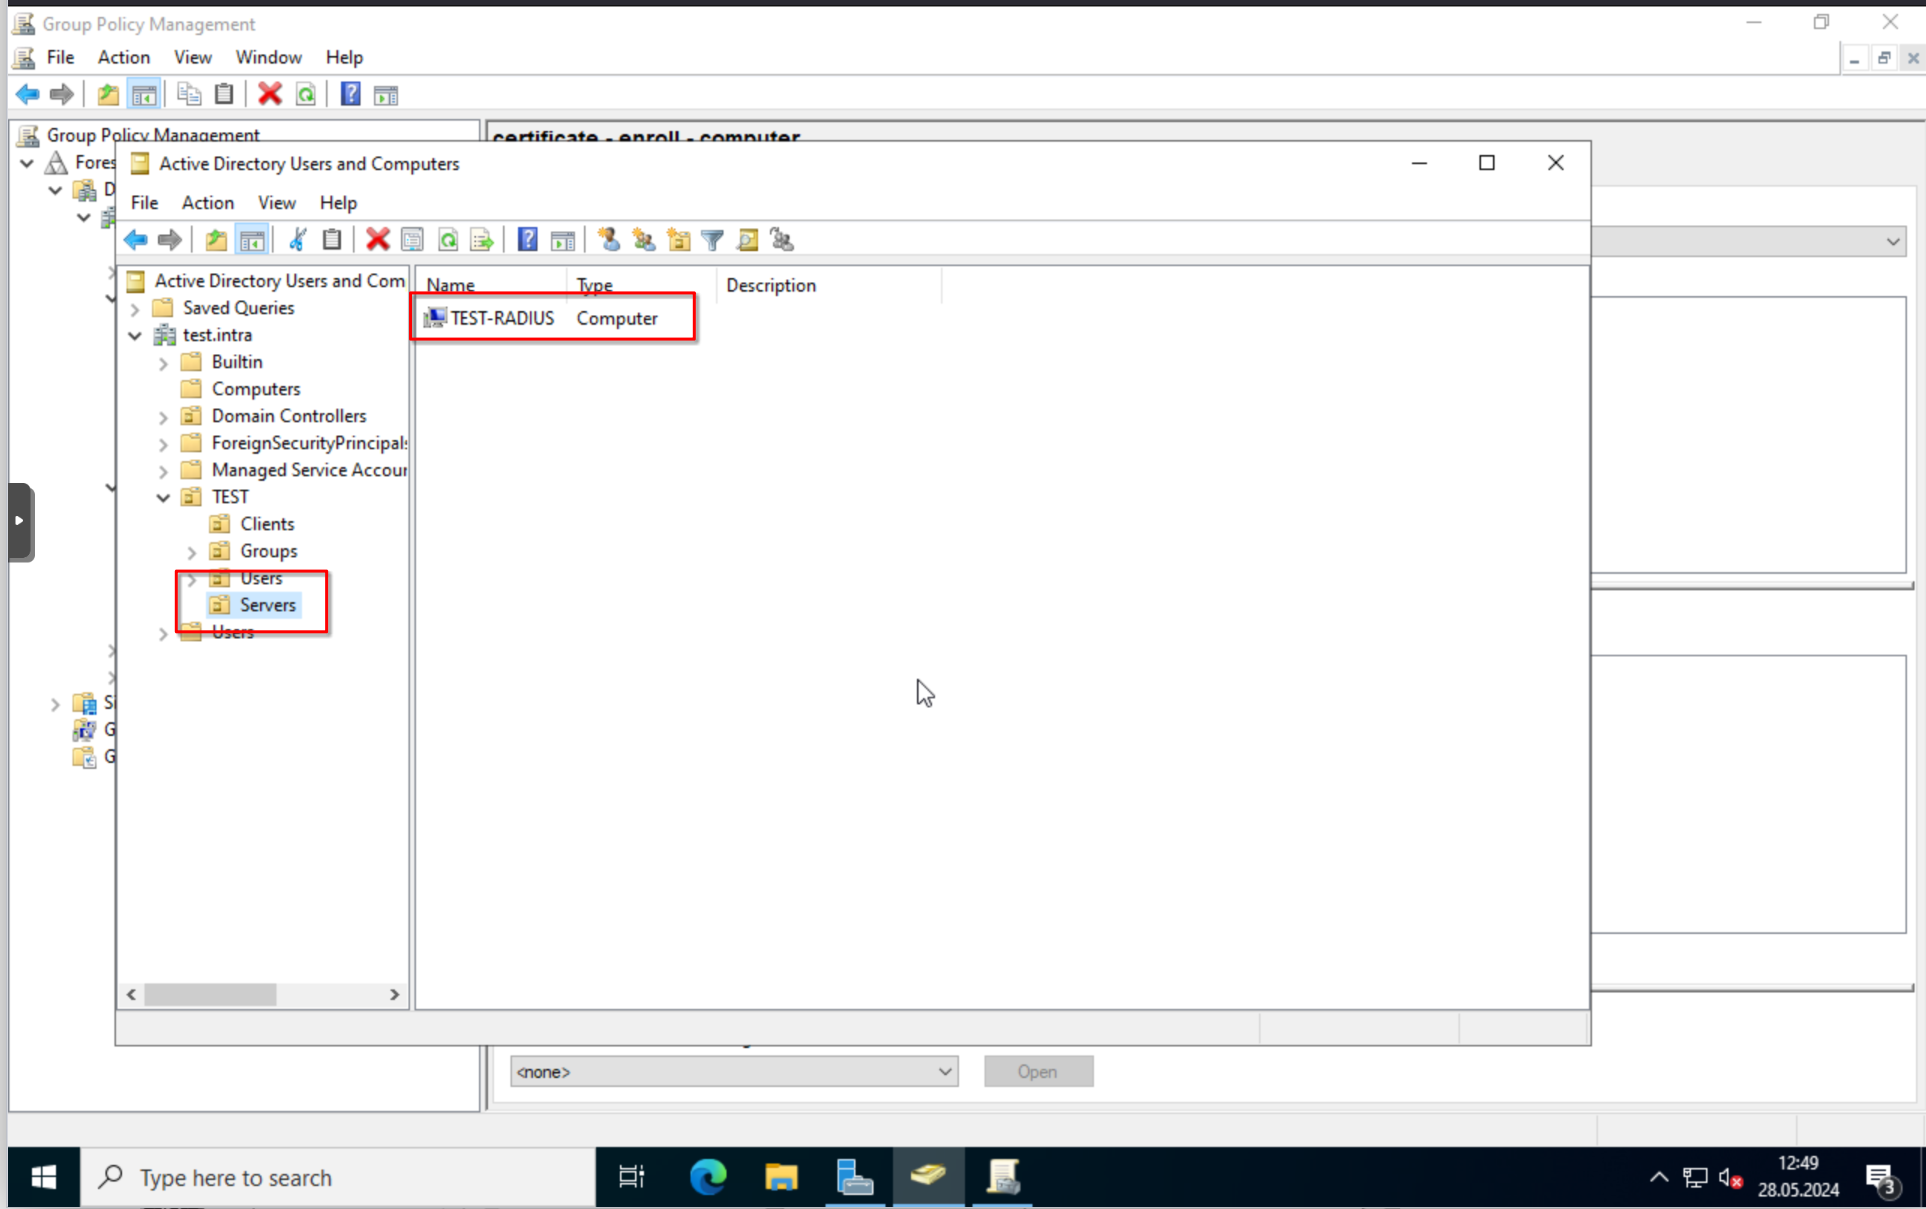
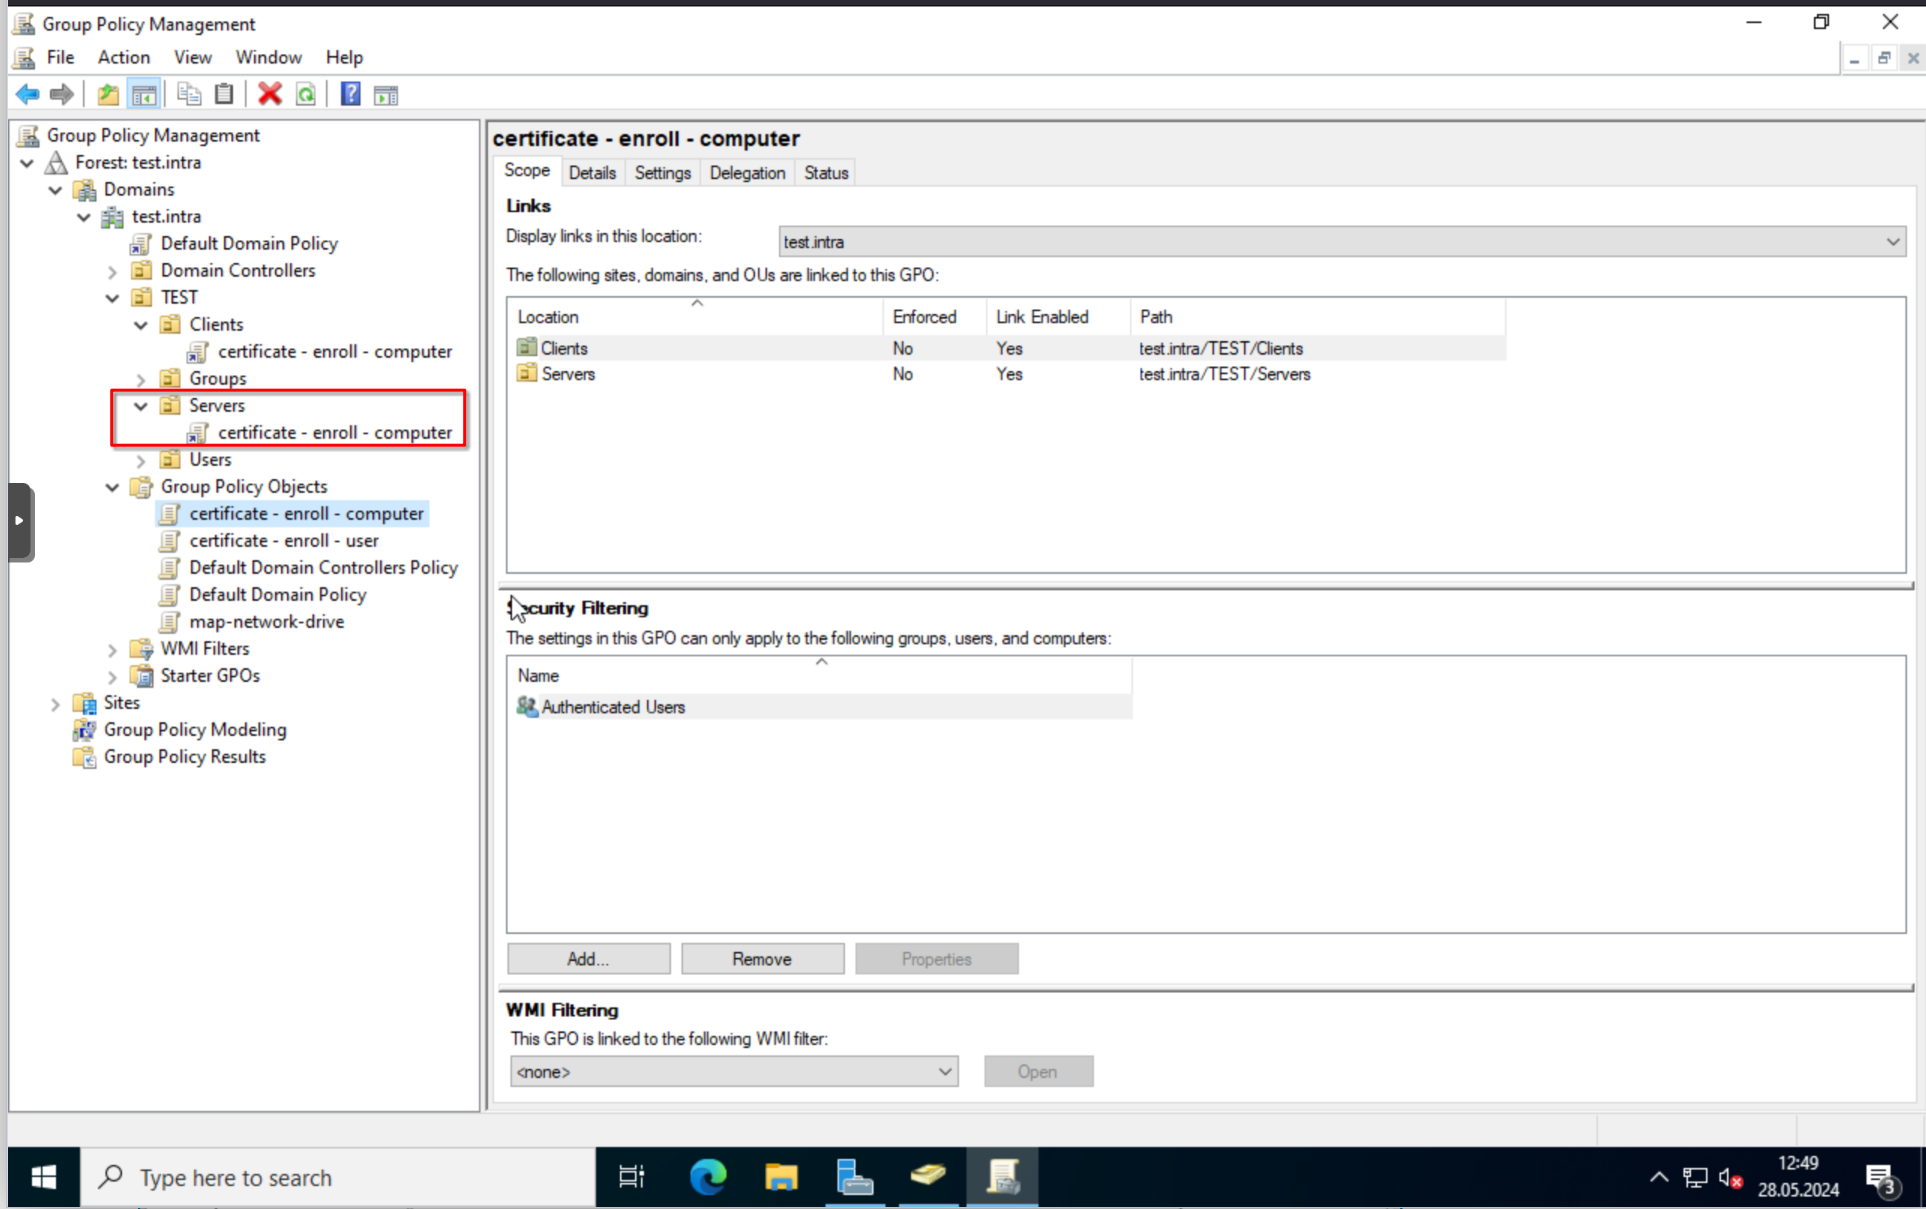
For this, I deployed a new Windows Server, naming it “TEST-RADIUS”. Make sure that the server is in an OU which has the certificate group policy we created in part 3. I created another OU “Servers” for this and assigned the group policy.
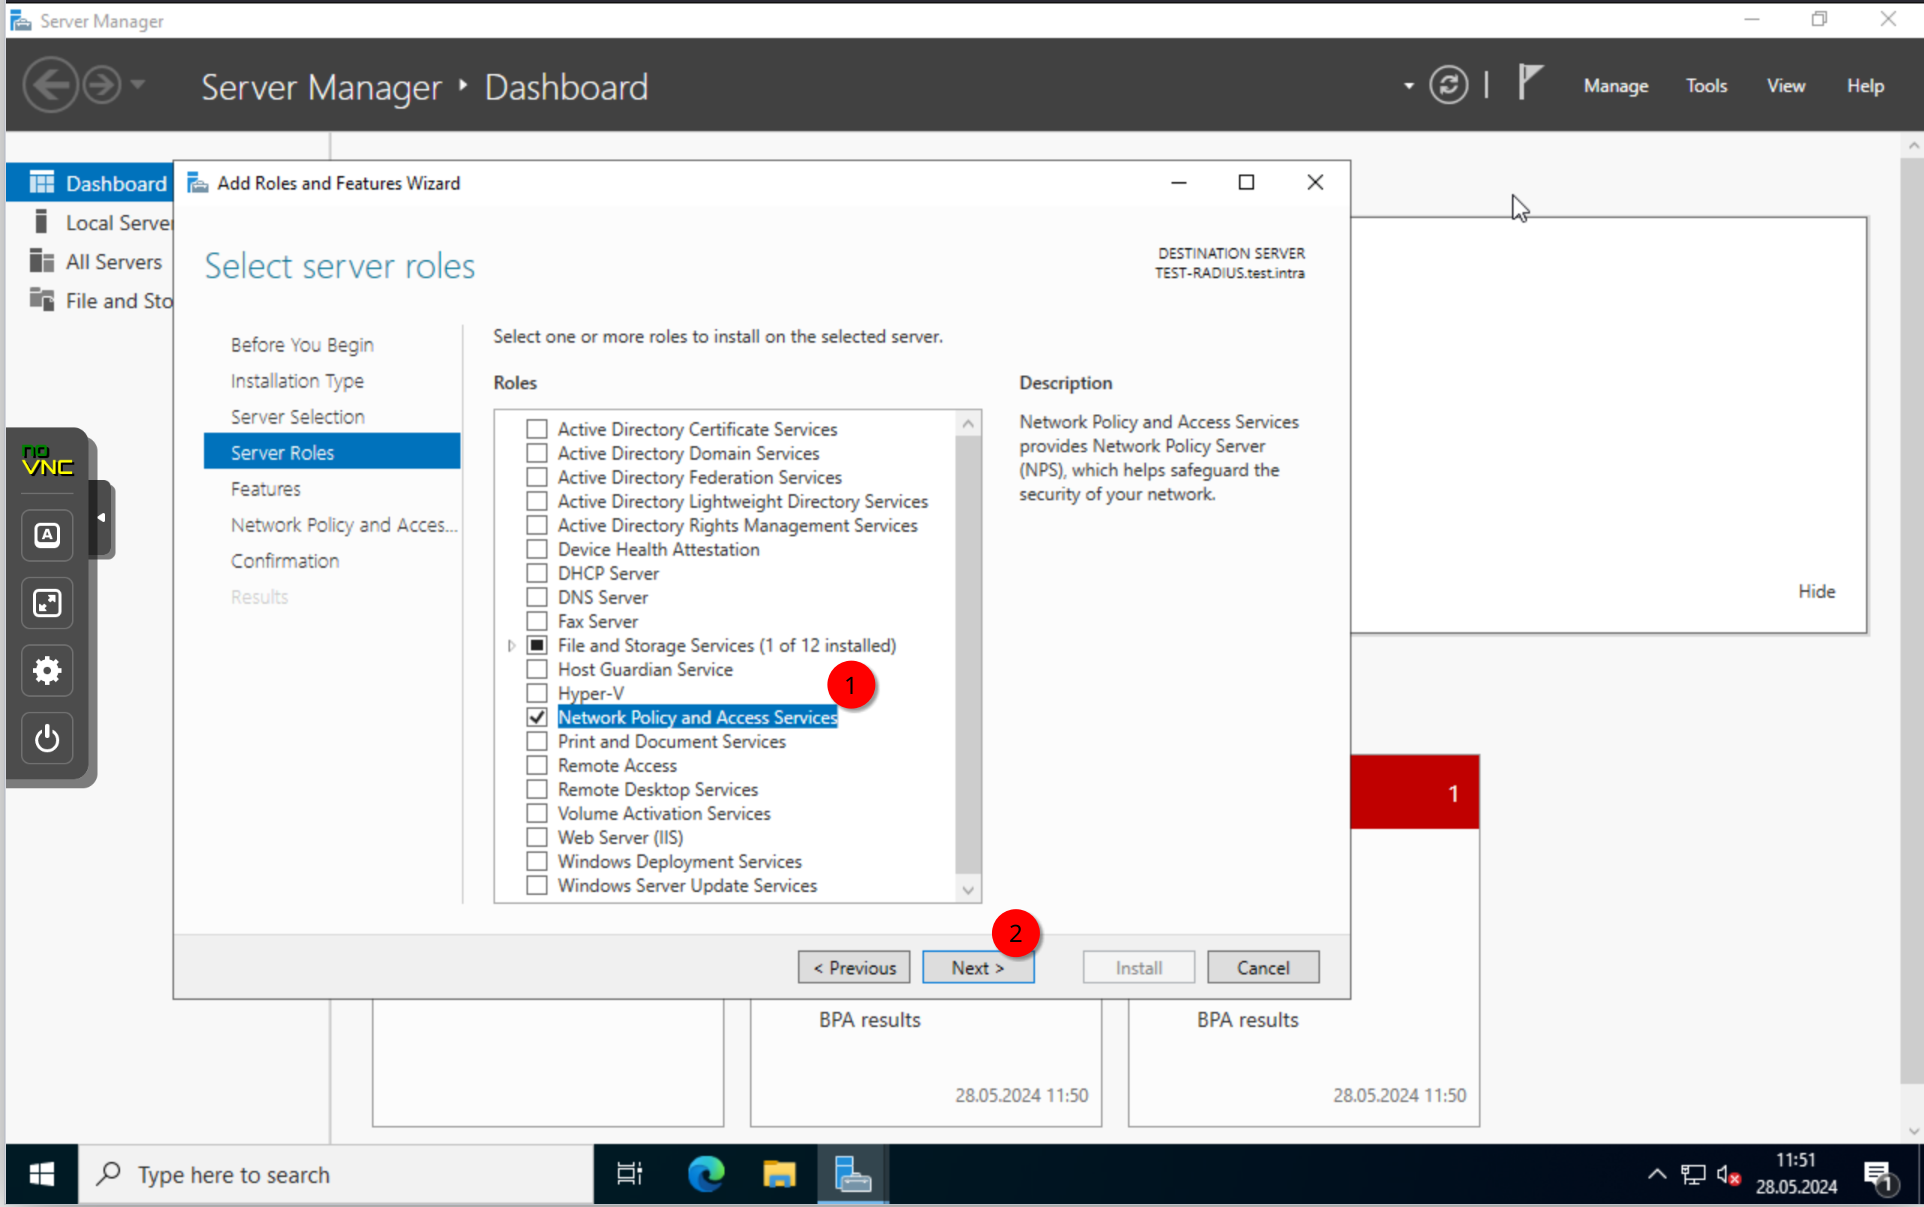
As per usual, start the “Add Roles and Features” from the “Server Manager” and install the “Network Policy and Access Services”.
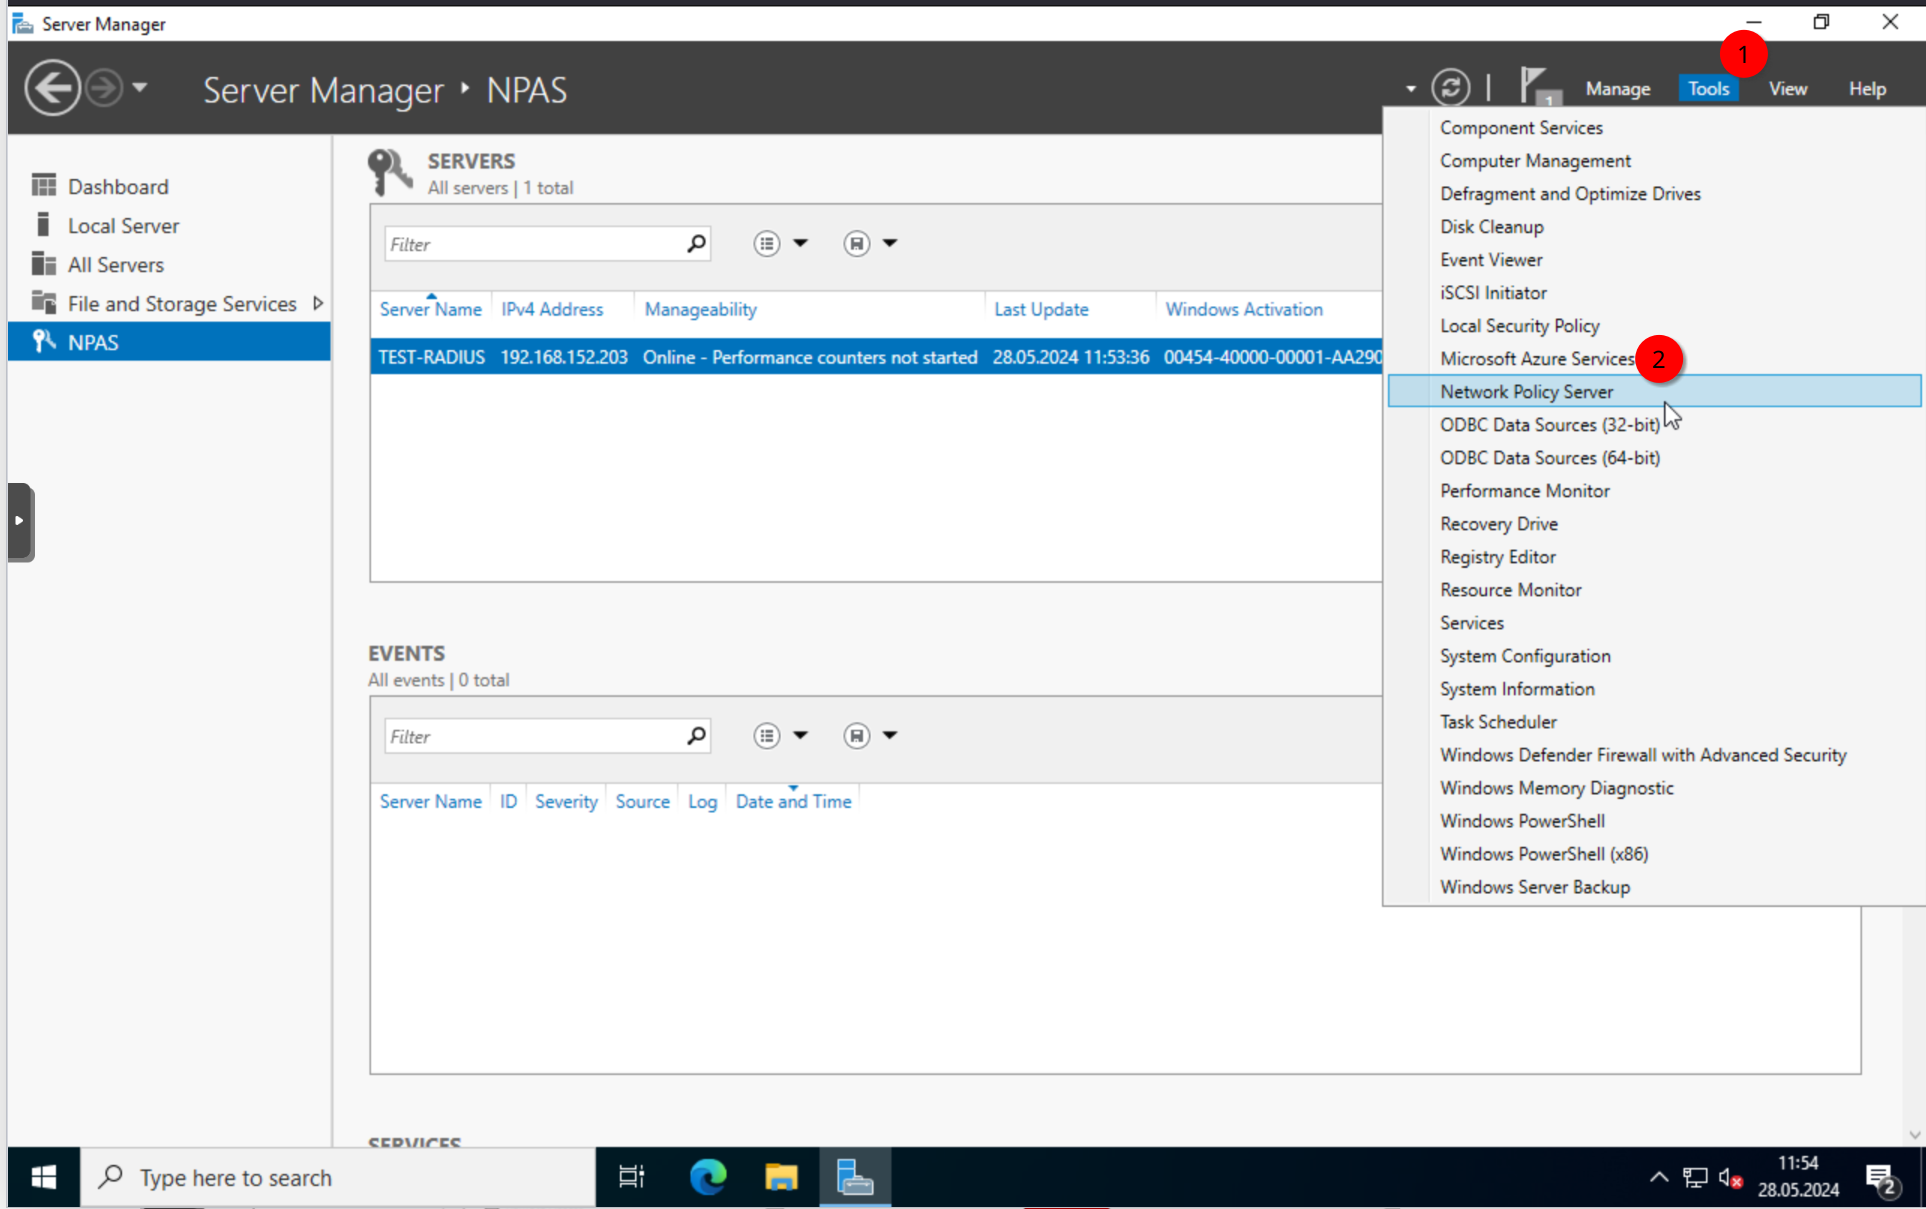
Once installed, we can start it through “Tools” -> “Network Policy Server”.
This will open the “Network Policy Server” window. Here, we can set up access policies for radius authentication requests.
Setting up the Radius Server
RADIUS Clients
First, we need to register the server with the Active Directory. Right-click on “NPS (local)” and select “Register server in Active Directory”. Click on “OK” to finish the authorization.
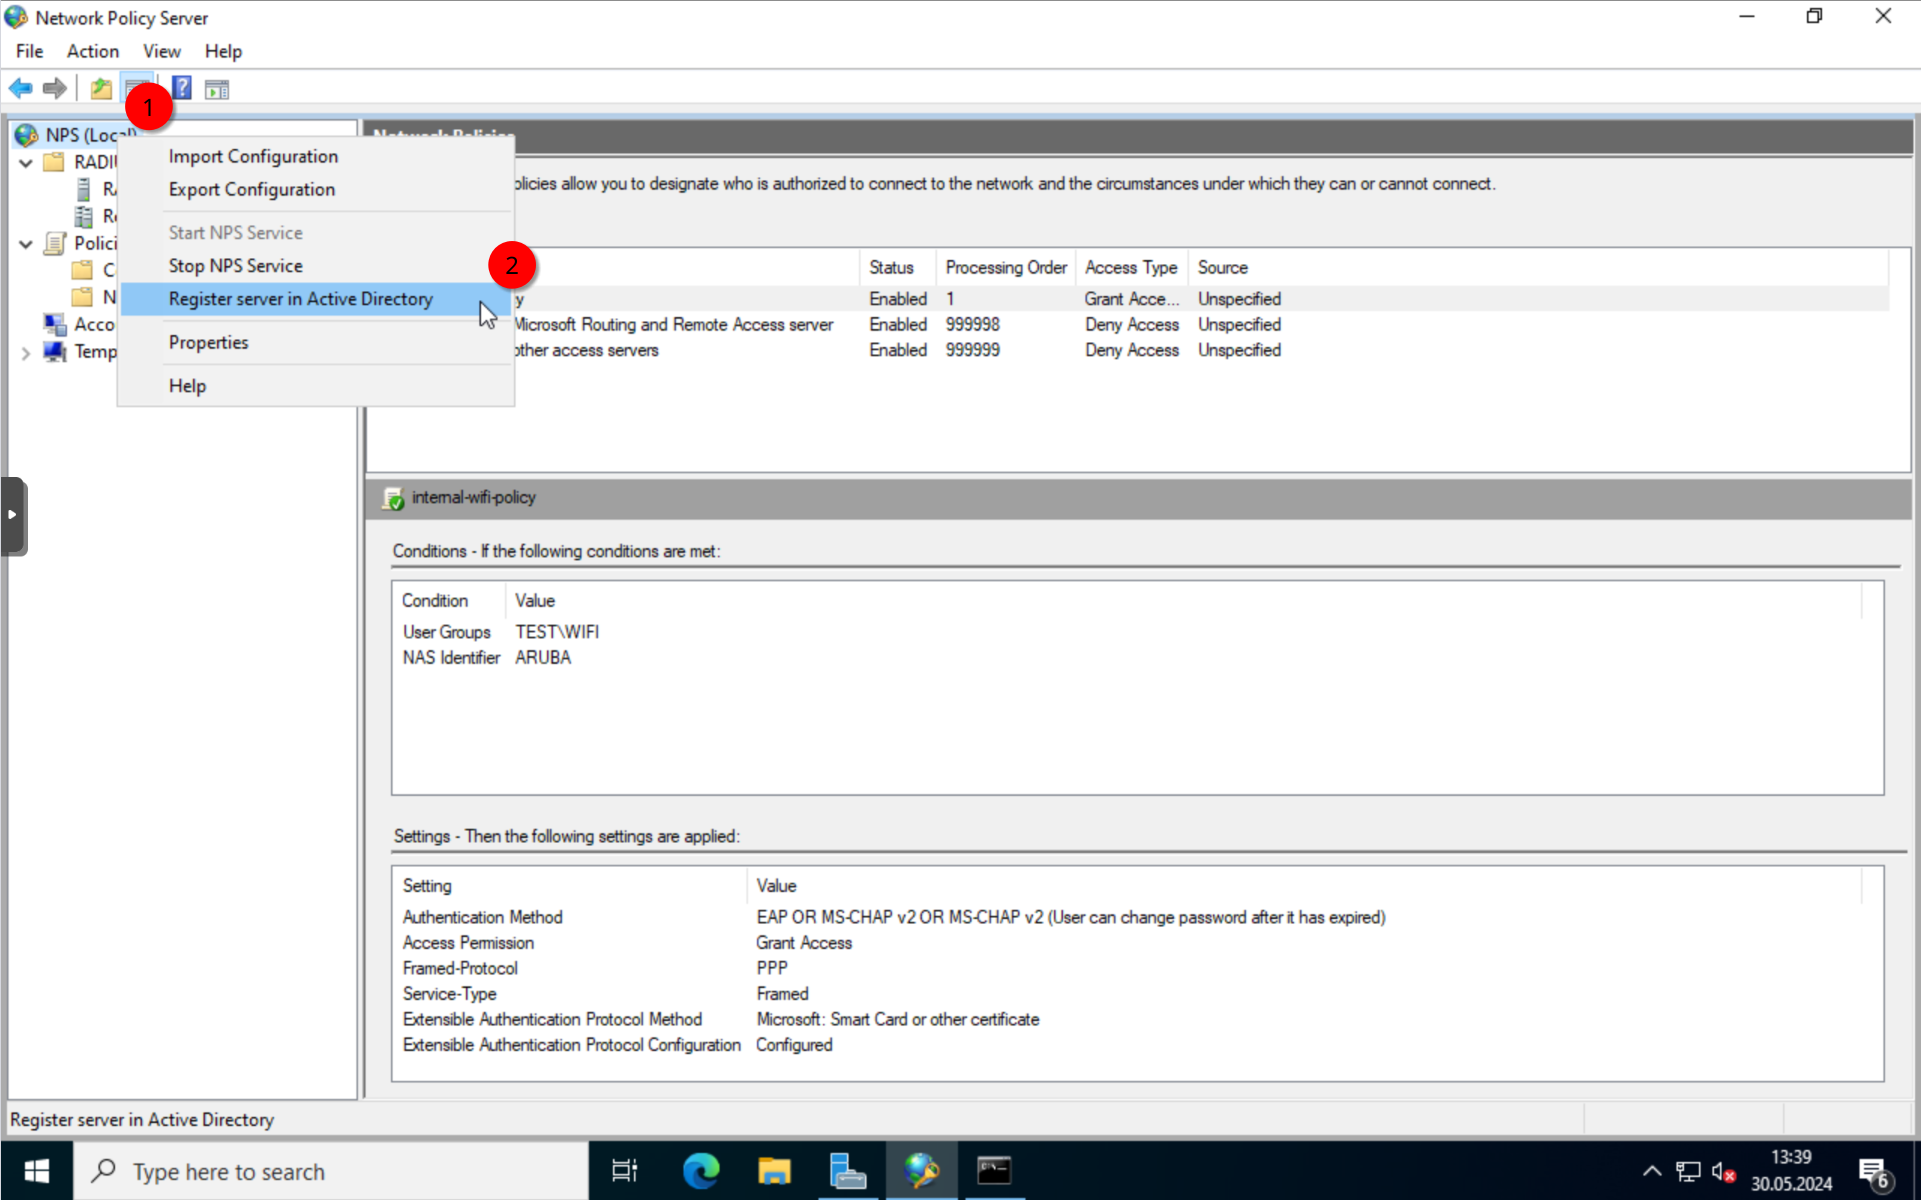
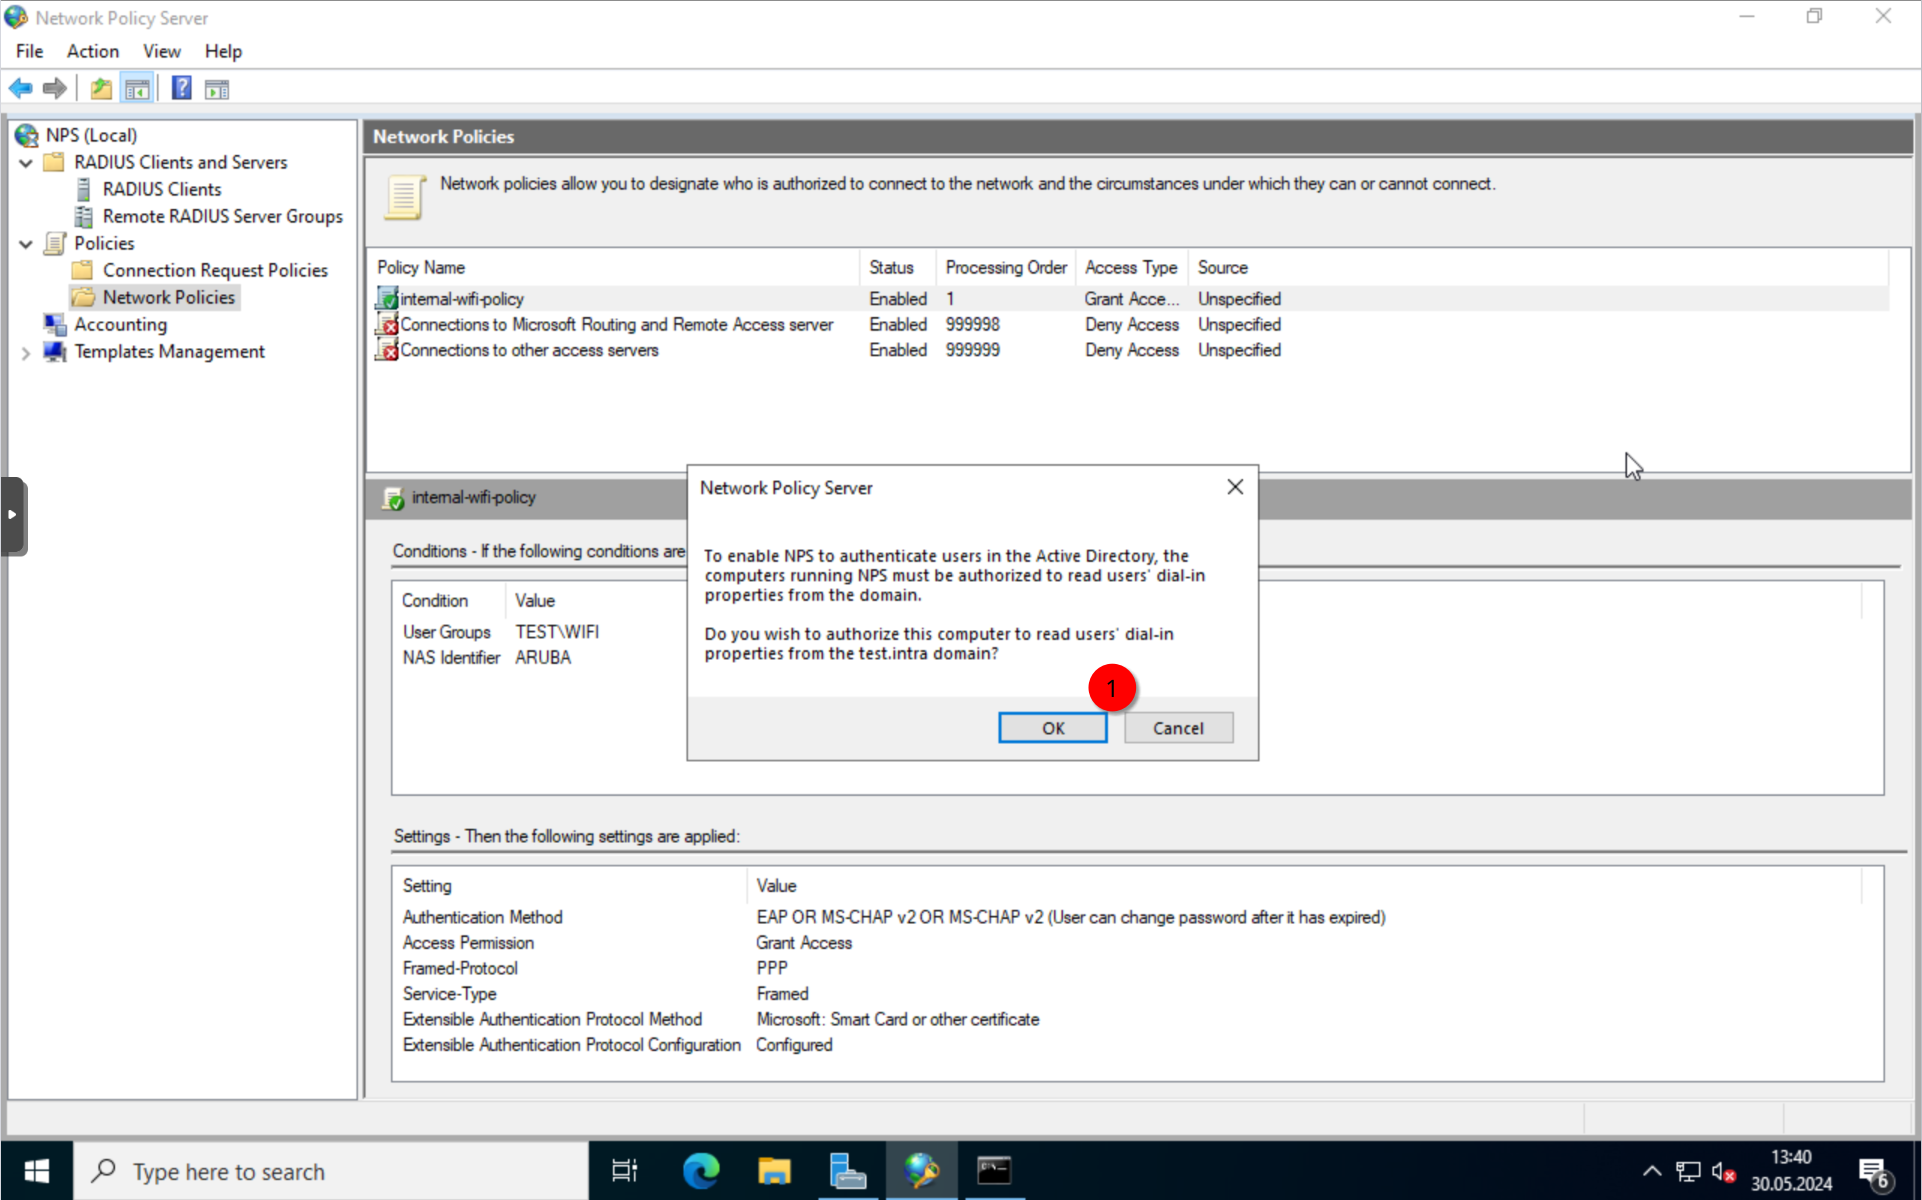
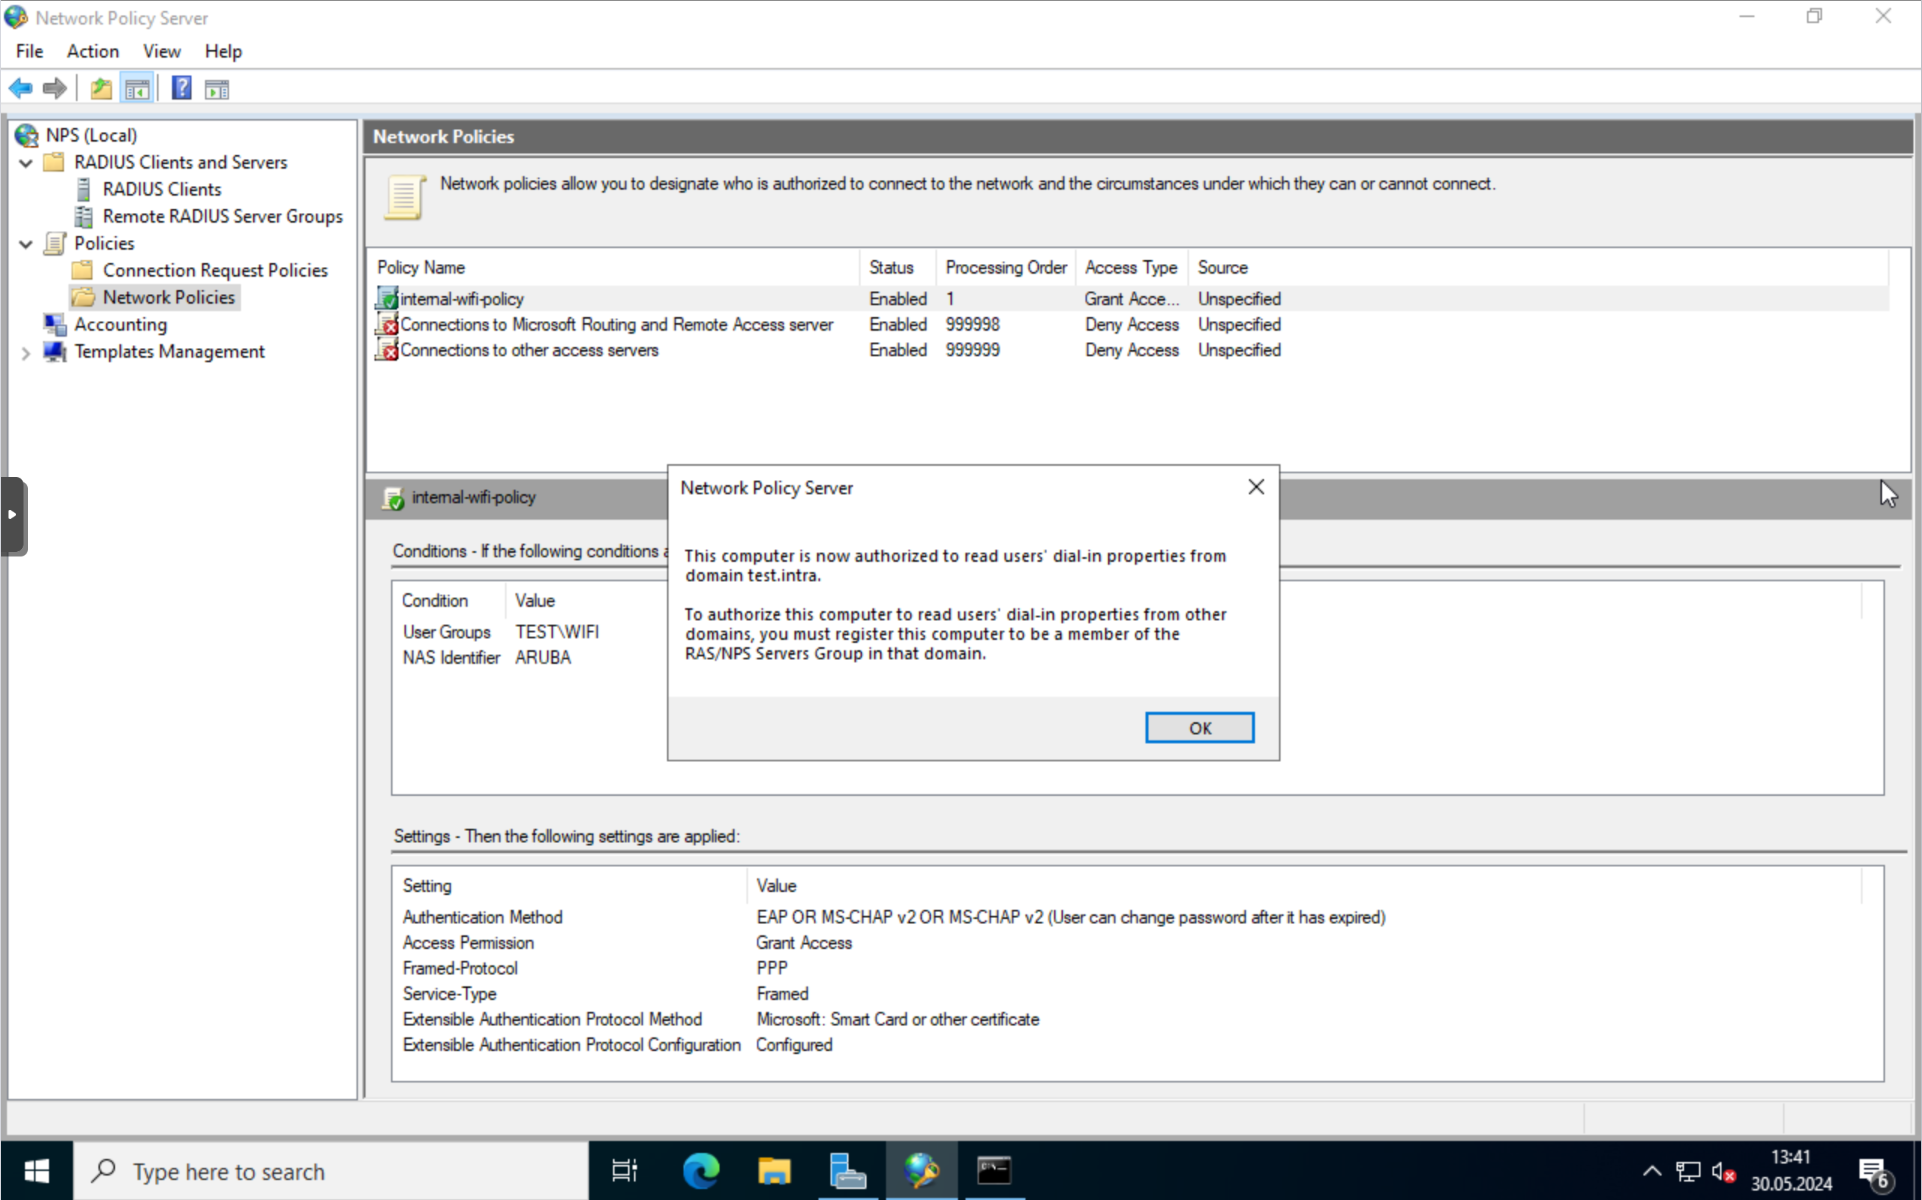
Next, we define the radius clients, that are allowed to communicate with the NPS server.
Right-click on the “RADIUS Clients” and select “New”.
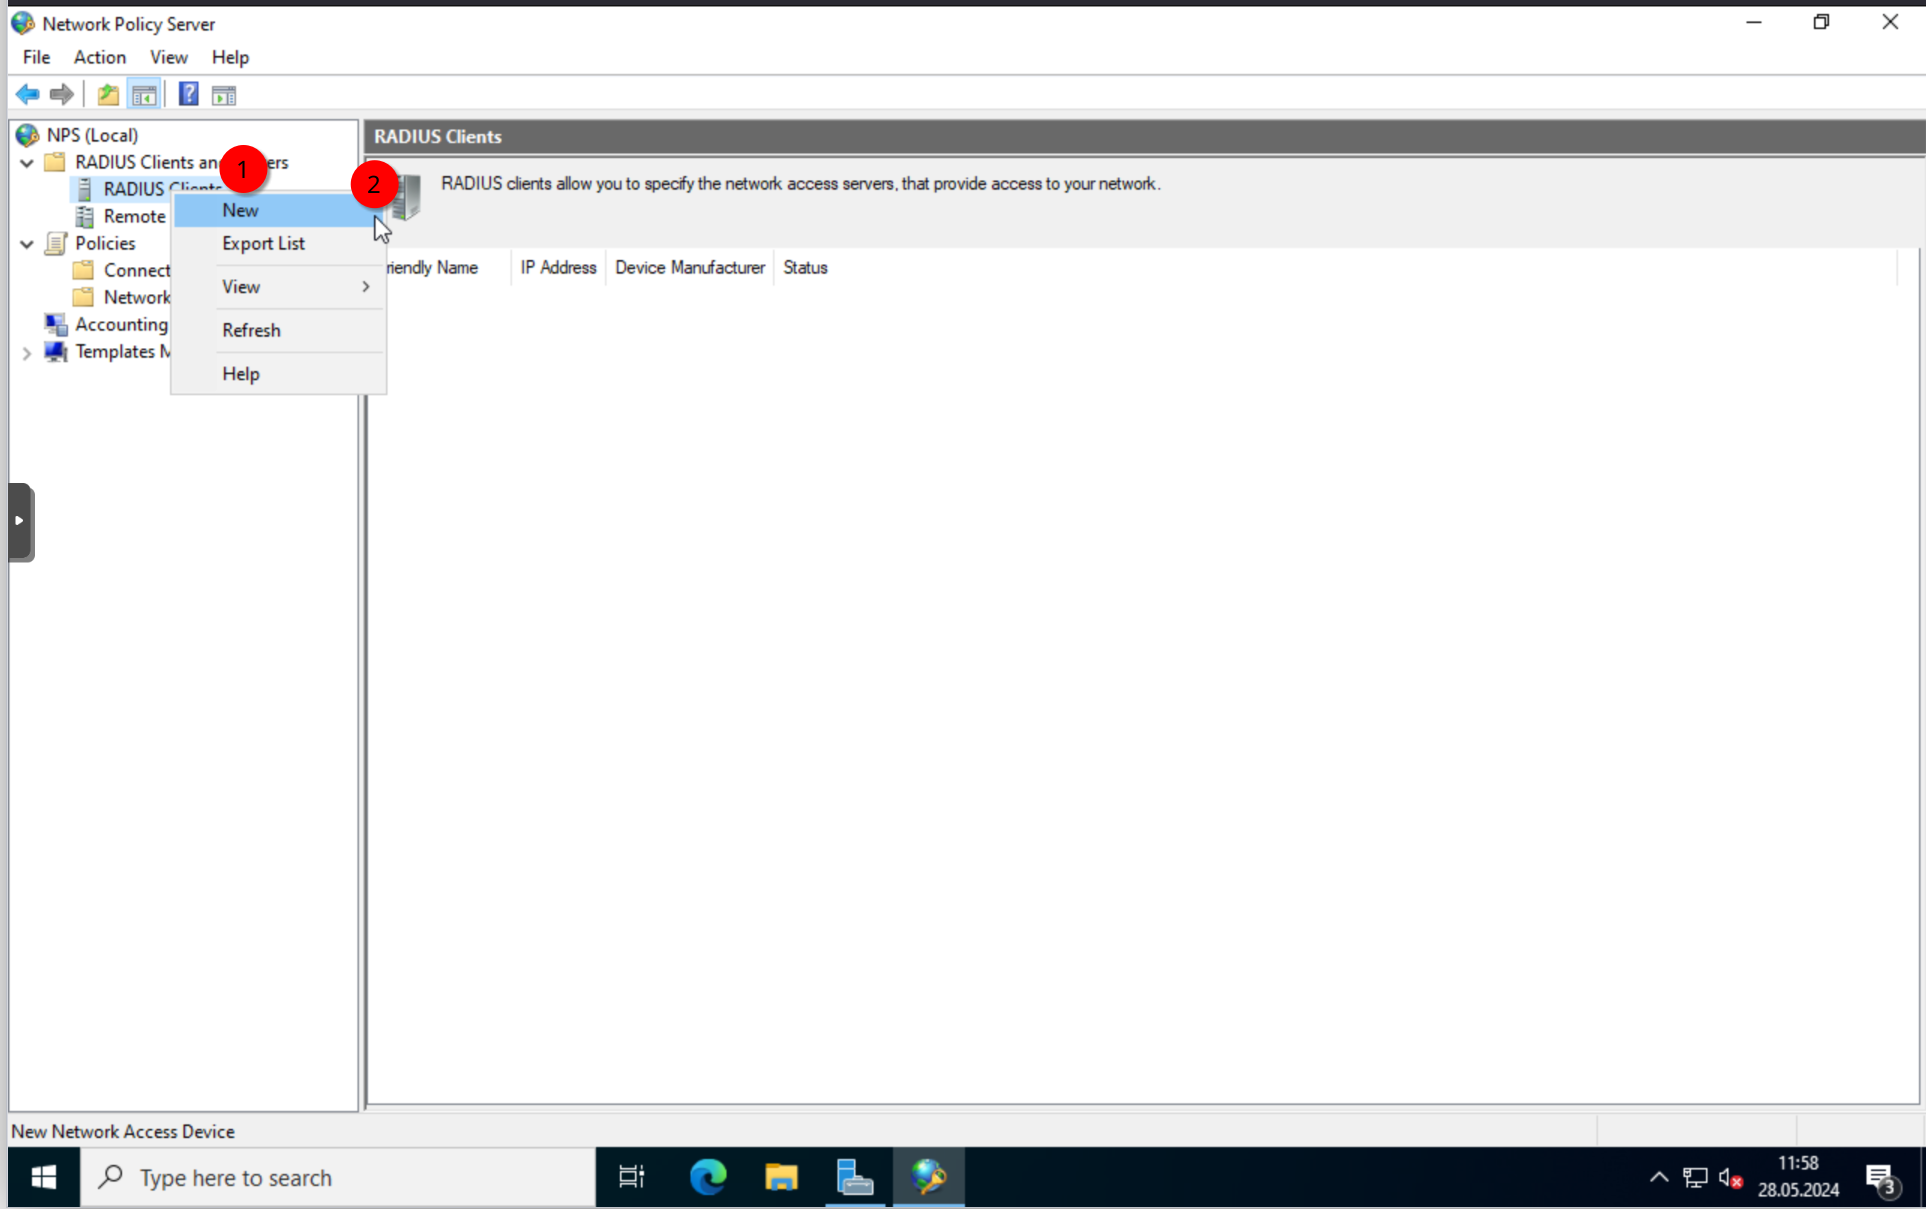
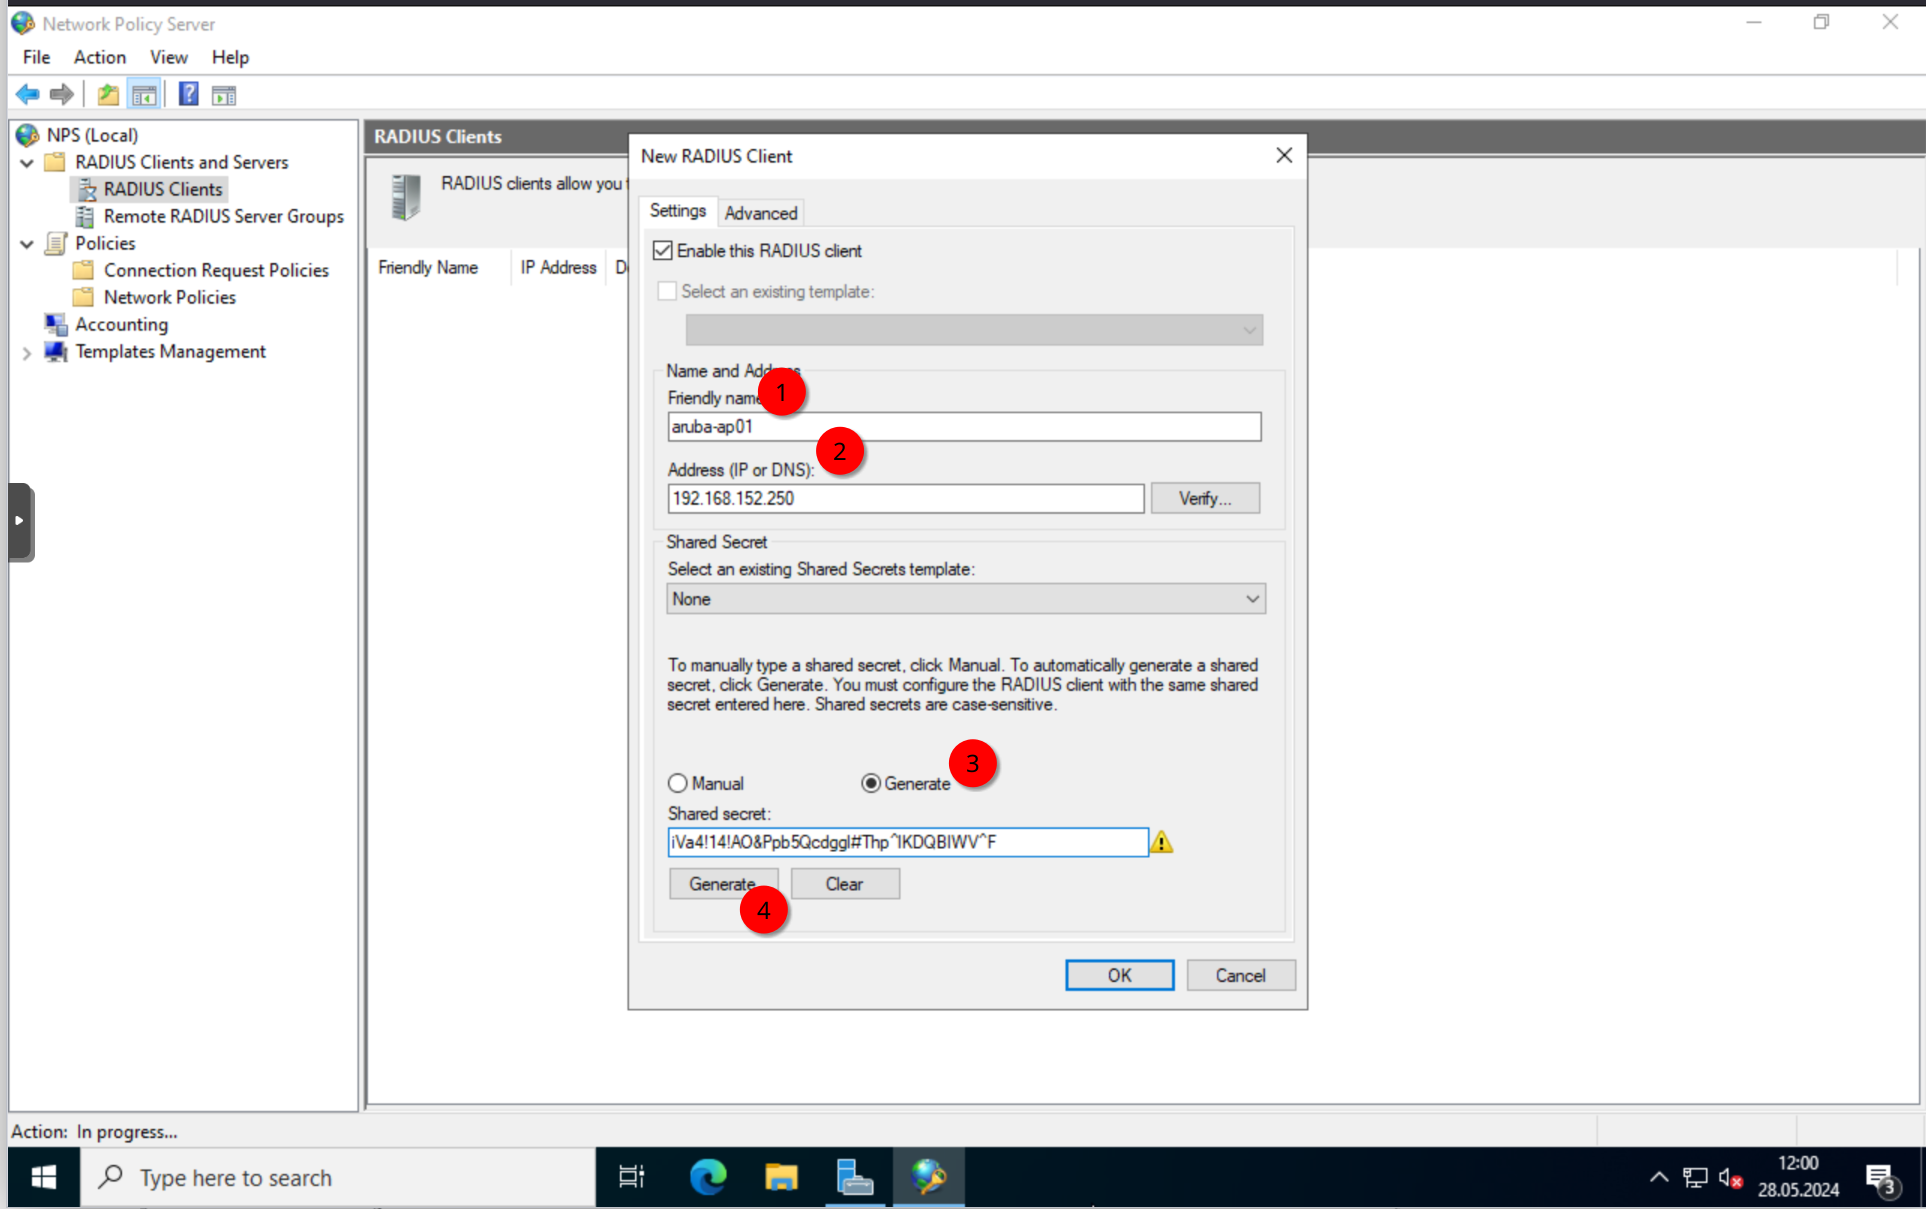
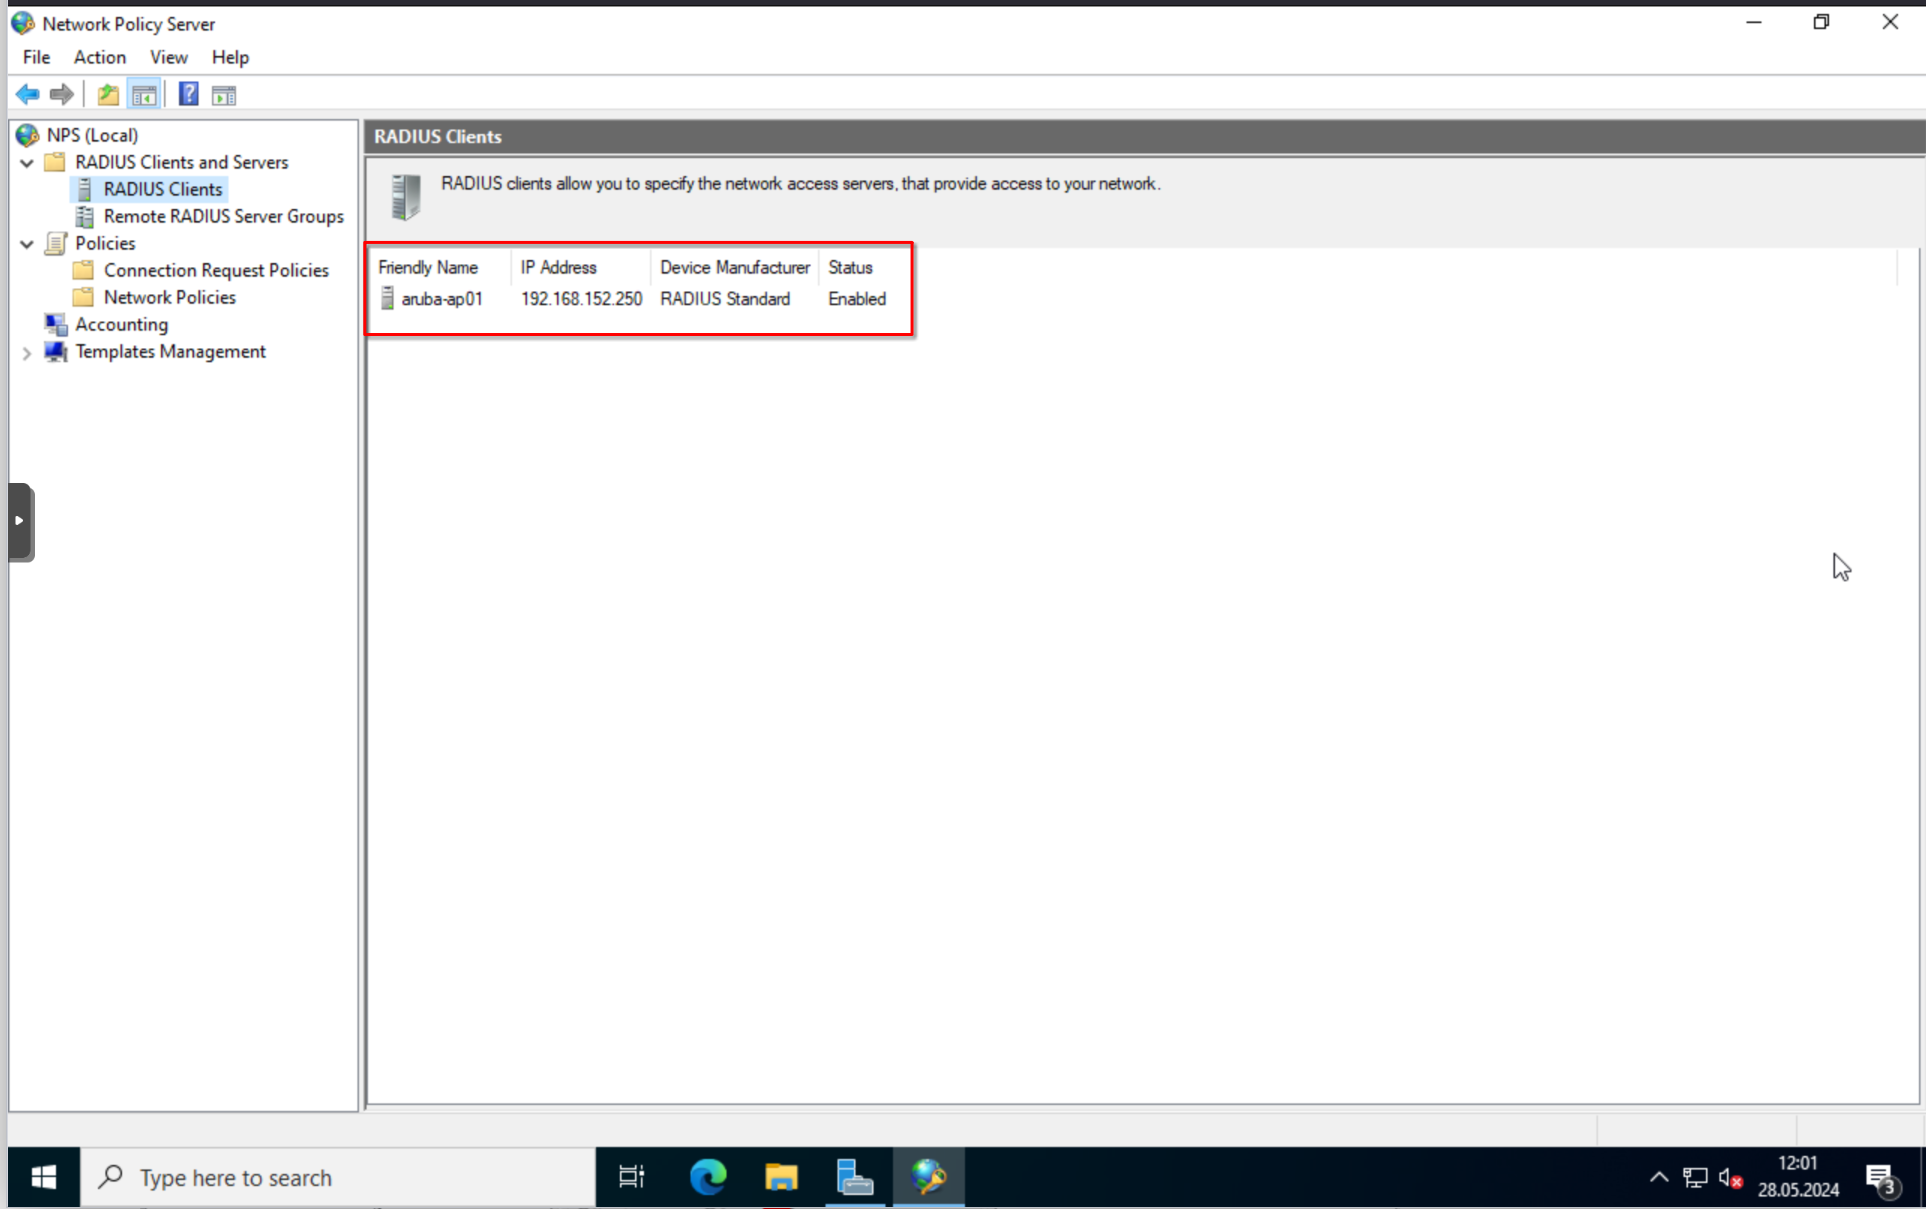
Type in the IP or hostname of the client and create a shared secret. Just use the “Generate” button for that.
I will shorten the generated secret a little bit, just in case the Aruba AP doesn’t like the length.
Connection Request Policies
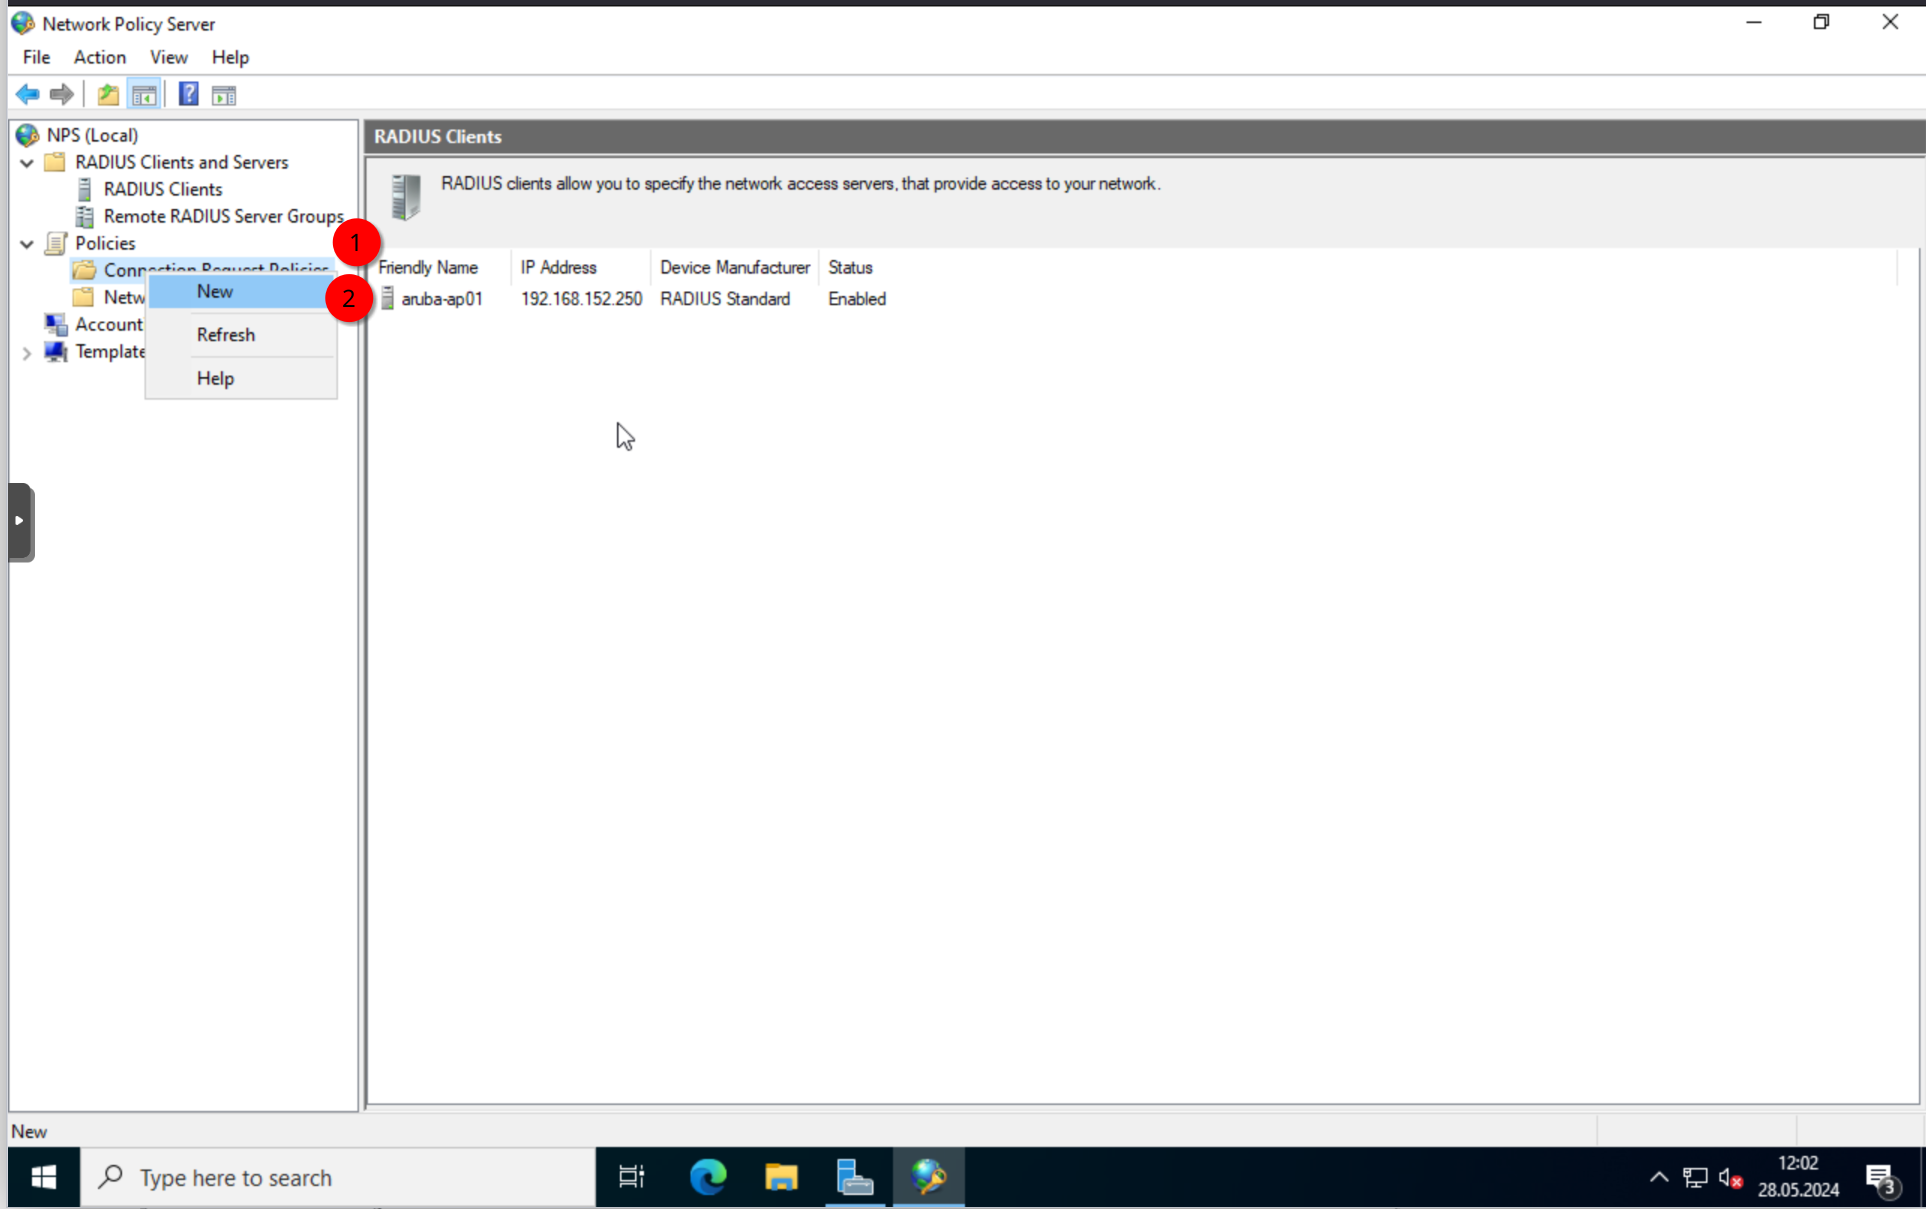
Alright. Next, we configure the “Connection Request Policies”. Again, Right-click and select “New”.
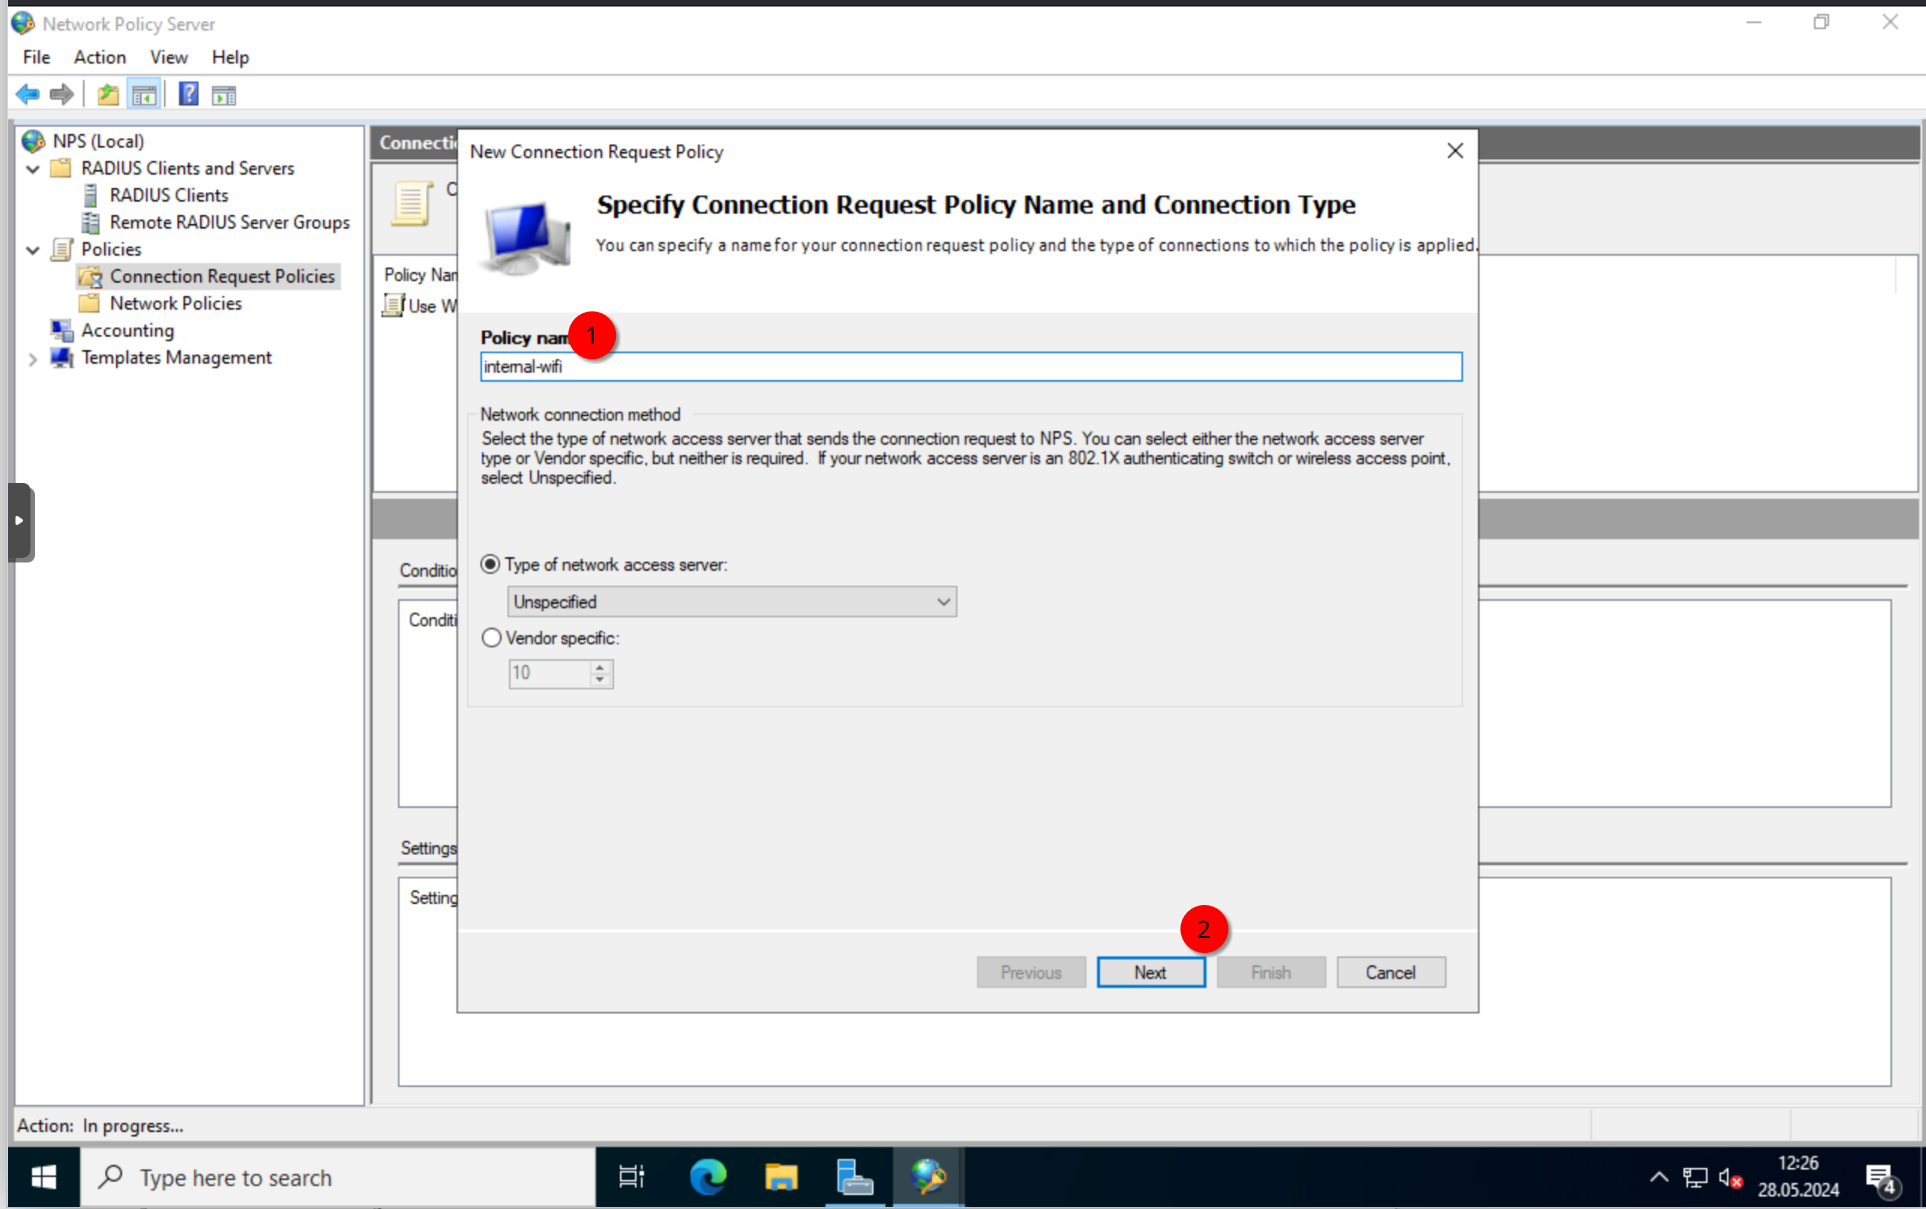
Give it a nice name.
Add the “NAS Port Type” condition to the policy and select Wireless 802.11.
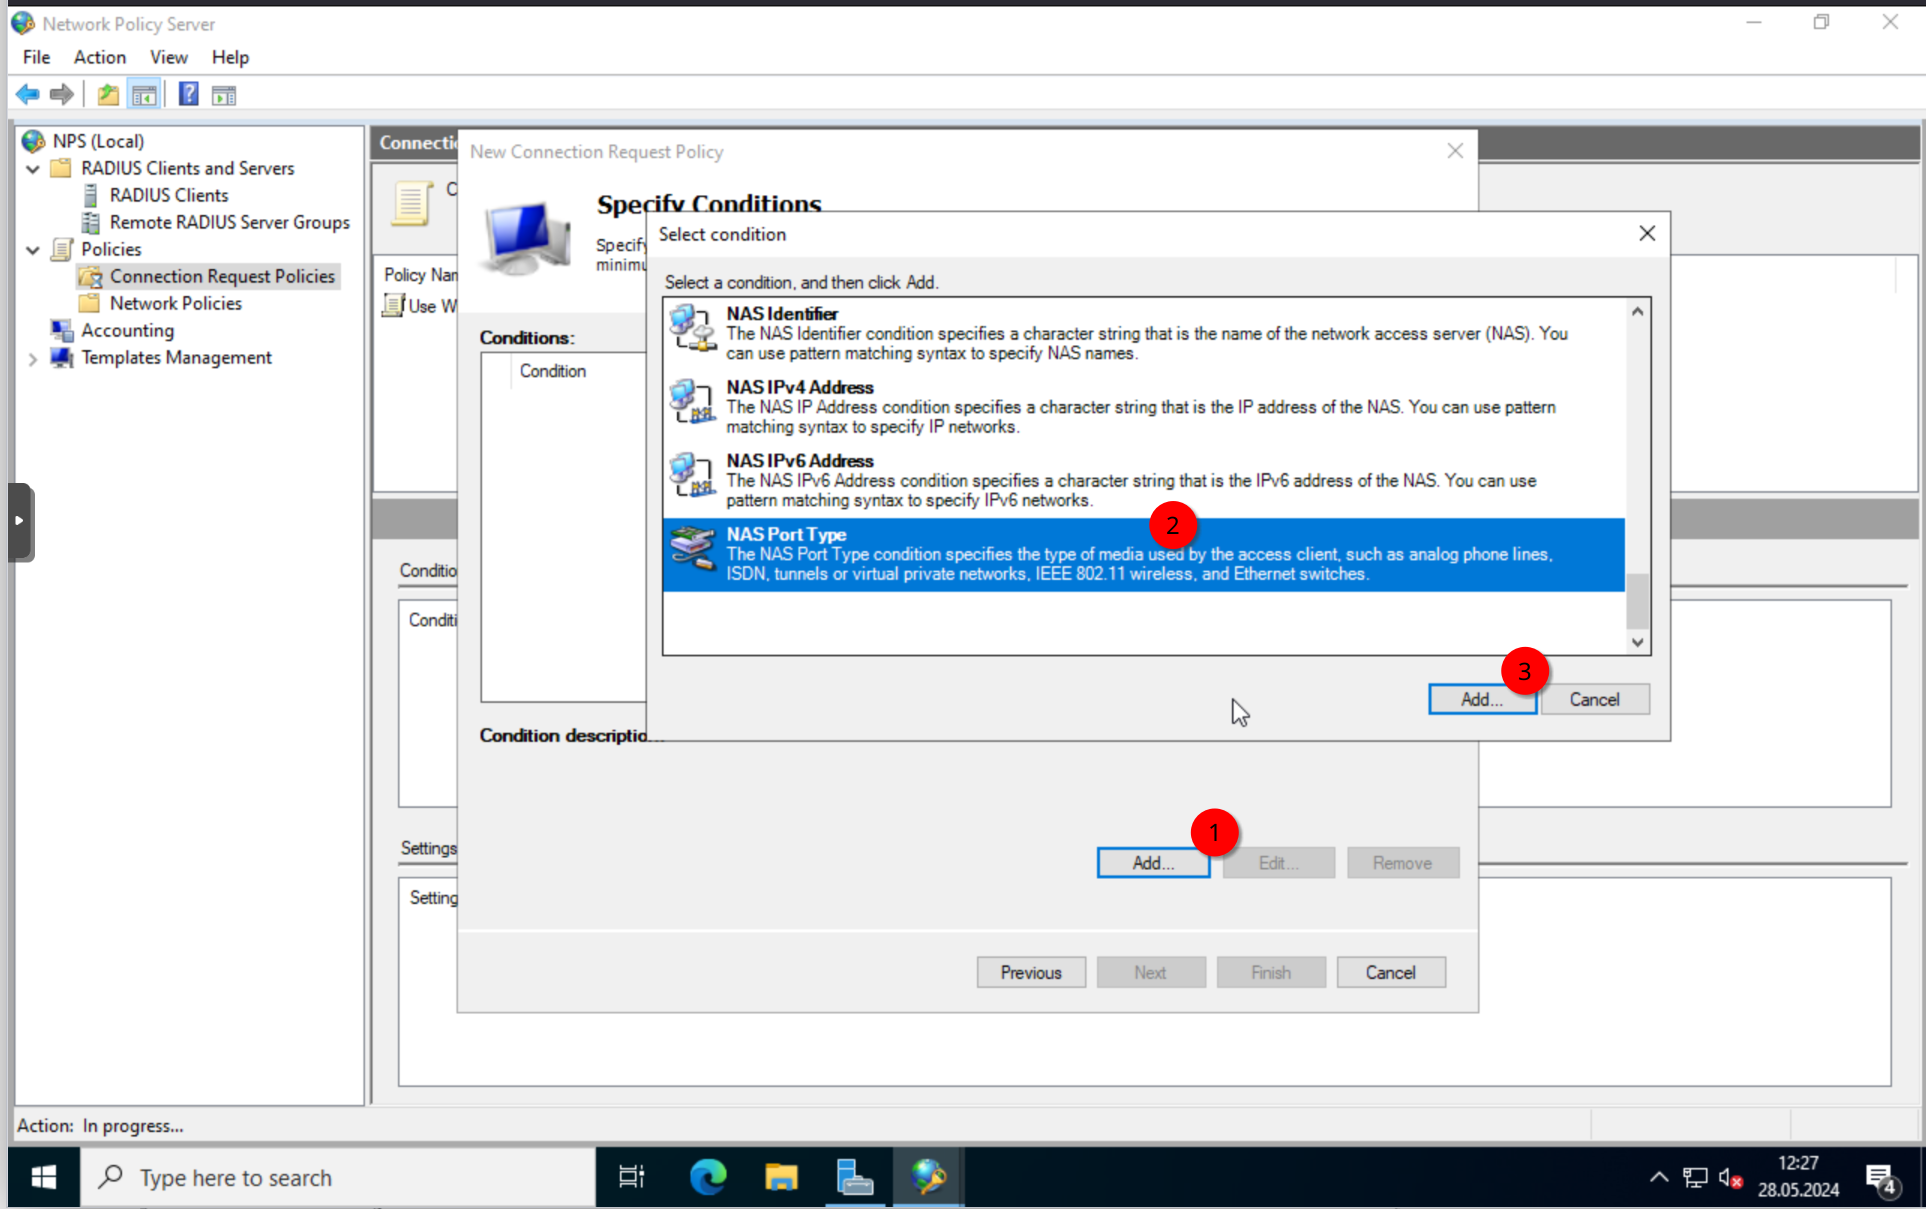
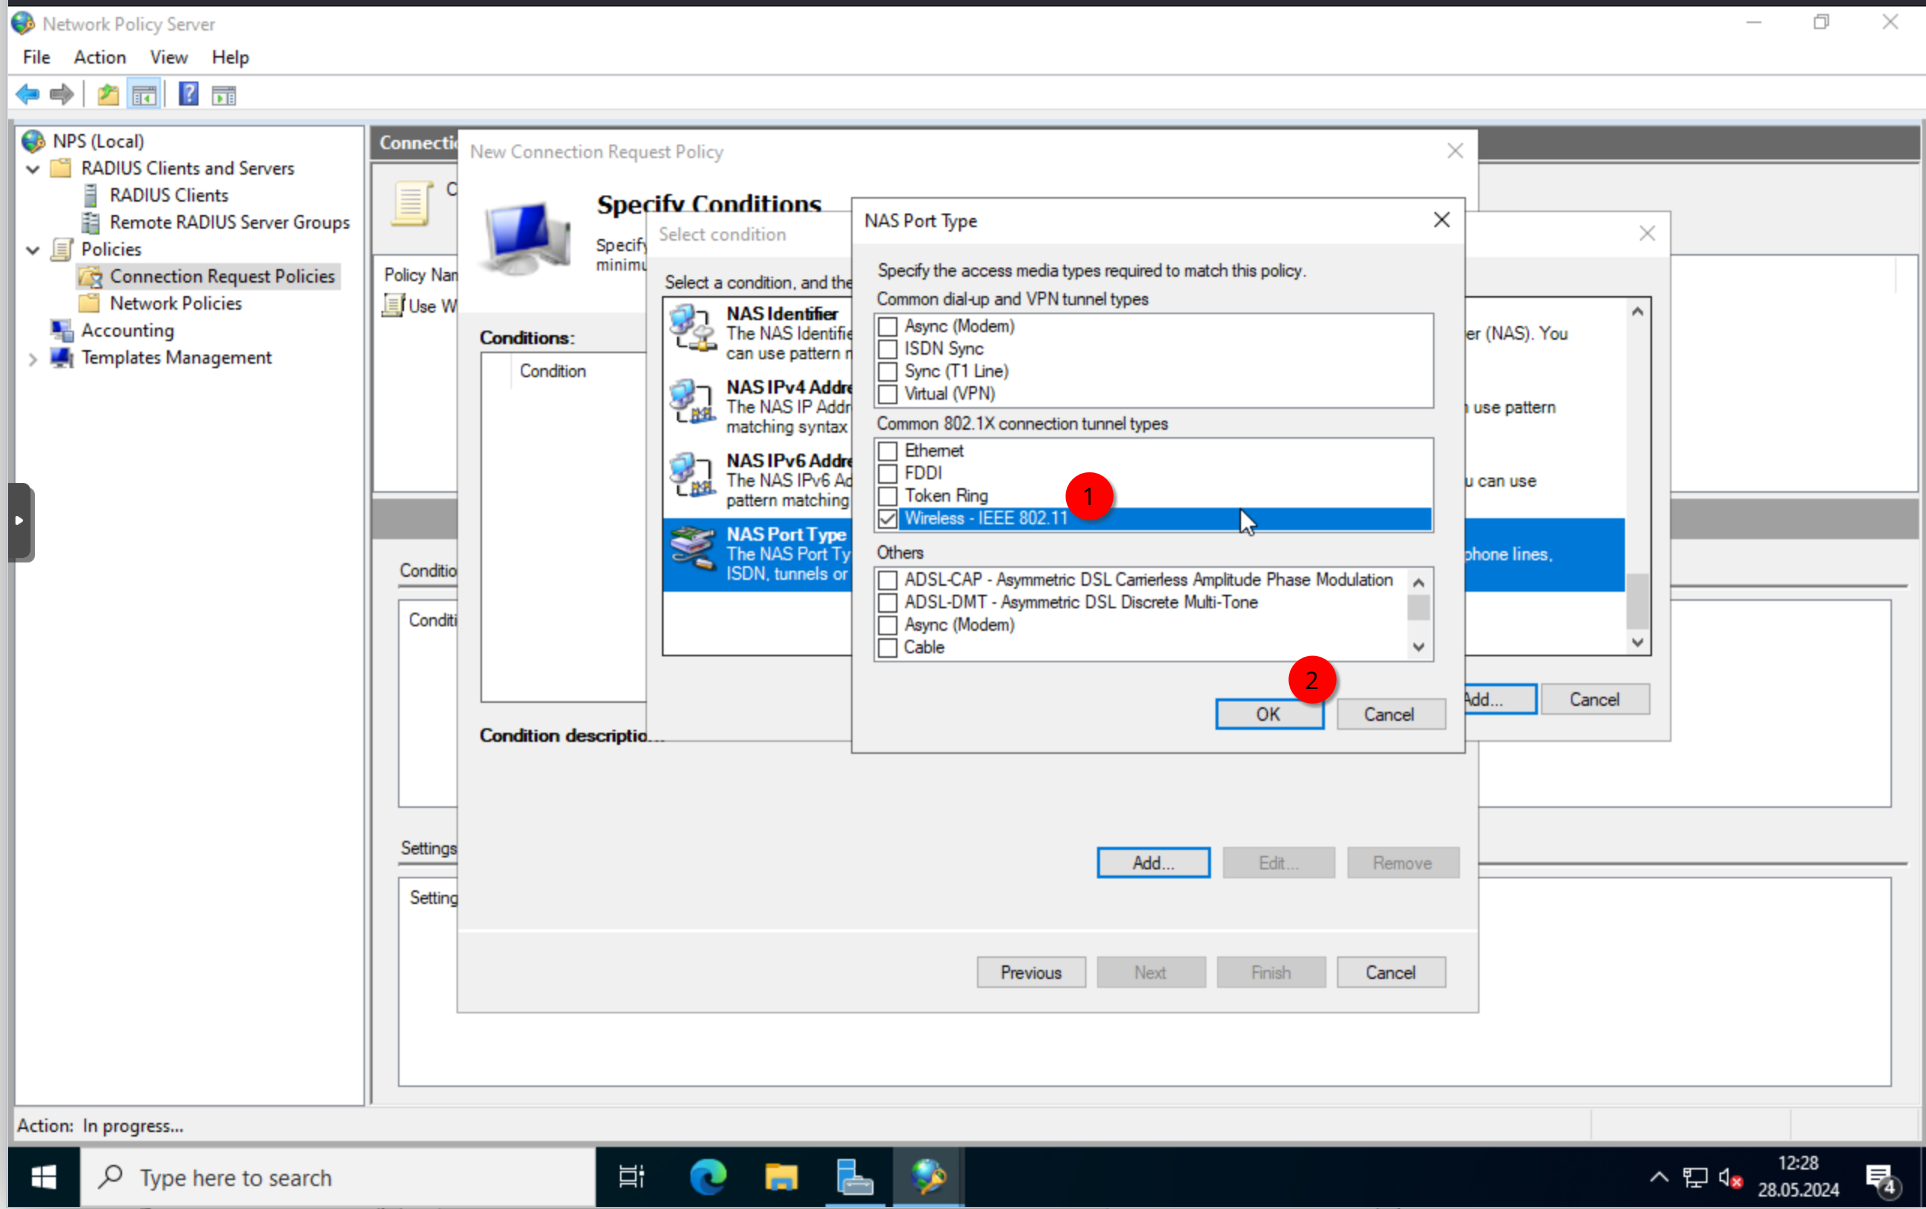
Click next and finish the configuration.
Network Policies
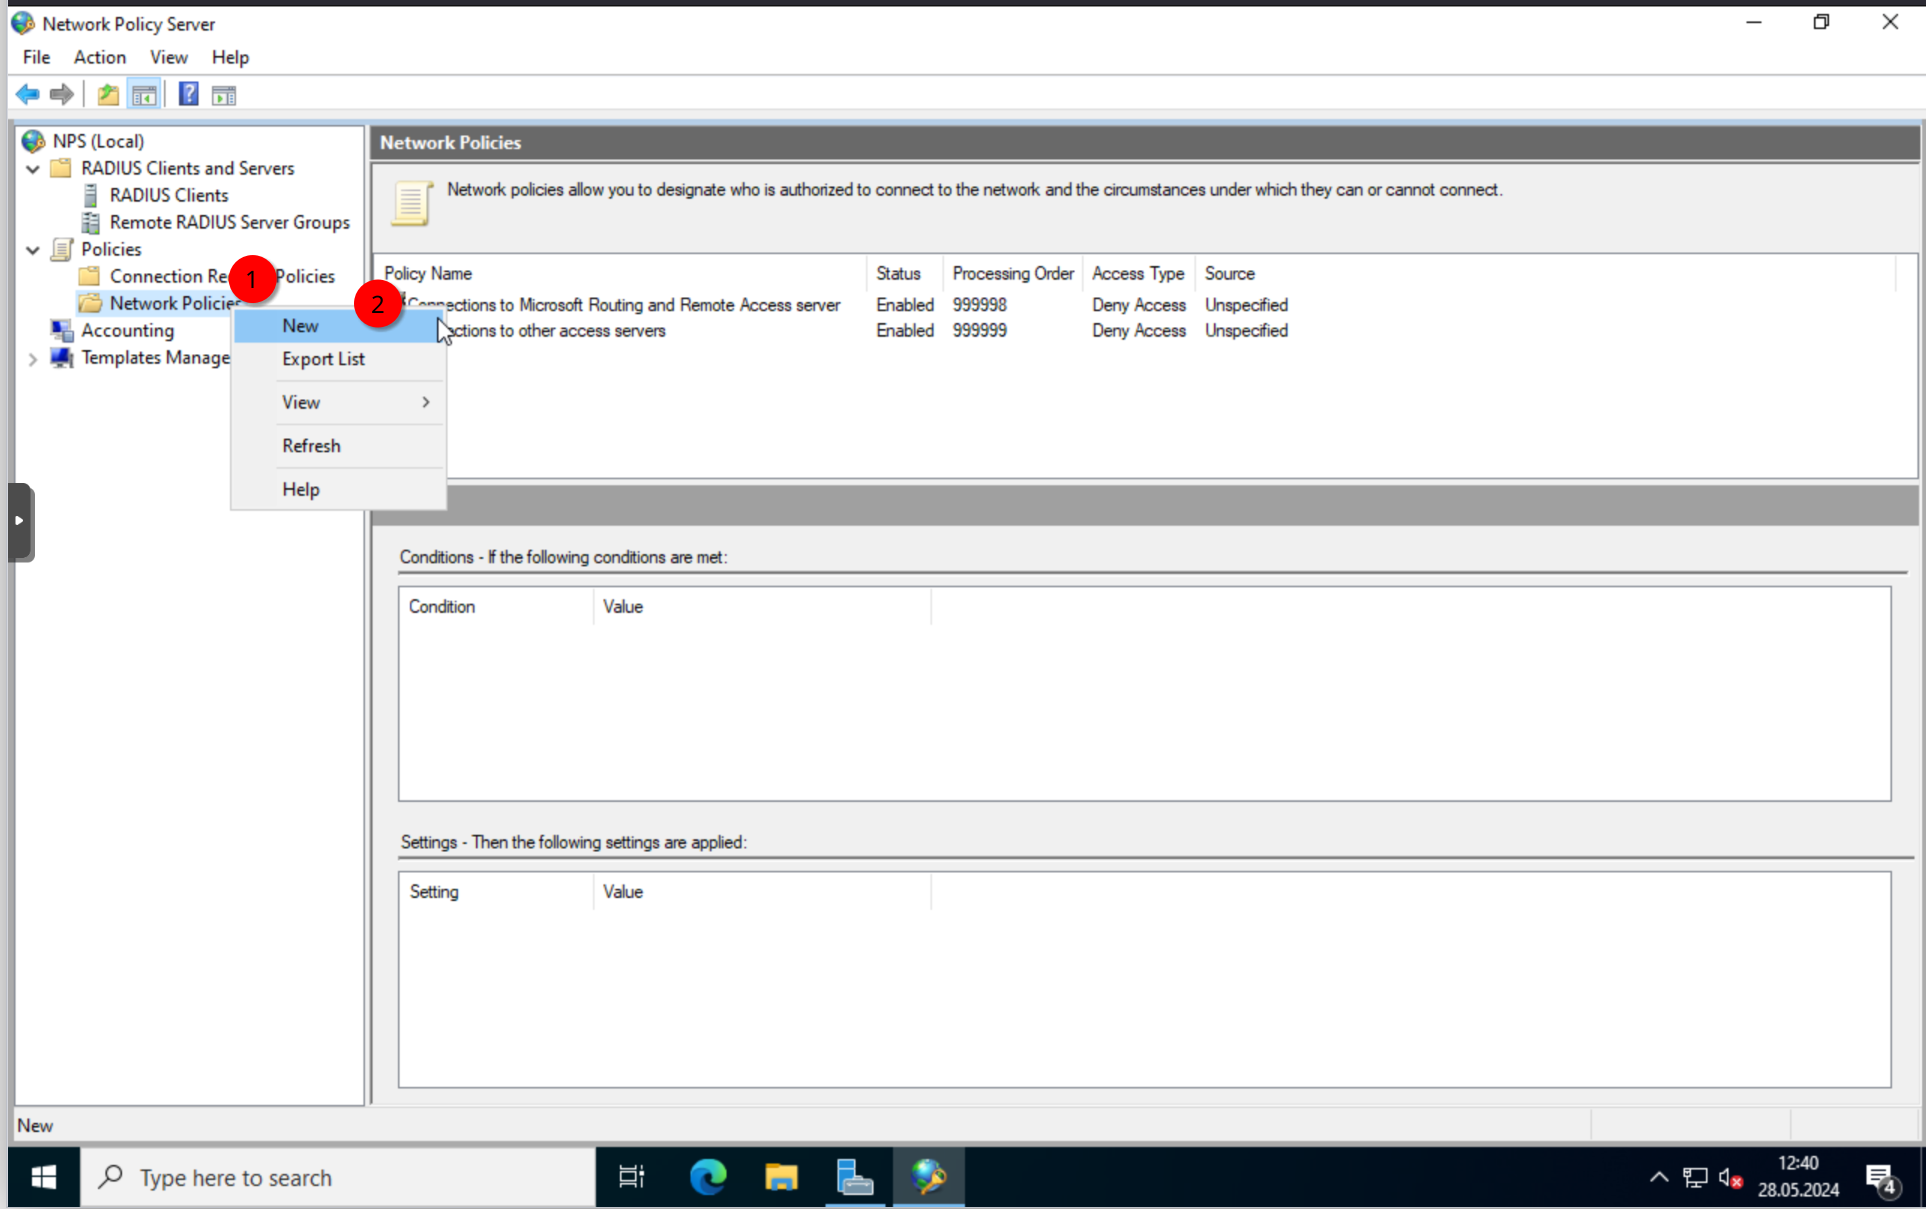
Create a new policy under the “Network Policies”.
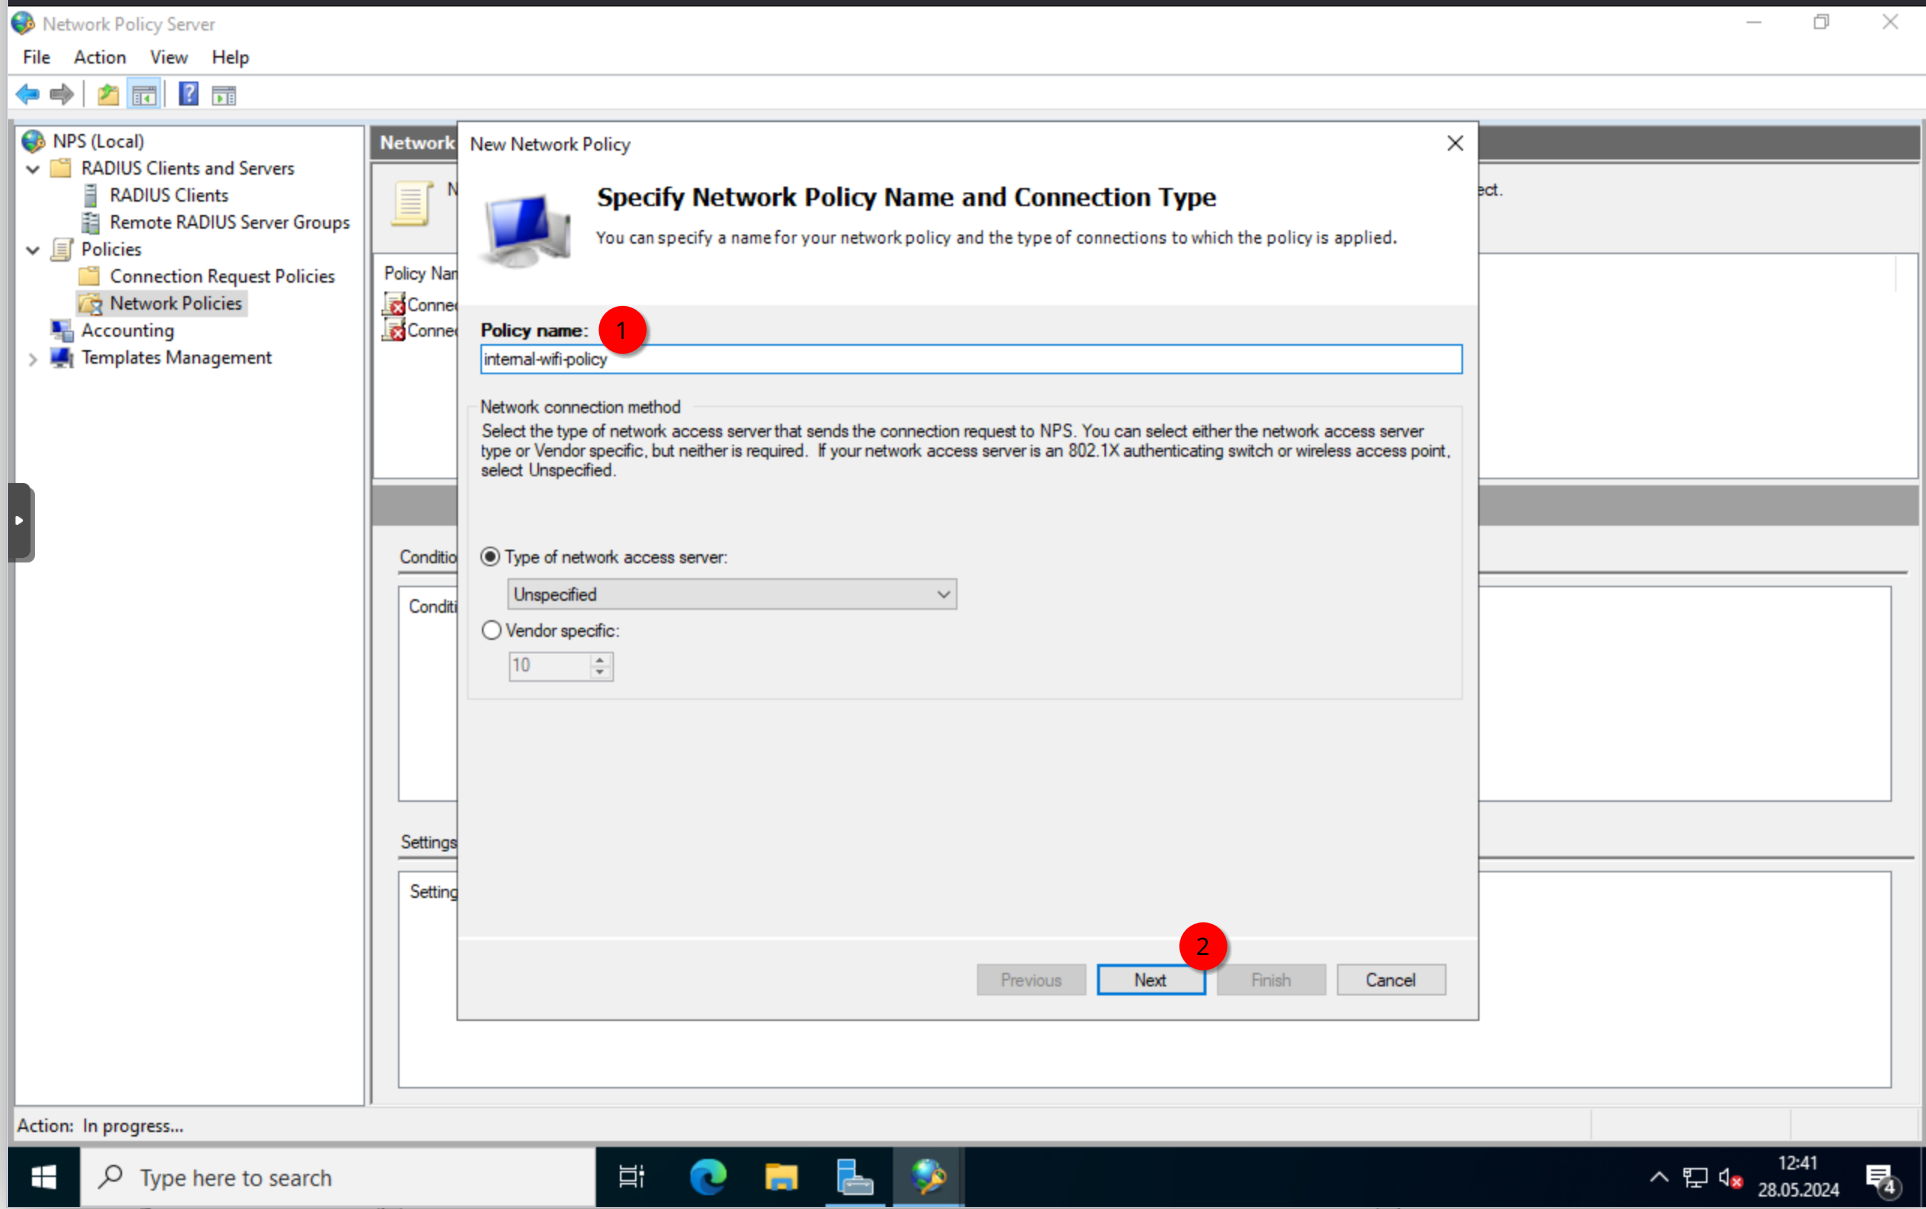
Give it a name, I will use “internal-wifi-policy”.
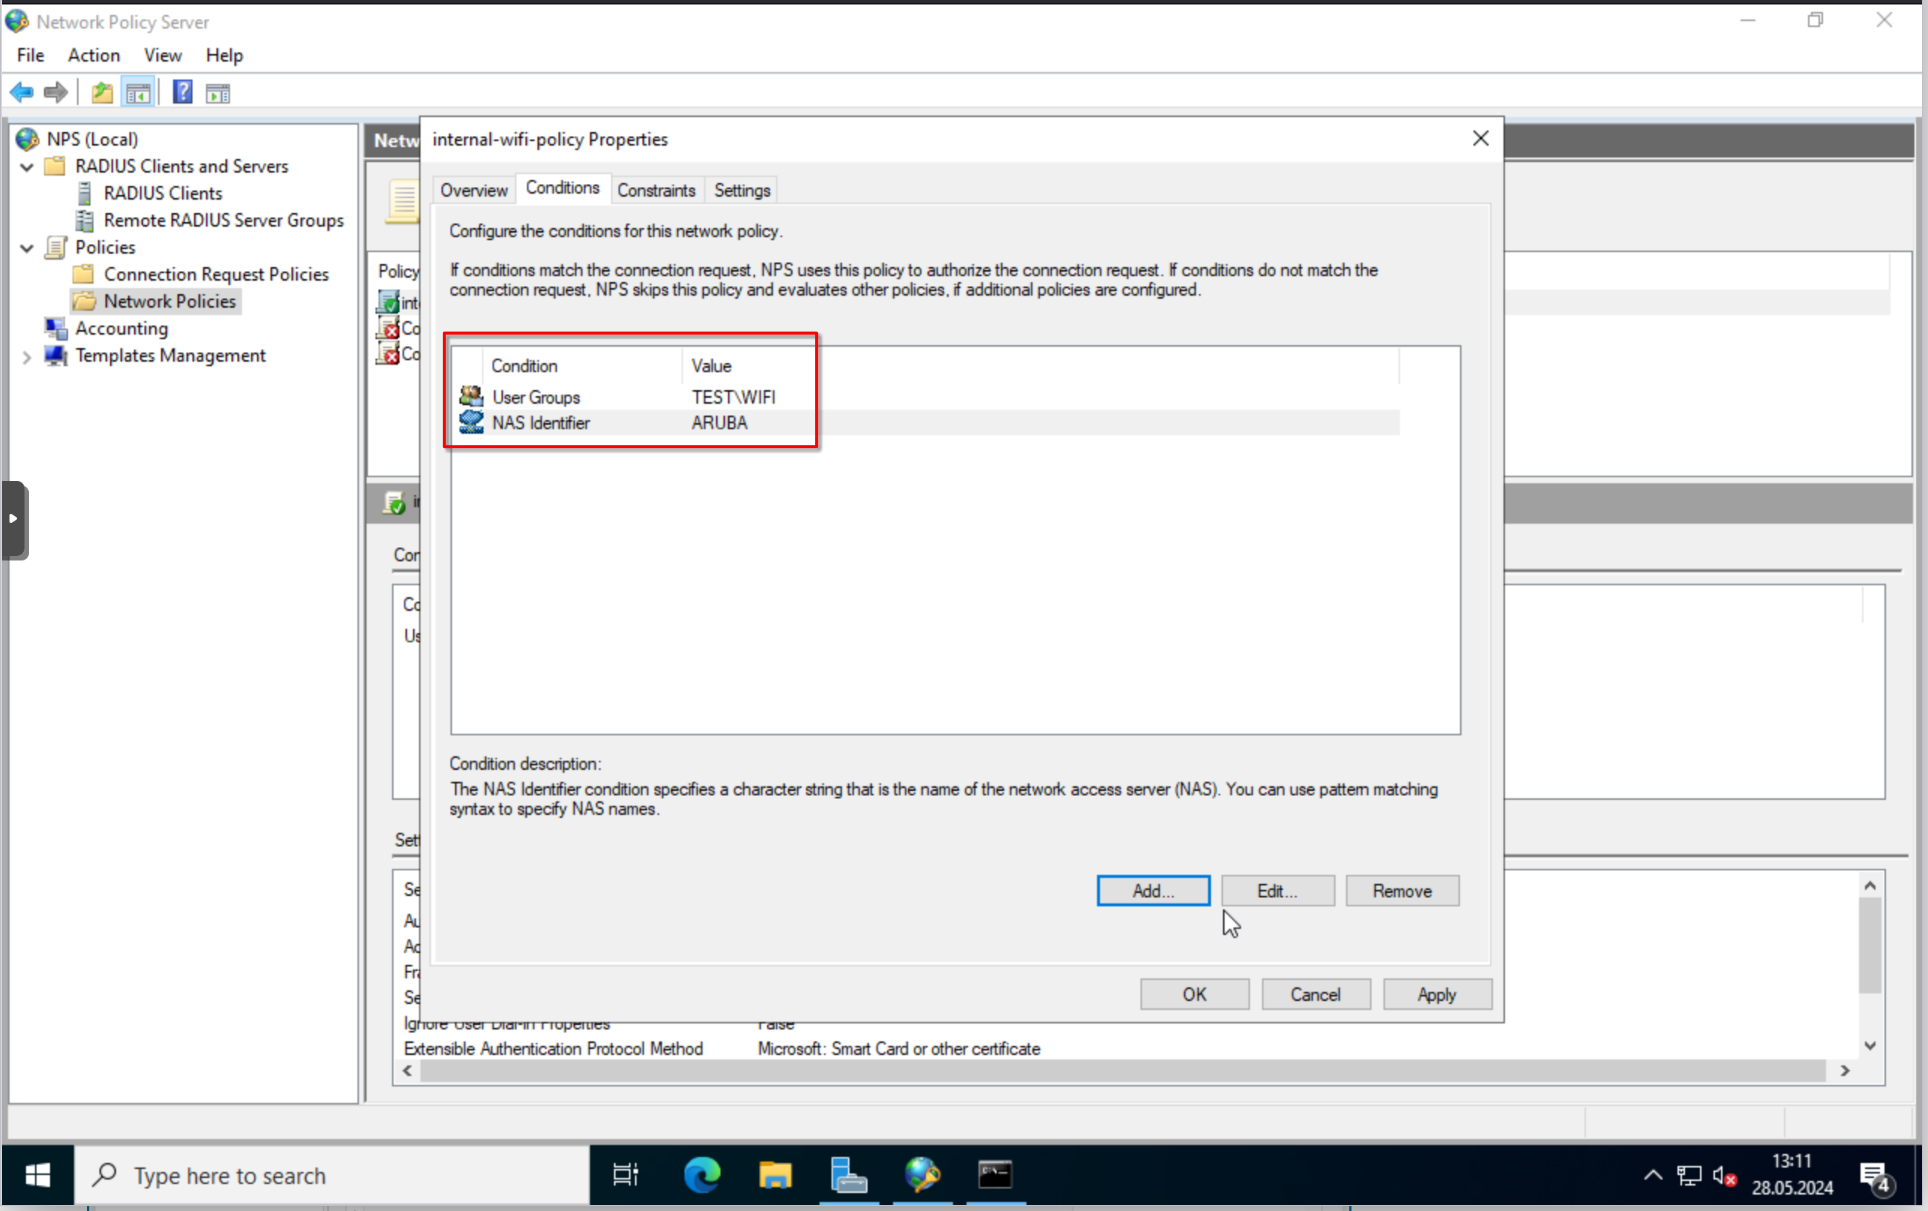
Add the following conditions.
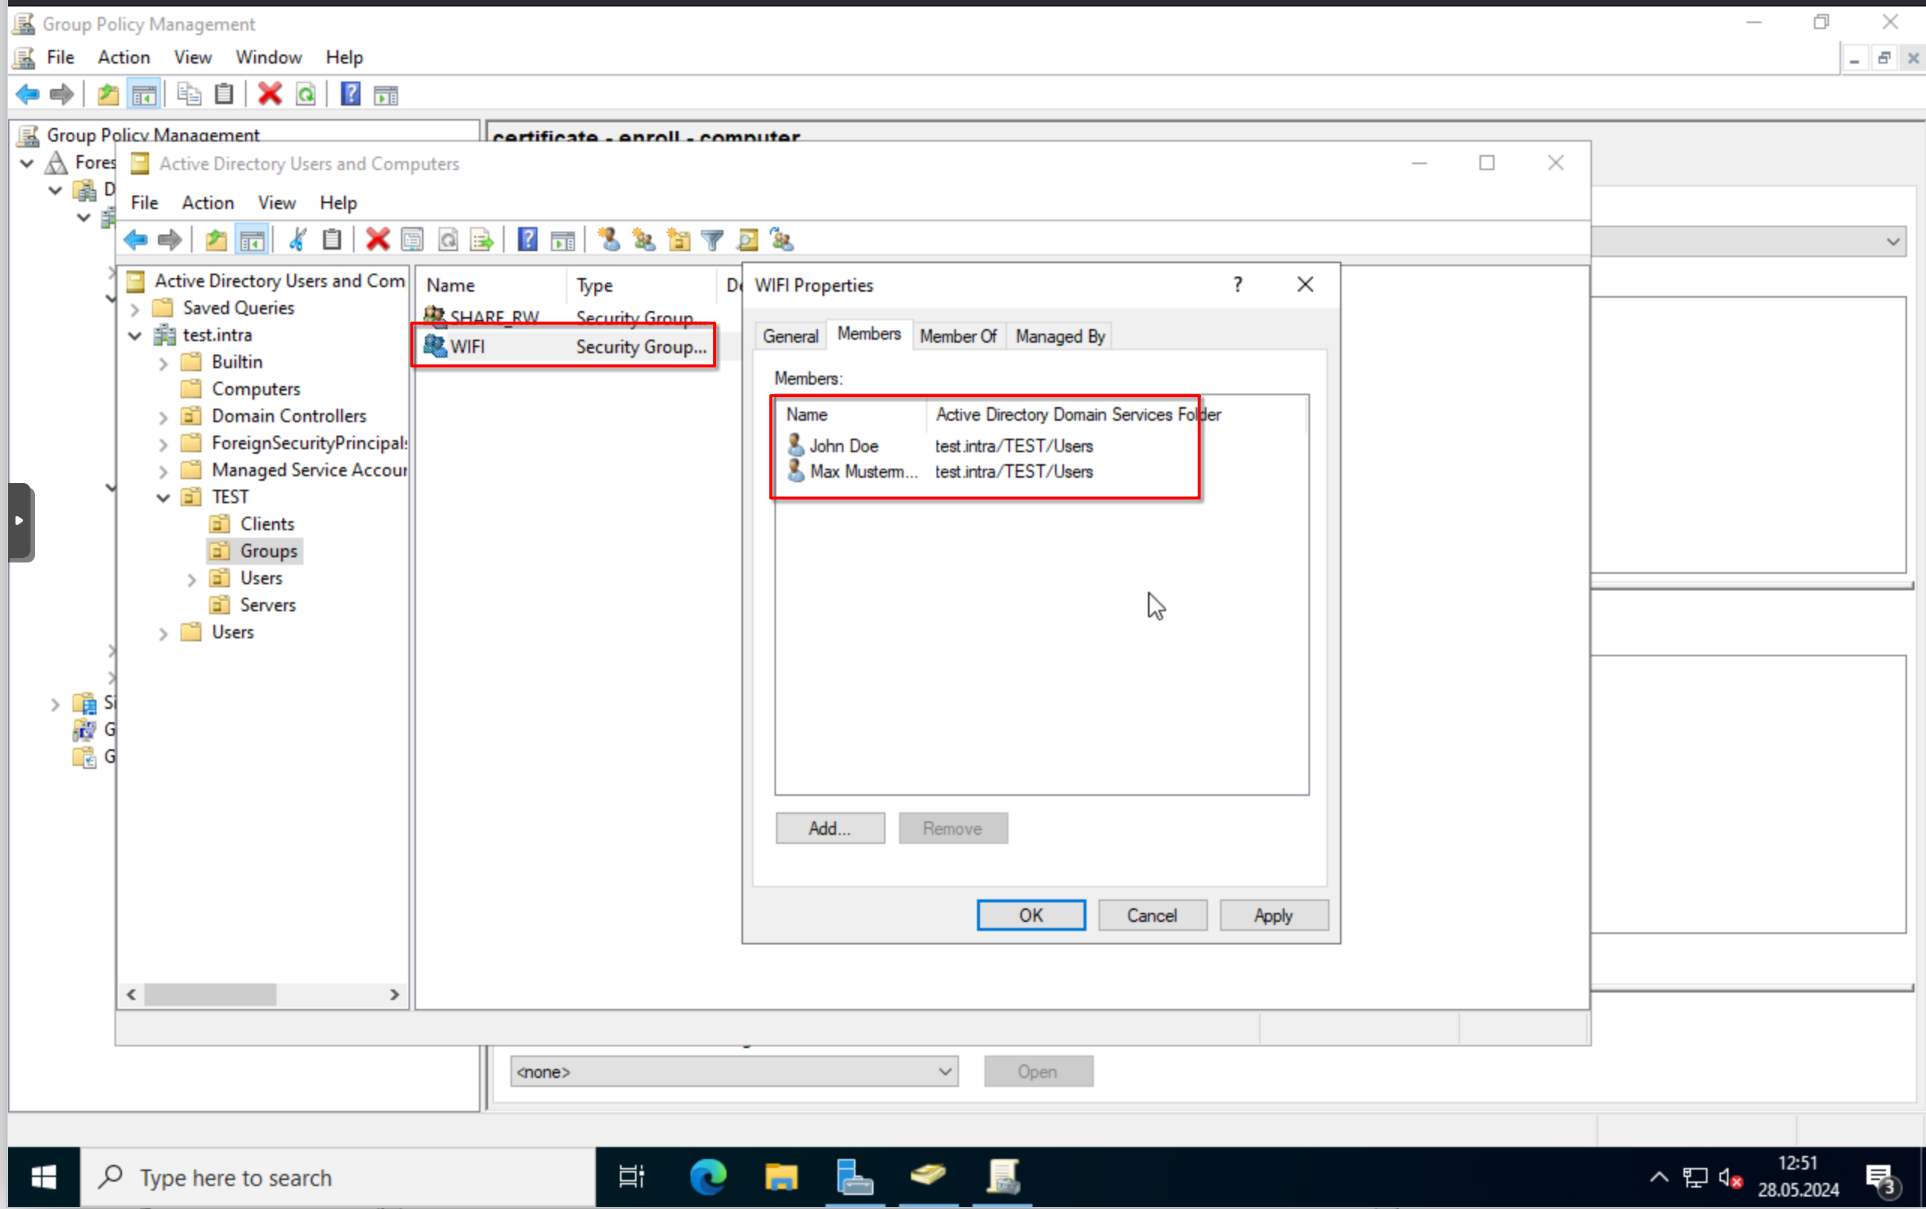
“User Groups”. I created an “WIFI” group and added the two users we created in previous posts, on the Domain Controller for this. We could also just use the “Domain Users” or the previously created “SHARE_RW” group. This is up to you.
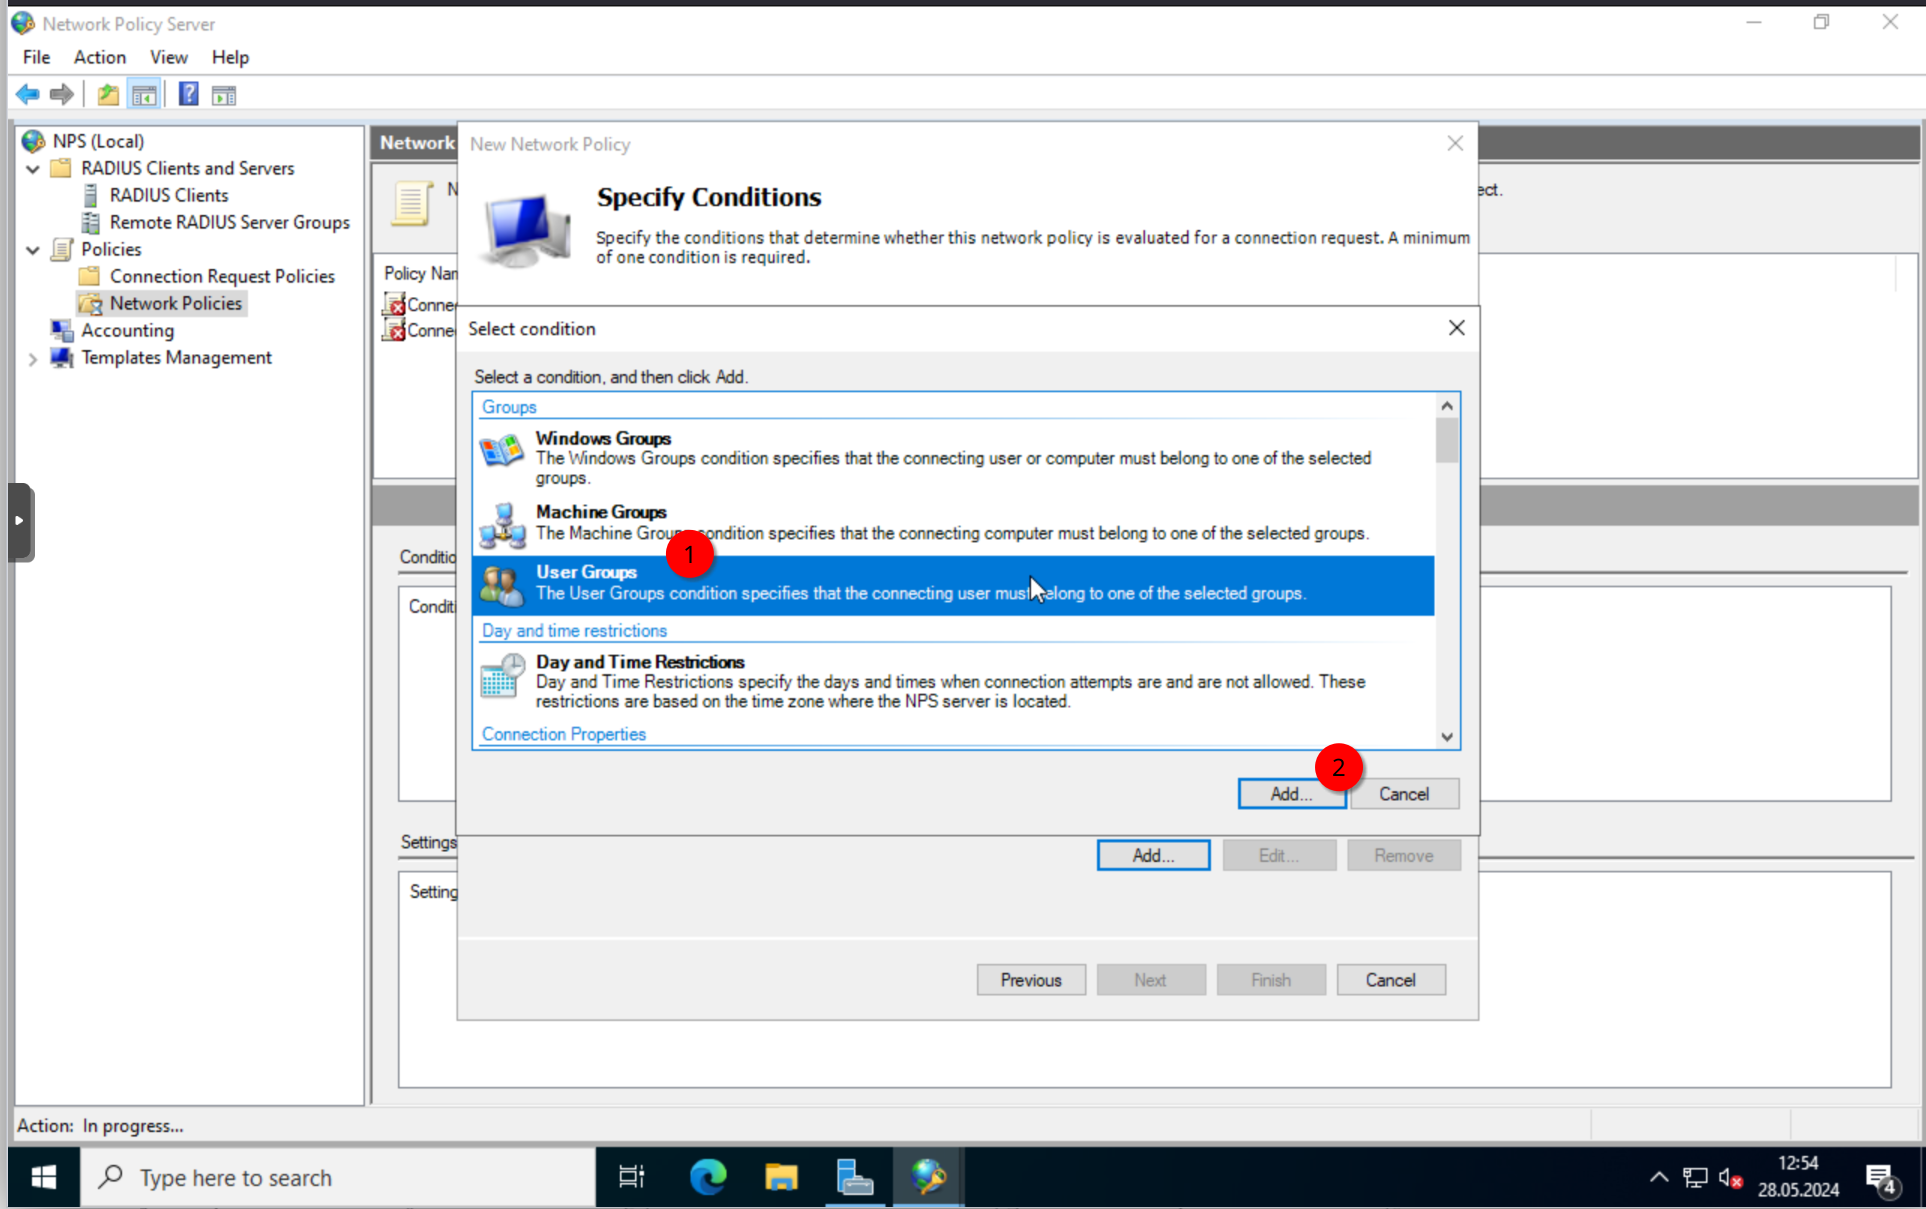
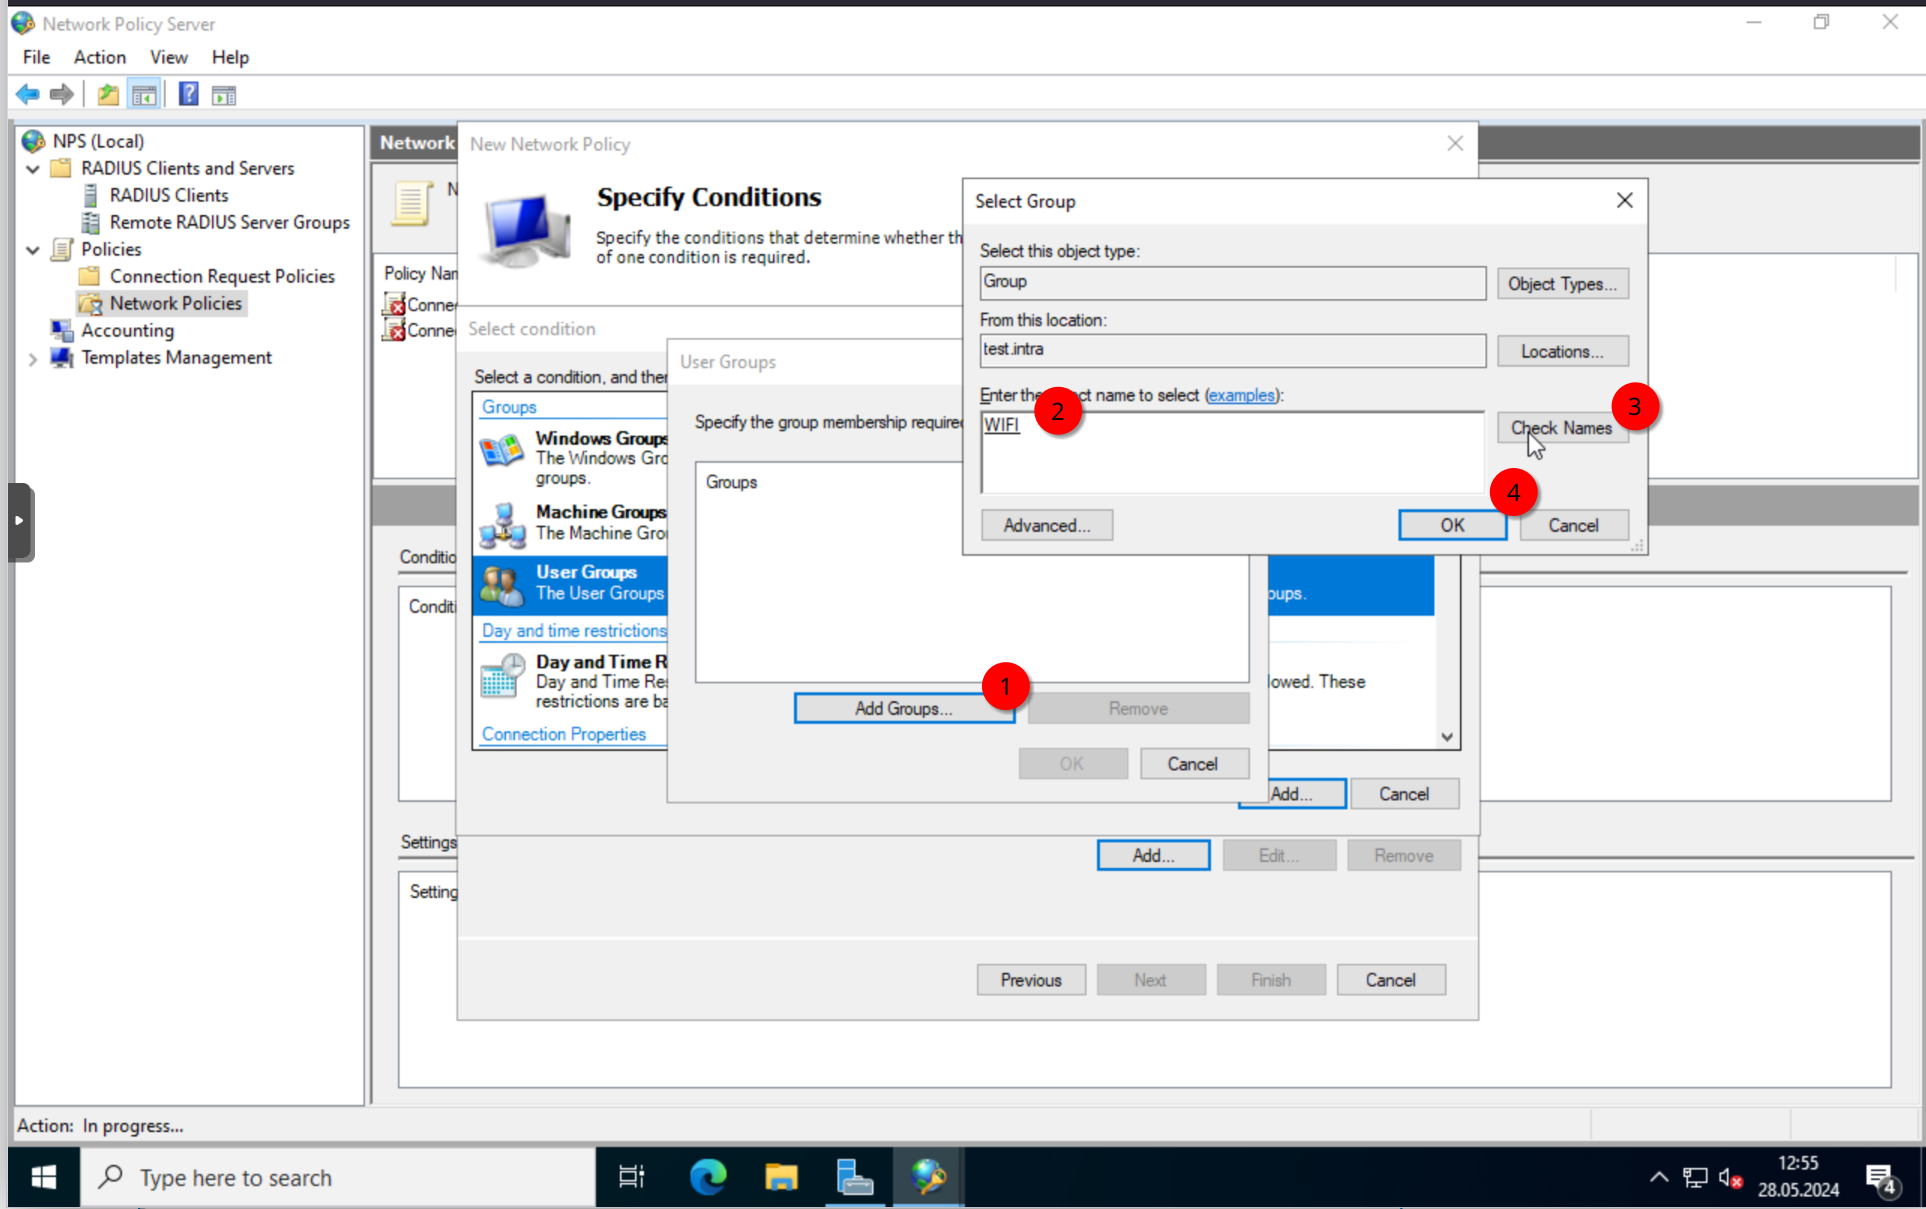
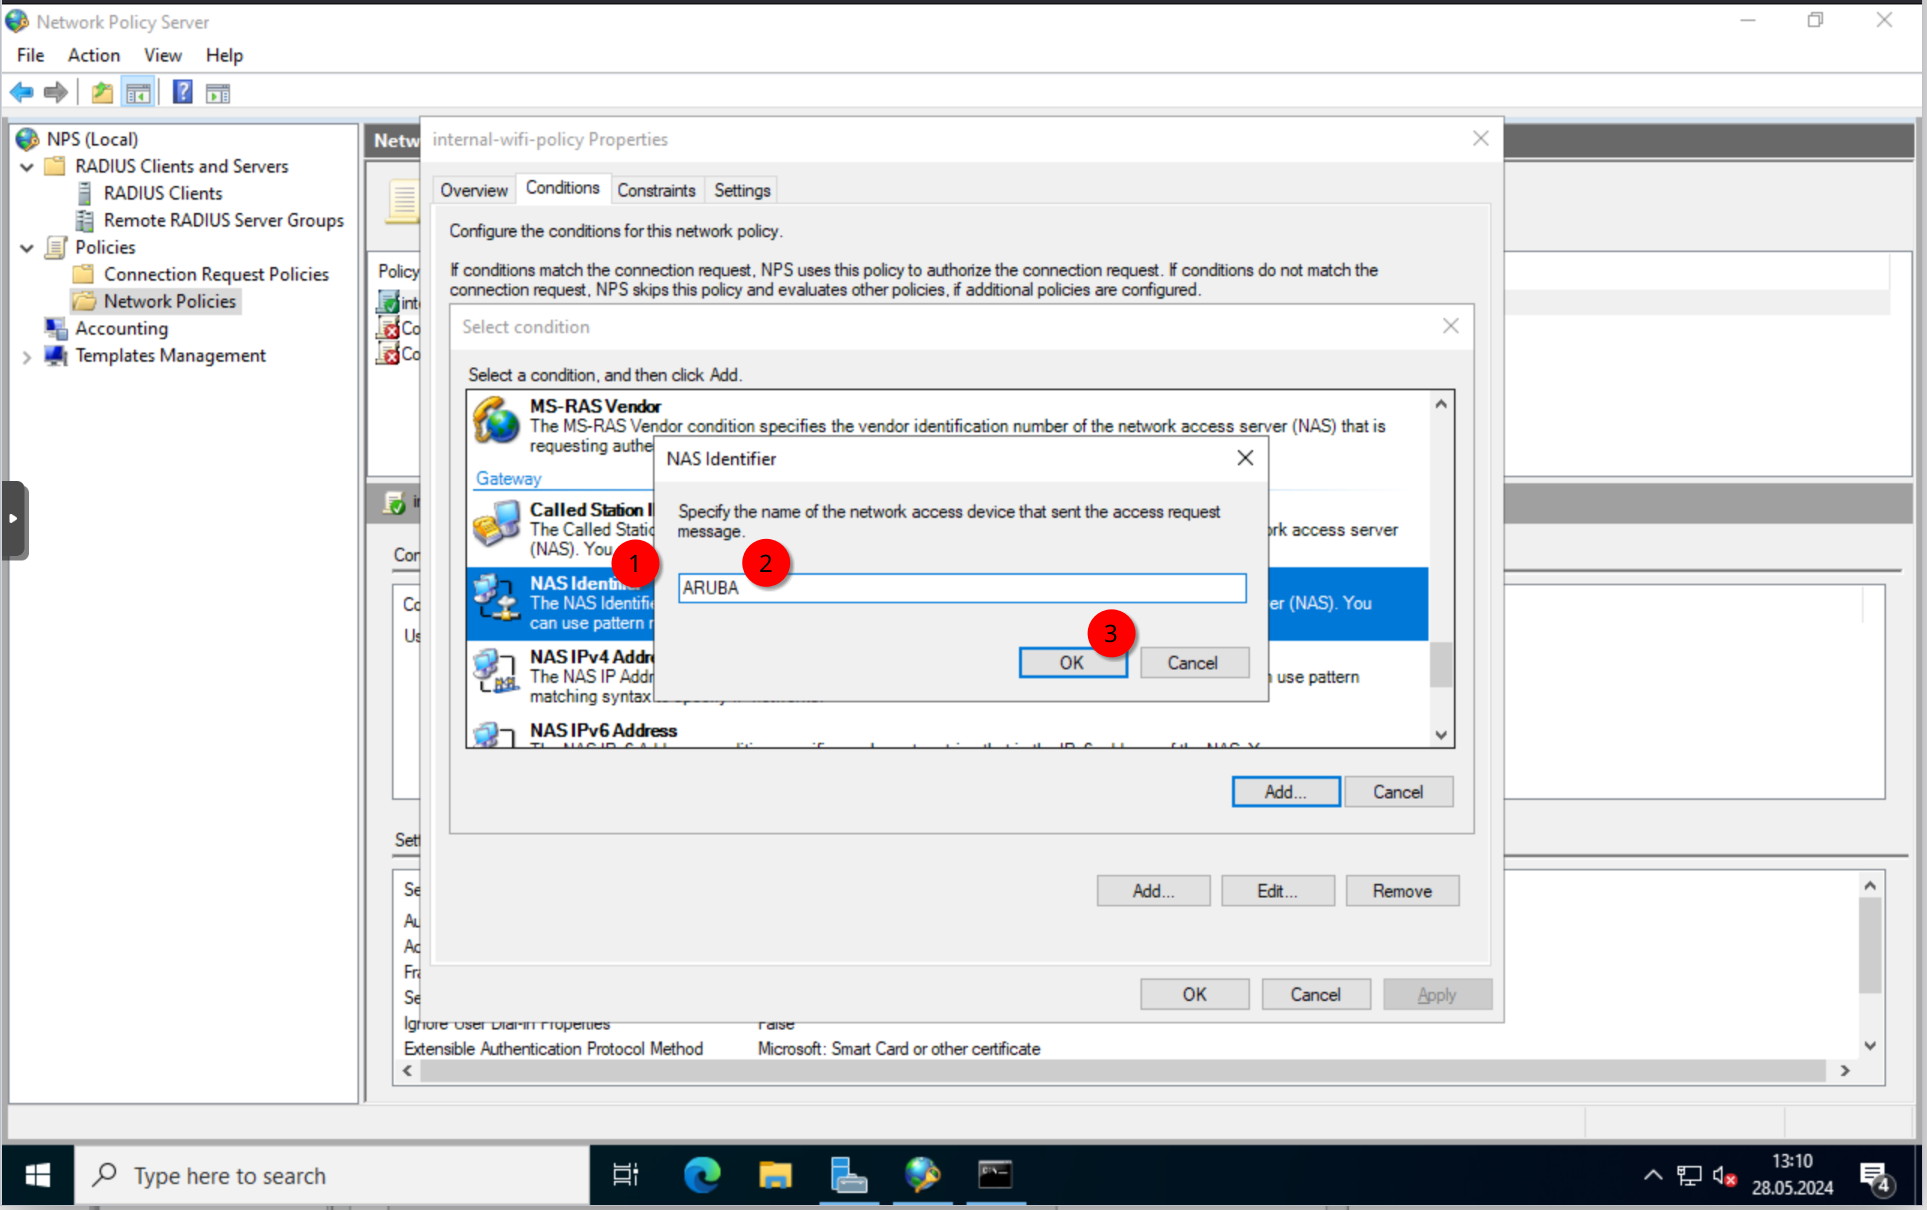
Now add the “NAS Identifier”, here you can type in whatever you want. I will use “ARUBA”. This has to be identical on the Aruba Access Point, we will configure later.
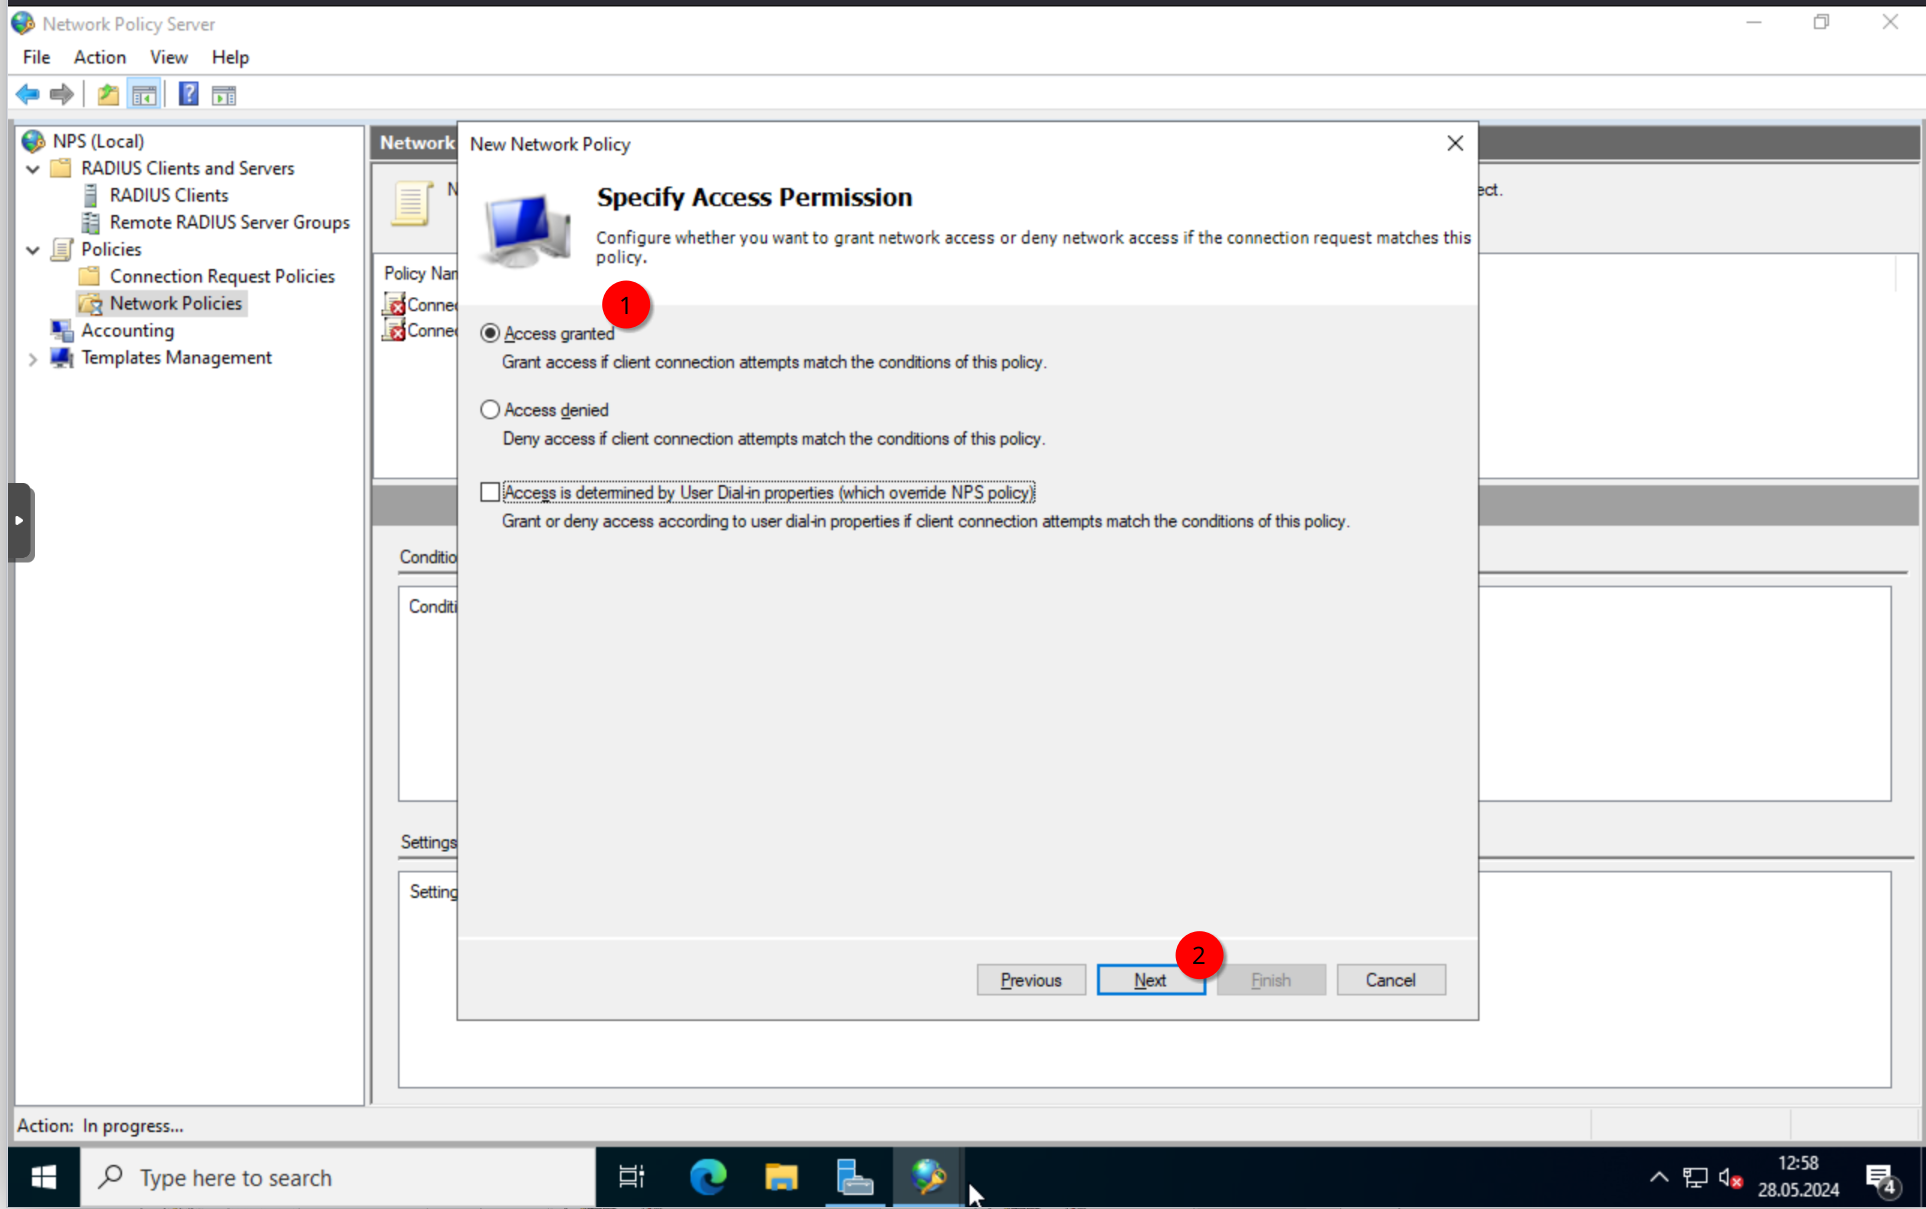
In the next tab, allow the access.
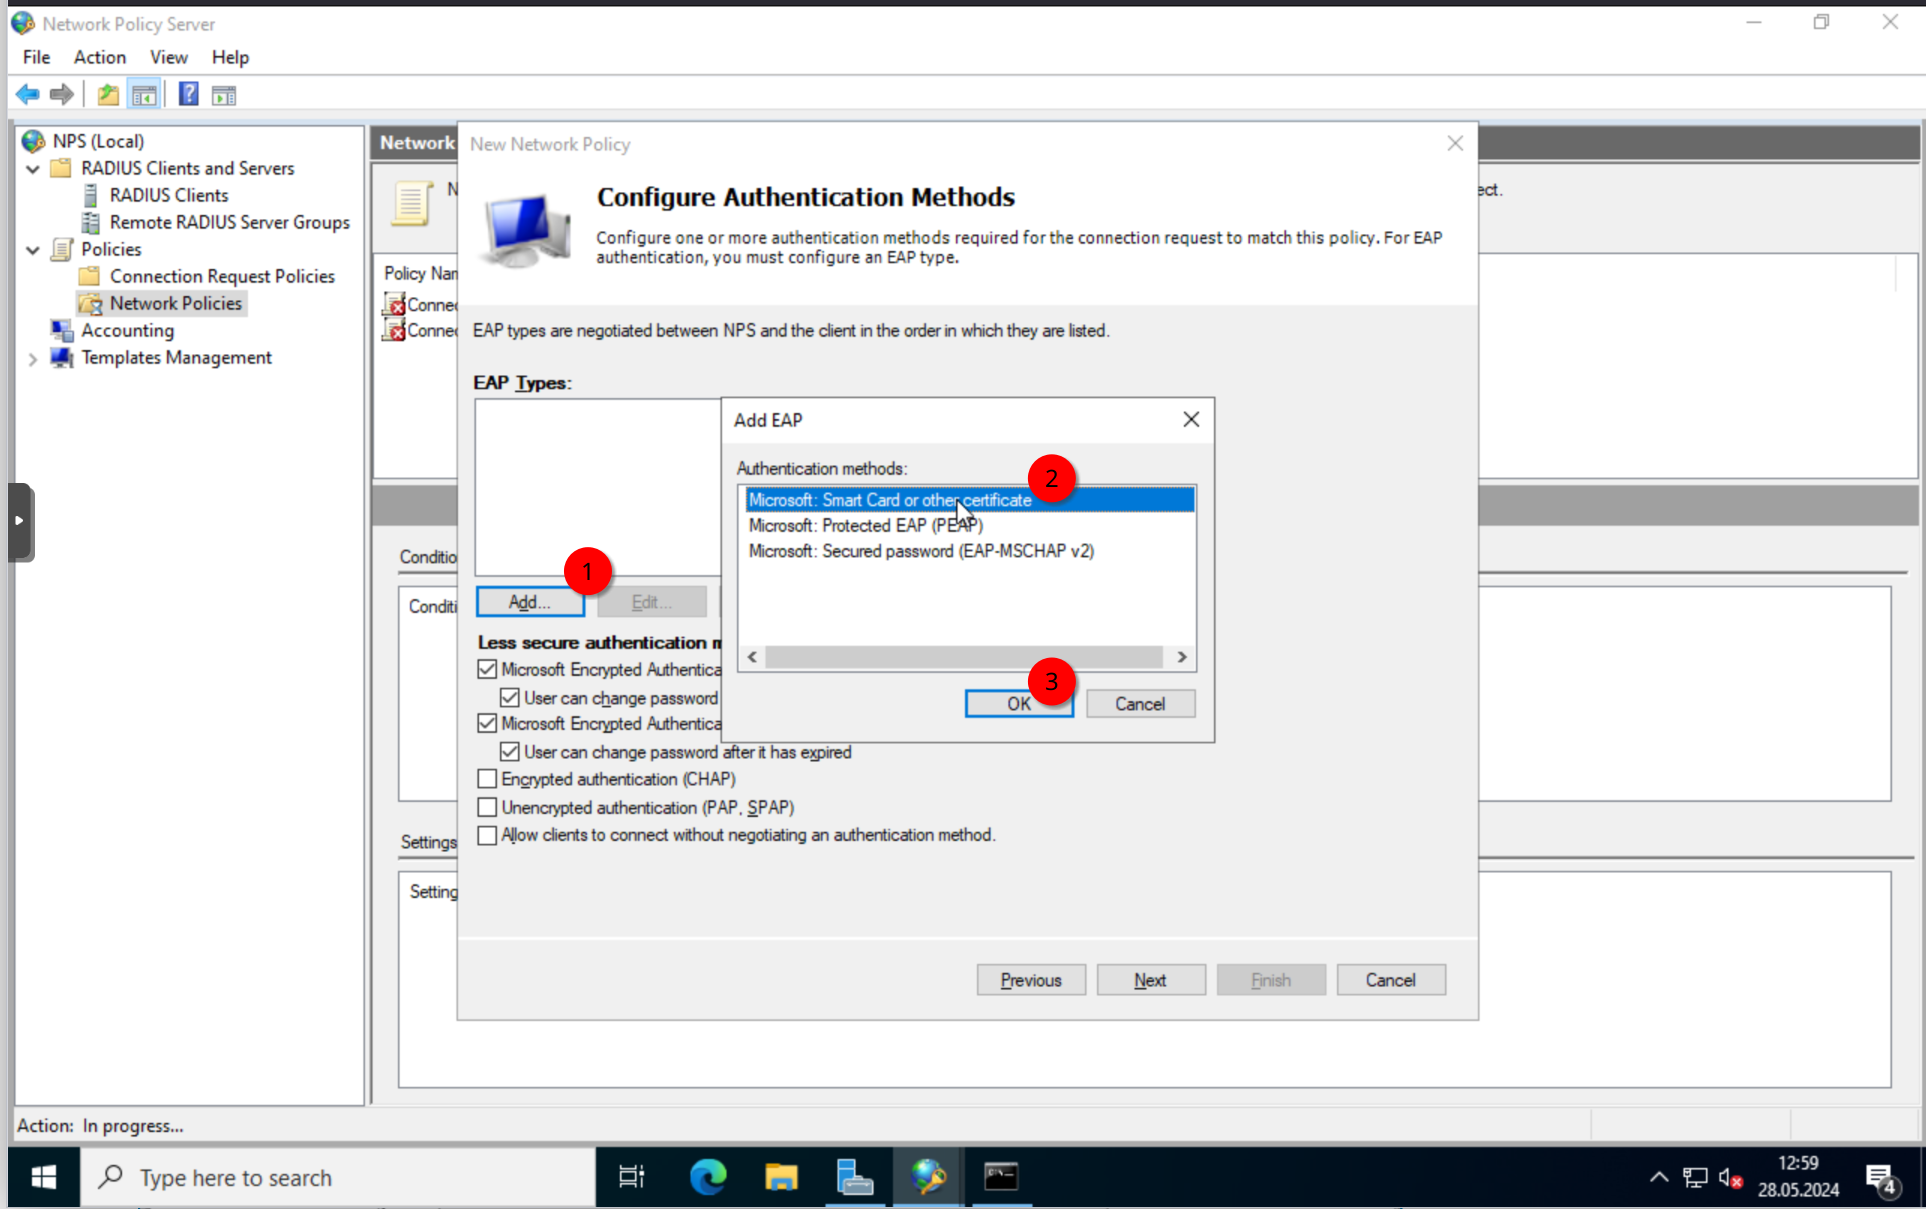
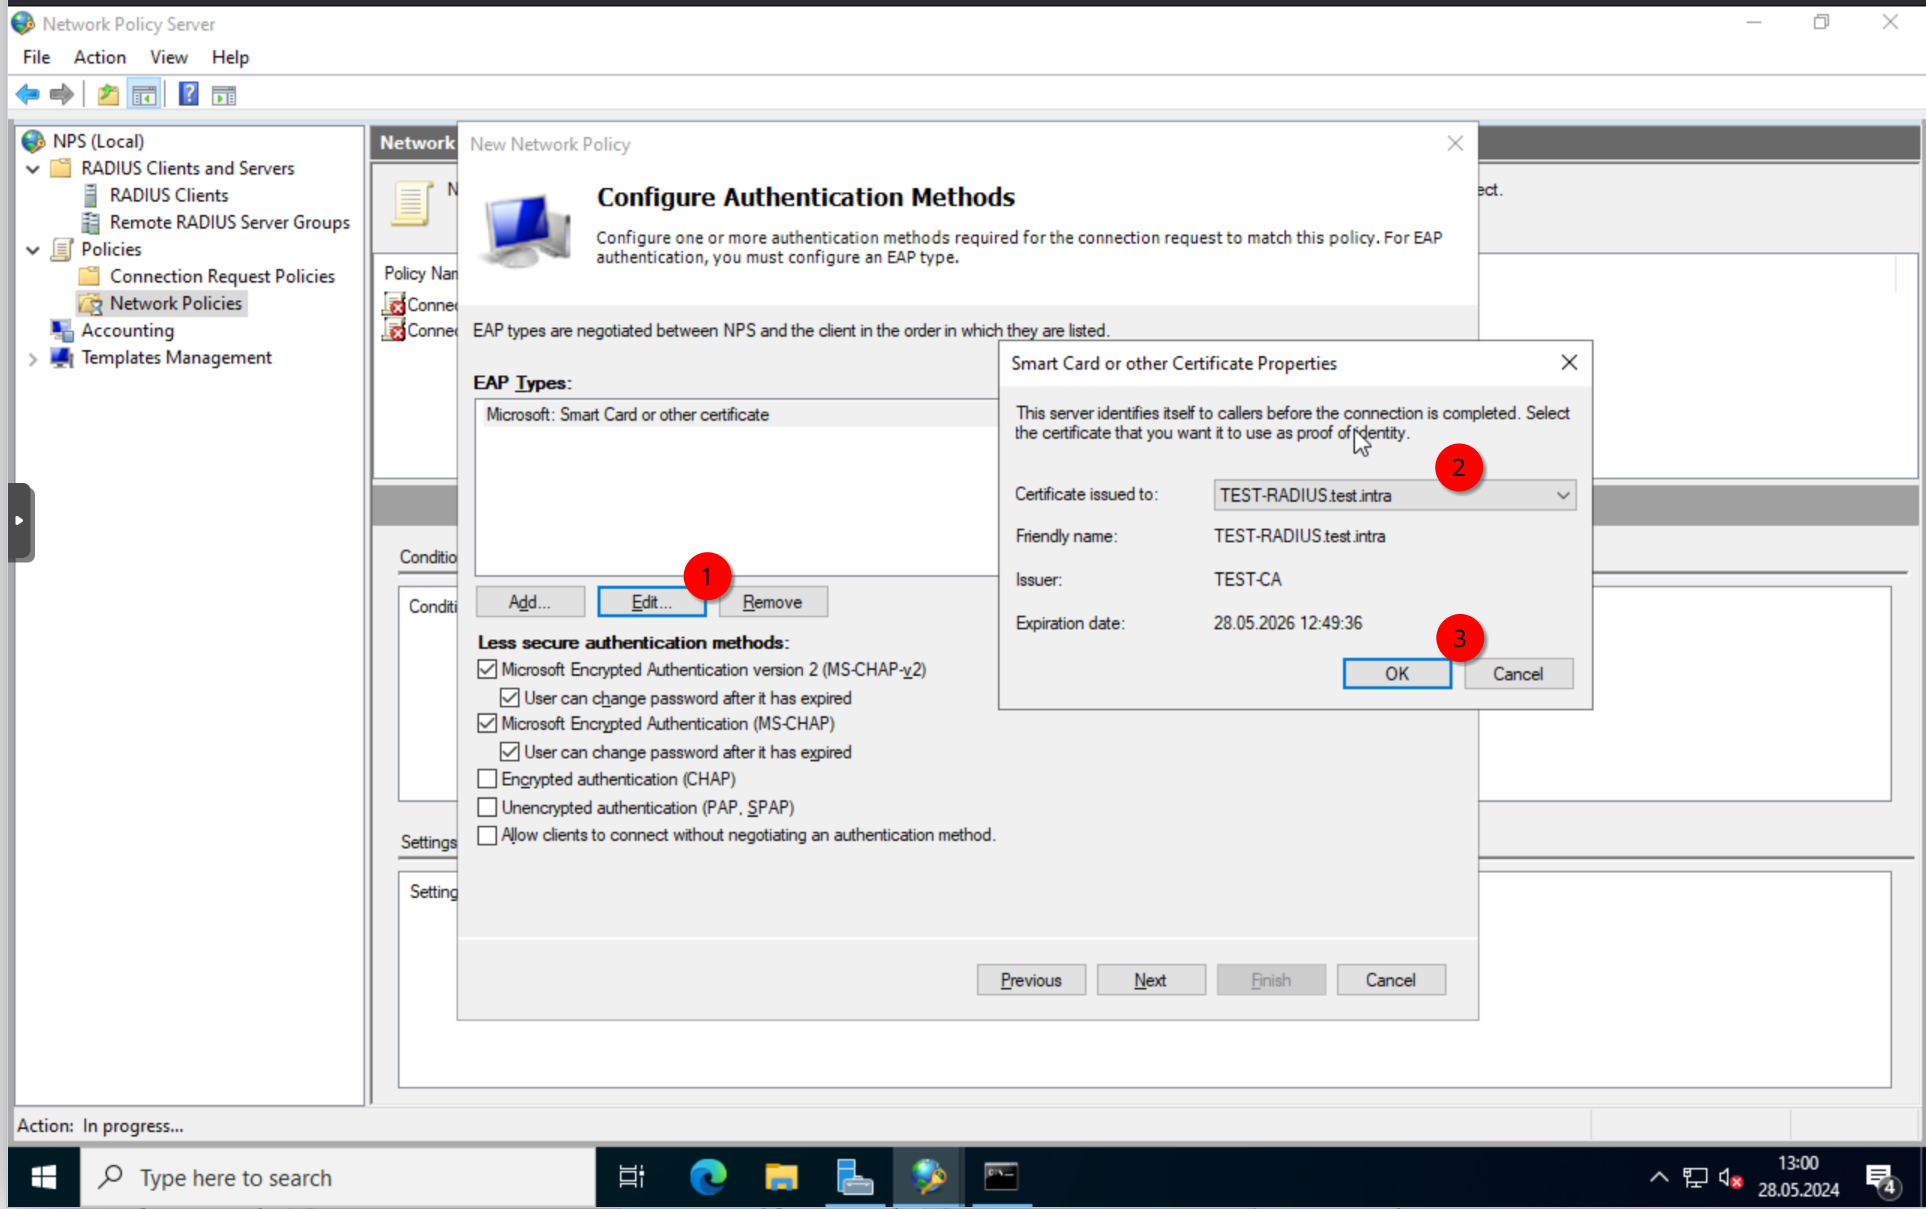
Now we can set the authentication method.
Click “Add…” and select “Microsoft: Smart Card or other certificate”. Once added, click on “Edit” and select the certificate generated by the TEST-CA server.
Error Message when adding “Microsoft: Smart Card or other certificate”
If you receive an error message when clicking on “Edit”, make sure that the certificate has been generated. Try the “gpupdate /force” command and if that does not work, check that your server is in an OU with the correct group policy assigned to it.
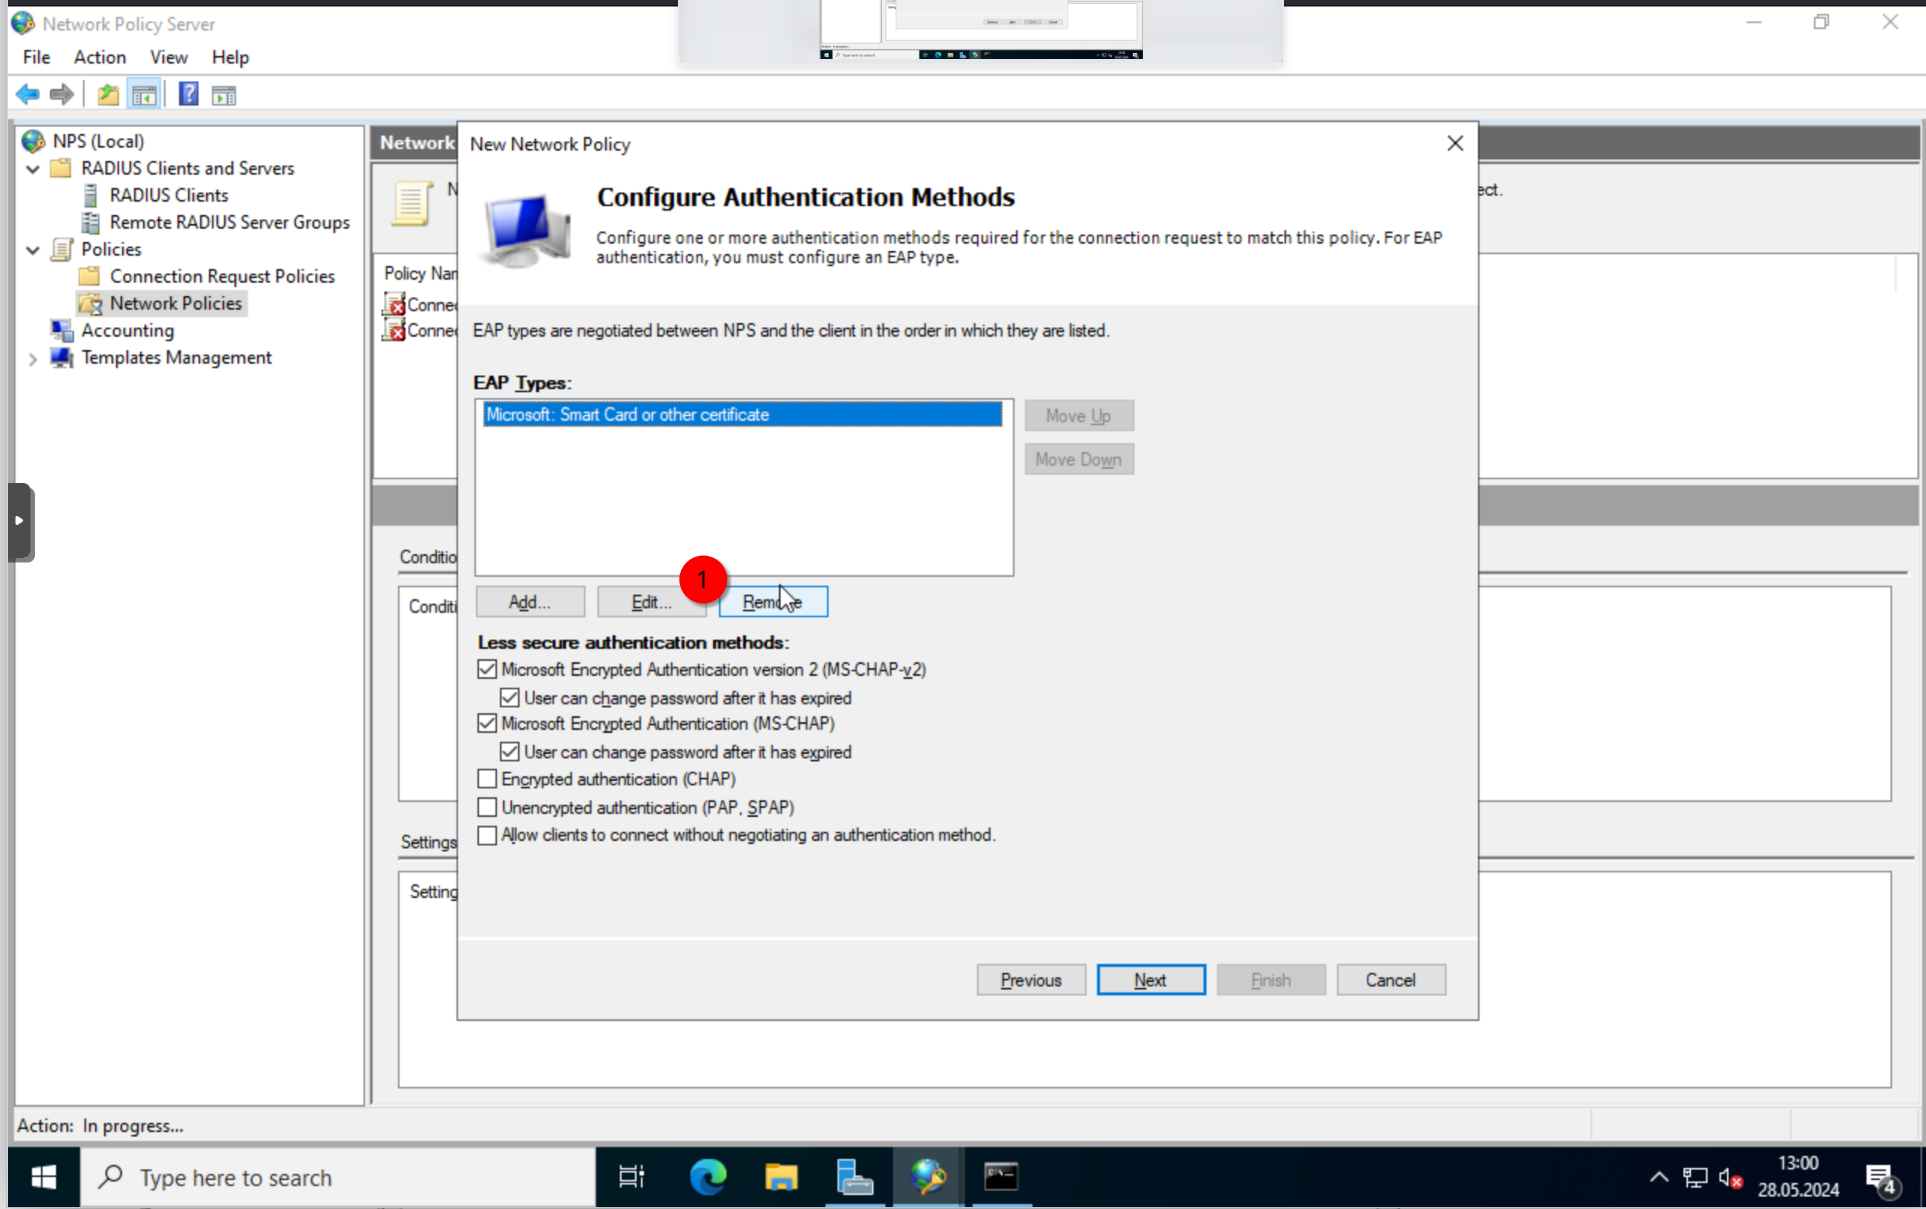
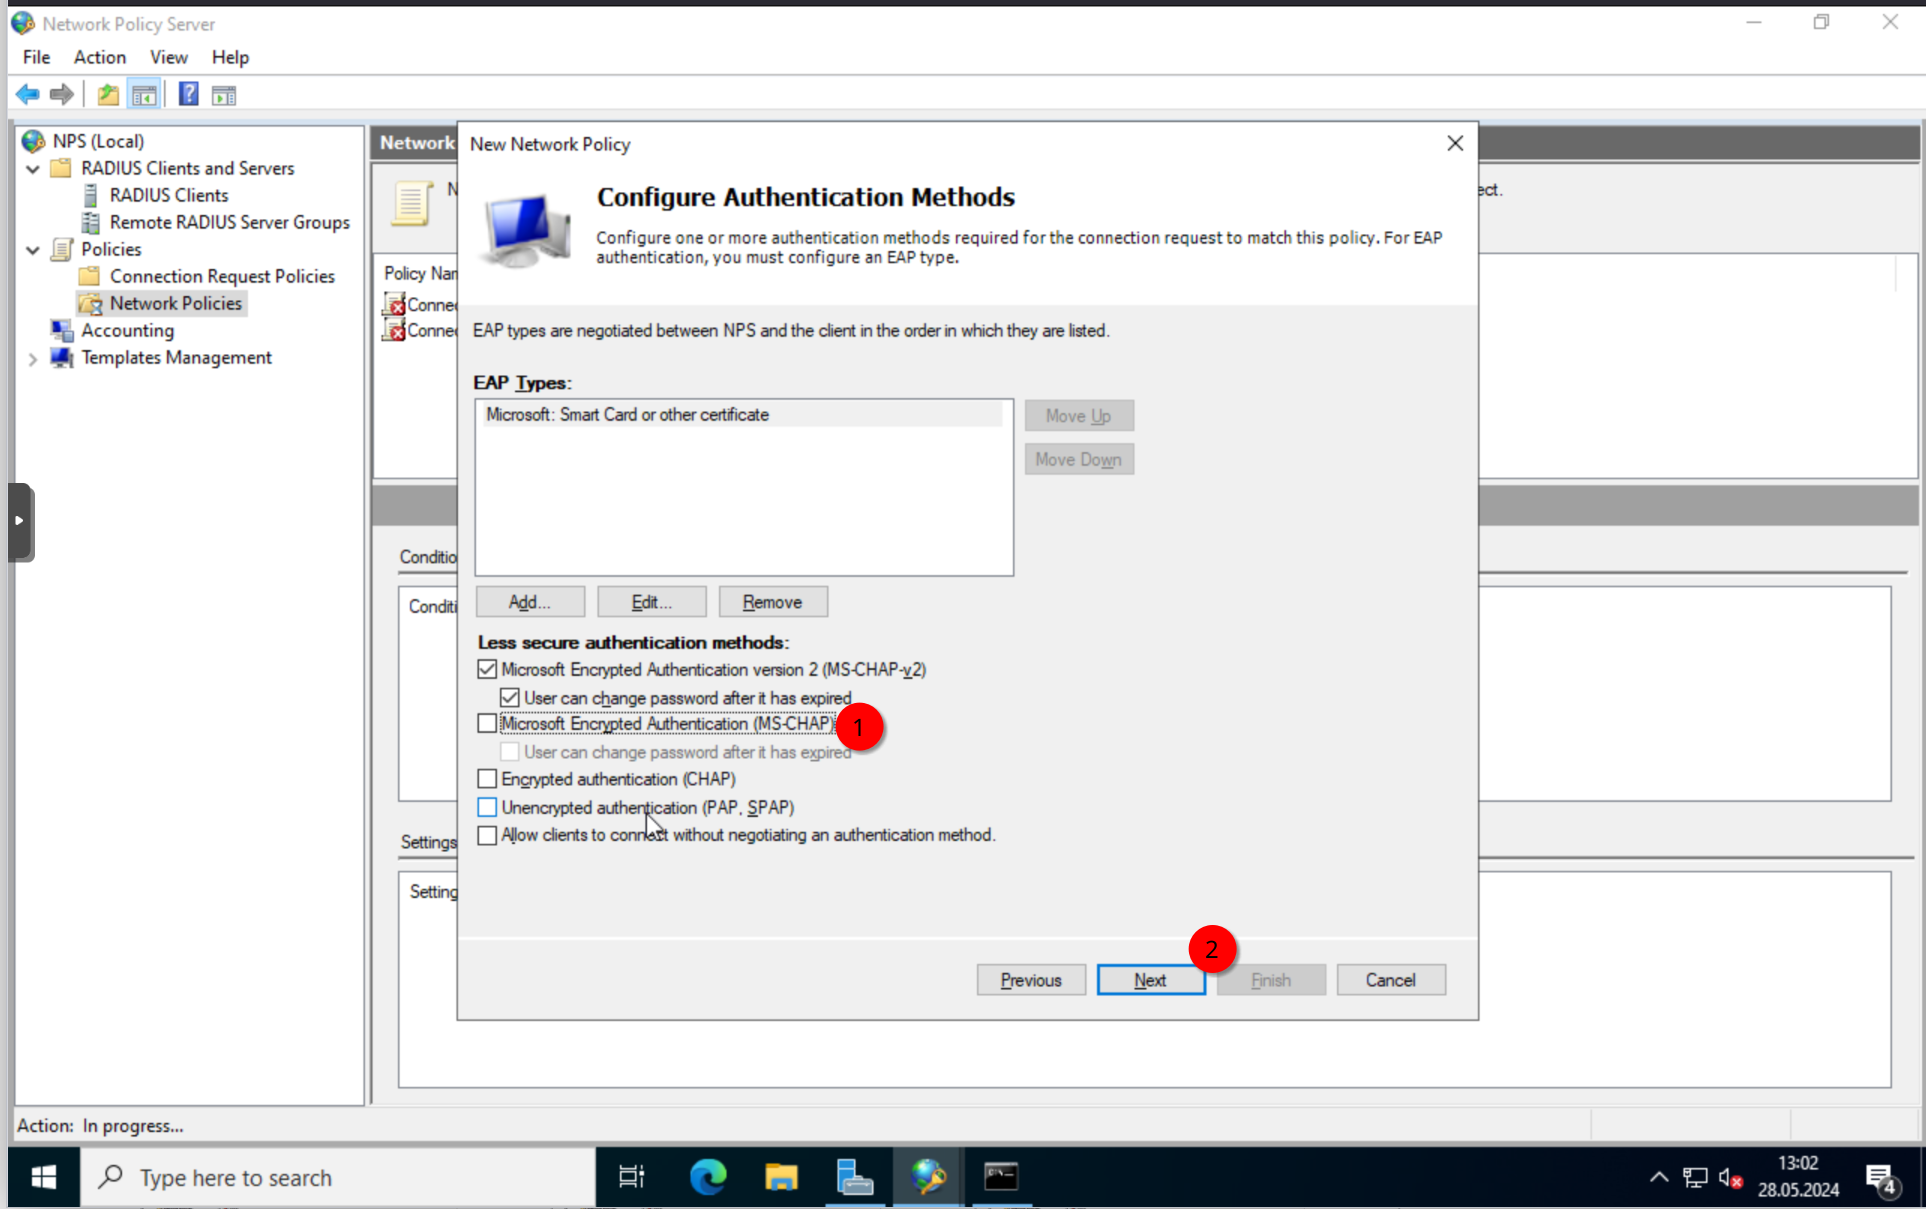
Remove the “MS-CHAP” and click “Next” until you finish the configuration.
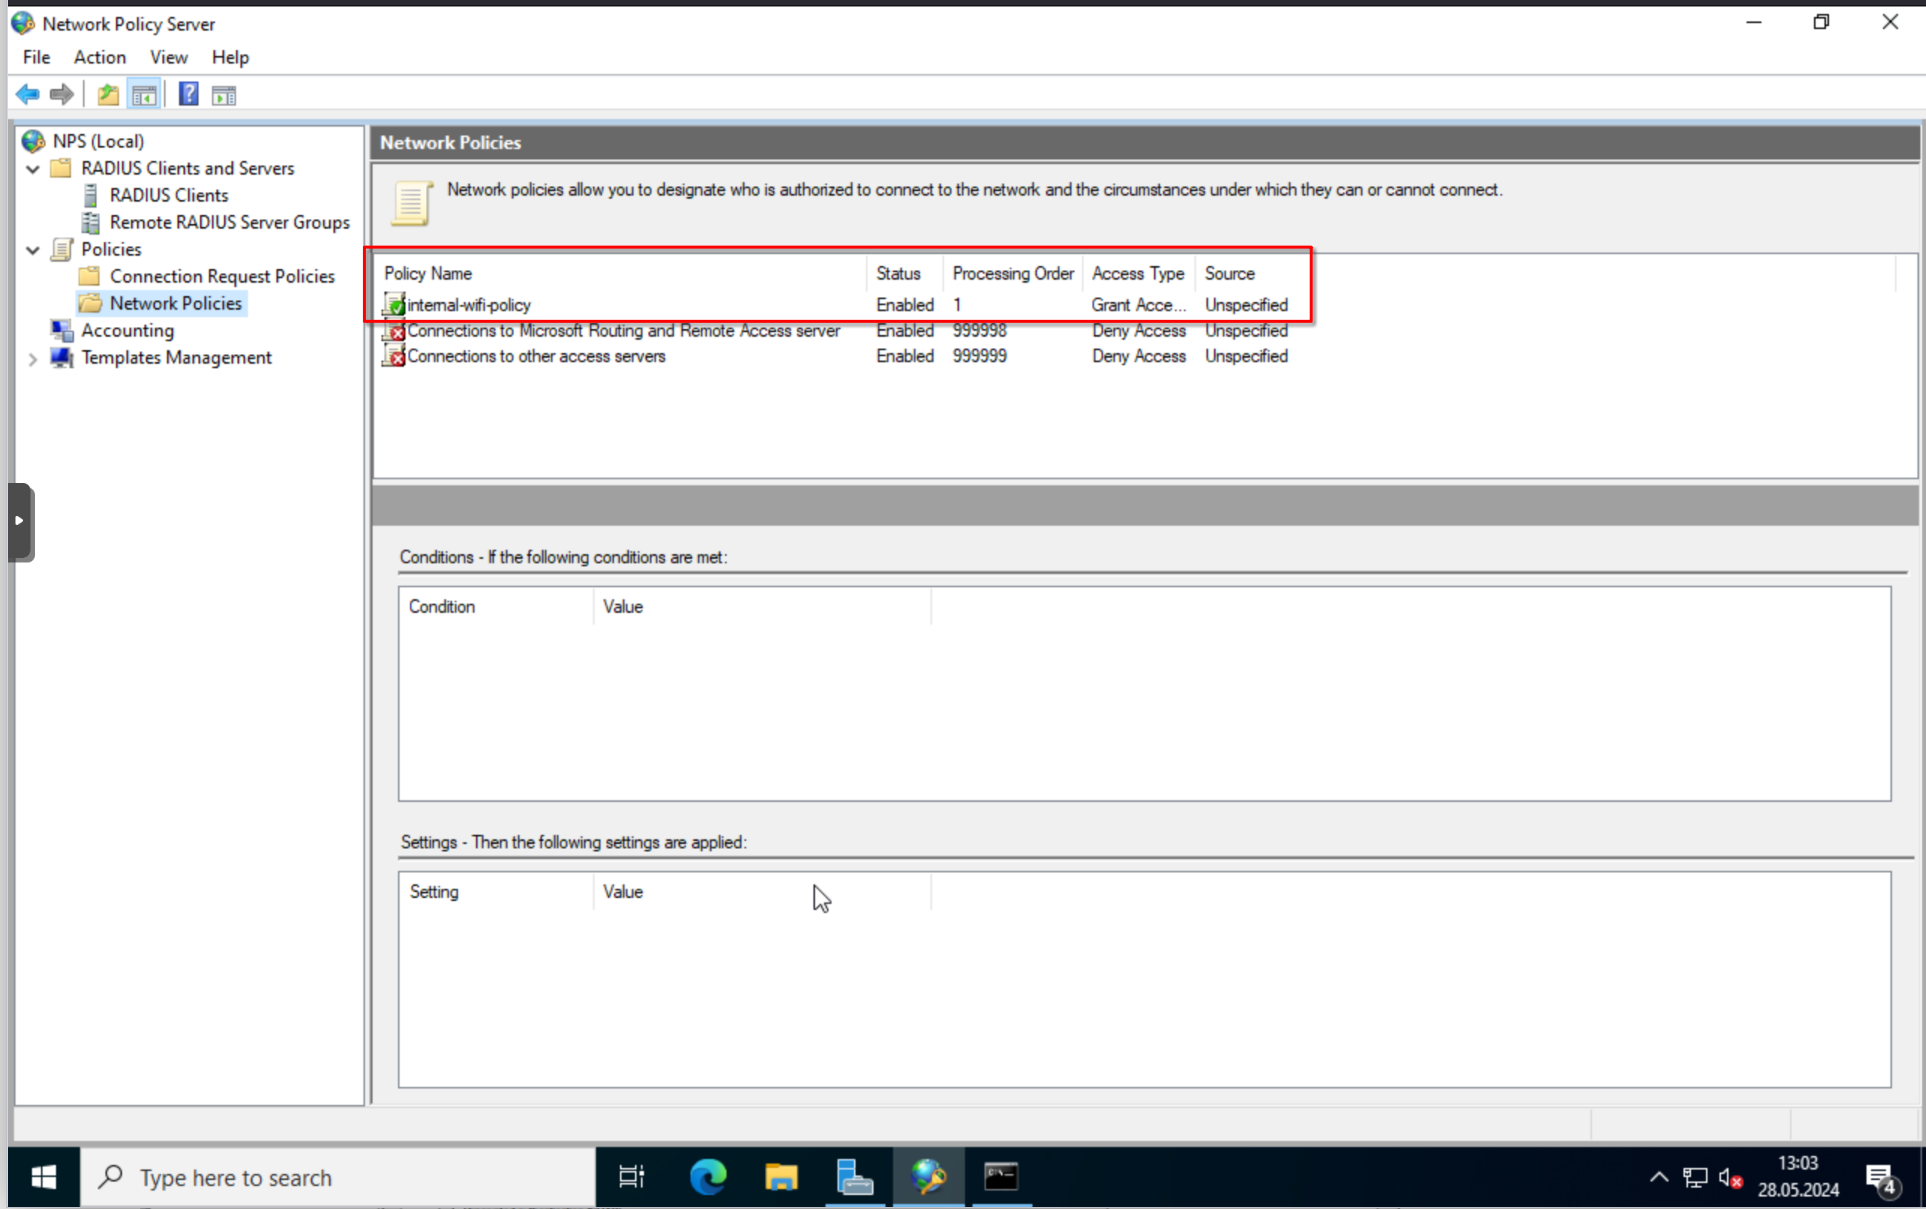
Alright. That’s it.
Aruba Virtual Controller Configuration
Let’s configure the Aruba Access Point.
I will not show the whole process, since the Aruba AP is only an example. The configuration should be similar on other APs.
Login and navigate to “Configuration” -> “Security” and click on the + in the “Authentication Servers” section.
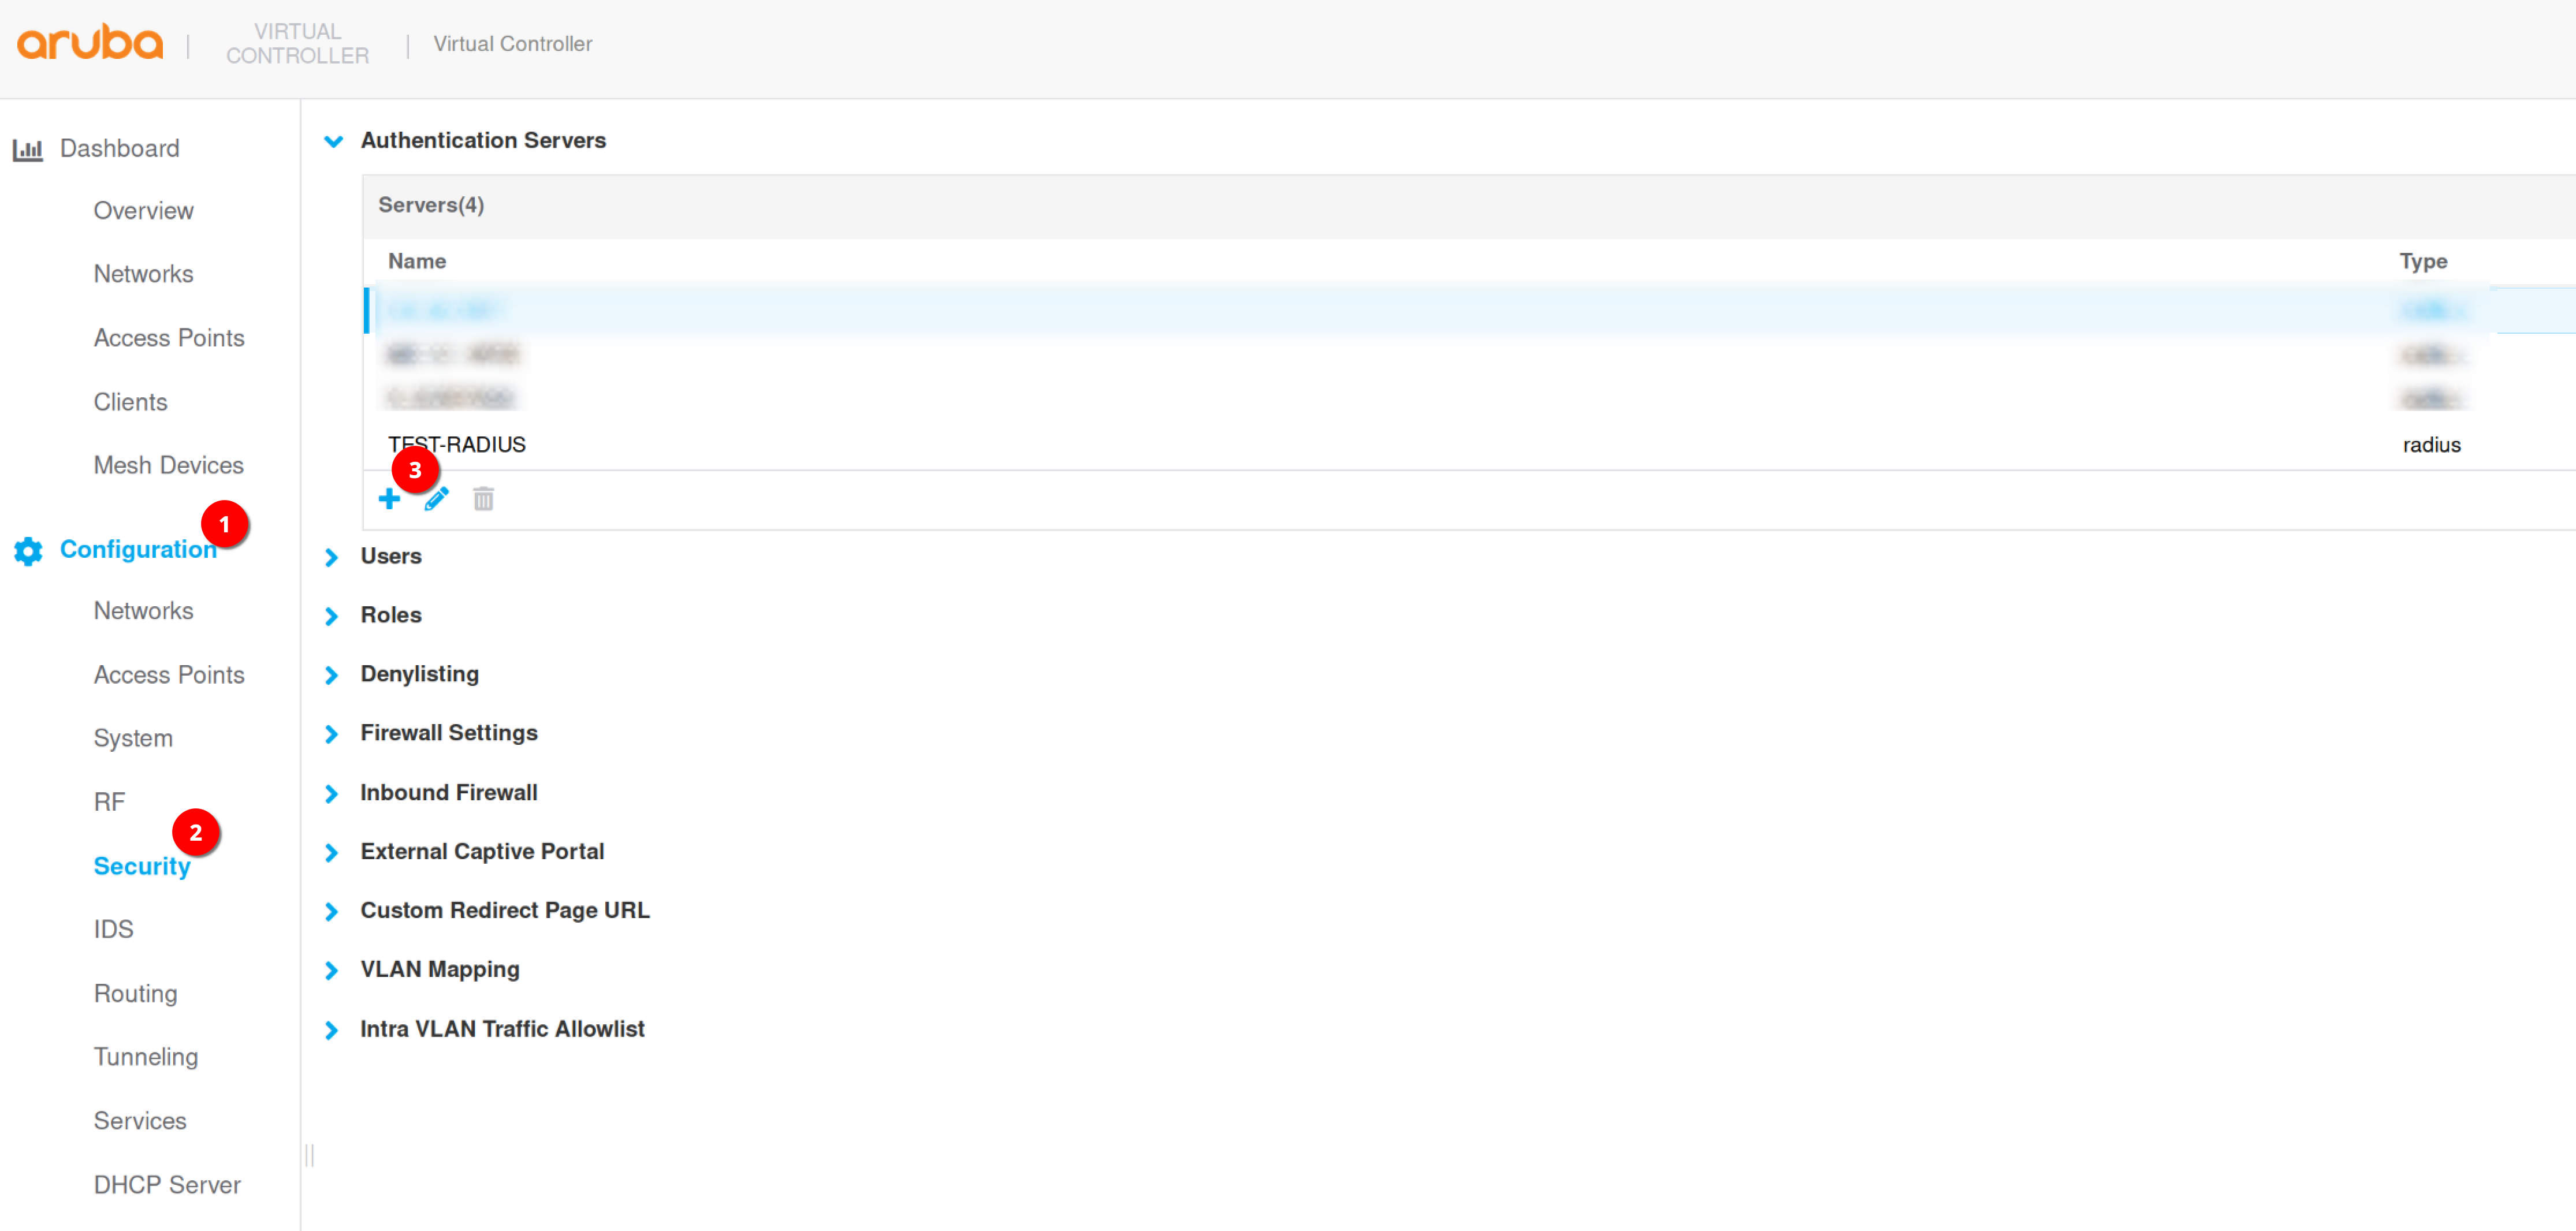
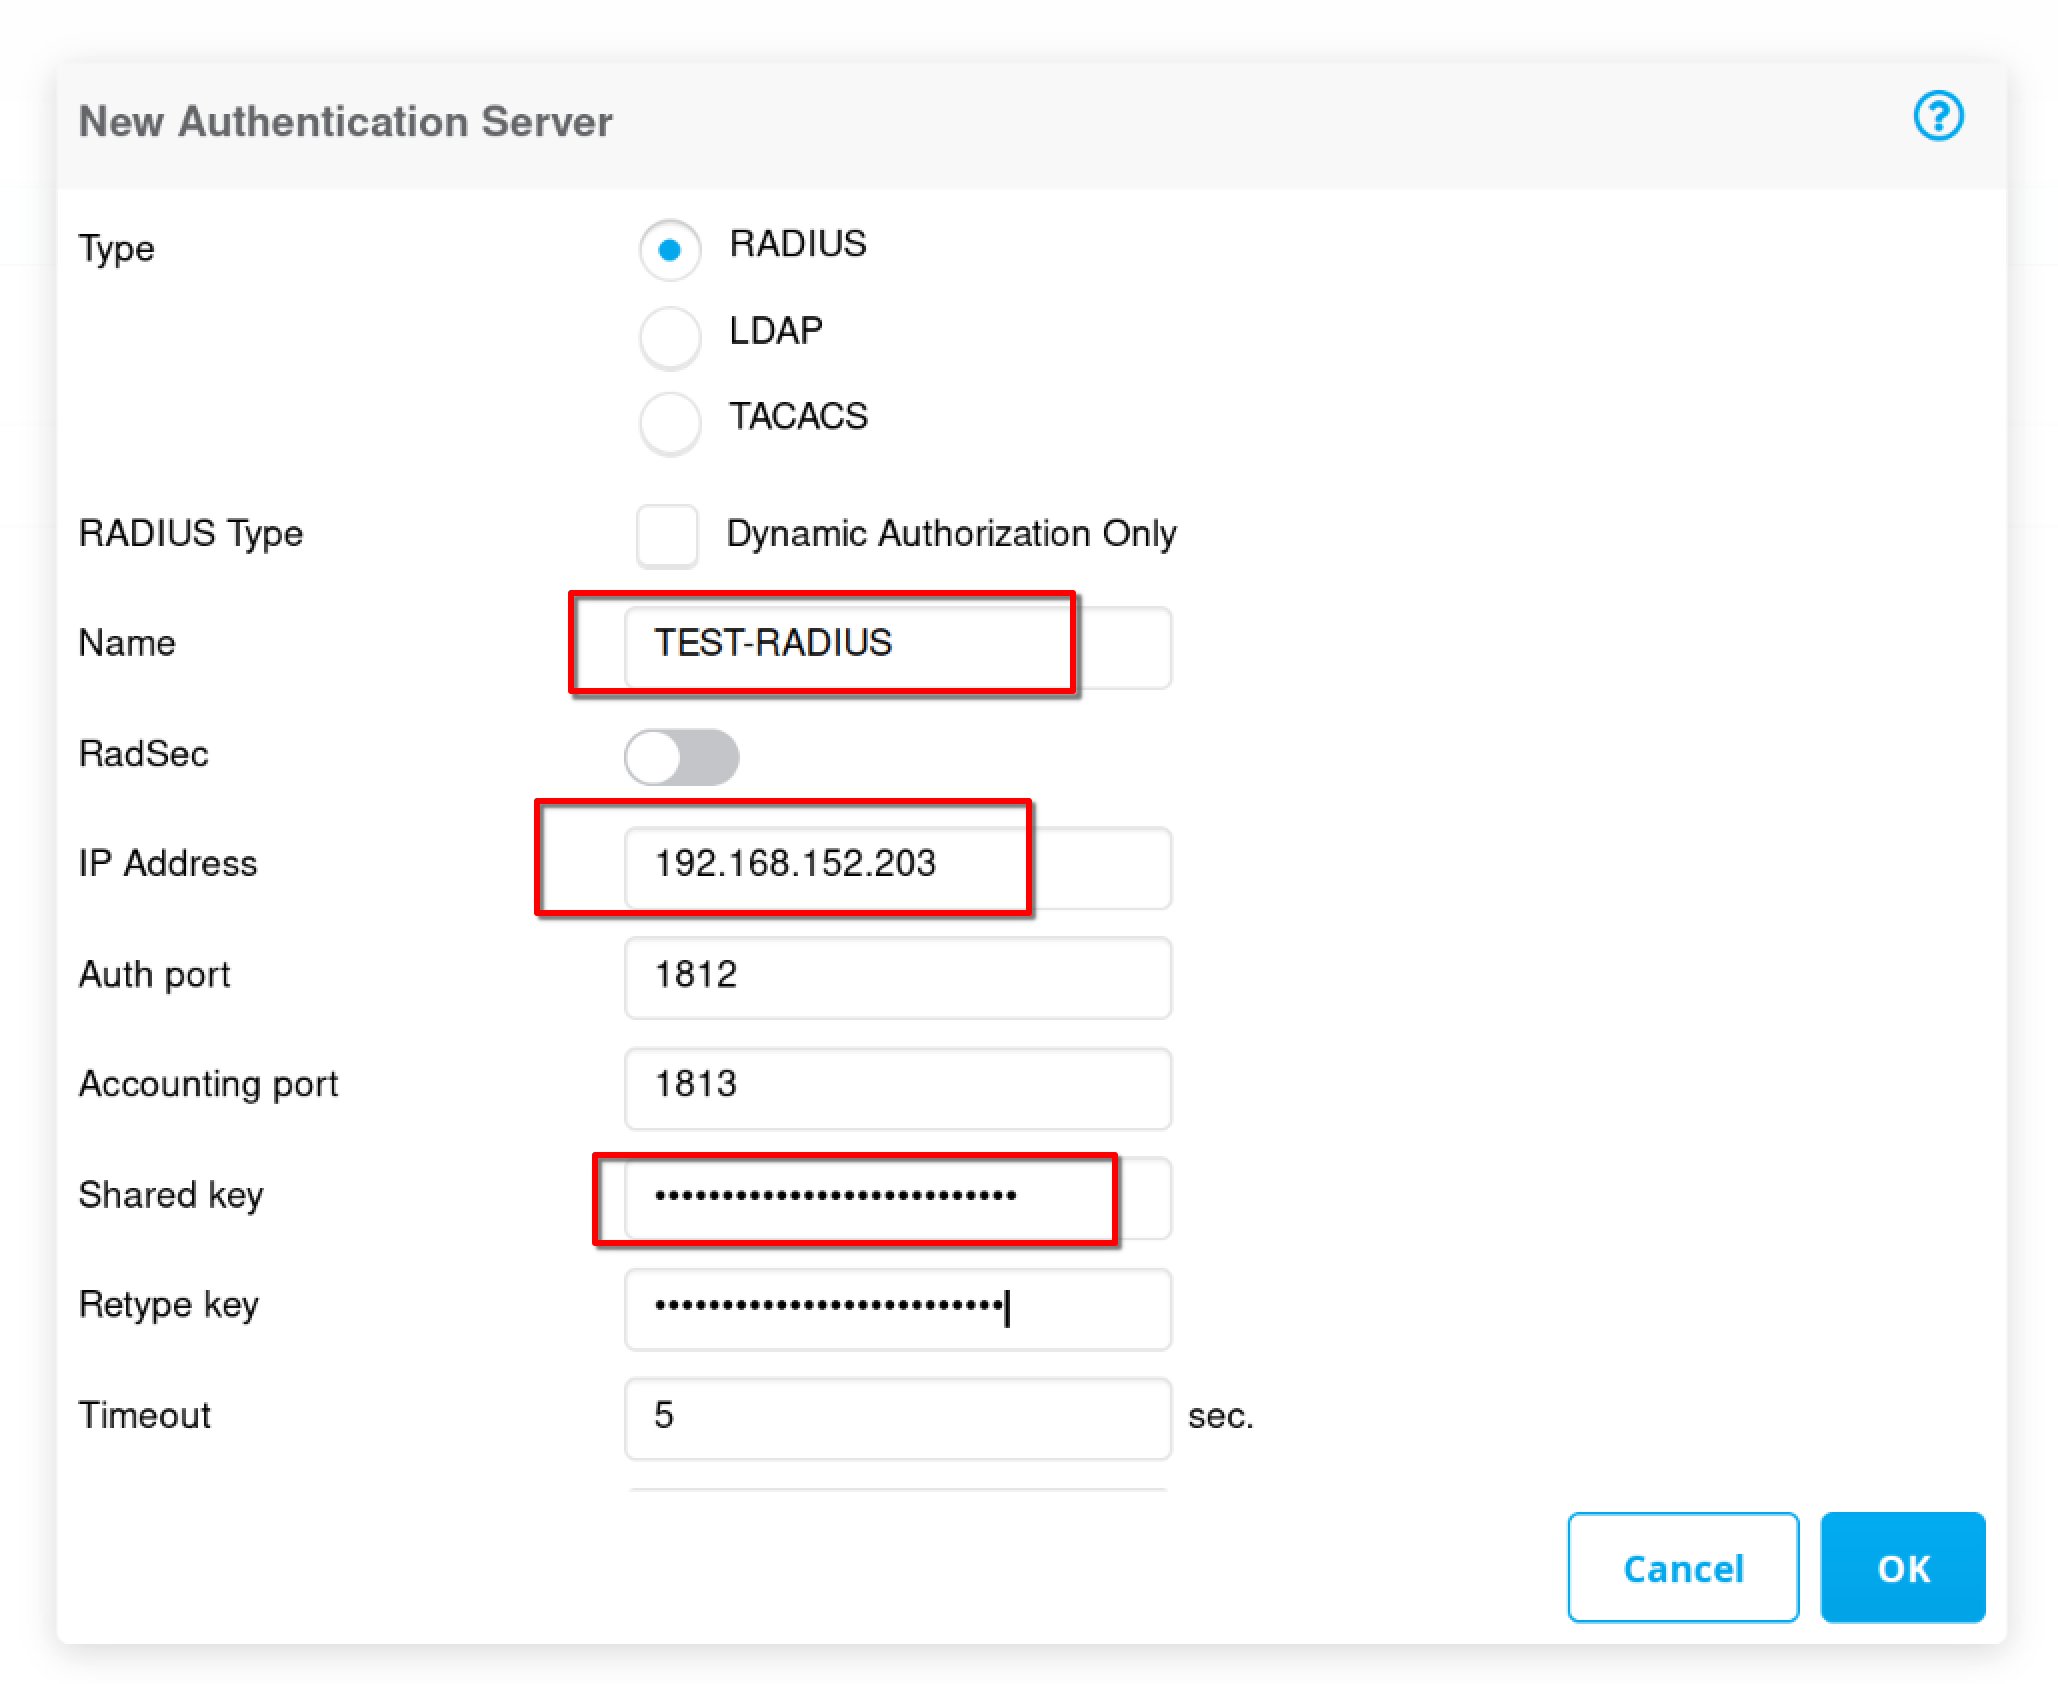
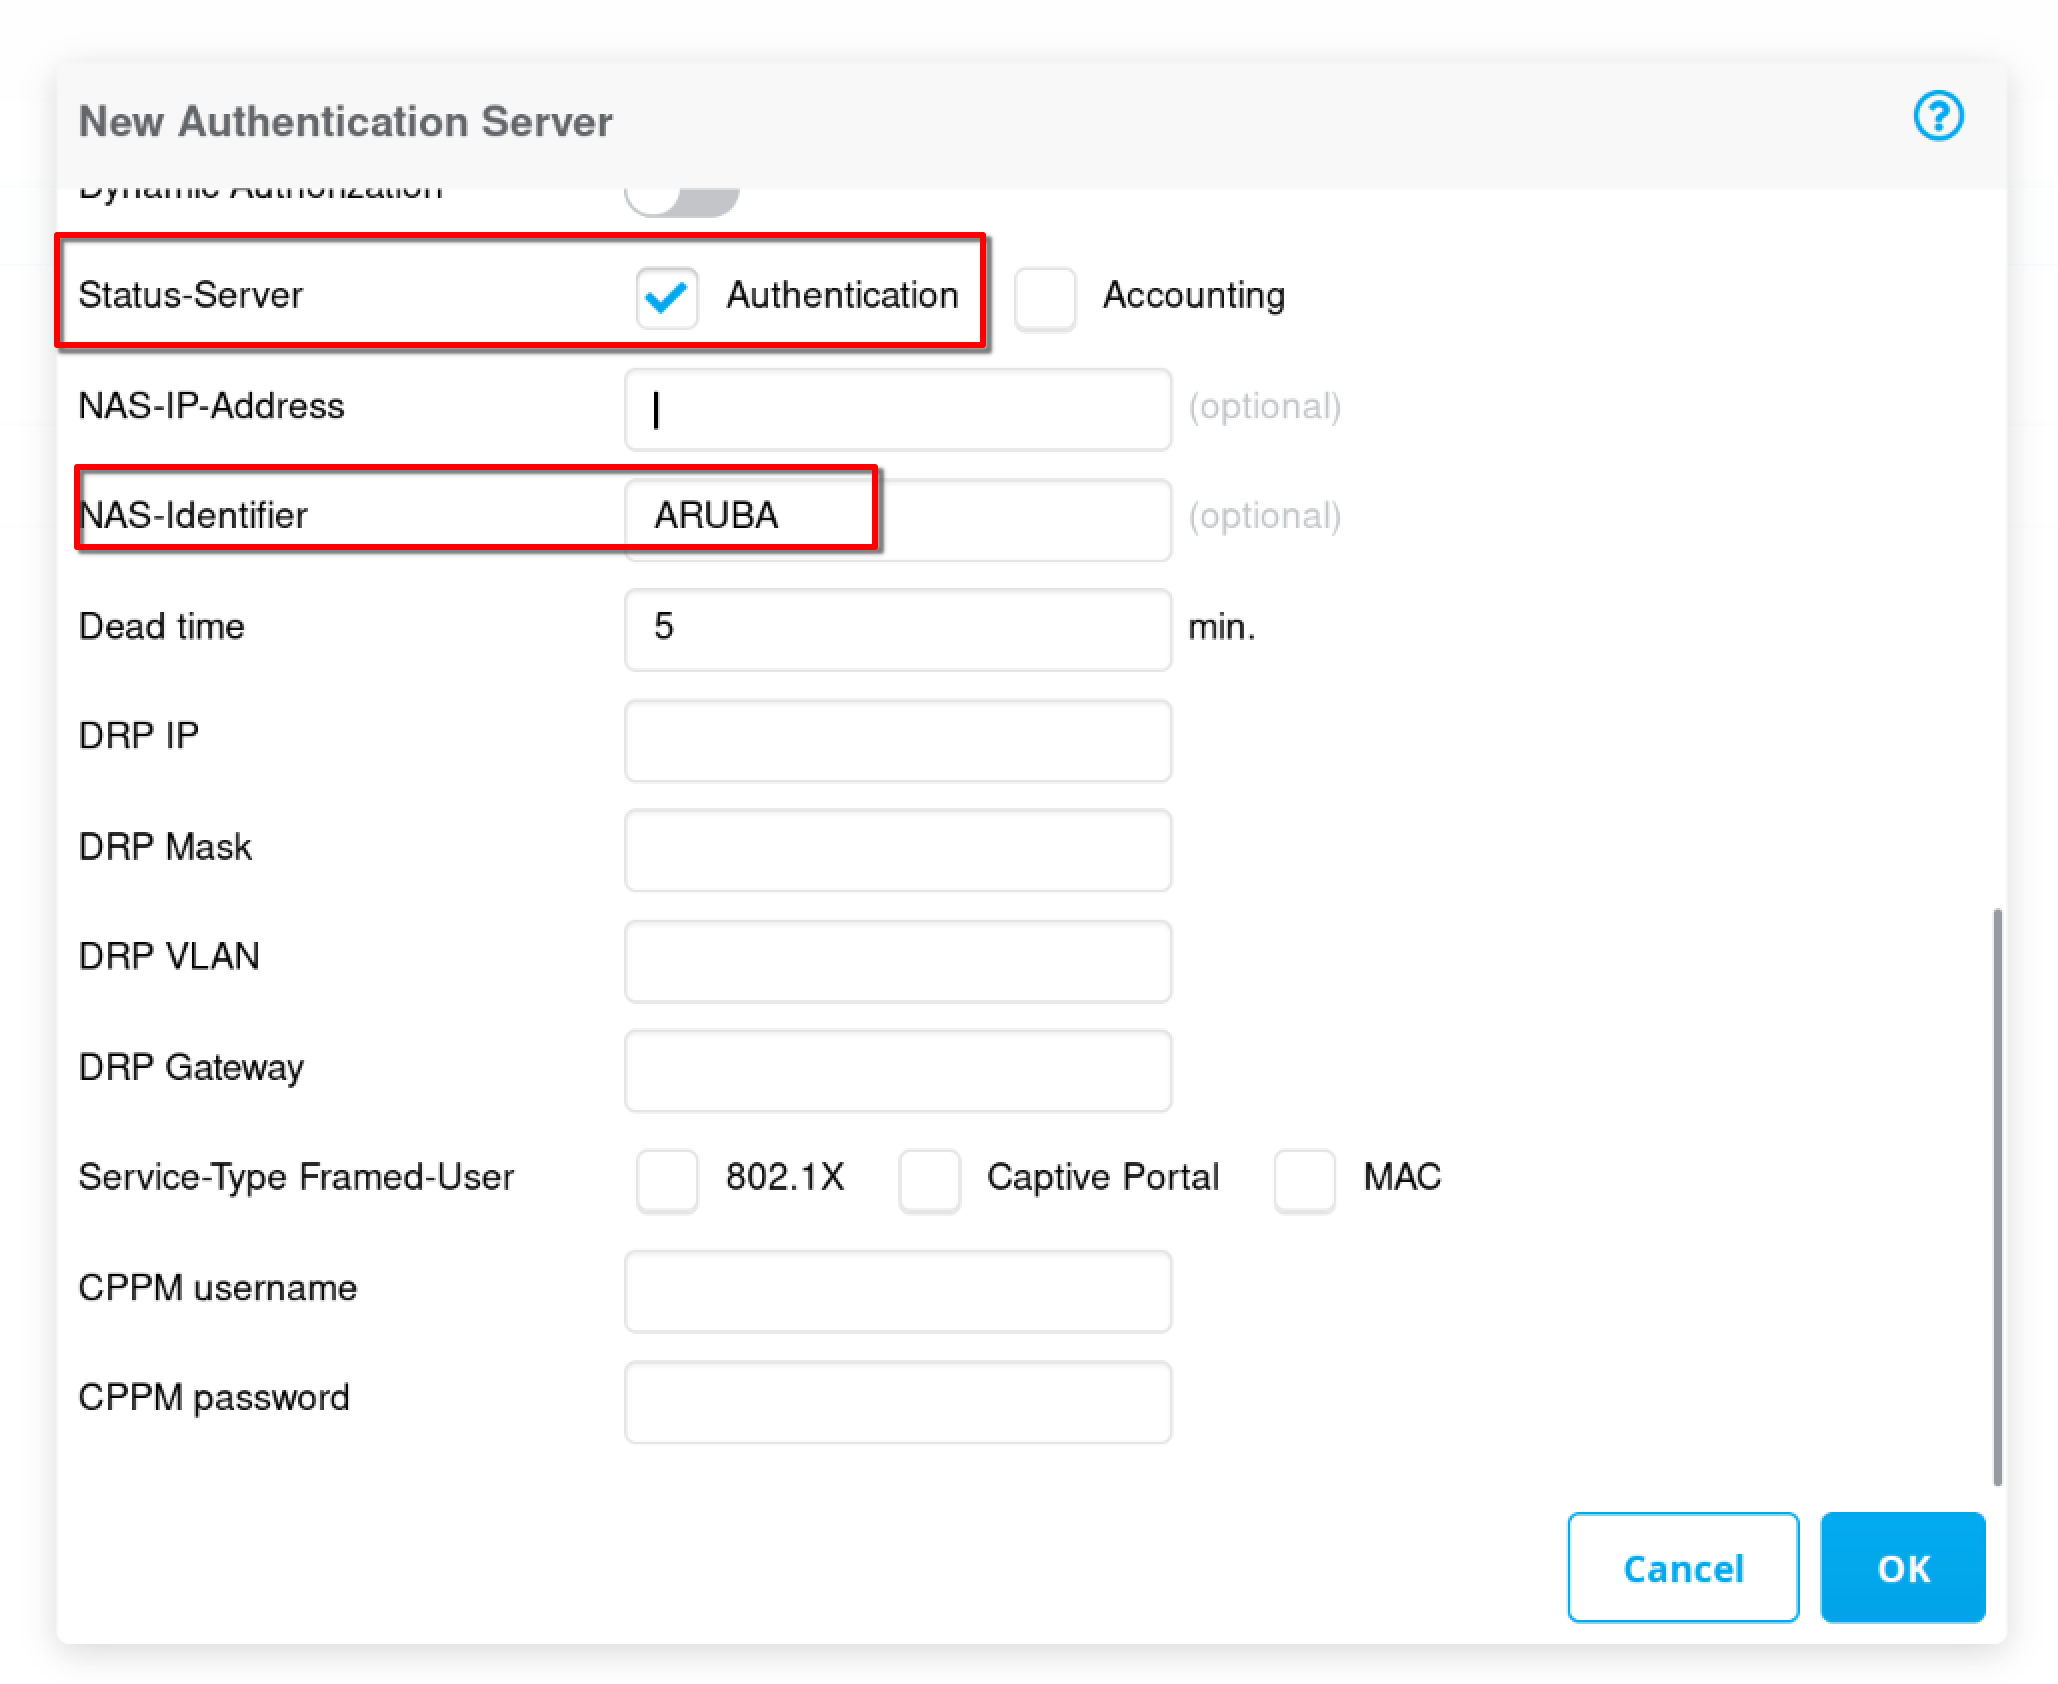
This should be enough to get a connection.
The Ending
Ok. That is it. We are at the end of the series “Deploying Windows Server Environment from Scratch”.
At this point, we should have a baseline for our small business. This will allow us to build upon our infrastructure, deploy new server and applications and having a centralized user authentication and management platform.
I might continue the series, if I can think of anything else, but that’s it, for now.
I might do this using Linux as a base. Hmm… we will see.
Till next time.
Comments