Hello there,
a few days ago, when I was checking my backups on “borgbase.com”, I thought “why does nothing similar to this exist, that I can self-host”. Well, apparently there is. It’s still a very young project but already very impressive.
Today I want to show you how to deploy and configure “BorgWarehouse” as a docker container (which was recently implemented) using Ansible and set up a simple backup.
I will also use Traefik as a reverse proxy for the WebUI. This is optional, and I will probably make a separate guide on Traefik at some point. But, I want to provide the whole configuration that I am actually using.
So, what is BorgWarehouse? Simply put, it,s a central borg repository management system with a pretty WebUI. It’s quick and easy to configure.
Let’s begin.
In this guide, I will provide the Ansible role I am actually using. You can find the docker compose file on the official documentation. I also assume you have a functioning docker server. If not, I have a guide on how to set this up here.
Generate SSH Key Pair
We need an SSH key pair for later, so let’s create that one first.
I will create this on the server I want to create the backups from. But it doesn’t really matter where you create it, as long as the files are at the correct location.
Give it a password if you want, I will create one without.
nextcloud :: ~ » ssh-keygen -t ed25519 -f ~/.ssh/borgwarehouse-backup
Generating public/private ed25519 key pair.
Enter passphrase (empty for no passphrase):
Enter same passphrase again:
Your identification has been saved in /admin/.ssh/borgwarehouse-backup.
Your public key has been saved in /admin/.ssh/borgwarehouse-backup.pub.
The key fingerprint is:
SHA256:Dmh6emDysw3YYdauq3OLnAMKWo5P2NKR+S6vOEpn3OA admin@nextcloud.gtu.local
The key's randomart image is:
+--[ED25519 256]--+
|                 |
|                 |
|                 |
|   + .           |
|  B.+ . S        |
|+O*Bo  o         |
|OOBE+.  .        |
|O*XB.            |
|*OXX+            |
+----[SHA256]-----+
Deploying BorgWarehouse on Docker using Ansible
First, let me show you how I build my roles in Ansible.
My folders look like this.
../Ansible/
../Ansible/ssh_key/
../Ansible/roles/
../Ansible/roles/ansible-role-docker/
../Ansible/roles/ansible-role-docker/{files, handlers, tasks, vars}
And here is the file structure I am using for this.
../Ansible/roles/ansible-role-docker.yml
---
- hosts: docker
  gather_facts: true
  become: true
  roles:
   - ansible-role-docker
../Ansible/roles/ansible-role-docker/tasks/main.yml
-- import_tasks: create-container-folders.yml
   tags: [create-folders, docker]
-- import_tasks: docker.yml
   tags: [docker]
-- import_tasks: crontab.yml
   tags: [crontab, docker]
../Ansible/roles/ansible-role-docker/tasks/create-container-folders.yml
Make sure to enter the username that has the UID and GID with 1001
  - name: Create borgwarehouse folders
    file:
     path: "{{ item }}"
     state: directory
     mode: 0770
     owner: borgwarehouse
     group: borgwarehouse
    with_items:
     - /etc/borgwarehouse/app/config
     - /etc/borgwarehouse/ssh
     - /etc/borgwarehouse/sshd
     - /etc/borgwarehouse/repos
     - /etc/borgwarehouse/tmp
     - /etc/borgwarehouse/logs
../Ansible/role/ansible-role-docker/tasks/docker.yml
This creates a separate docker network and assigns the network and IP to the borgwarehouse container.
If you want to use this without Traefik remove the yellow parts and add the red lines. Also modify the green lines.
  - name: Create docker proxy network
    docker_network:
       name: backup
       internal: no
       ipam_config:
         - subnet: 172.32.91.0/24
           gateway: 172.32.91.1
           iprange: 172.32.91.0/24


  - name: Create borgwarehouse
    docker_container:
       name: borgwarehouse
       image: borgwarehouse/borgwarehouse:latest
       networks:
        - name: backup
          ipv4_address: 172.32.91.200
       pull: yes
       state: started
       published_ports:
        - 0.0.0.0:2222:22
## Remove this line if you use Traefik
        - 0.0.0.0:3000:3000
       volumes:
        - /etc/borgwarehouse/app/config:/home/borgwarehouse/app/config
        - /etc/borgwarehouse/ssh:/home/borgwarehouse/.ssh
        - /etc/borgwarehouse/sshd:/etc/ssh
        - /etc/borgwarehouse/repos:/home/borgwarehouse/repos
        - /etc/borgwarehouse/tmp:/home/borgwarehouse/tmp
        - /etc/borgwarehouse/logs:/home/borgwarehouse/logs
       env:
         WEB_SERVER_PORT: "3000"
         SSH_SERVER_PORT: "2222"
         FQDN: "borgwarehouse.random-it-blog.de"
         NEXTAUTH_URL: "https://borgwarehouse.random-it-blog.de"
         NEXTAUTH_SECRET: "<random-secret>"
         CRONJOB_KEY: "<another-random-secret>"
         UID: "1001"
         GID: "1001"
         CONFIG_PATH: "/home/borgwarehouse/app/config"
         SSH_PATH: "/home/borgwarehouse/.ssh"
         SSH_HOST: "/etc/ssh/ssh_host"
         BORG_REPOSITORY_PATH: "/home/borgwarehouse/repos"
         TMP_PATH: "/home/borgwarehouse/tmp"
         LOGS_PATH: "/home/borgwarehouse/logs"

         MAIL_SMTP_FROM: "info@random-it-blog.de"
         MAIL_SMTP_HOST: "<your-smtp-server>"
         MAIL_SMTP_PORT: "25"
         MAIL_SMTP_LOGIN: "info@random-it-blog.de"
         MAIL_SMTP_PWD: "<your-secret-password"
         MAIL_REJECT_SELFSIGNED_TLS: "false"

## Remove the comment if you use Traefik
       # labels:
        # traefik.enable: "true"
        # traefik.http.routers.borgwarehouse.entryPoints: "websecure"
        # traefik.http.routers.borgwarehouse.rule: "Host(`borgwarehouse.random-it-blog.de`)"
        # traefik.http.routers.borgwarehouse.tls.certresolver: "myresolver"
        # traefik.http.routers.borgwarehouse.tls: "true"
        # traefik.http.services.borgwarehouse.loadbalancer.server.port: "3000"
## Only uncomment if you want to restrict the access to specific IPs
        # traefik.http.routers.borgwarehouse.middlewares: "borgwarehouse-middlewares"
        # traefik.http.middlewares.borgwarehouse-middlewares.ipwhitelist.sourcerange: "127.0.0.1/32, 100.64.0.0/24"
../Ansible/roles/ansible-role-docker/tasks/crontab.yml
This is for the repository status update. Used disk space and so on.
  - name: crontab "trigger Borgwarehouse API Status"
    cron:
      name: Trigger Borgwarehouse API Status
      minute: "5"
      job: "curl --request POST --url '{{borgwarehouse_url}}/api/cronjob/checkStatus' --header 'Authorization: Bearer {{borgwarehouse_crontab_key}}' ; curl --request POST --url '{{borgwarehouse_url}}/api/cronjob/getStorageUsed' --header 'Authorization: Bearer {{borgwarehouse_crontab_key}}'"
../Ansible/roles/ansible-role-docker/vars/main.yml
borgwarehouse_url: "https://borgwarehouse.random-it-blog.de"
borgwarehouse_crontab_key: "<random-secret>"
../Ansible/hosts
all:
    children:
         docker:
             hosts:
                 docker:
             vars:
                 ansible_user: ansible
                 ansible_become_pass: <super-secrete-sudo-pass>
                 ansible_ssh_private_key_file: ssh_key/ansible
                 ansible_python_interpreter: /usr/bin/python3
I don’t really know if this way of showing the configuration is really helpful. 😛
If not, just leave a short comment, I will try to make it a bit more readable.
Anyway. Let’s deploy it.
fedora :: ~ » cd ~/Nextcloud/Ansible
fedora :: Ansible » ansible-playbook -i hosts roles/ansible-role-docker.yml

TASK [ansible-role-docker : Create borgwarehouse folders] ********************************************************************************************
ok: [docker] => (item=/etc/borgwarehouse/app/config)
changed: [docker] => (item=/etc/borgwarehouse/ssh)
ok: [docker] => (item=/etc/borgwarehouse/sshd)
changed: [docker] => (item=/etc/borgwarehouse/repos)
ok: [docker] => (item=/etc/borgwarehouse/tmp)
ok: [docker] => (item=/etc/borgwarehouse/logs)

TASK [ansible-role-docker : Create borgwarehouse] ****************************************************************************************************
ok: [docker]

PLAY RECAP ****************************************************************************************************************************************
docker             : ok=9    changed=1    unreachable=0    failed=0    skipped=0    rescued=0    ignored=0
Now, the container should be up and running. If you use Traefik, your server should be reachable via “https://borgwarehouse.random-it-blog.de”. Replace with your URL of course. If you use it without a reverse proxy, type in the port at the end. “http://borgwarehouse.random-it-blog.de:3000”.
Setting up BorgWarehouse
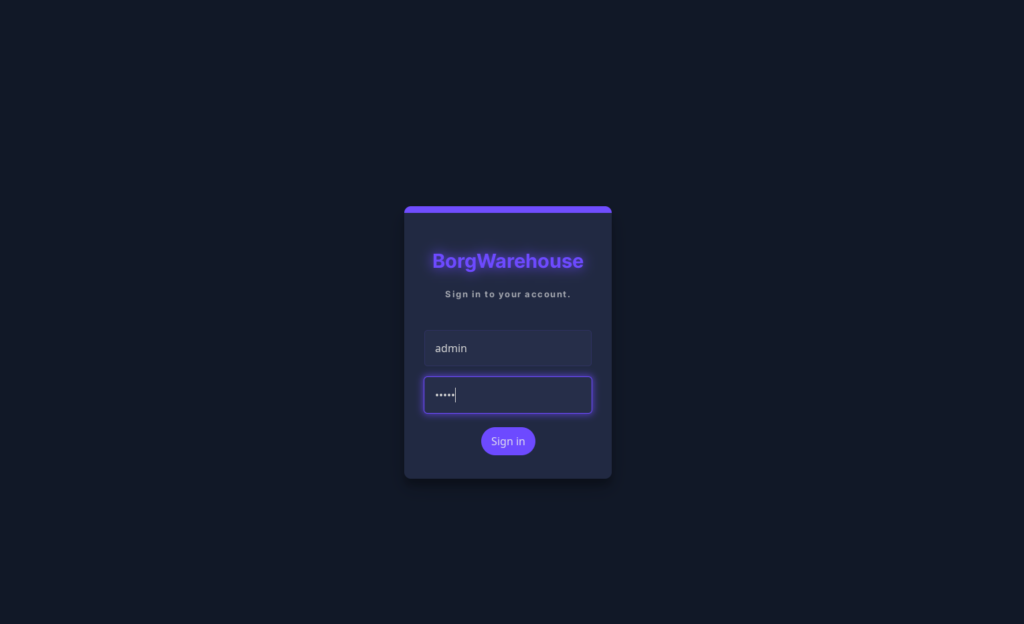
Alright. We should be on the WebUI now. The default login is “admin” “admin”.
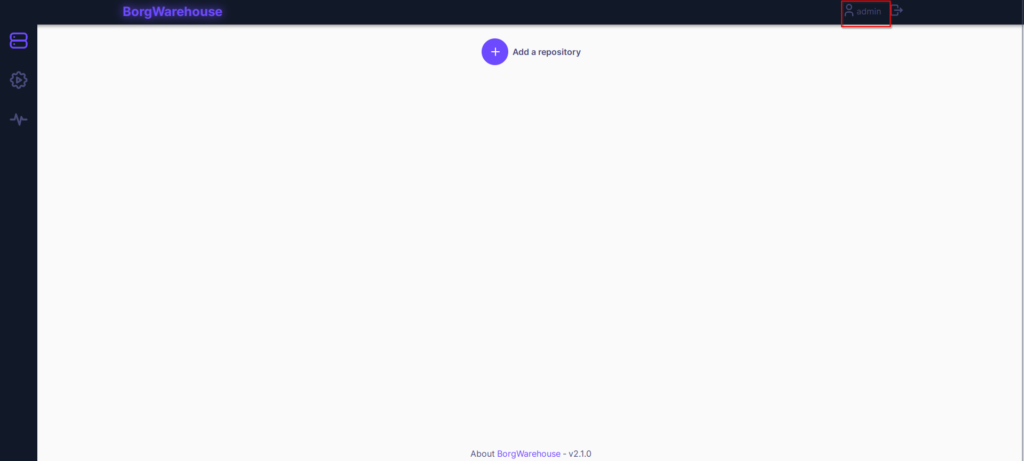
Once in, you should see an empty window with the option to add a new repository. But first, we should change the default password. Click on the username on the top right.
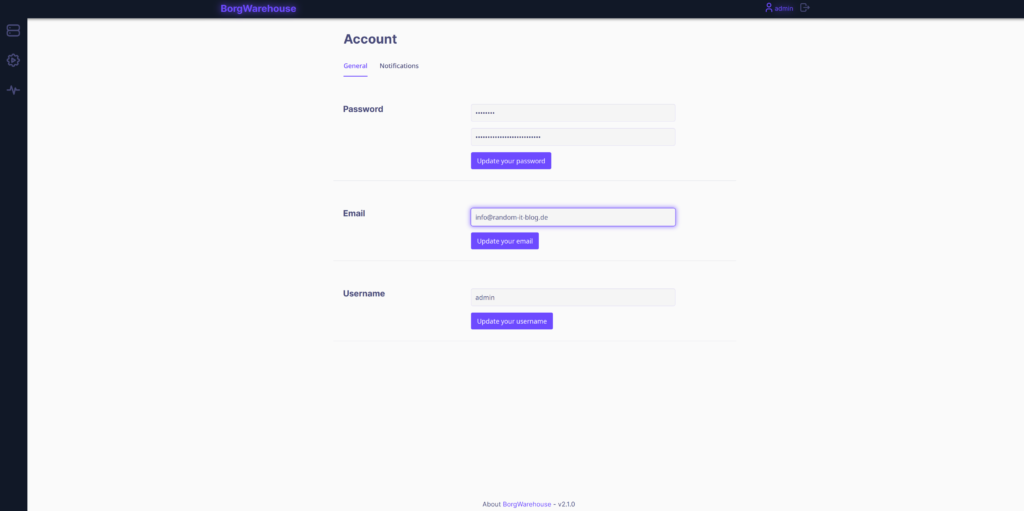
Here you can set your new password. While at it, also set your E-Mail address. This is only necessary if you want to use the E-Mail notification feature.
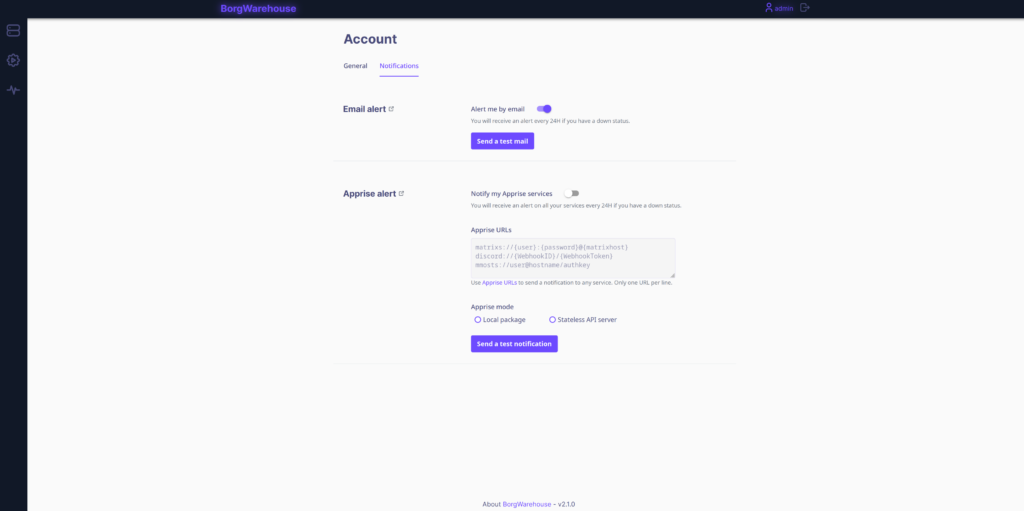
Now, switch to the “notifications” tab. Here, we can enable the E-Mail notification and send a test E-Mail. Below that, we have the option to set up and enable the apprise alert service. For this we need an additional docker container, “apprise”. I am not going to use it.
Once that’s done, switch back to the main page with the “repository” button on the left.
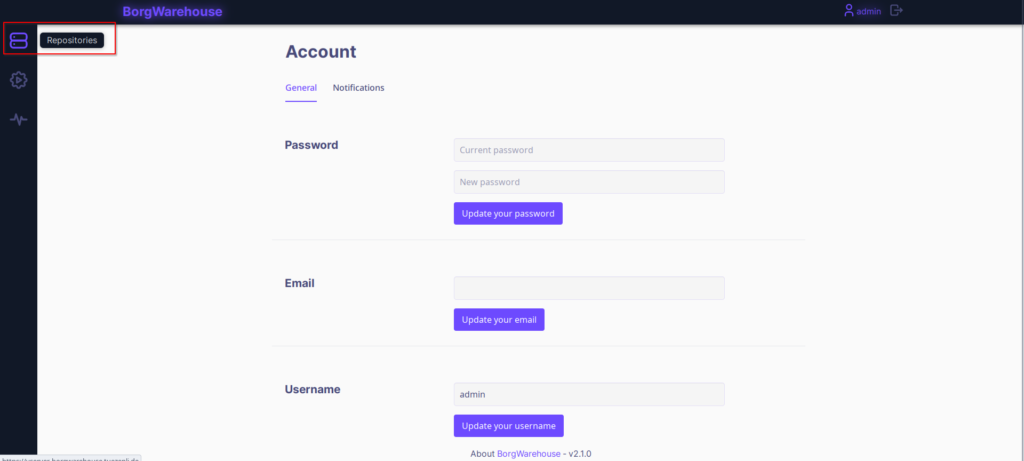
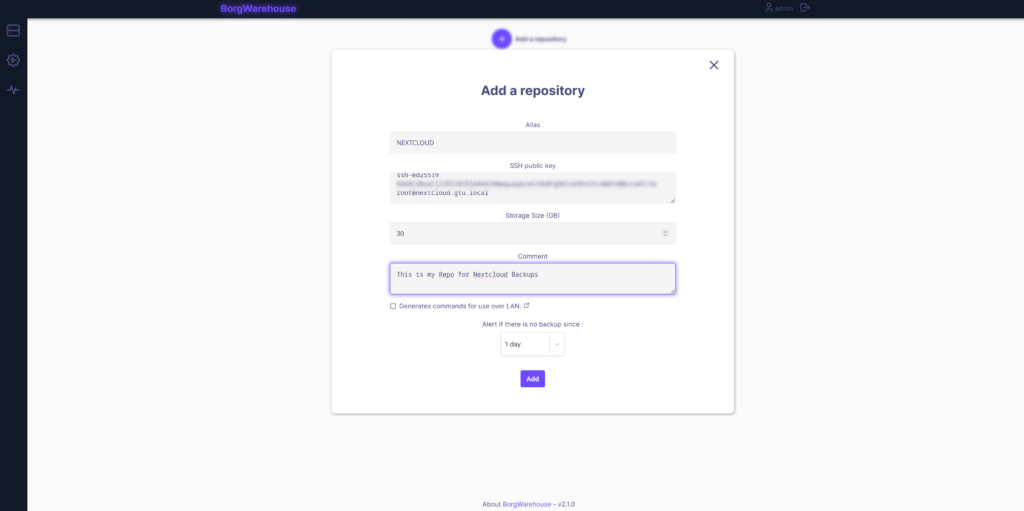
Click on “Add a repository” to create a new one.
Here we can set an “Alias”. This is only for you.
Below it wants a public key which will be used to connect via SSH to the server with borg. This does not allow you to connect to the CLI, it’s only for the backup. Paste the public key we created earlier.
Below that, is the max storage size that can be used with this repository.
Next, you can set the time it should wait before sending you a notification in case the backup does not work.
Once done, click on “Add”.
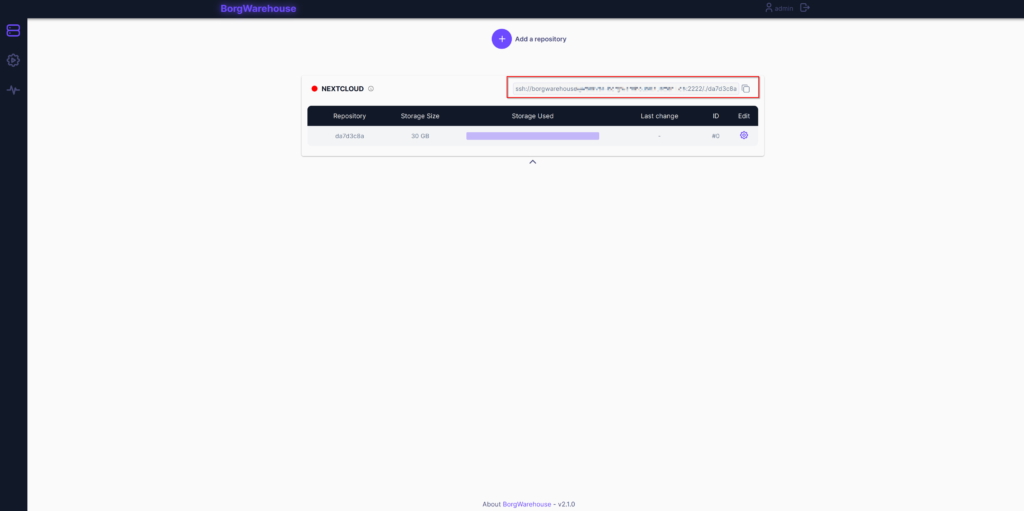
Alright. Our first repository. On the top right of the repo you can display the SSH URL for your backup. Copy the line for later.
There is actually a great wizard implemented that can guide you through the process of configuring your server or client you want to back up. For this, click on the “Setup Wizard” on the left. It will show you the necessary steps for applications like Vorta.
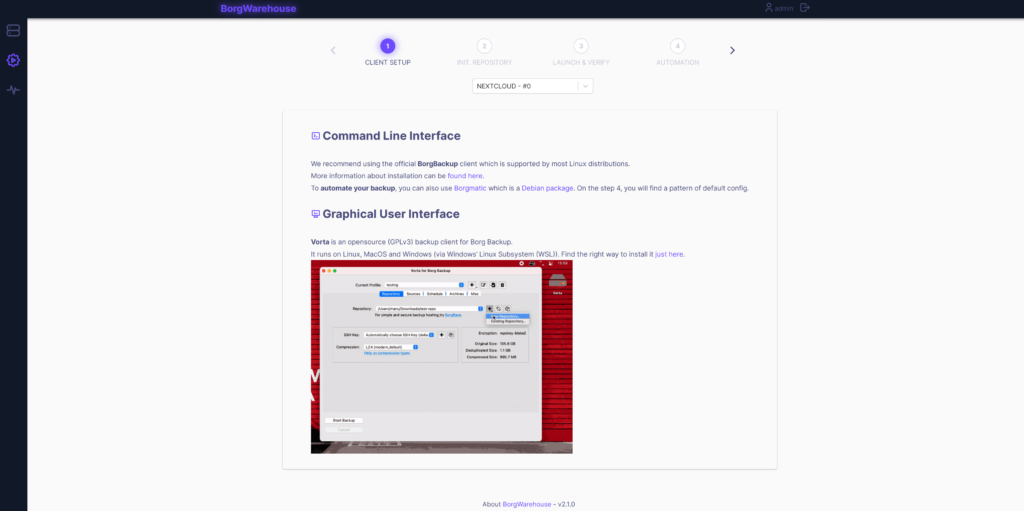
I will not use this though, so let’s proceed.
Setting up the Backup
Initializing the Repository
Backup to the server we want to back up. First we want to initialize the repository.
# Set the ssh key path
nextcloud :: ~ » export BORG_RSH='ssh -i /admin/.ssh/borgwarehouse-backup'
nextcloud :: ~ » borg init -e repokey-blake2 ssh://borgwarehouse@borgwarehouse.random-it-blog.de:2222/./da7d3c8a
Enter new passphrase:
Enter same passphrase again:
Do you want your passphrase to be displayed for verification? [yN]:
Create a Backup
Now we configure our backup. I have a script for this, but a simple one-liner would look like this.
# This will backup the folder /var/www/html/nextcloud.
nextcloud :: ~ » borg create ssh://borgwarehouse@borgwarehouse.random-it-blog.de:2222/./da7d3c8a::NEXTCLOUD-$(date +%F_%R) /var/www/html/nextcloud/
success
Keeping archive: NEXTCLOUD-2024-01-11_13:11           Thu, 2024-01-11 13:11:49 [0705bc583001f686bed7d89853c889217b76z93afd79f0a683c328f4768db4c1]
------------------------------------------------------------------------------
                       Original size      Compressed size    Deduplicated size
Deleted data:                    0 B                  0 B                  0 B
All archives:                5.62 GB              5.32 GB              5.21 GB

                       Unique chunks         Total chunks
Chunk index:                    5901                 8129
------------------------------------------------------------------------------


# To remove old Backups
nextcloud :: ~ » borg prune --stats --list --keep-hourly=0 --keep-daily=5 --keep-weekly=0 --keep-monthly=1 ssh://borgwarehouse@borgwarehouse.random-it-blog.de:2222/./da7d3c8a
Here is also the script, if you are interested.
#bin/bash
set +o history
export BORG_RSH='ssh -i /root/.ssh/vserver'
export BORG_PASSPHRASE="<your-secret-repo-passphrase>"
export BORG_RELOCATED_REPO_ACCESS_IS_OK=yes
set -o history

if borg create ssh://borgwarehouse@borgwarehouse.random-it-blog.de:2222/./da7d3c8a::NEXTCLOUD-$(date +%F_%R) /var/www/html/nextcloud/ --exclude '/var/www/html/nextcloud/data/'; then
echo success
else
curl -d "Nextcloud to BorgWarehouse backup failed" https://backup:'<super-secret>'@ntfy-server/Backup
fi


# Remove old Backups
borg prune --stats --list --keep-hourly=0 --keep-daily=5 --keep-weekly=0 --keep-monthly=1 ssh://borgwarehouse@borgwarehouse.random-it-blog.de:2222/./da7d3c8a
Alright. Let’s take a look at the WebUI.
First the repository itself.
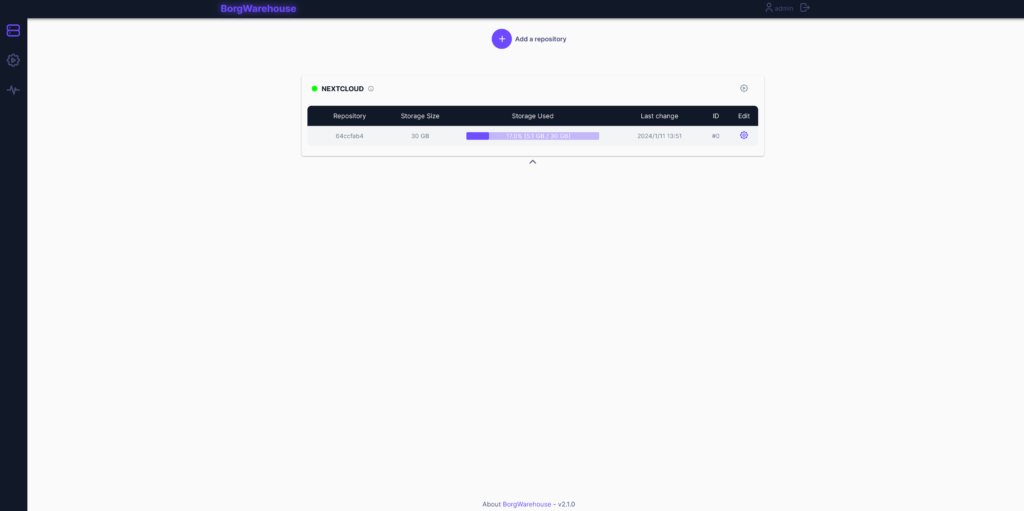
And the “Monitoring” page.
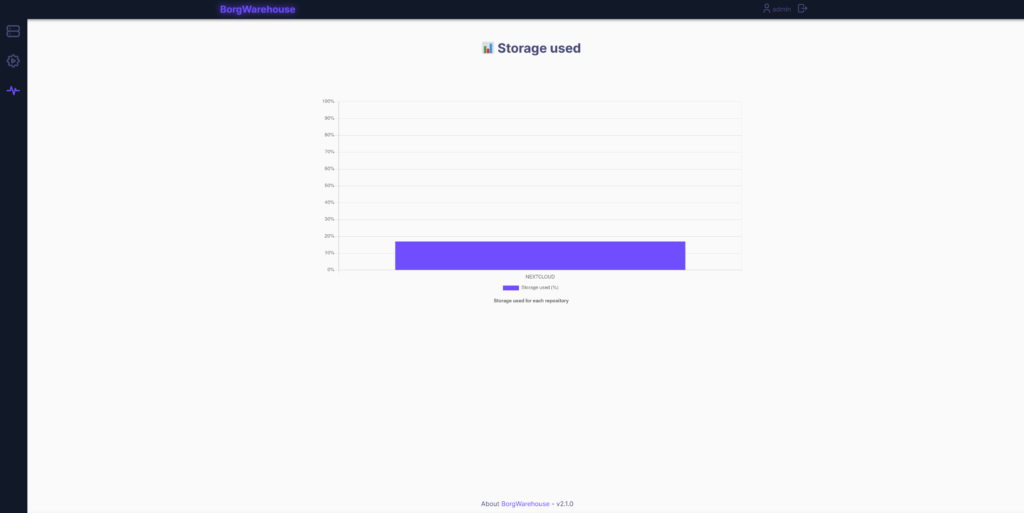
Keep in mind that the cronjob we created earlier has to run, for the used storage to show.
You can also manually execute a stat refresh.
Monitoring / Stat refresh
Either I don’t get it, or this part isn’t really well documented. It’s just a single line in the documentation. Anyway, if you want the “used storage” and “monitoring” page to actually show anything, you have to execute the “getStorageUsed” and “checkStatus” API calls.
Here is the line, you can also check this on the documentation page at the bottom under “Scheduled tasks”.
## Replace the "borgwarehouse_crontab_key" with the key you used in the container deployment.
docker :: ~ » curl --request POST --url 'https://borgwarehouse.random-it-blog.de/api/cronjob/checkStatus' --header 'Authorization: Bearer {{borgwarehouse_crontab_key}}' ; curl --request POST --url 'https://borgwarehouse.random-it-blog.de/api/cronjob/getStorageUsed' --header 'Authorization: Bearer {{borgwarehouse_crontab_key}}'
Ok. That is it. Till next time.