So… I have been using GNS3, to run my Network Simulations for a while now. Mainly to try out and learn new things, but also to test new configurations for customers, before implementing them. I also like it as a teaching tool for the new trainees.
That’s why I decided to make a full guide (probably in multiple parts) on how to install and configure GNS3 VM on Fedora Linux with KVM as its base for virtualization. I have been using VMWare Player in the past, but have almost always had some type of issue with it, primarily when updating Fedora (most of the time the modules didn’t compile with the new kernel).
That’s why I switched to KVM and am more than happy with my decision. It has been working flawlessly for me so far.
In this part, we will install KVM on a clean Fedora 34, get GNS3 VM, deploy it and configure the system to allow nesting (allowing to virtualize within a virtual machine). Nesting is a requirement for GNS3 VM.
I will not show the installation of Fedora 34, so this guide assumes that you have a working Fedora system already. This might work for other distributions like Ubuntu as well (except the package installation), but I didn’t test it.
Let’s begin.
Pre requirement
- First, let’s check if the system allows nesting. If you get a “Y” or “1” then your system supports it.
// For Intel based systems
fedora-kde :: ~ » cat /sys/module/kvm_intel/parameters/nested
fedora-kde :: ~ » Y
// For AMD based systems
fedora-kde :: ~ » cat /sys/module/kvm_amd/parameters/nested
fedora-kde :: ~ » 1
2. Now we have to enable nesting. You can enable it for the current session, but this will only last until the next reboot. We have to edit the “kvm.conf” file under modprobe.d to make it permanent.
//// Running System. Holds until reboot
// Unload the kvm_probe module (Intel)
fedora-kde :: ~ » sudo modprobe -r kvm_intel
// Unload the kvm_probe module (AMD)
fedora-kde :: ~ » sudo modprobe -r kvm_amd

// Load the module to enable nesting (Intel)
fedora-kde :: ~ » sudo modprobe kvm_intel nested=1
// Load the module to enable nesting (AMD)
fedora-kde :: ~ » sudo modprobe kvm_amd nested=1


//// Editing the kvm.conf file. survives a reboot
// Edit the kvm.conf file (Intel)
fedora-kde :: ~ » sudo vim /etc/modprobe.d/kvm.conf
// find and replace or add option
options kvm_intel nested=1

// Edit the kvm.conf file (AMD)
fedora-kde :: ~ » sudo vim /etc/modprobe.d/kvm.conf
// find and replace or add option
options kvm_amd nested=1
Installation / Konfiguration
3. Now we start with the installation of KVM, virt-manager and its dependencies.
fedora-kde :: ~ » sudo dnf install qemu-kvm virt-install libvirt virt-manager
4. Make sure that the libvirtd service is running. The first command enables the startup on boot. The second one starts the service immediately.
fedora-kde :: ~ » sudo systemctl enable libvirtd.service ; sudo systemctl start libvirtd.service
5. I will prepare folders for the VMs and ISOs (not really used in this guide. It’s for future proofing). I will create those in the home folder, but you can choose any location, like a second disk for instance.
fedora-kde :: ~ » mkdir /home/$USER/{VMs,ISOs}
6. Let’s start virt-manager. This is a GUI to manage your virtual machines, networks and storage devices for KVM. We could do this from the command line, but this is easier and I think quicker (until I build an Ansible playbook or a script I guess).
Right-click on “QEMU/KVM”, select “Connect” and enter your password. Once you are connected, right-click on it again and choose “Details”.

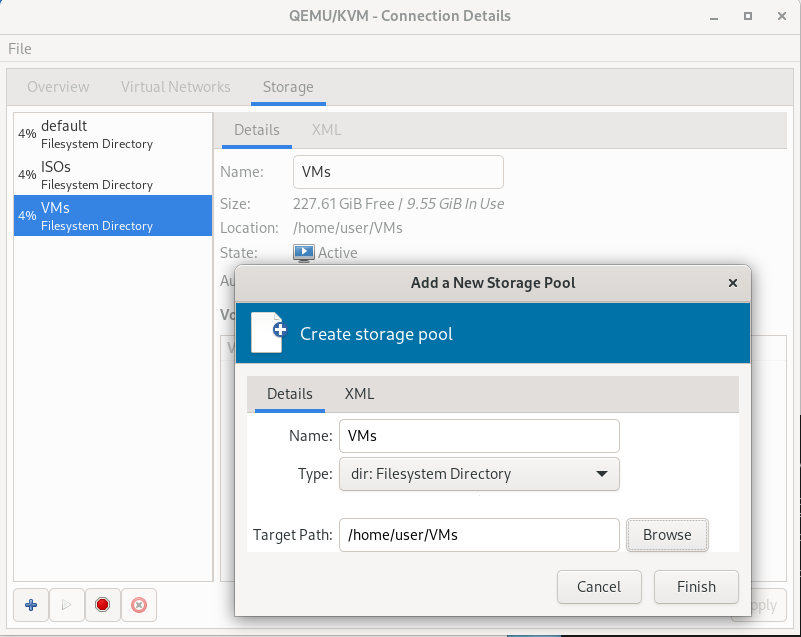
7. Once the “Connection Details” windows open, choose the “Storage” slide. Here click the + button. Under “Name” enter “ISOs”. Click on “Browse”, select the folder you created and click on “Finish”.
follow the same steps for the “VMs” folder.

8. Now we need the “GNS3 VM VMWare Workstation zip” file from gns3.com. At the time of writing the latest version is 2.2.26. Check the homepage for the current version.
Change to the folder “ISOs” and download the file.
fedora-kde :: ~ » cd /home/$USER/ISOs
fedora-kde :: ~/ISOs » wget https://github.com/GNS3/gns3-gui/releases/download/v2.2.26/GNS3.VM.VMware.Workstation.2.2.26.zip
9. Unzip the file. This will extract a single OVA file. “GNS3 VM.ova”
fedora-kde :: ~/ISOs » unzip ./GNS3.VM.VMware.Workstation.2.2.26.zip
10. Now extract the vmdk files from the OVA. We will use the command “tar” for this.
This will give us a few more files. The only ones we need, are the “GNS3_VM-disk1.vmdk” and “GNS3_VM-disk2.vmdk”.
fedora-kde :: ~/ISOs » tar xvf ./"GNS3 VM.ova"
11. Next up is converting the vmdk files into qcow2. We could actually use vmdk with KVM, but I prefer the native format. It also allows us to create snapshots of the VM, which is quite useful when doing upgrades. But this step is technically optional.
Once the conversion is done, move the files into the “VMs” folder.
fedora-kde :: ~/ISOs » qemu-img convert -f vmdk -O qcow2 ./GNS3_VM-disk1.vmdk GNS3_VM-disk1.qcow2
fedora-kde :: ~/ISOs » qemu-img convert -f vmdk -O qcow2 ./GNS3_VM-disk2.vmdk GNS3_VM-disk2.qcow2
fedora-kde :: ~/ISOs » mv GNS3_VM-disk?.qcow2 ~/VMs
12. Switch back to virt-manager and click on the “New Virtual Machine” button in the upper left corner.
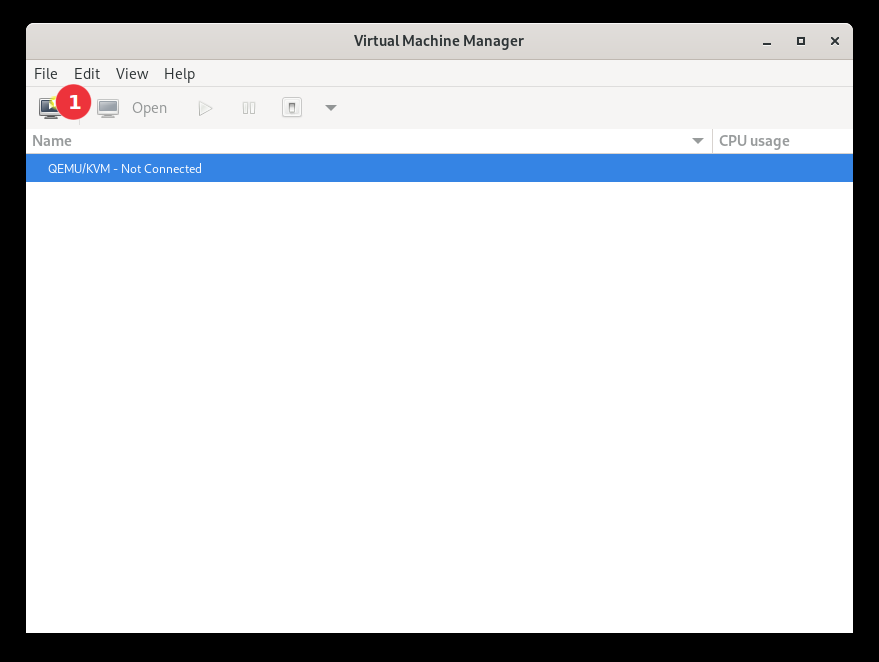
13. Choose “Import existing disk image” and click on “Forward”.

14. Select “Browse”. In the new windows, select GNS3_VM-disk1.qcow2 from the “VMs” slide.
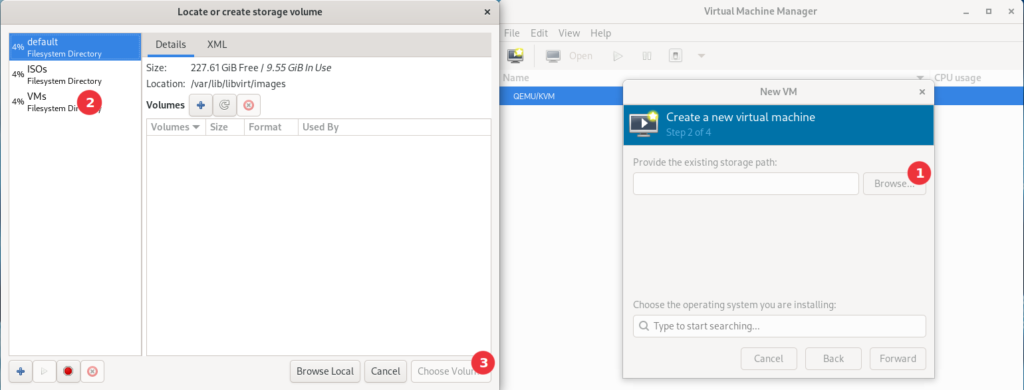
15. In the “Choose the operating system you are installing:” textbox, enter “Debian 10”. Click “Forward”.

16. Now virt-manager will ask you if it should correct the permissions for the selected path. Answer with “Yes”.

17. Almost done. In this step, you can set the amount of RAM and the CPU core count for your GNS3 VM. Once you are done, click on “Forward”.

18. Here you can set your VM name, network (we will leave at the default) and if you want to further customize the configuration. Select the customize option and click on “Finish”.
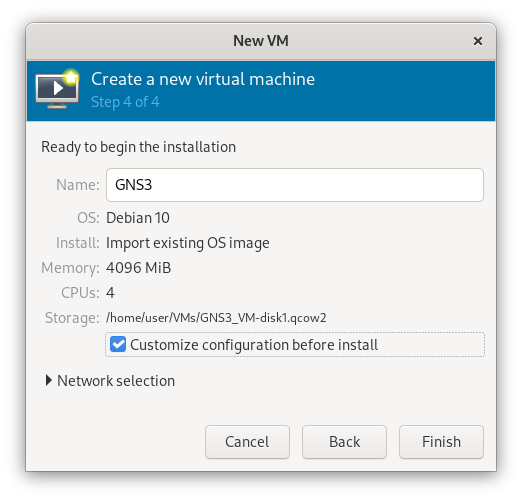
19. In this new window you can change the hardware configuration for your VM. We only assigned the first disk, we can add the second here.
Select “Add Hardware” at the bottom of the window.
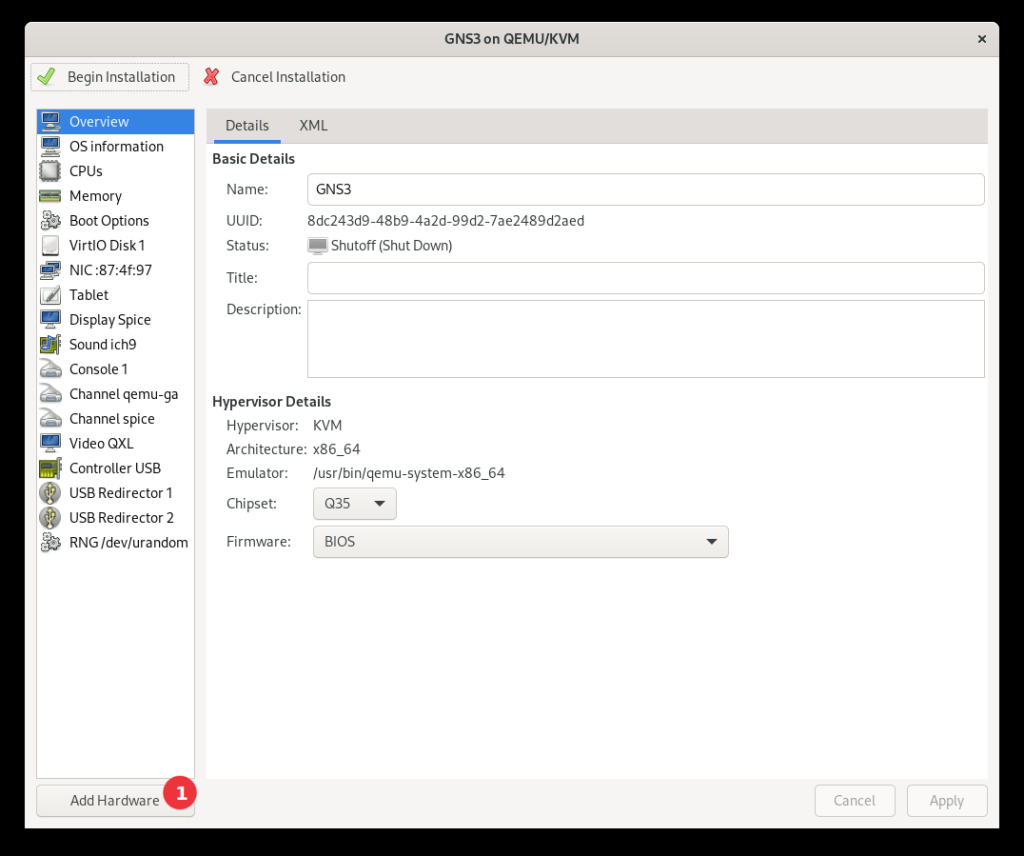
20. Select the “Storage” slide. Under “Details” click on the “select or create custom storage” radio button and click on “Manage…”.

21. Add the second disk, the same way you added the first one.

22. Last step. Click on “Finish” -> “Begin Installation”. After this, the VM will boot up and you should be greeted with the GNS3 VM information windows.

That’s it. At this point, you should be able to connect to the GNS3 WebUI with the shown URL (yours will probably be different) and add your first VMs and switches.
Now… the WebUI is great and all but still a bit too buggy for my taste. So I do prefer the GNS3 GUI, which we will configure in the next part.
See you in the next post.
Links:
Thank you. Someone this time, I got this blog mentioned in Google Search. That didn’t happen before 6 and 3 months ago.
My problem was: How the f**K would I use/connect the second disk image? Now that I know, how simple and straightforward this is, makes so much sense. I feel so dumb.
Thank you for writing this.
My curiosity:
– Why are you using 4 CPUs when you literally have only 4 total CPUs? Wouldn’t that create too much pressure?
I went with the default requirement of 2 GB of RAM and 2 CPUs. Hope that’s fine.
Sorry for the late response. Didn’t really expect anyone to write a comment, so I didn’t see it. 🙂
I’m glad I could help.
The RAM and CPU you assign to the GNS3 VM, sets the limit to everything within your GNS3 Simulation environment. Meaning you can only assign that amount the the switches, VMs within GNS3 itself.
Since I am not really using my system during GNS3 simulations, it’s not creating to much load on the CPUs. They are idle most of the time anyway.
Overall 4GB of RAM and 4 CPU cores are still not enough to really run larger simulations, with a lot of VMs. On my main system I use 64GB and a AMD Ryzen 7 3700X to run the simulations.
Thx for this nice tuto.
Can we do the same on Ubuntu with the same commandes by replacing dnf > apt ?
Hi Bobby,
you won’t be able to replace it 1:1. But the following command should install enough.
sudo apt install virt-manager qemu-kvm