Updated: Updated Authentik to 2025.4.0, recreated the screenshots and tested the setup again.
Hi there,
today will be a short one… I think.
I want to show you, how to set up the SSO with OpenID in MinIO using Authentik. In this, I am not going to show how to deploy the applications (I already did with MinIO). So I am assuming you already have a running Authentik and MinIO server.
Let’s begin.
Authentik Configuration
Create a Property Mapping
First, we will set up a role mapping. Login to Authentik and switch to “Customisation” -> “Property Mappings” and create a new one.
In here, give it a scope name and enter the following under “Expression”. You can get more details on the official documentation for Authentik.
return {
    "policy": "readwrite",
}

Create Provider
Now we need the to create an Application and Provider for MinIO.
Let’s begin with the “Providers“. Navigate to “Applications” -> “Providers” and click on “Create“.
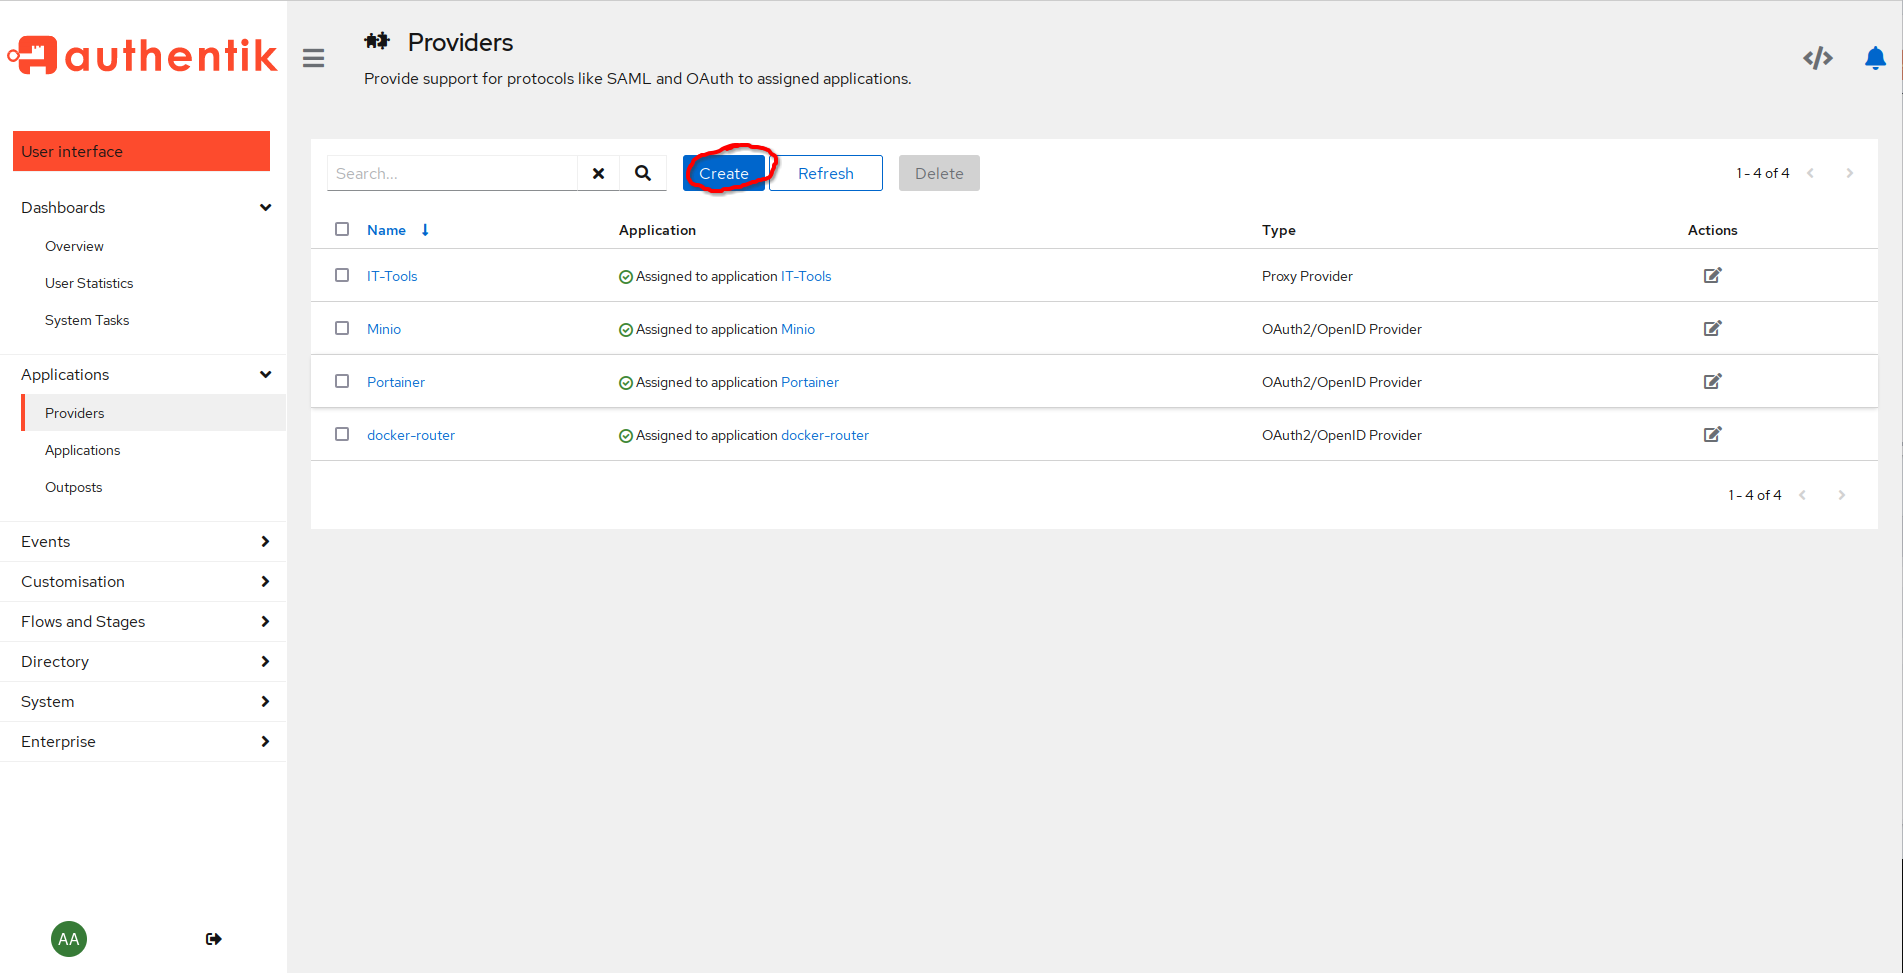
Choose the type. In our case, the OAuth2/OpenID provider.

Next, give the provider a fitting name. I will use “minio-provider” and take note of the “ClientID” and “Client Secret“. In the “Authentication flow” and “Authorization flow“, you can choose the defaults.
After that, click on “Finish”.

We should have a new entry with an error message telling us that we need to assign an application to this provider. We will do that next.

Create Application
Alright. Let’s continue. Switch to the “Applications” tab below providers, and click on “Create“.

Again, enter a fitting name. I will use the same for the “Slug“, and choose the provider we created earlier. You can enter the URL for MinIO in “Launch URL” but it should also work without that entry.
Click on “Create” and that’s it.

OK. Switch back to the “Providers” and click on the newly created “minio” object. We get a bunch of URLs. Take note of the first one “OpenID Configuration URL”

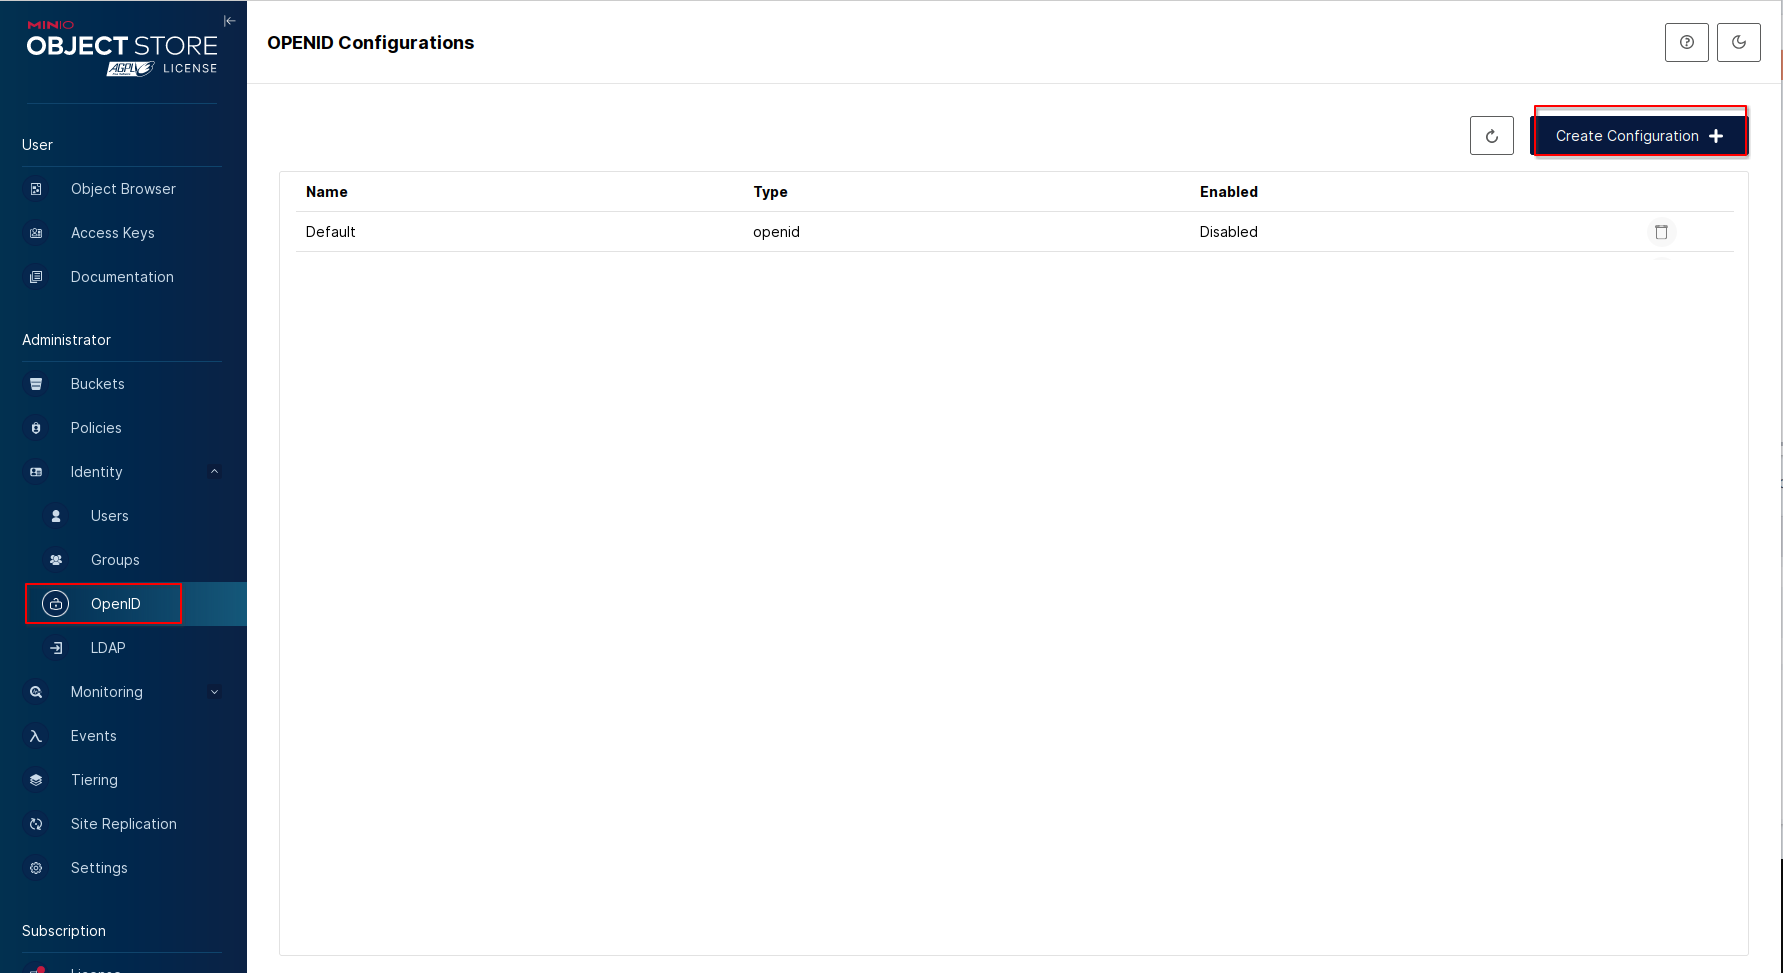
MinIO OpenID Configuration
Great. Lets setup Minio.
Once logged in, switch to “Identity” -> “OpenID” and click on “Create Configuration”.
Here we give it a name, I will use “Authentik“, enter the URL we copied earlier and enter the Client ID / Client Secret.
For the “Scopes” enter the following “openid,profile,email,minio” and “https://minio-server-url/oauth_callback” for the “Redirect URI“.
Keep in mind that the “Scopes” entry depends on the first configuration we did. So if you used a different name for the “Role Mapping” you have to adjust the name here.
The “Role Policy” defines the permissions the users authenticating through OpenID have. Default is “readonly” but I will use the “consoleAdmin“.

Save the setting, and that should be it. At this point, you should be able to authenticate using Authentik credentials.
New MinIO login
Let’s log out and see what it looks like.
We should see a new button. “Login with SSO (Authentik)”.

That’s it. Hope this helps.
Till next time.
Coooooool !
How to add self-signed certificate for OIDC?
Hi Nikhitha,
you can upload or create a self-signed certificate in the admin interface under “certificate” -> “create” / “generate”.
After this, select the certificate in the “provider” setup.
I understand you redact potentially sensitive information, however, it would be beneficial to those reading your guide, if you still dokumented what to fill in in the redacted fields.
You did it almost for every field but for the Claim Name.
I was hoping your guide would help me since I tried your and the authentik guide on integrating Minio, but i keep getting this error upon login: “Error from IDP An error occurred, please try again Token contains an invalid number of segments”
Yet, I followed either guide step by step…
Hello Sesh,
sorry about that. I was using an existing setup and didn’t want to redo everything, but you’re right, I should have at least added a fake entry to make things clearer.
That said, I’m not sure why there’s any text in the “Claim Name” field, as it’s not required. I checked my current setup and that field is actually empty.
I’ll update the screenshots to make everything clearer.
About the error you are getting. This sounds like something is missing either in the “Client Secret” or “Client ID”.
Alright. I redid the configuration, tested it and updated the screenshots. Hopefully this is a bit clearer.