Windows Server 2022 Installation and Domain Controller Deployment
Hello everyone,
it’s been a while, again. Didn’t have much to write about, and still don’t really.
But I thought, why not create a multipart post on deploying a Windows Server environment for an imaginary business. We will go through the installation of Windows Server 2022, deployment of a domain controller, setting up a file / DHCP / DNS server, certificate authority and so on.
I will be using Proxmox for the hypervisor, since it’s what I already have. It’s the one from the “HPE Alletra 5000 iSCSI with Proxmox using OCFS2” post.
In this post, we will begin with the initial installation of Windows Server 2022 and deploy the Domain Controller, since that will be our starting point for the following servers.
I will try to mention every step and every error I receive (if any) to make it as useful as possible.
System Information
| Hostname | IP | Function |
| TEST-DC01 | 192.168.152.200/24 | Domain Controller / Active Directory / DNS / DHCP |
Network Information
| Network | 192.168.152.0 |
| Subnet | 255.255.255.0 |
| Gateway | 192.168.152.254 |
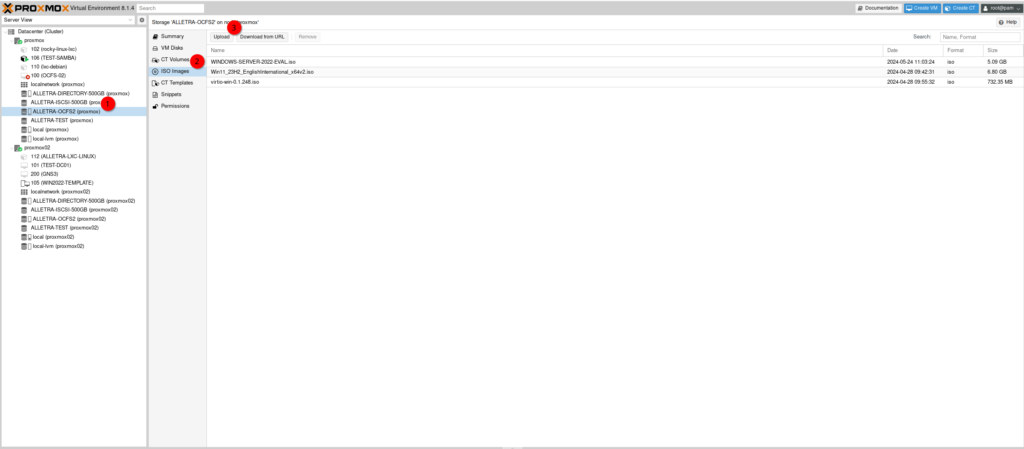
Download Windows Server 2022 Evaluation ISO
First, we need the actual ISO. We can grab it from the Microsoft Evaluation Center. Go to this URL “https://www.microsoft.com/de-de/evalcenter/download-windows-server-2022” and download the ISO in your preferred language.

Once we have the ISO, we can upload it to our hypervisor of choice.
Windows Server 2022 Installation
VM Deployment in Proxmox
Alright. Let’s begin with the installation of Windows Server 2022.
I will quickly show you the steps in Proxmox, I take.

Give it a nice name. “TEST-DC01” in my case.

Choose the ISO for Windows and the virtio drivers.

Set the location for the EFI qcow2.

Configure the disk for the system. 60GB should be enough.

I always assign at least 2 CPU cores and, in this case, set the CPU type to “host“.

8GB of RAM. 4GB would be enough if you don’t have any to spare.

I will leave the defaults here.


Windows Server 2022 Installation
Next is the Windows Server installation. There is not much to talk about here. We mainly click “Next“. The only quirk is the drivers for the virtIO storage device I need, since I am deploying on a Proxmox Server. You won’t have this issue with VMWare or Hyper-V.
Set your Time format and keyboard layout.

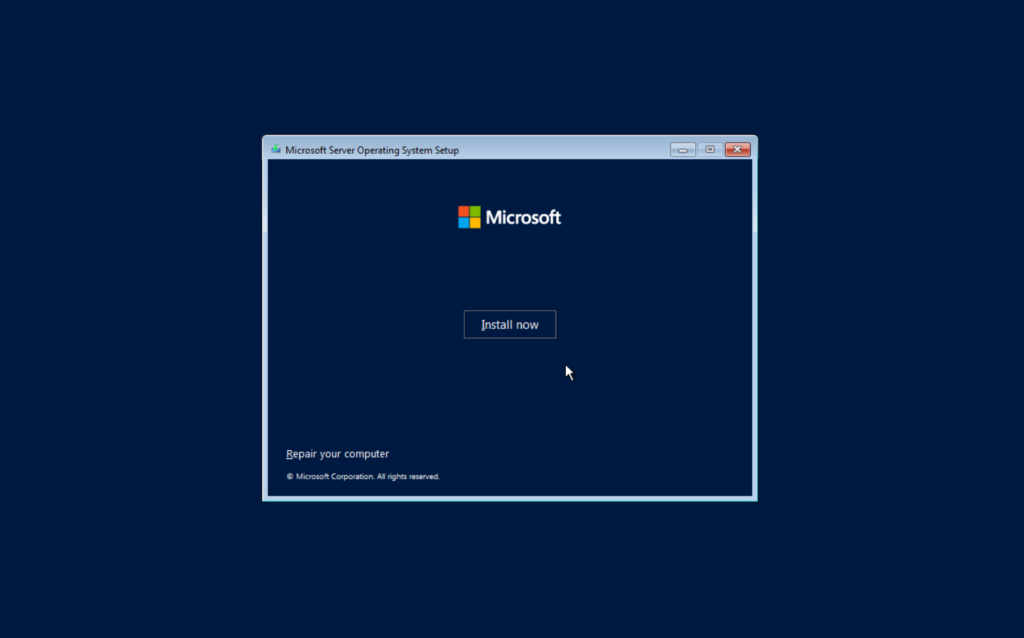
Click on “Install now“.
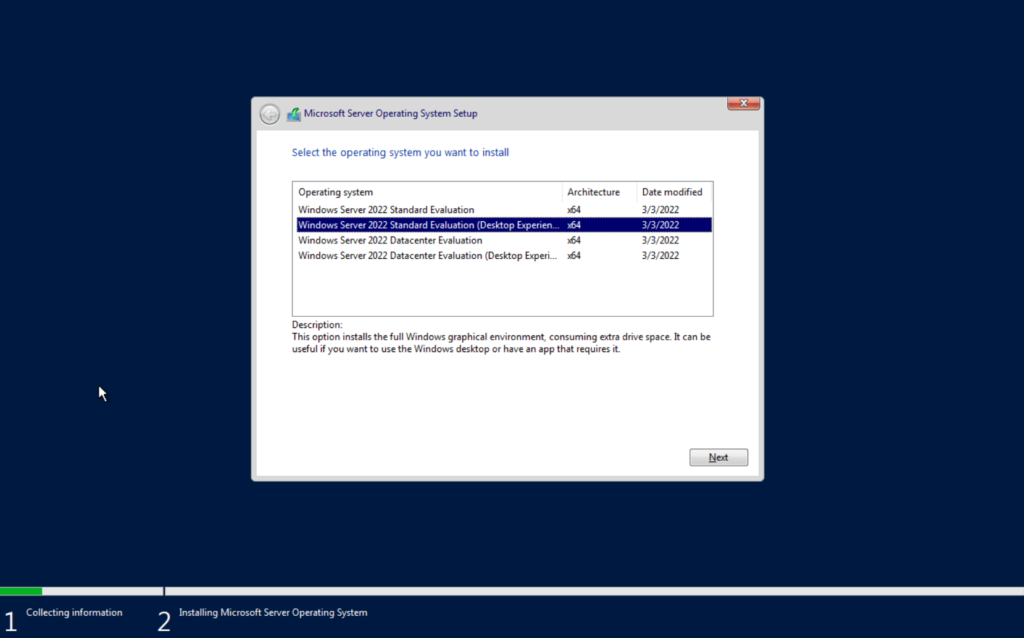
I will select the “Windows Server 2022 Standard Evaluation (Desktop Experience)“
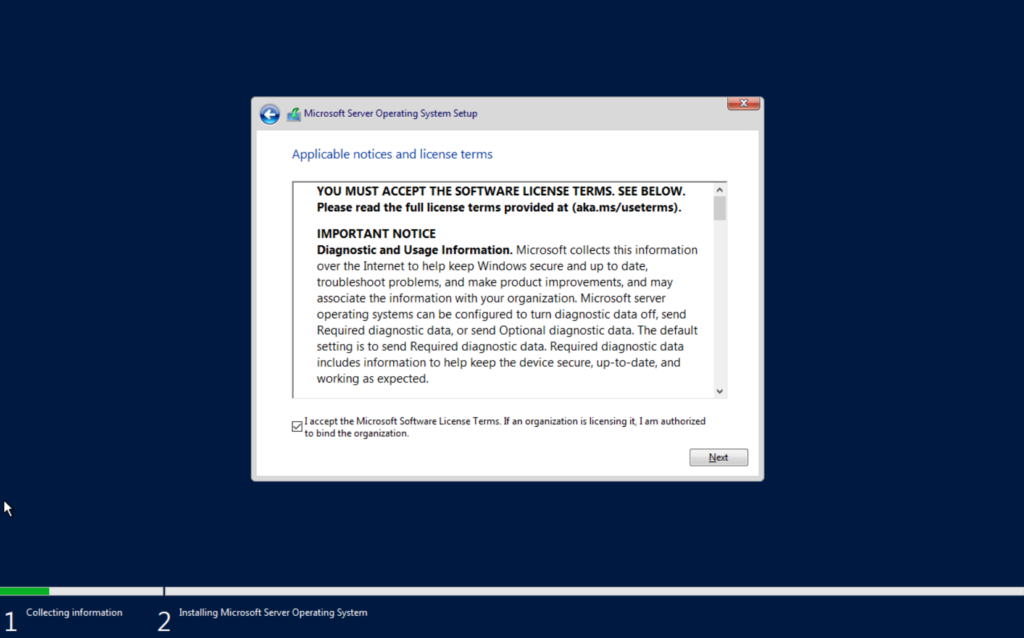
Accept the license terms.
Select “Custom…“

This is the step I mentioned earlier. If you use VMWare or Hyper-V, the disk should just show up, but in this case, we have to load the virtIO drivers.
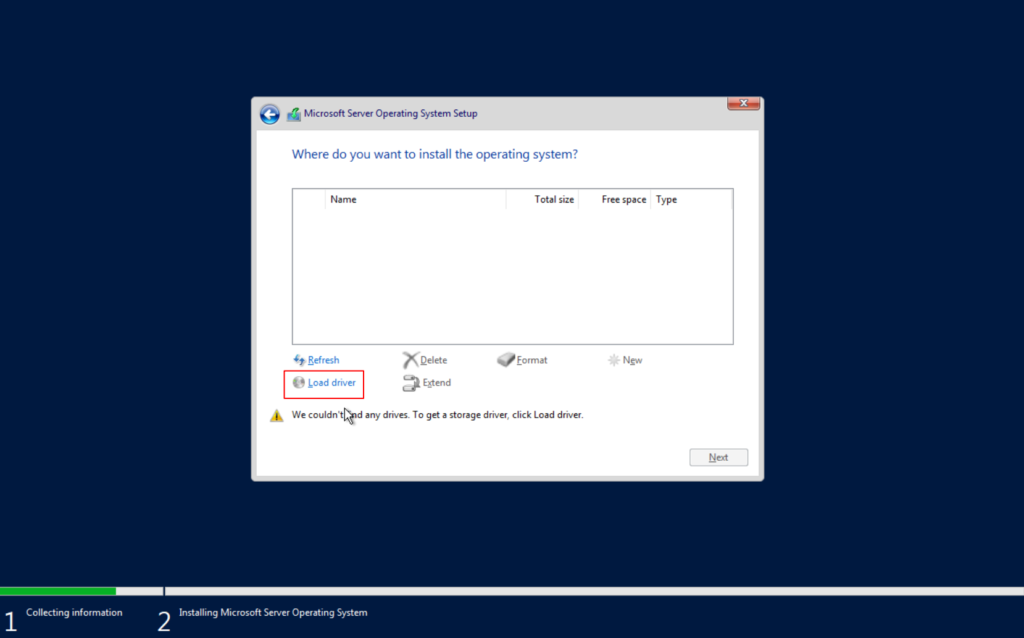
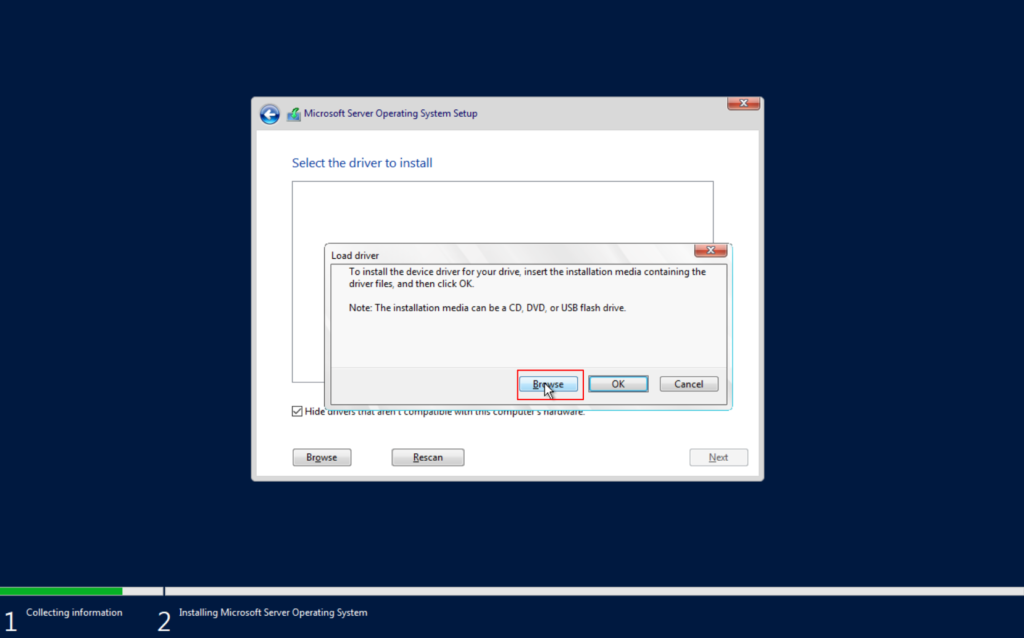

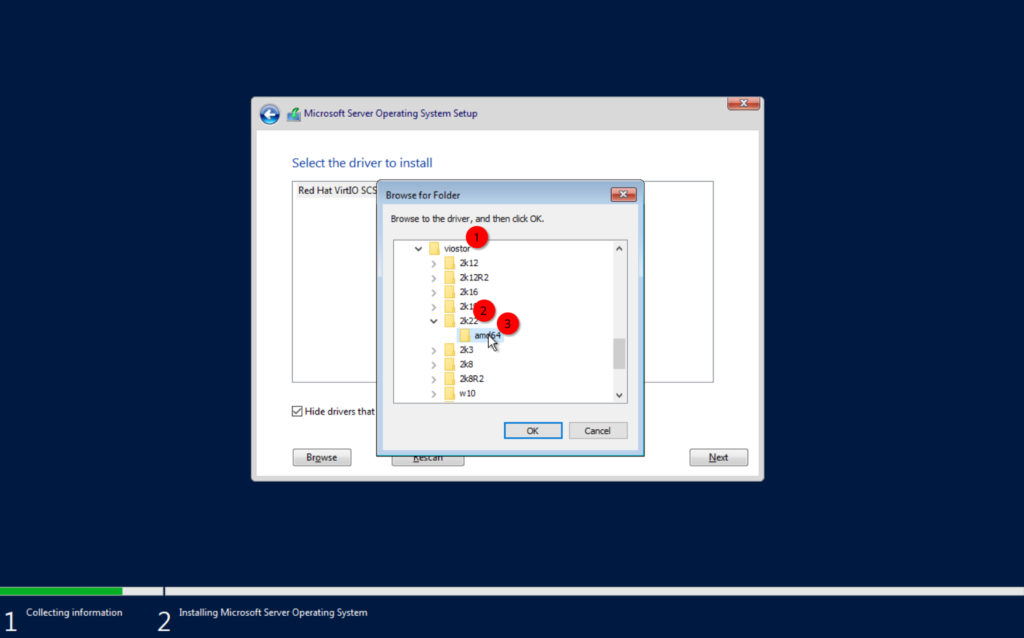

Once loaded, we can select our disk.

Waiting for the installation.

Initial Configuration
Installing Guest Tools
Alright. Let’s go through the initial setup.
Set a password.
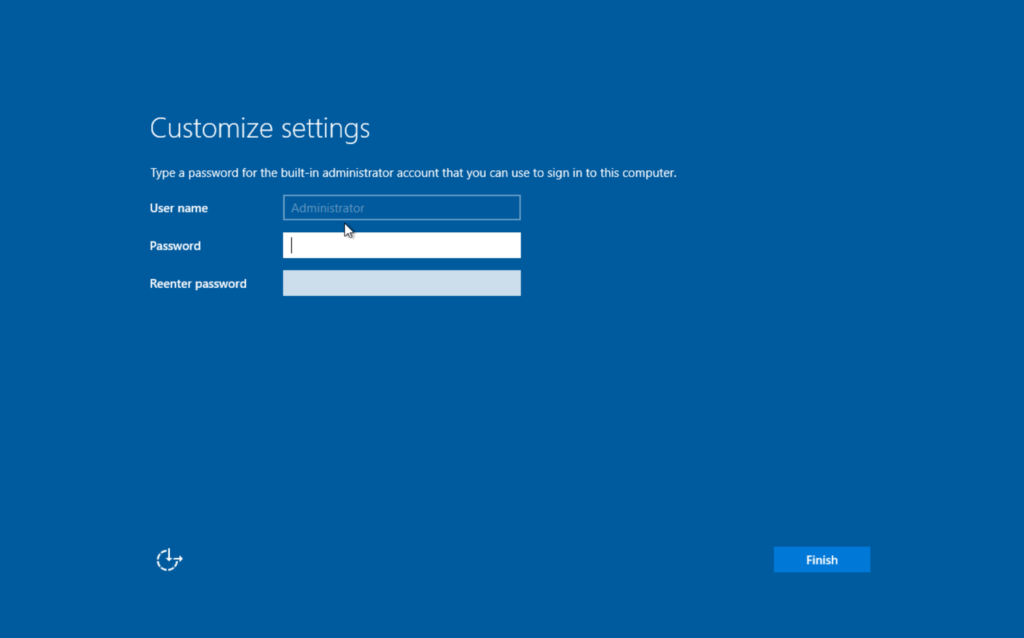
Login.
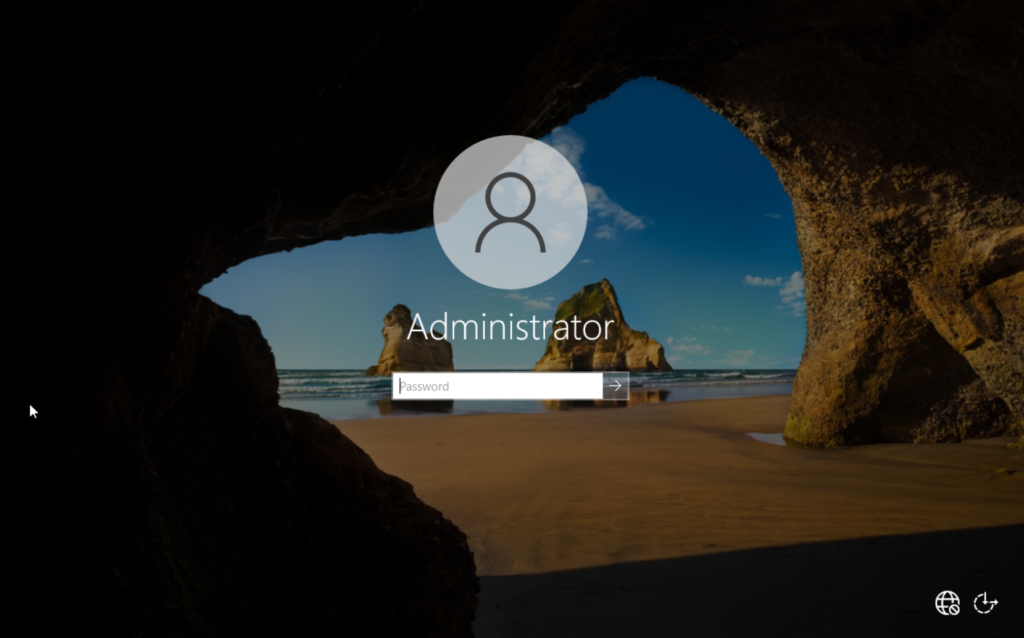
The first thing I will do, is to install the guest tools. This will install all the drivers and gives us better integration and performance. Keep in mind that, the steps are slightly different in VMware ESXi.
Open the file explorer, select the virtio-win ISO and double-click the “virtio-win-guest-tools” exe.

Agree to the terms and click on “Install“.
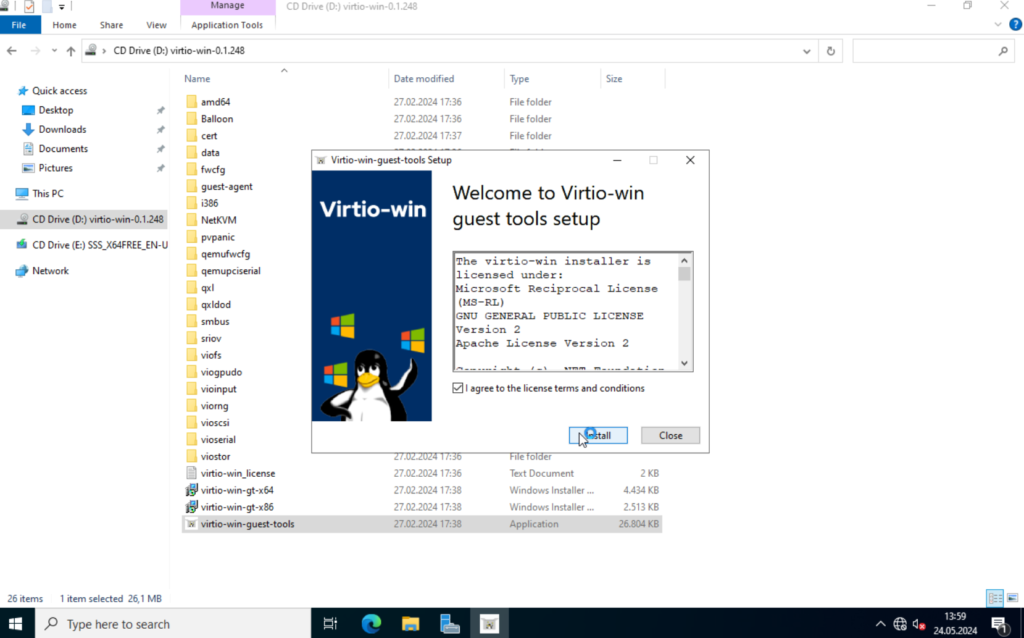
For the next steps, just click on “Next” and “Install” every time. Once done, click on “Close“.

Setting the Hostname, enabling RDP
Next, open the “Server Manager“. In here, click on “Configure this local server“.
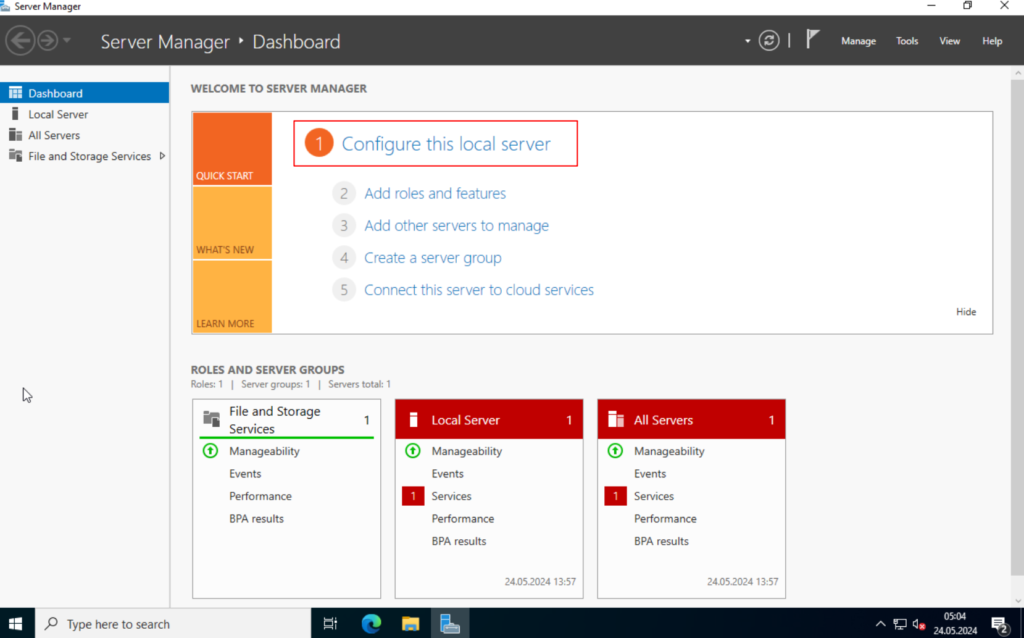
Click on the “computer name“, this will open a new window, where we can change the hostname to something more readable. I will set it to “TEST-DC01“.

Select “OK“, this will ask you to reboot the system. Confirm and close the windows. Again, it will ask you to reboot, but we will select “Restart Later” for now.


Next, we want to enable RDP. Click on “Remote Desktop – Disabled“, select “Allow remote connections to this computer” in the new window and confirm.

Now, click on “Ethernet“. We want to set a static IP. I will use “192.168.152.200” for the Domain Controller.

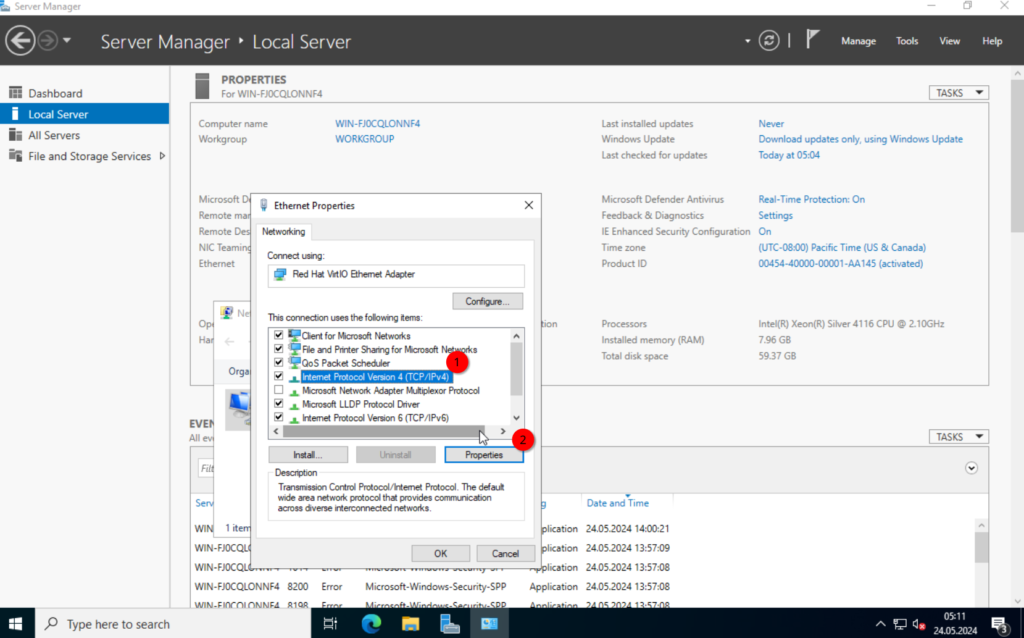

Once that’s done, confirm everything and reboot the system.

Activate Evaluation
If you have a license and want to switch from the evaluation to a full license, use this command.
## Standard Edition
dism /Online /Set-Edition:ServerStandard /ProductKey:XXXXX-XXXXX-XXXXX-XXXXX-XXXXX /AcceptEula
## Datacenter Edition
dism /Online /Set-Edition:ServerDatacenter /ProductKey:XXXXX-XXXXX-XXXXX-XXXXX-XXXXX /AcceptEula
Windows Domain Controller Deployment
Install Domain Services Role
Now that the base setup is done, we can continue with the installation of our first role.
Once logged in again, open the “Server Manager“, click on “Manage” -> “Add Roles and Features“.

Click on “Next” and make sure “Role-based and Feature-based installation” is selected. Click on “Next“.

Select “Next“.

Now, here we select the “Active Directory Domain Services“, the “DNS Server” and confirm the required features.
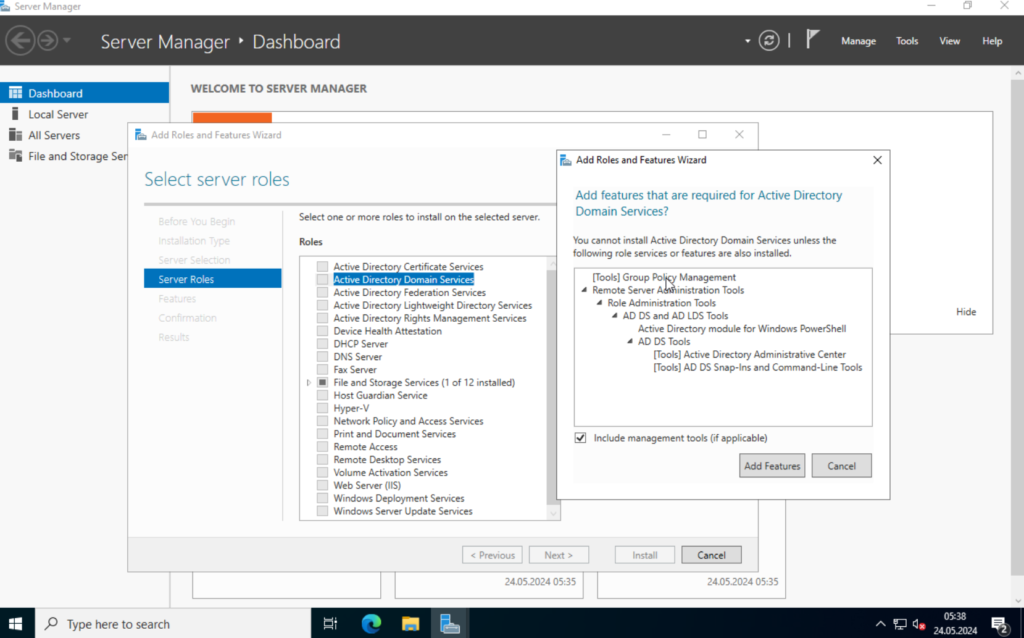
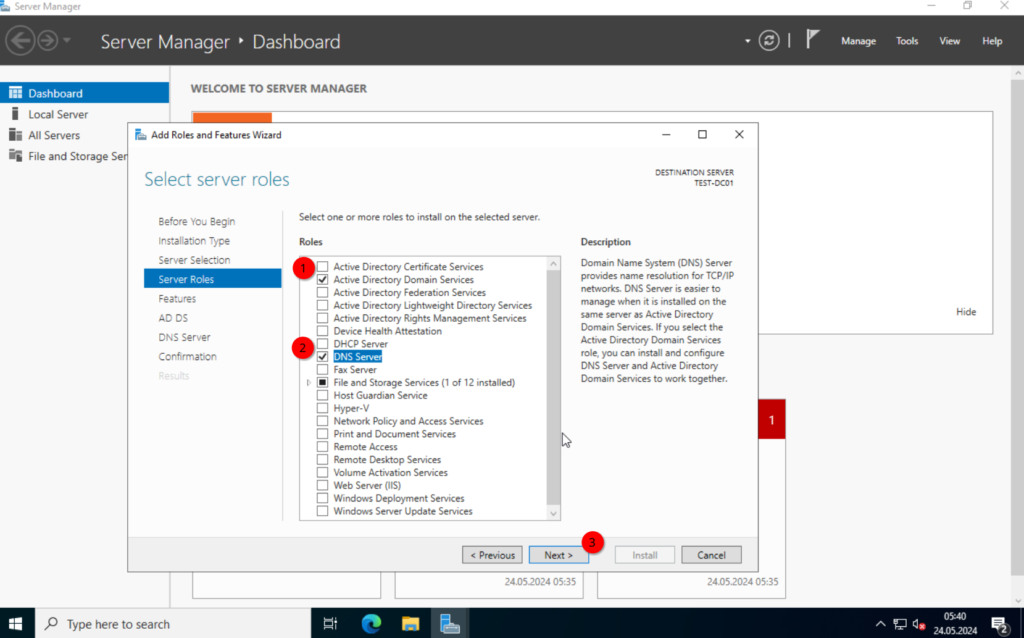
Click on “Next” and “Next” again on the “Select Features” tab. Continue until you get to the “Install” page.

Set up the Domain Service
Once the installation is done, click on the “Promote this server to a domain controller” link or select the banner on the top right.
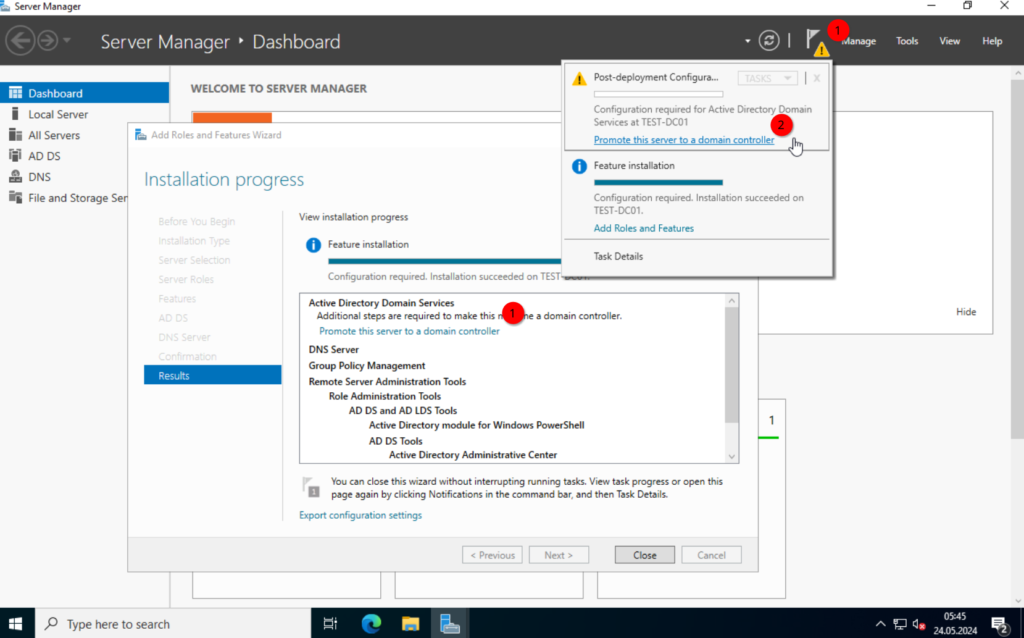
This is the Active Directory Deployment. Here we can set up our Domain.
Select “Add a new forest” and give it a nice and telling name.
Domain Recommendation
In production, it is recommended to use a subdomain of your business domain. For example. My domain is “random-it-blog.de“, for my internal systems I would use something like “intra.random-it-blog.de“
I will be using “test.intra“

In the next step, we have to set a recovery password. This is only required in a disaster situation.

You can ignore the DNS warning for now. Click on “Next“.
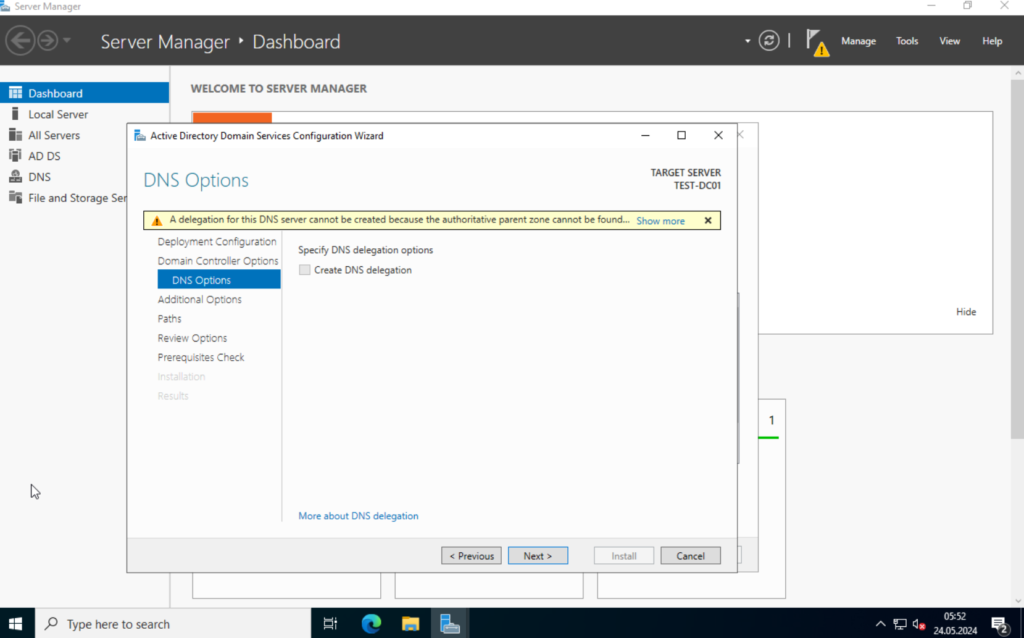
Make sure the NetBIOS domain name is correct and click on “Next“.

I would recommend leaving the defaults for the system folders.

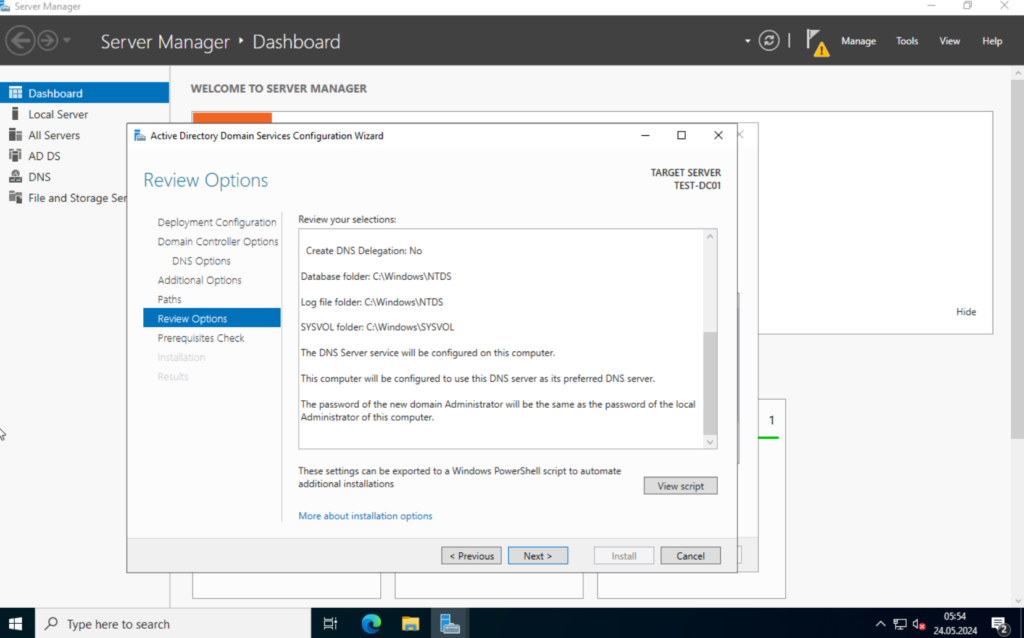
Here you can review the settings. If you are happy with it, click on “Next“.
Next, the system will run a prerequisite check. Again, you can ignore the DNS warning.
Select “Install“.

The system will automatically reboot.

Once the system boots back up, you should see your administrator account with the domain.

Alright. That’s it for the installation of a Windows Domain Controller. In Part 2 we will create a few users and groups, add a server to the domain and configure a file server.
Till next time.