Setting up a Windows Certificate Authority, configuring certificate templates, setting up auto-enroll.
Hello everyone,
we continue our series, on how to set up a Windows Server Environment. Last time we configured our DHCP server, a file server and created a group policy to automatically assign a network drive to specific users.
Today, we are deploying a Windows CA, and auto-enroll our users and clients to distribute certificates automatically. We mainly use this for Wi-Fi authentication in combination with radius.
Let’s begin.
System Information
| Hostname | IP | Function |
| TEST-DC01 | 192.168.152.200/24 | Domain Controller / Active Directory / DNS / DHCP |
| TEST-FILE | 192.168.152.201/24 | File Services |
| TEST-CA | 192.168.152.202/24 | Certificate Authority |
Network Information
| Network | 192.168.152.0 |
| Subnet | 255.255.255.0 |
| Gateway | 192.168.152.254 |
Windows Certificate Authority Deployment
Active Directory Certificate Services Installation
I deployed another Windows Server VM for this, calling it “TEST-CA“. I won’t go through the installation and base configuration, since we already did this in the previous posts.
We go through the same steps. Install the agent, rename the server, give it a static IP and join it into the domain.
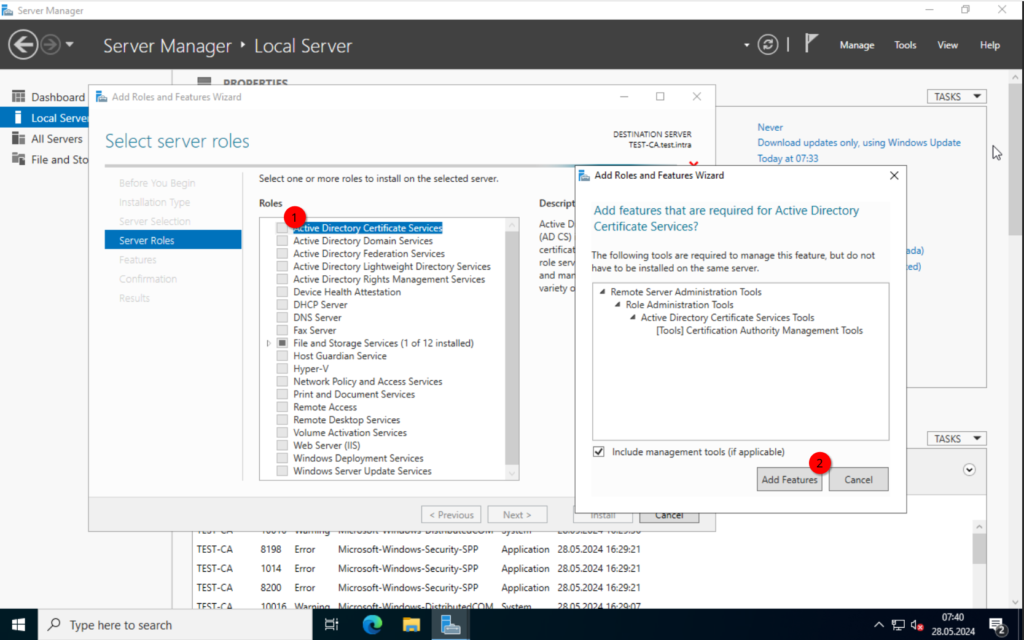
Once the system is up and running, log in, open the “Server Manager“, click on “Add Roles and Features” and select “Next” until you reach the “Server Roles” tab. Here we select the “Active Directory Certificate Services” and add the Features.
Keep clicking on Next until you reach the “Role Services” tab. Make sure “Certificate Authority” is selected and click on Next.
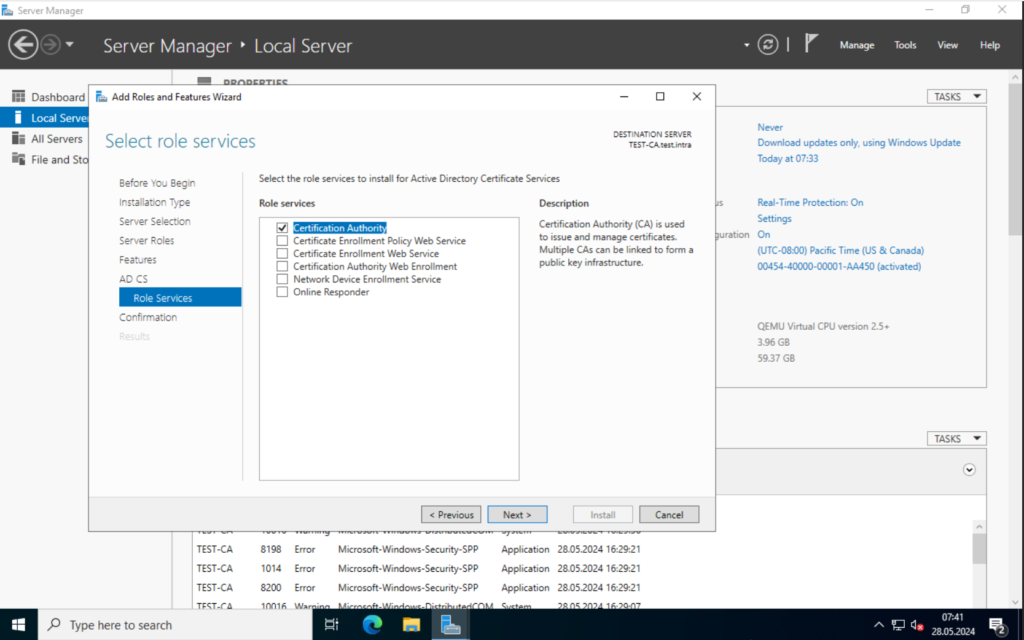
Select “Install” and wait for the installation process to finish.
Active Directory Certificate Service Configuration
Once done, select “Configure Active Directory Certificate Services on the destination server“.
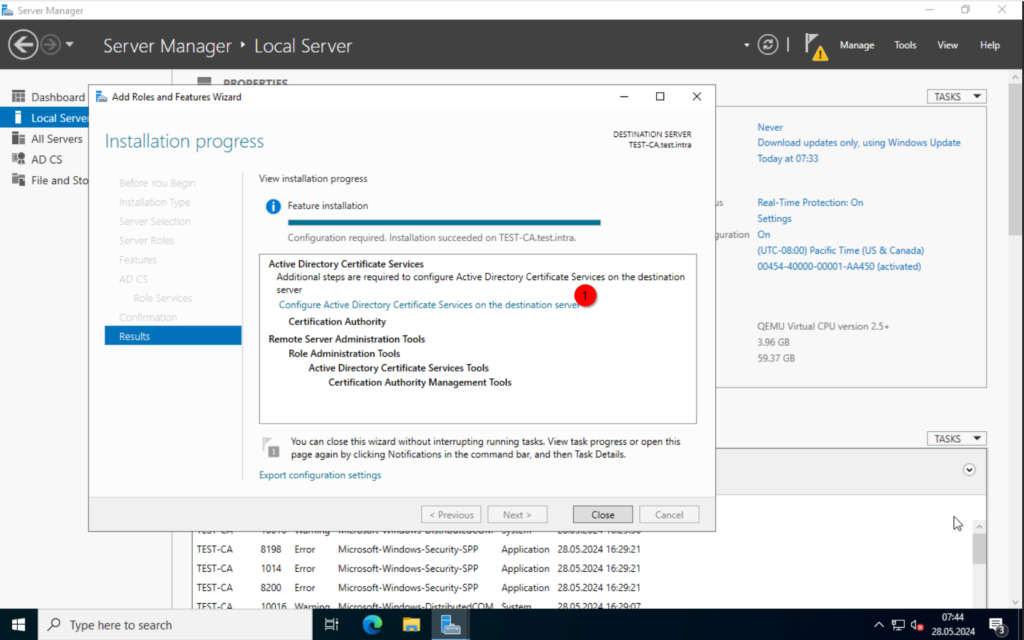
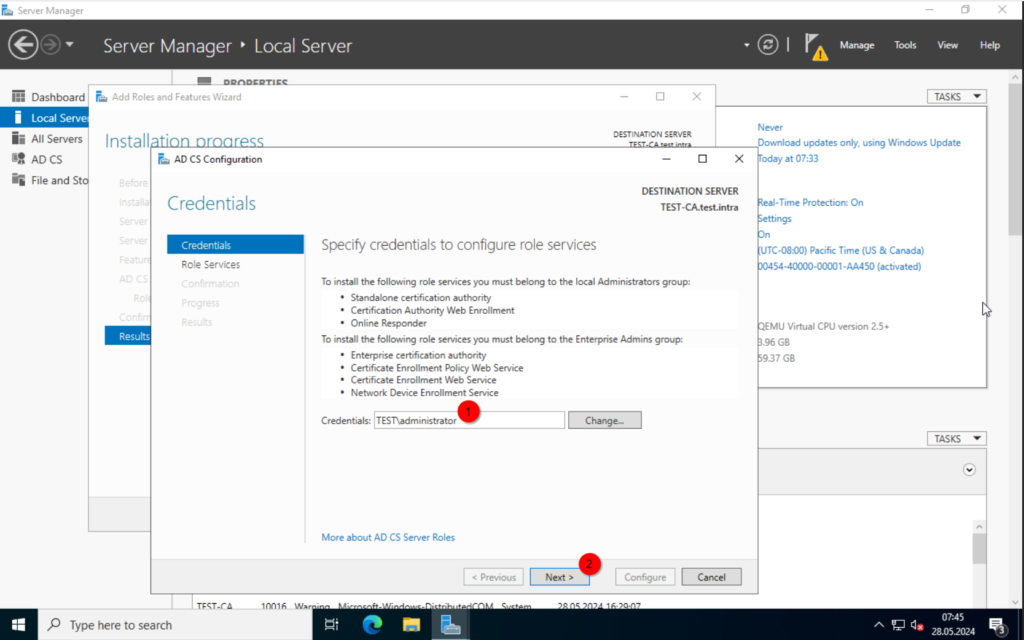
Now, to the actual configuration.
Verify that the credentials are correct and click on “Next”.
Select the “Certificate Authority” and select “Next”.

We choose the “Enterprise CA” for the type. “Standalone CA” would be used, if we wanted a Certificate Authority without a Domain Controller.
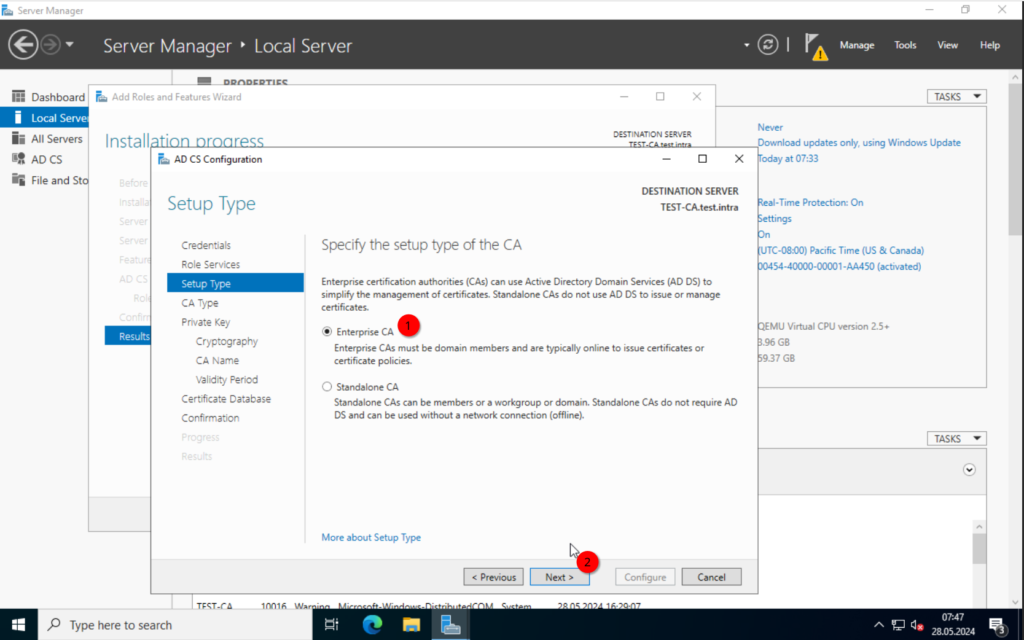
This will be our “Root CA“, so select this and click on “Next“.

“Create a new private key“
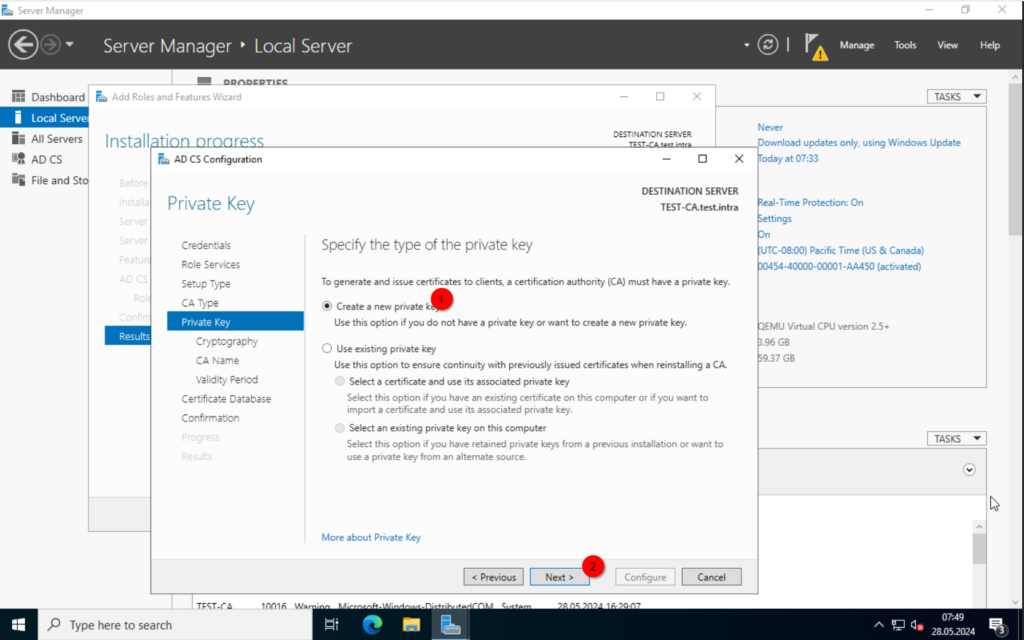
In the next step, I will choose a key length of 4096 and leave the has algorithm at SHA256. Choose what would be best for your use case.

I will change the common name for the CA to “TEST-CA” and leave the rest at its defaults.

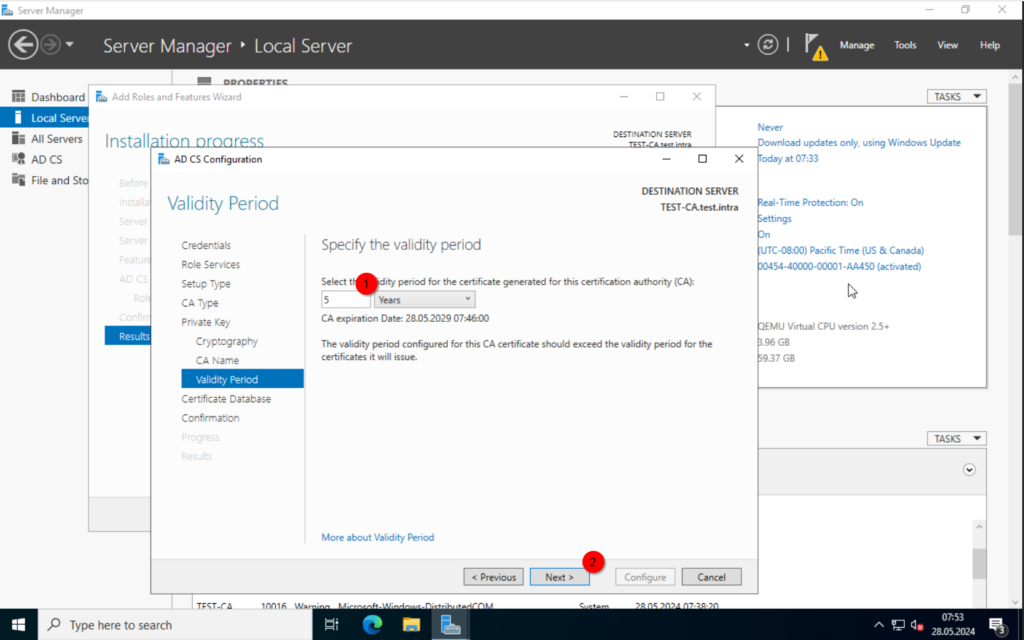
Here we can specify the validity period. I will leave it at its default of 5 years.
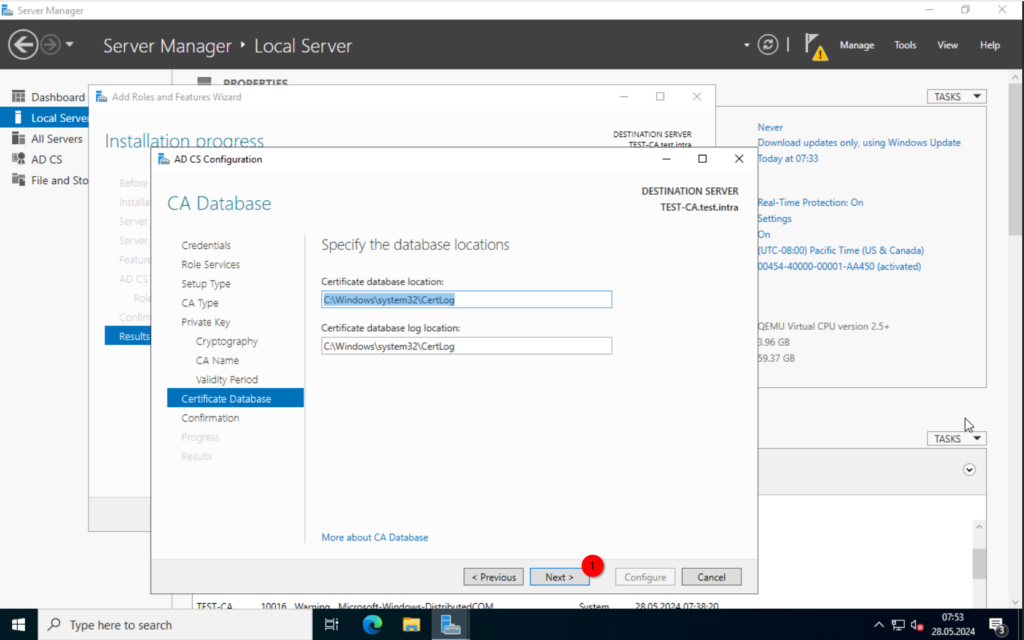
Specify the database location. I will leave the defaults.
Last step. Verify the configuration and click on “configure“.
Once the process is finished, select “close“.

Certificate Templates
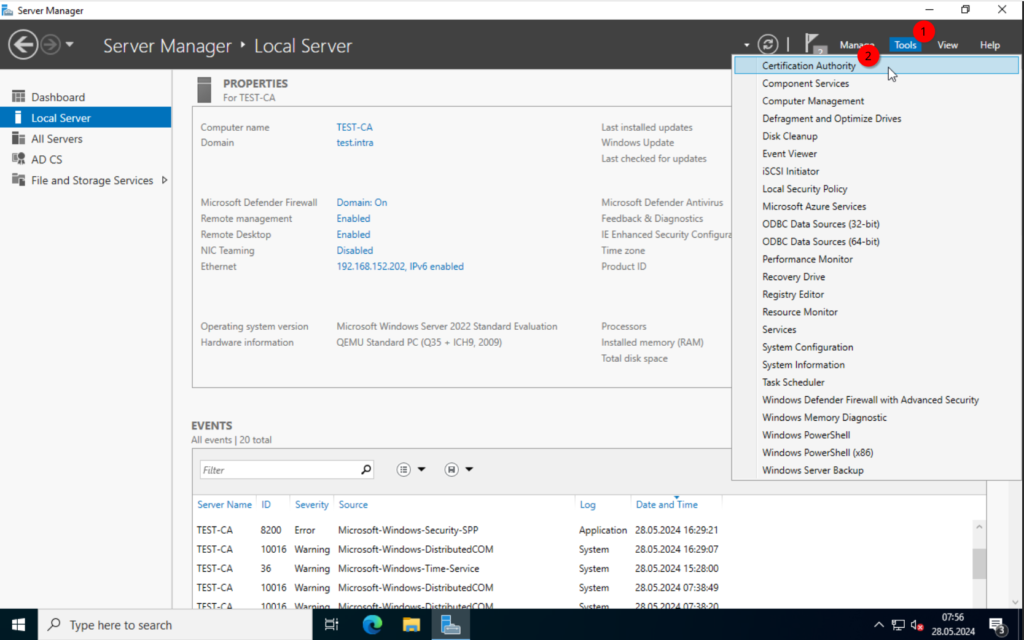
Alright. We have our CA, now we can configure our templates. For this, select “tools” in the “Server Manager” and click on “Certification Authority“.
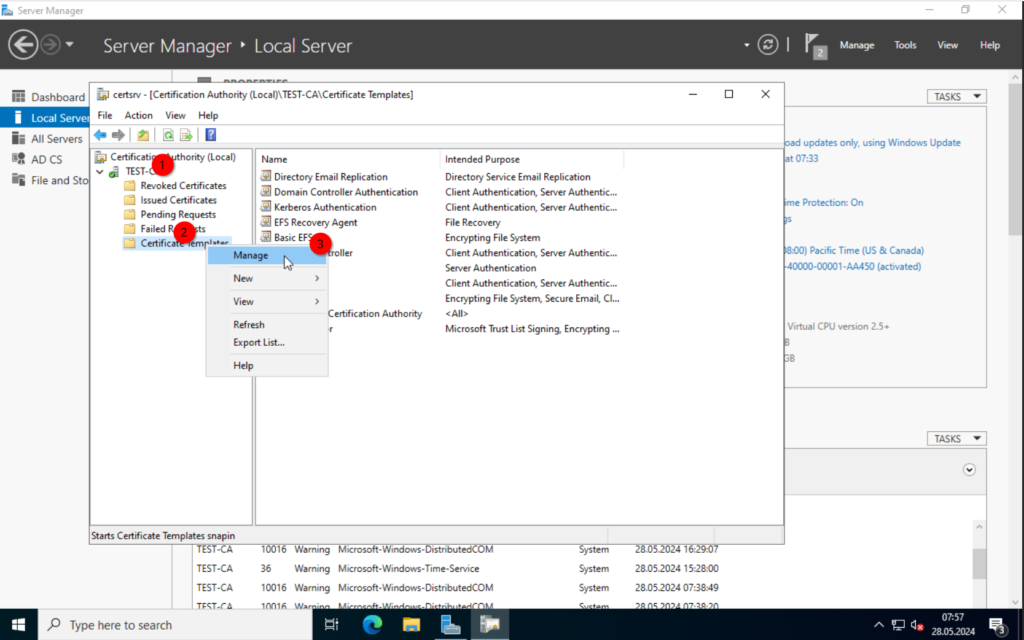
In here, we right-click on “Certificate Templates” and select “manage”.
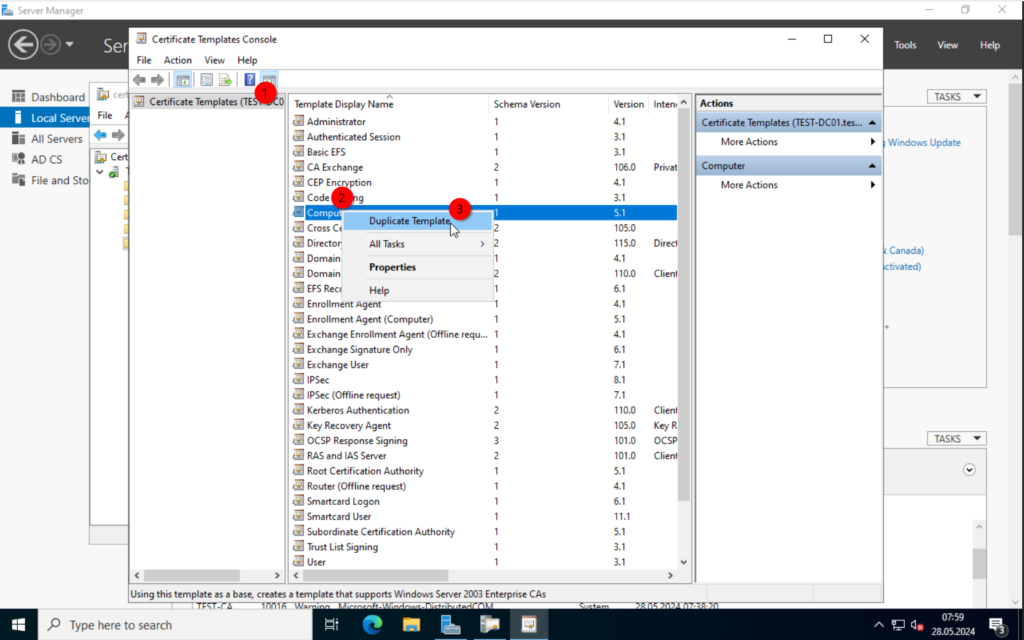
This will open a new window with all the certificate templates. We will use 2 of those as our template.
Right-click on the “Computer” template and click on “Duplicate Template”.
In the screenshots below, you can see the settings I will change.
Important is the “Subject Name” configuration. Make sure to set the “Subject name format”. Otherwise, we will get an error message when trying to deploy the certificates.
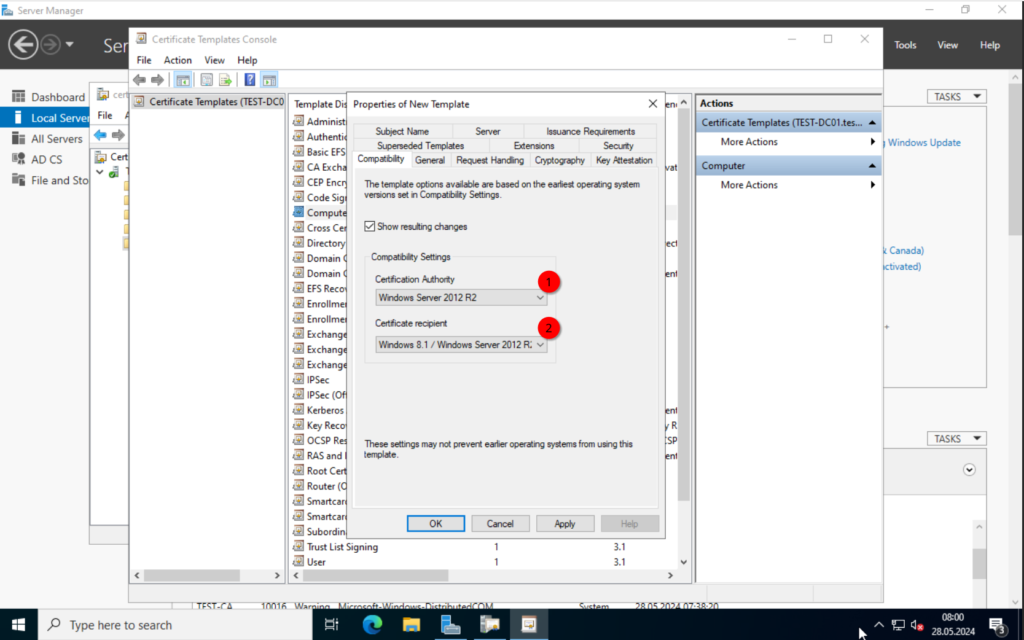
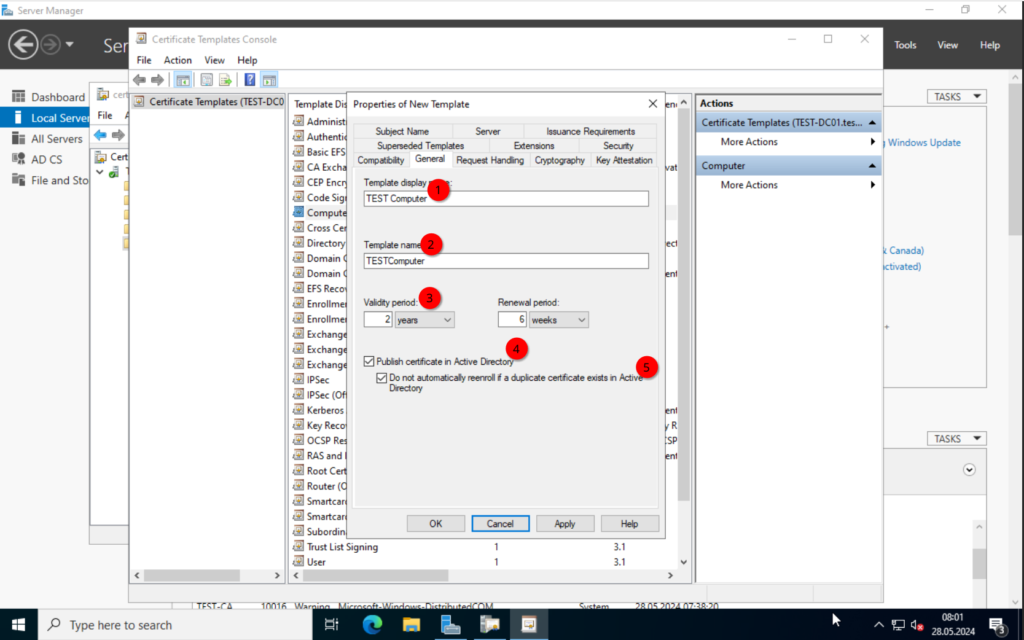
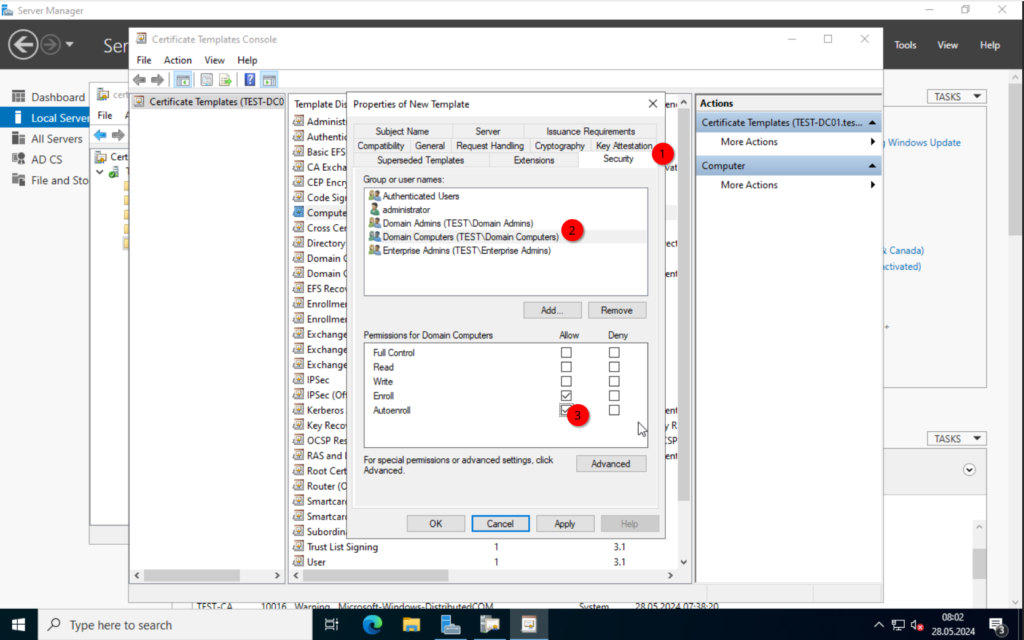

Alright. Click on OK and right-click on the “User” template. Again, click on “Duplicate Template”.
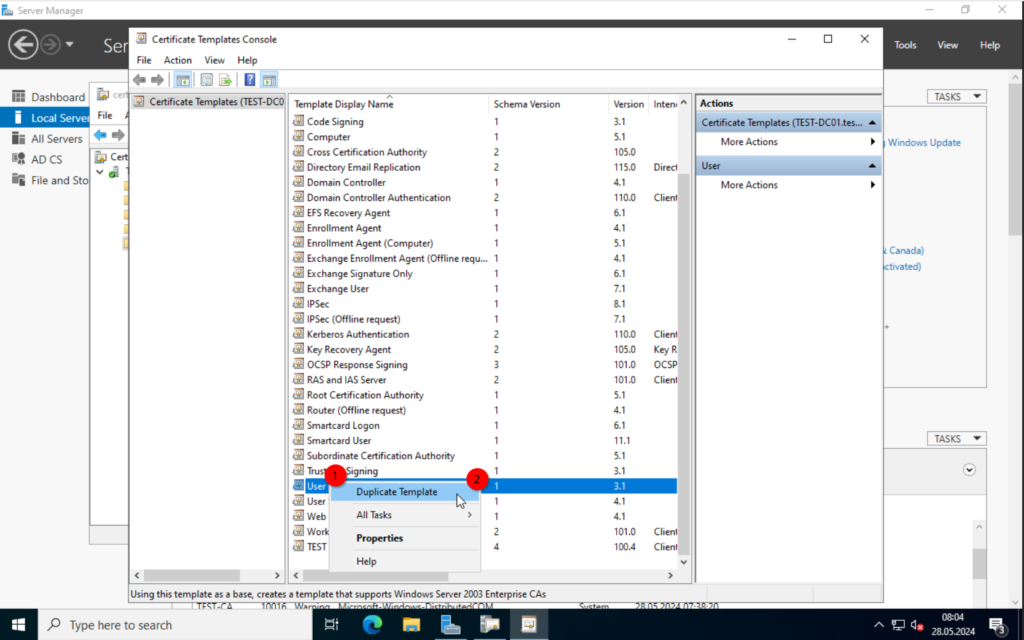
The settings are more or less the same. If you have users with e-mails already created, than you could include the “e-mail name” in the “Subject Name“.
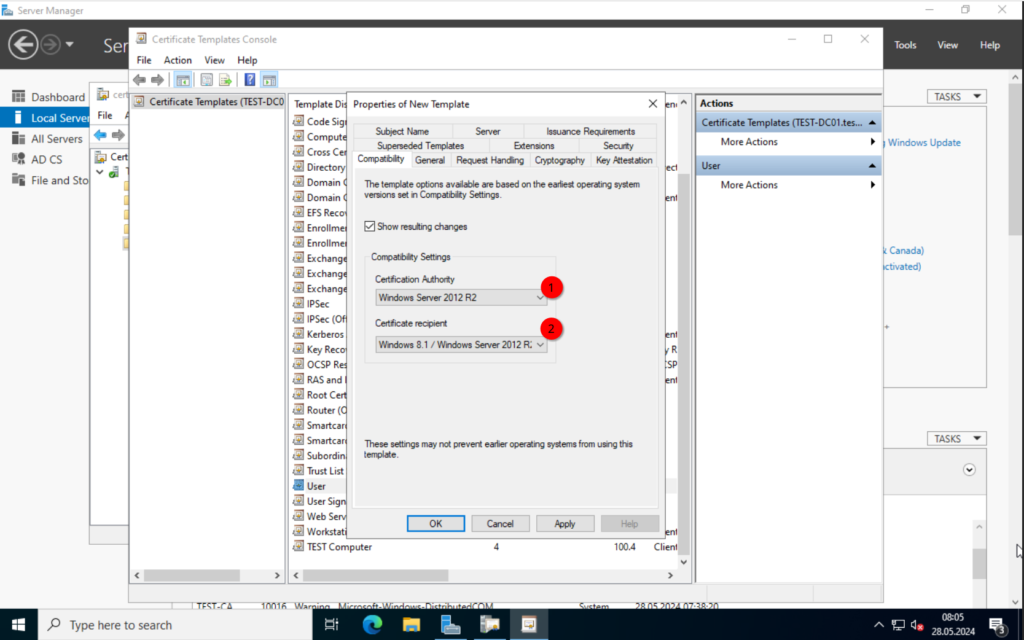


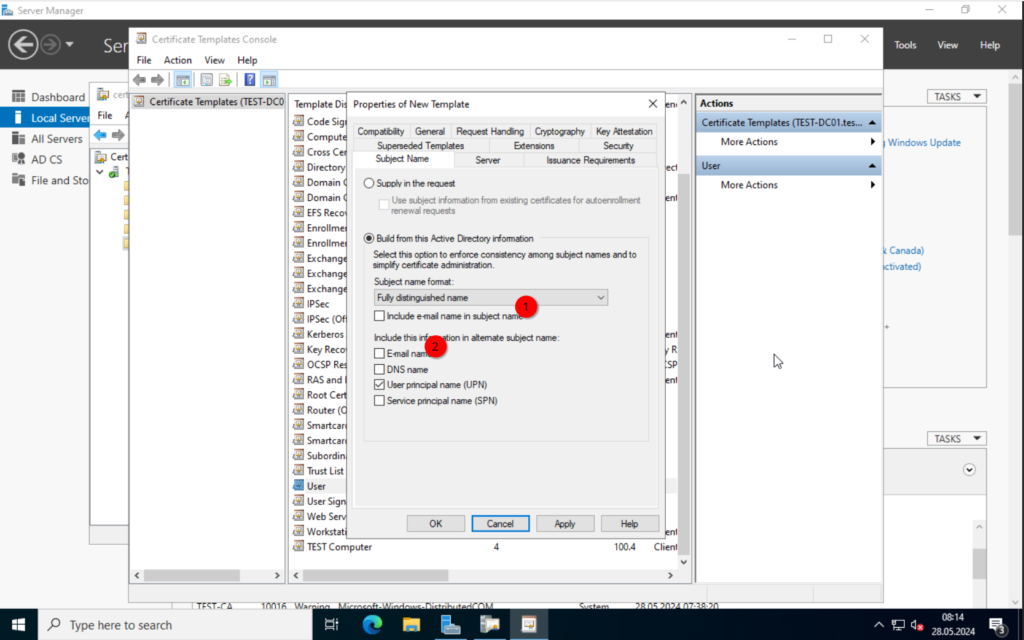
Once done, click on “OK”.
Close the “Certificate Templates Console” and switch back to the “Certficate Authority”. Right-click on the “Certificate Teplates” -> “New” -> “Certificate Teplate to Issue“.

Select the newly created Templates “TEST Users” and “TEST Computer” and click on OK.

The two templates should now show up in the “Certificate Templates“.
Group Policy for Certificate auto-enrollment
Create the group policy
We log back into the TEST-DC01 server, where we create a new group policy. For a step by step on how to create a policy, check the previous post.
Now, create a new policy, I will name it “certificate – enroll – user“. Edit the policy and enable the “Auto-Enrollment“.
User-Configuration -> Policies -> Windows Settings -> Security Settings -> Public Key Policies | Certificate Services Client – Auto-Enrollment.
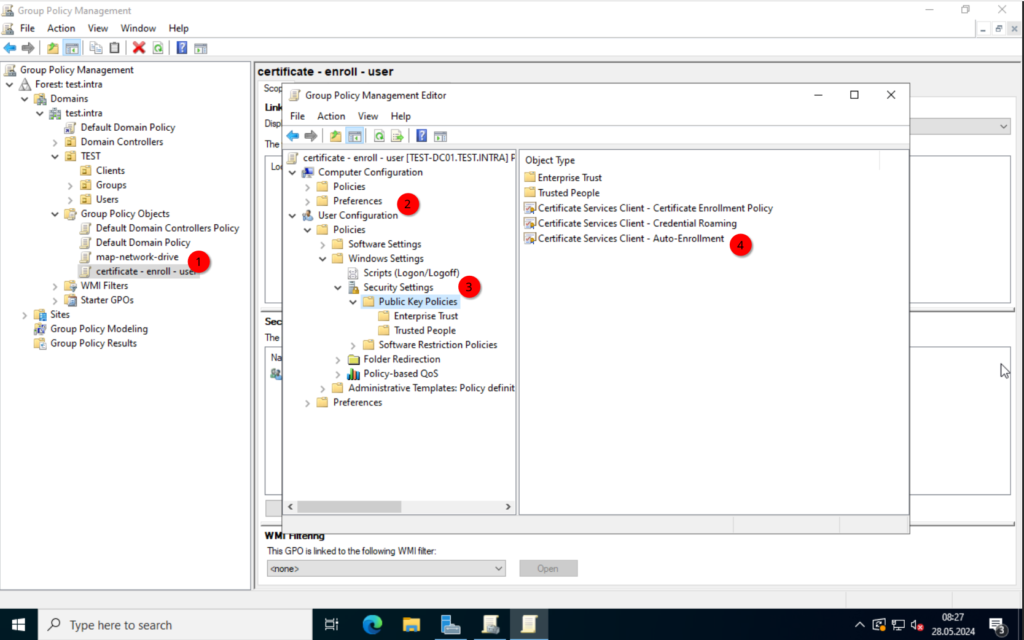
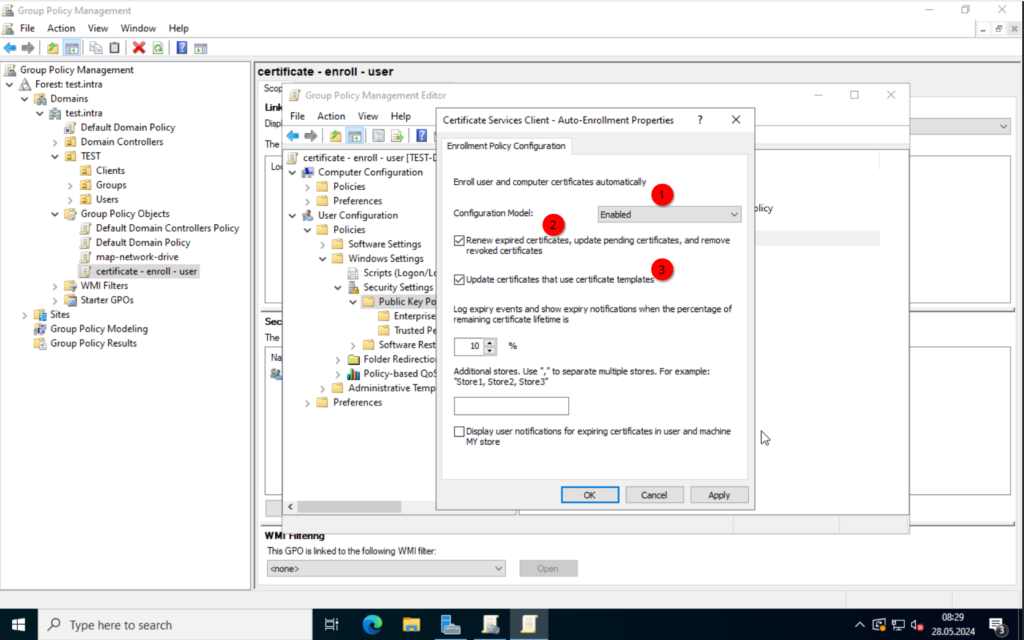
Close the window and create another policy. This time we will create one for the computer.
The steps are almost identical, with the key difference that we use the “computer configuration“.
Close the window and assign the policies to the correct OUs, by either drag and dropping the policy or right-clicking the OU and selecting “Link an existing GPO“.
For the user policy.
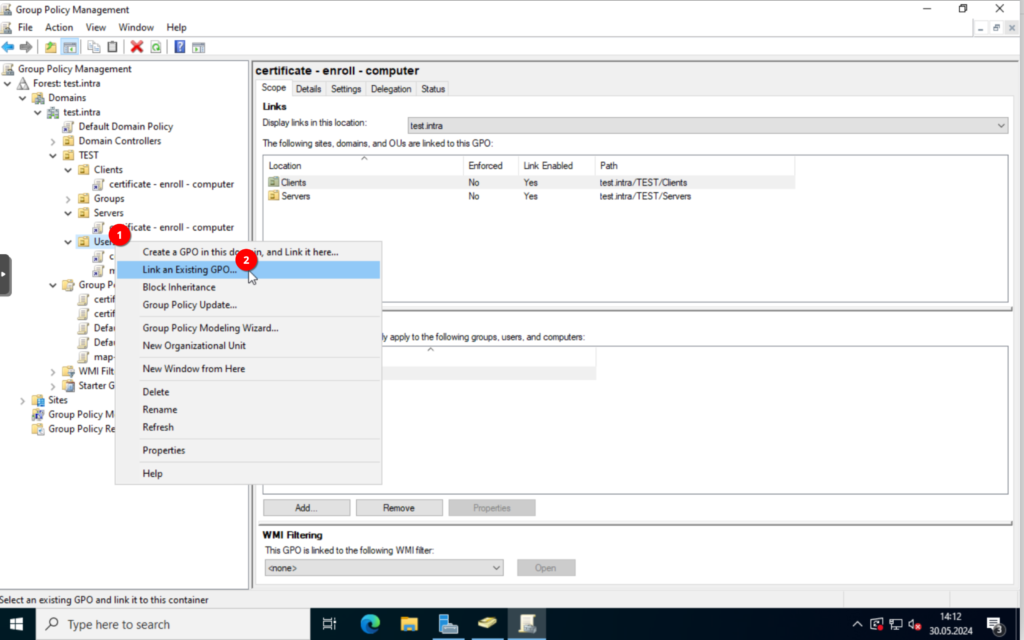

For the computer policy

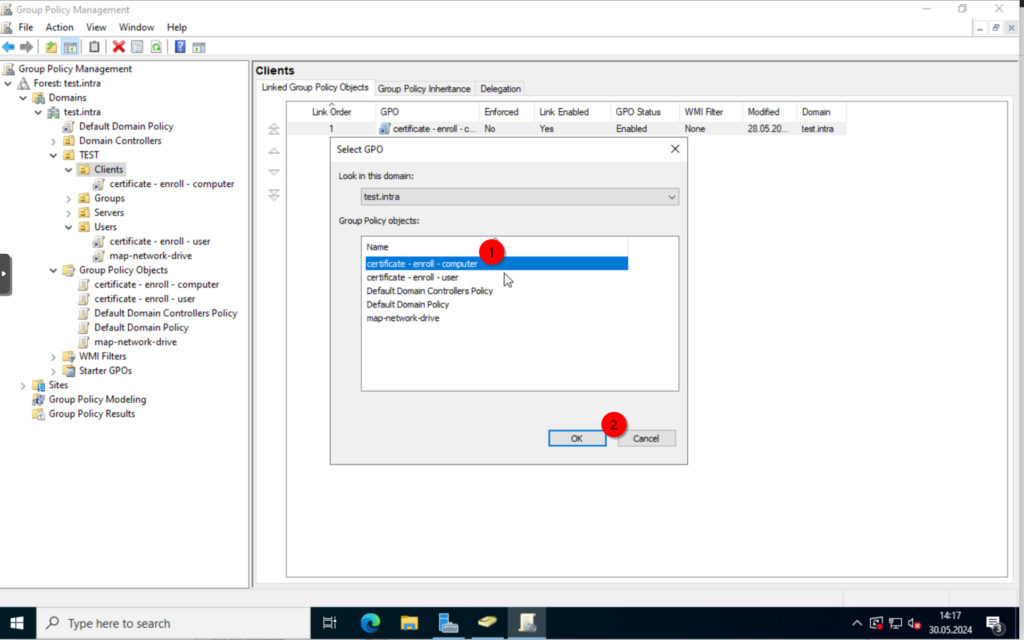
Next, we test the policies on our client, we joined to the domain last time.
Testing the certificate auto-enrollment
Now we want to check if the policy works. We can either restart the client or execute a policy update through the command prompt. I will show you the latter.
Log into your Windows 11 client.

Once logged in, open the command prompt by typing “cmd” into the search.

Type in the following command, to force a policy update.
PS \home\user> gpupdate /force
Updating policy...

Computer Policy update has completed successfully.
User Policy update has completed successfully.
Alright. Let’s check the local certificate store for the certificates.
Type in the following to open the user certificate store.
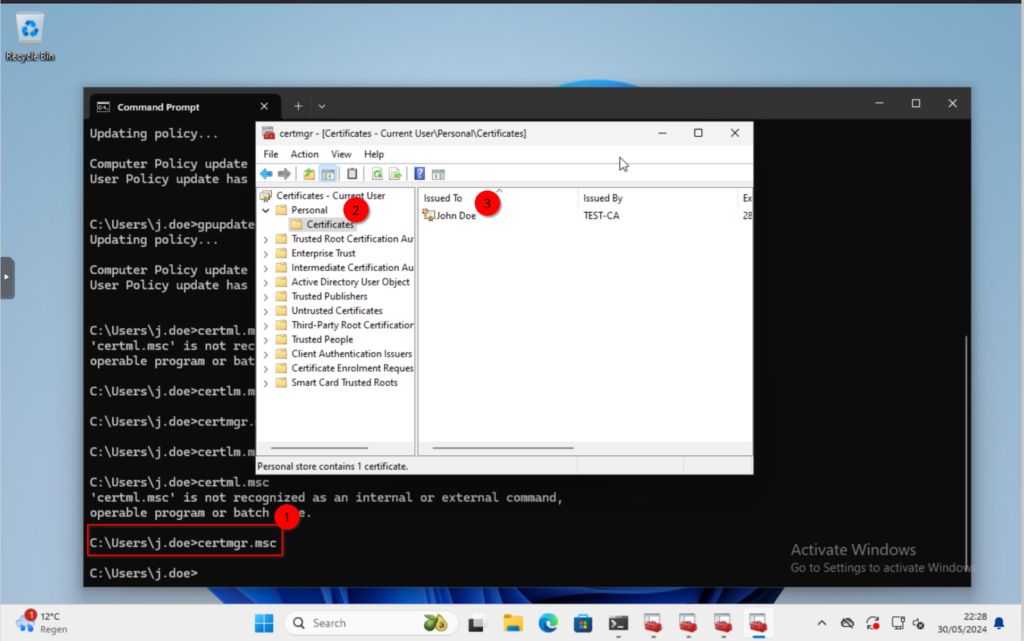
PS \home\user> certmgr.msc
Navigate to the “Personal” -> “Certificates” folder in the new window.
Here we should see our new certificate.
Next we should check the computer certificate. Go back up to command prompt and type in the following.
PS \home\user> certlm.msc
This will open the certificate store for the local computer. Again, navigate to “Personal” -> “Certificates” and verify that the certificate has been created.
Missing certificates
In case, the certificates do not show up on your client. Check a few things. Verify that the client, and the user you log in with, is in the correct OU.
Check that the policy is correctly assigned. The computer policy has to be assigned to the OU the computer is in, and similarly for the user policy.
Use the following command to check if the policy is being loaded at all.
gpresult /R
This will show you a list of the policies that are loaded.
Let me show you an alternative way to access the user certificate.
Type “mmc.exe” into the command prompt. This should open a new console window. Click on “File” in the top left and select “Add/Remove a Snap-in“.
Select “Certificates” in the new window and click “Add“. This will add the local certificates store to the console.


Using this, you could create your own view within the console window.
Alright, we have our certificates, but what can we actually do with that?
Like I mentioned in the beginning, the main usage for us (the business I work for) is for the Wi-Fi authentication. We will get into that in the next post, where we deploy a NPS server, configure the policies and quickly configure an Aruba Access Point to use said NPS server.
Till next time.