Hi there.
Today I want to take a look, at how to update docker containers using ansible. This is a single home server setup, so no Kubernetes or other orchestration applications. Just simple docker. I have been managing my home servers with ansible for a while now. Nothing too extreme, but every change I make on a server, I try to do with ansible. This makes it easier to reinstall a server in case something goes wrong.
I will also show how to install docker and quick container deployment, just as an example. This server runs Rocky Linux 8.4. To be clear, we could do all of these things with ansible as well, but I think it would be good to see how it’s done manually first.
Let’s begin.
Installation of Docker on Rocky Linux 8/CentOS 8
We will start with the installation of docker. For this we will use the official repository, which you can get from doc.docker.com.
First, we need the repository.
docker :: ~ » sudo dnf install yum-utils -y
docker :: ~ » sudo yum-config-manager --add-repo https://download.docker.com/linux/centos/docker-ce.repo
Now installing docker.
docker :: ~ » sudo dnf install docker-ce docker-ce-cli containerd.io -y
Ok. We have docker now. Let’s check if the service is running.
docker :: ~ » sudo systemctl status docker.service
● docker.service - Docker Application Container Engine
   Loaded: loaded (/usr/lib/systemd/system/docker.service; disabled; vendor preset: disabled)
   Active: inactive (dead)
     Docs: https://docs.docker.com
No, it’s not. We need to start the service and make sure it starts on boot.
docker :: ~ » sudo systemctl start docker.service
docker :: ~ » sudo systemctl enable docker.service
Created symlink /etc/systemd/system/multi-user.target.wants/docker.service → /usr/lib/systemd/system/docker.service.
That’s it for the installation. Next, let’s deploy a container. I will use “portainer” as an example for a few reasons. Primarily because I like it, but also because it uses volumes which makes it more interesting as an example.
Prepare Host for Ansible
There are a few pre-requirements on the docker host to get ansible to work.
I will create a dedicated user for ansible.
docker :: ~ » sudo useradd ansible
docker :: ~ » sudo passwd ansible
Changing password for user ansible.
New password:
Next, we need python3. Ansible needs python for a lot of modules on the target machine.
docker :: ~ » sudo dnf install python3
Now, I did not find another way to get ansible to work with docker, without also installing “docker” with root privileges via pip3.
docker :: ~ » sudo pip3 install docker
Deploying a docker container
As mentioned, we need to create a volume for portainer.
docker :: ~ » sudo docker volume create portainer_data
docker :: ~ » sudo docker run -d -p 8000:8000 -p 9443:9443 --name portainer --restart=always -v /var/run/docker.sock:/var/run/docker.sock -v portainer_data:/data cr.portainer.io/portainer/portainer-ce
This will pull and deploy the container. At this point, we won’t be able to access the WebUI, since the port will be blocked by the firewall. We need to take care of that first.
Let’s check the required ports. I will mark the one we need for the WebUI red.
docker :: ~ » sudo docker ps
CONTAINER ID   IMAGE                                    COMMAND        CREATED         STATUS         PORTS                                                                                            NAMES
26faf16e0bb5   cr.portainer.io/portainer/portainer-ce   "/portainer"   3 minutes ago   Up 3 minutes   0.0.0.0:8000->8000/tcp, :::8000->8000/tcp, 0.0.0.0:9443->9443/tcp, :::9443->9443/tcp, 9000/tcp   portainer
Configuring the firewall.
docker :: ~ » sudo firewall-cmd --add-port 9443/tcp
success
docker :: ~ » sudo firewall-cmd --add-port 9443/tcp --permanent
success
(Optional) Inital configuration of Portainer
In case you are interested in portainer, here is a quick guide on how to configure it. Skip this if you don’t care about it.
Open a web browser and enter the IP of your server with port 9443. https://192.168.178.28:9443 in my case.
Next, enter a password and click on “create user”.

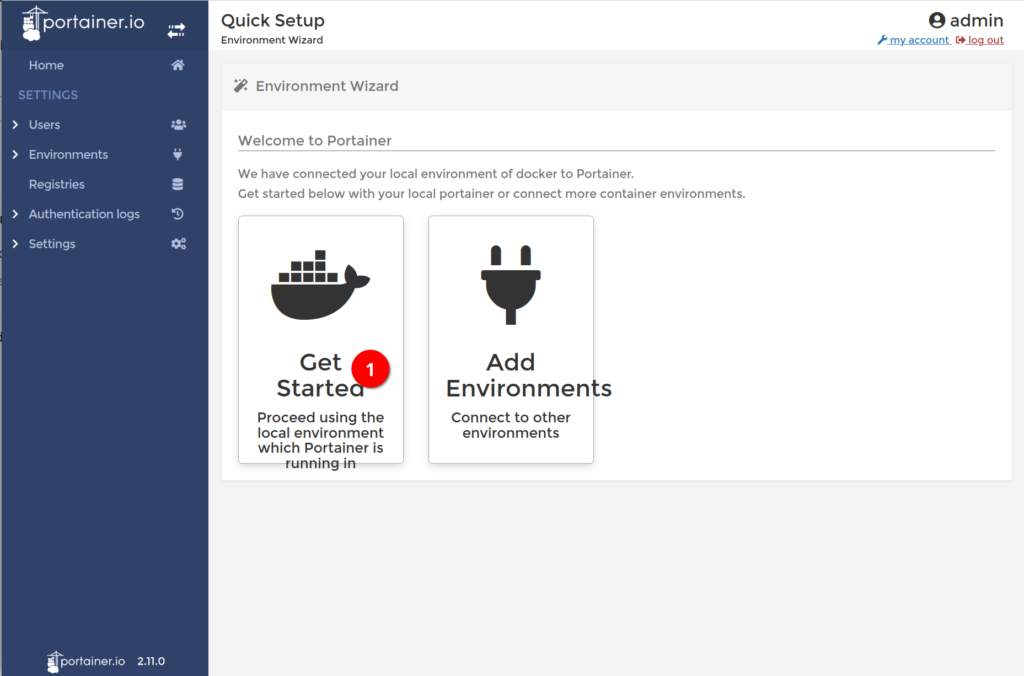
Choose “Get Started”.

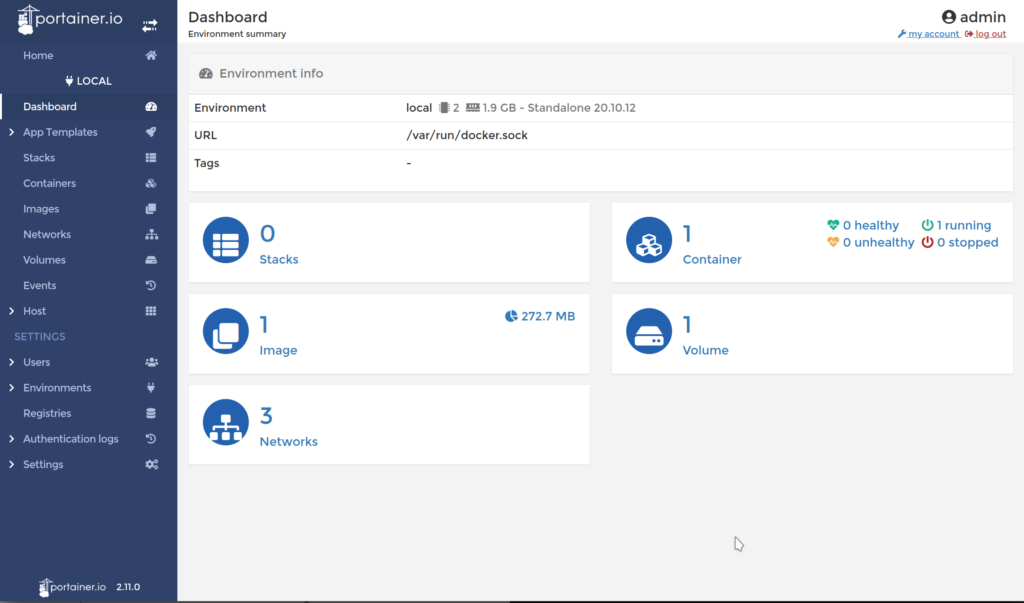
Now you have an overview of your containers, volumes etc. You can manage your containers from here, deploy new ones or check the logs.


Installation of Ansible and creation of the configuration files
Good, now we need ansible. I will install it on my home pc, not a dedicated server. Since my configuration files are on a nextcloud share, I am not worried about losing anything and it’s very simple to get ansible up and running (in this tiny deployment). I am using Fedora 35 for this.
Installing ansible.
fedora-kde :: ~ » sudo dnf install ansible python3
That’s that. Next, we will create a few folders for our configuration files. My current folder layout looks like this. Most of those we won’t use in this guide.
fedora-kde :: ~ » ll /home/Nextcloud/ansible
group_files/
group_vars/
playbooks/
roles/
ssh_keys/
I will begin with the “Inventory” file. This has a list of the hosts we want to manage with ansible. Here is a snippet out of my file. The lower block (new🙂 is what we are using. The lines marked green are the hostnames, and the orange ones are the variables. Group names are purple. If you cannot resolve the hostname, you can add the IP address with “ansible_host”. In this case, I am using a password to execute the commands on the server. But you could (and probably should) use ssh keys for the login.
If you want more details on how to build your inventory, the official documentation explains it beautifully.
fedora-kde :: ~ » cat /home/user/Nextcloud/ansible/hosts
all:
  children:
    fedora:
      hosts:
        file:
          ansible_host: 192.168.178.55
        deluge:
        pihole:
      vars:
        ansible_user: ansible
        ansible_become_pass: super-secure-password
        ansible_ssh_private_key_file: ssh_key/ansible
        ansible_python_interpreter: /usr/bin/python3

    new:
      hosts:
        docker:
          ansible_host: 192.168.178.28
      vars:
        ansible_user: ansible
        ansible_become_pass: this_is_a_password
        ansible_password: this_is_a_password
        ansible_python_interpreter: /usr/bin/python3
Next is the “playbook”. This defines the state of the hosts we want. I tend to create roles for everything because I like the flexibility and I think it’s a bit more organized. This would be out of scope for this post though.
This will create the volume for “portainer” (if it doesn’t already exist) and pull/deploy the “portainer” container. Since I already deployed it, it will only check if there is a newer version available.
fedora-kde :: ~ » cat /home/Nextcloud/ansible/playbooks/docker-update.yml
---
- hosts: new
  gather_facts: false
  strategy: free
  become: true
  tasks:
    - name: Create Portainer Volume "portainer_data"
      docker_volume:
       name: portainer_data
       state: present

- hosts: new
  gather_facts: false
  strategy: free
  become: true
  tasks:
    - name: Create/Update docker container | portainer
      docker_container:
       name: portainer
       image: portainer/portainer-ce:latest
       pull: yes
       state: started
       restart_policy: always
       published_ports: 0.0.0.0:9443:9443
       volumes:
        - /var/run/docker.sock:/var/run/docker.sock
        - portainer_data:/data
That’s it for the configuration files. Let’s try our first test run.
Running Ansible
We will get right into it. The “-C” option runs ansible in “check” mode. Meaning it won’t actually make any changes.
fedora-kde :: ~ » cd /home/user/Nextcloud/ansible
fedora-kde :: ~/Nextcloud/ansible » ansible-playbook -i hosts playbooks/docker-update.yml -C

PLAY [new] **************************************************************************************************************

TASK [Create Portainer Volume "portainer_data"] *************************************************************************
ok: [docker]

PLAY [new] **************************************************************************************************************

TASK [Create/Update docker container | portainer] ***********************************************************************
ok: [docker]

PLAY RECAP **************************************************************************************************************
docker                       : ok=2    changed=0    unreachable=0    failed=0    skipped=0    rescued=0    ignored=0
Looks good to me. Green means that nothing was or in this case would have been changed.
Let’s see what actually happens if there is a change. You can add the option “-v” to get more verbose output. Up to 4 “v” are possible. I will run the command without it.
fedora-kde :: ~ » ~/Nextcloud/ansible » ansible-playbook -i hosts playbooks/docker-update.yml

PLAY [new] *********************************************************************************************************************

TASK [Create Portainer Volume "portainer_data"] ********************************************************************************
changed: [docker]

PLAY [new] *********************************************************************************************************************

TASK [Create/Update docker container | portainer] ******************************************************************************
changed: [docker]

PLAY RECAP *********************************************************************************************************************
docker                       : ok=2    changed=2    unreachable=0    failed=0    skipped=0    rescued=0    ignored=0
Ok, great. We could check the server now, but the output would be the same as the above example with the manually deployed container.
Error Message
If you get an error similar to this one, check again if you installed docker with pip3 as root/sudo.
fedora-kde :: ~/Nextcloud/ansible » ansible-playbook -i hosts playbooks/docker-update.yml -C

PLAY [new] **************************************************************************************************************

TASK [Create Portainer Volume "portainer_data"] *************************************************************************
fatal: [docker]: FAILED! => {"changed": false, "msg": "Failed to import the required Python library (Docker SDK for Python: docker (Python >= 2.7) or docker-py (Python 2.6)) on docker's Python /usr/bin/python3. Please read module documentation and install in the appropriate location. If the required library is installed, but Ansible is using the wrong Python interpreter, please consult the documentation on ansible_python_interpreter, for example via `pip install docker` or `pip install docker-py` (Python 2.6). The error was: No module named 'docker'"}
Docker playbook
Here is a little extra. This task yaml is from my media server, which runs several containers. There are a few more variables in this one, so could be interesting.
Links: