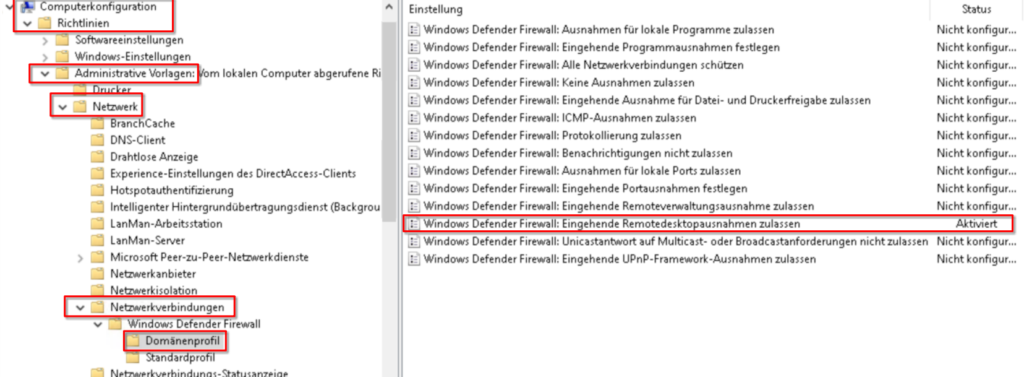
Update: Forgot to include the Firewall Rule
Hello everyone.
Today, I want to show you, how to enable RDP on a client with a GPO. I wanted this for a test environment I set up.
Nothing to fancy, just the policy.
Let’s begin.
Group Policy Management
Create a Policy
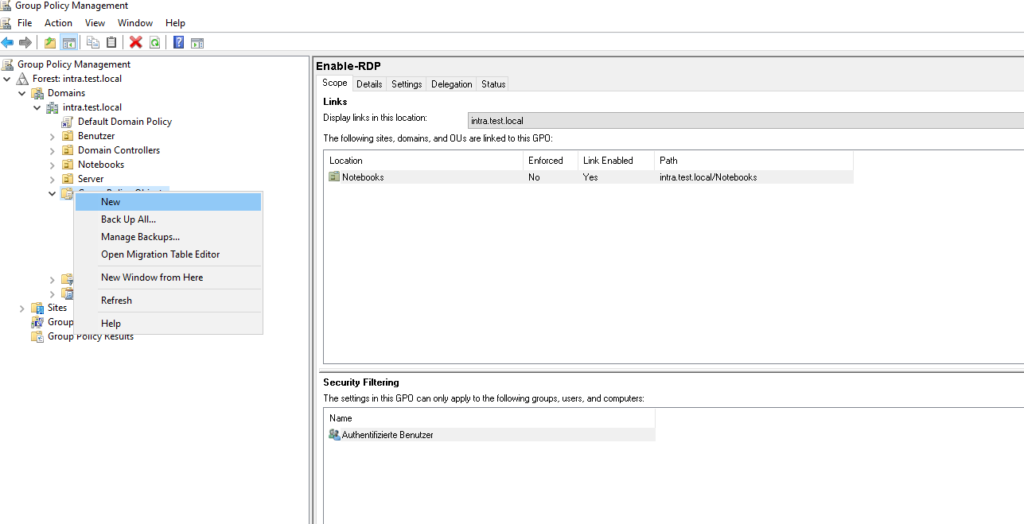
Open the “Group Policy Management” and create a new policy and give it a name.


Configure the Policy
Allow Remote desktop
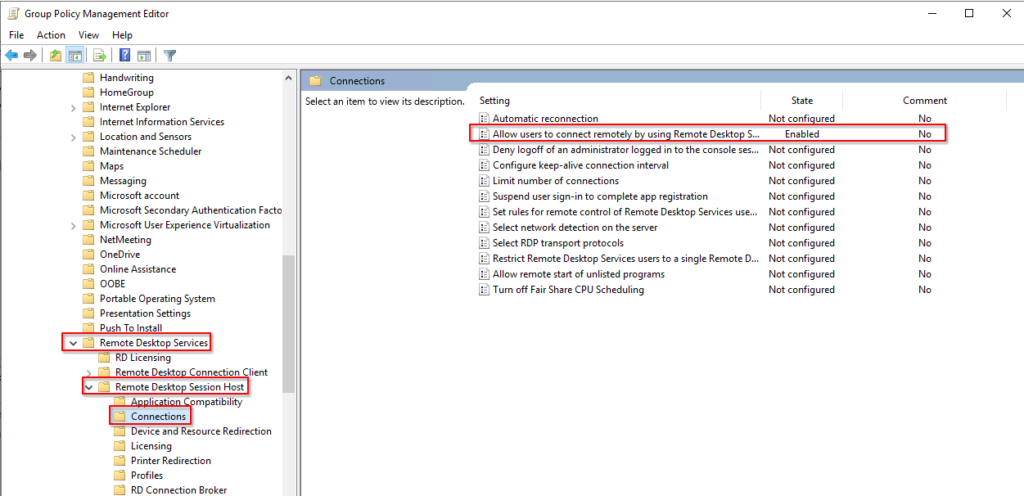
Alright. Now let’s set up the RDP service. Navigate to “Computer Configuration” -> “Policies” -> “Administrative Templates” -> “Windows Components” -> “Remote Desktop Services” -> “Remote Desktop Session Host” -> “Connections” and set the “Allow users to connect remotely by using Remote Desktop Services” to “Enable”.

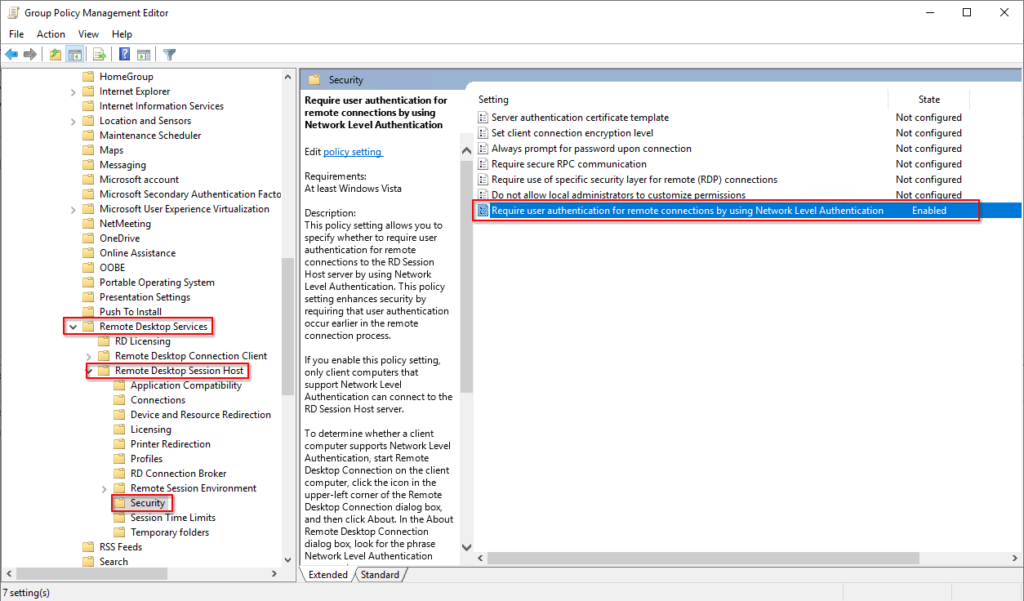
Next, navigate to “Security” under the same folder and set “Require user authentication for remote connections by using Network Level Authentication” to “Enable”.

Set the firewall (Update)
Now we also need to add the firewall exception.
Navigate to “Computer Configuration” -> “Policies” -> “Administrative Templates” -> “Network” -> “Network Connections” -> “Windows Defender Firewall” -> “Domain Profile” and enable “Windows Defender Firewall: Allow inbound Remote Desktop exceptions”.

That should be it, if you want administrative access only. But let’s go further. I want a user to be able to access a client.
Add User to allowed RDP list (optional)
Navigate to “Computer Configuration” -> “Policies” -> “Windows Settings” -> “Restricted Groups”. Right-click on the white space on the right and select “Add Group…”

Click on “Browse …”

Type in “remote” and select “Check Names”. It should say “Remote Desktop Users”. My system was initially German so, that’s why the name is different in mine.


Alright. Select the group and click on “OK”. Now, double-click on the group, here we can add users to the group. Click on “Add…” -> “Browse…” -> Type in the username and click on “Check Names”. It should fill in the user, after this we can click on “OK” in every window.

That’s it. We can close the editor.

Now we can assign the policy to one of the organizational units. Either drag and drop the policy onto one of the folders, or right click on one of the folders and select “Link an Existing GPO…”.

Select the new GPO and click on “OK”.

The Client
Sync the policy
Now we can either restart the client or execute the “gpupdate /force” command in the “command prompt”.

Verify the setting
Let’s check the settings for the remote desktop.
Type in “sysdm.cpl” in the search and hit enter.

This will ask you for your administrative credentials. Type them in and a new window should open. Select “Remote” from the index tab and click on “Select Users…”.

Here we can see the newly added user.

That’s it.
Hope you find this helpful. Till next time.