Hey there. Let’s go over the Sophos XG HA cluster configuration. This will probably be the last part. If you missed the first two parts, just use the buttons above.
The XG cluster configuration is different from the UTM and a bit more involved (if you do it manually). For this setup, I will assume that the Sophos XG is fully licensed, and subscribed. Otherwise, we won’t be able to enable the Cluster.
Here is the topology for this setup.

Let’s begin.
Sophos XG HA Cluster Configuration
For the primary and auxiliary devices, I will use the hostnames “HA1” and “HA2” respectively.
Sophos Auxiliary Configuration
Interface configuration
We will start with the auxiliary. For the cluster, we need a dedicated interface for the HA link and of course the normal internal network, so let’s start with that.
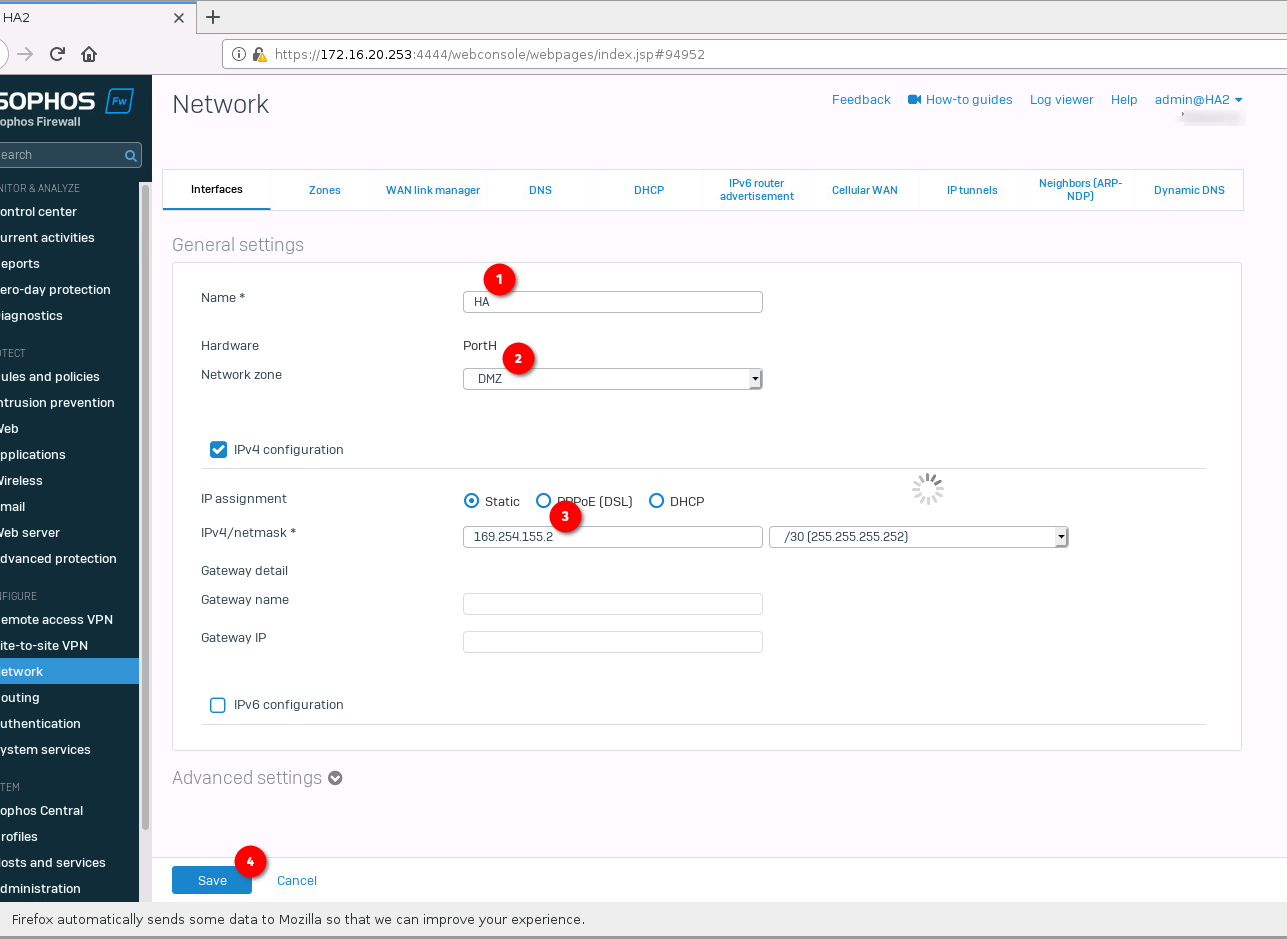
Select “Network” -> “Interfaces” and choose a port you want to set for the HA link, the last port in my case. Enter the IP for that link and (this is important) select “DMZ” for the “interface zone”. I will directly attach the auxiliary to the primary, for the IP, a link-local address will do fine. I will set it to 169.254.155.2/30. The quickHA mode also sets an IP in that range.
- Name: HA Link
- Network zone: DMZ
- IPv4/netmask: 169.254.155.2/30
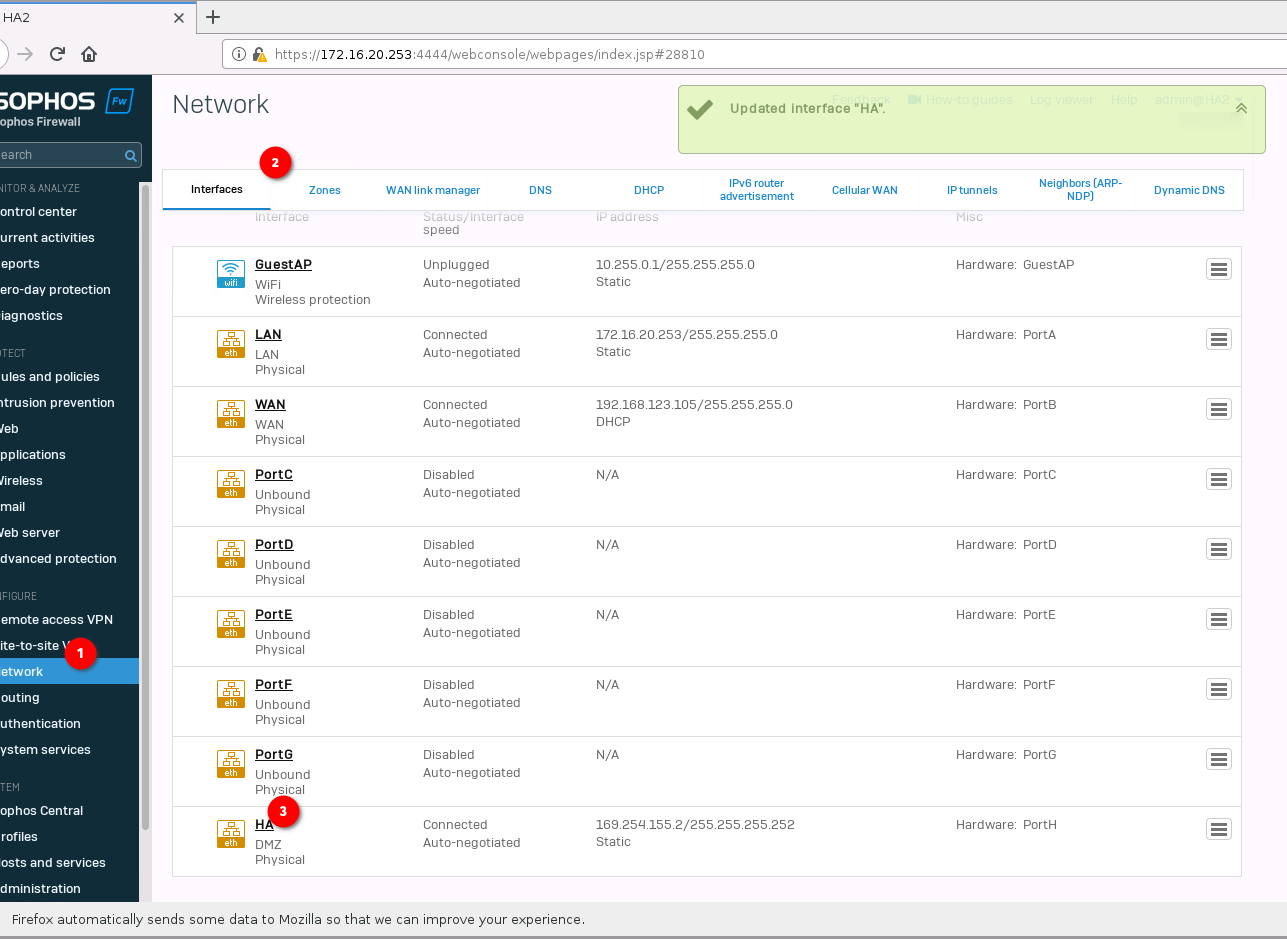
While we are at it, also set the LAN interface to the desired network. I will use “172.16.20.253/24” for the auxiliary.
- Name: LAN
- Network zone: LAN
- IPv4/netmask: 172.16.20.253/24
Enable HA Cluster
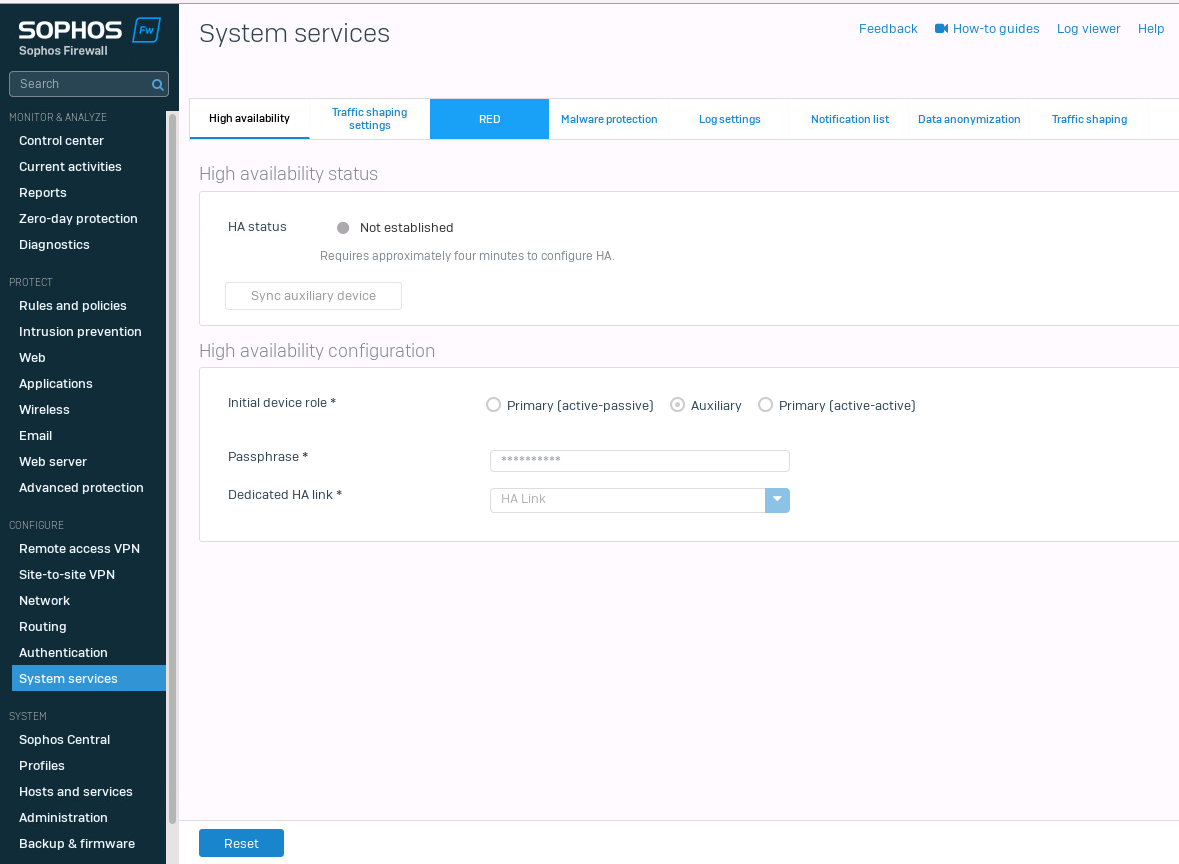
Next, we will enable the HA service on the auxiliary.
Select “System services” -> “High Availability”. Under “High availability configuration” select “Auxiliary” and “interactive mode”.
Here you can enter a “Passphrase” and select the “HA link” we configured earlier. Click on “Save”.
- Initial device role: Auxiliary
- HA configuration mode: Interactive mode
- Passphrase: <secret-passphrase>
- Dedicated HA link: HA Link
Sophos Primary configuration
Network interface configuration
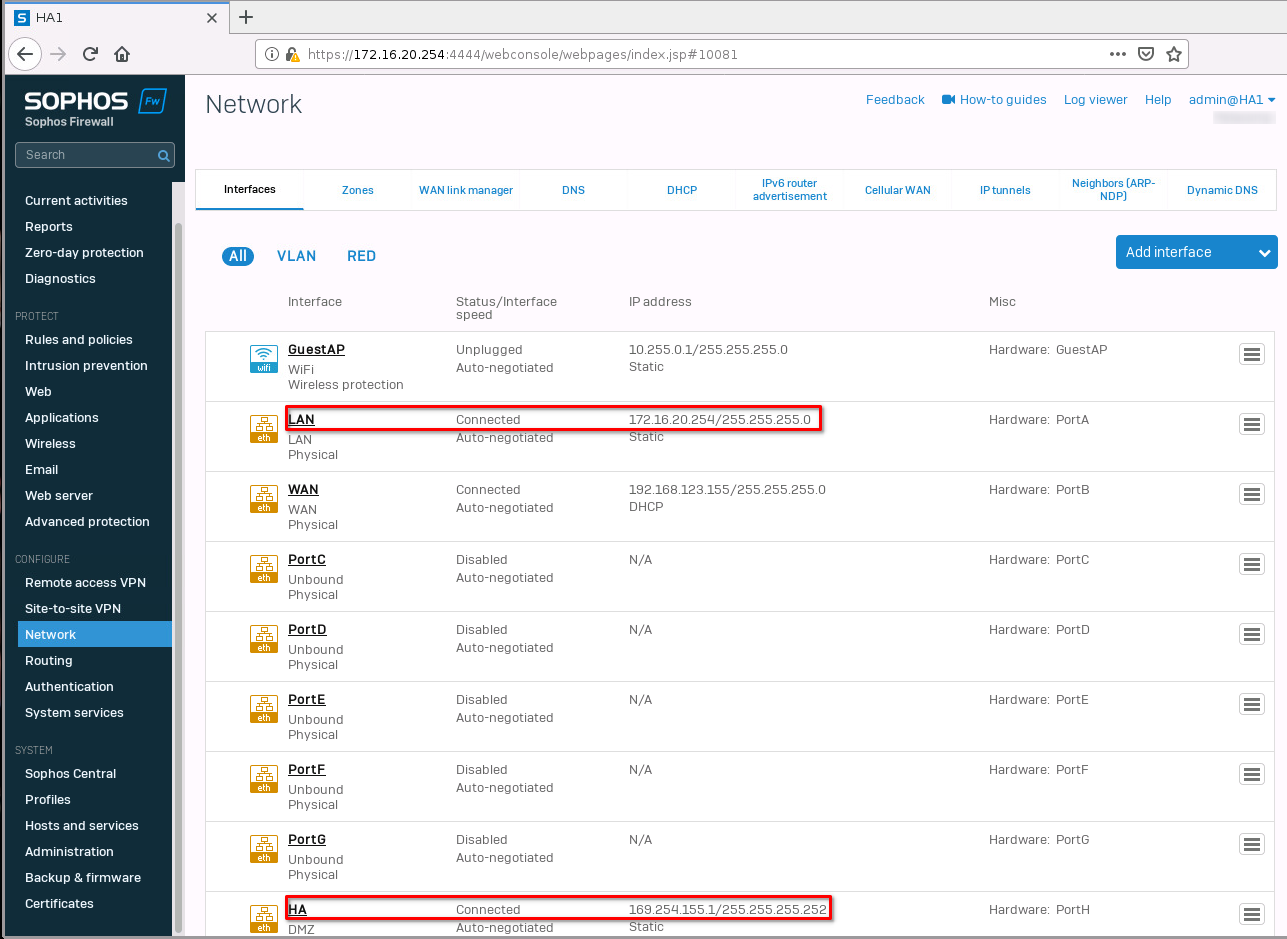
It’s time for the primary system. Navigate to the interface configuration and set up the interfaces. I will use “172.16.20.254/24” for the “LAN” interface and 169.254.155.1/30 for the “HA Link”.
- Name: HA Link
- Network zone: DMZ
- IPv4/netmask: 169.254.155.1/30
- Name: LAN
- Network zone: LAN
- IPv4/netmask: 172.16.20.254/24
Enable HA Cluster
Alright. Now for the last step. Switch to the “High Availability” tab and set the following.
- Initial device role: Primary (active-passive)
- HA configuration mode: Interactive mode
- Passphrase: <secret-passphrase>
- Dedicated HA link: HA Link
- Dedicated peer HA link IPv4 address: 169.254.155.2
- Peer administration settings: (Interface) LAN, (IPv4 address) 172.16.20.253
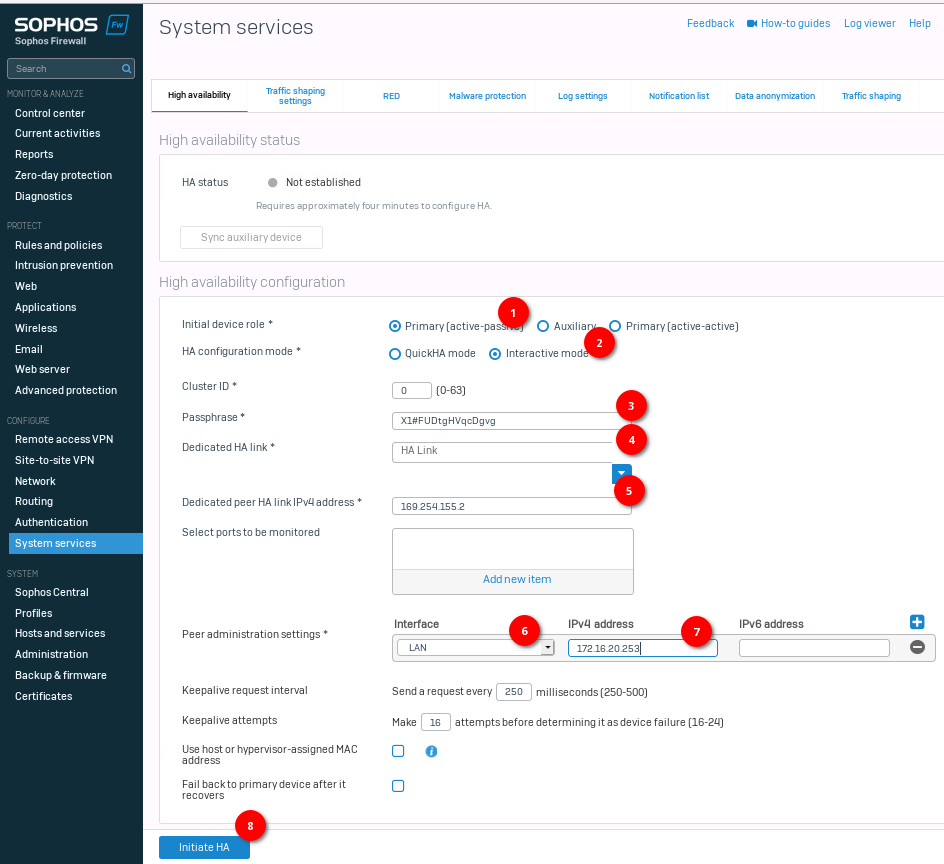
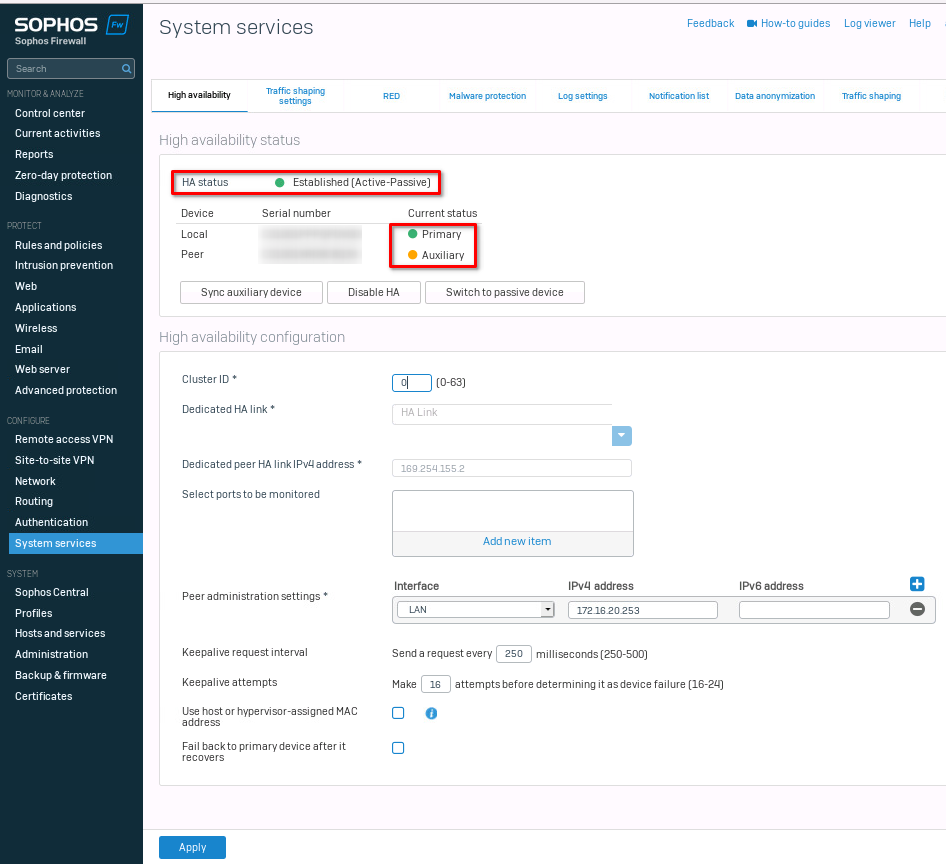
Click on Initiate HA. This will take a few minutes. The systems should reboot. Once this is done, log back in and check the status in the “High availability” tab. The status should be “Established”.
Also, you will see that the “auxiliary” has a small yellow circle. This is normal.
Under the “Select ports to be monitored”, we can choose which ports cause a failover in case of failure.
Now we could test the setup, by unplugging the primary and checking connectivity.
That is it for the cluster setup.
Till next time.