Hello everyone,
today, I want to walk through setting up Yubikey authentication in Fedora GNOME. I recently configured this for my Fedora KDE workstation at work, but I find the implementation in KDE lacking. The integration feels incomplete. For example, the lock screen doesn’t detect the Yubikey until after a failed password attempt, and the login screen provides no visual indication that a hardware key is even required.
On my second work laptop, I have GNOME running, and it works almost flawlessly, though it’s a bit unfortunate that we still do not have an easy GUI to configure this.
For this, I will be using the latest Fedora GNOME version, which is 43 at time of writing.
This guide focuses on GNOME but should work on most Fedora spins.
Prerequisites
A few things I assume.
- A Fedora GNOME installation with disk encryption enabled.
- A Yubikey (other vendors will probably work the same way, but I did not test it).
Setting up the Yubikey
Unfortunately, I don’t have a fresh Yubikey, and I rather not reset it. Currently, there is too much depending on it.
But make sure, that you set a PIN.
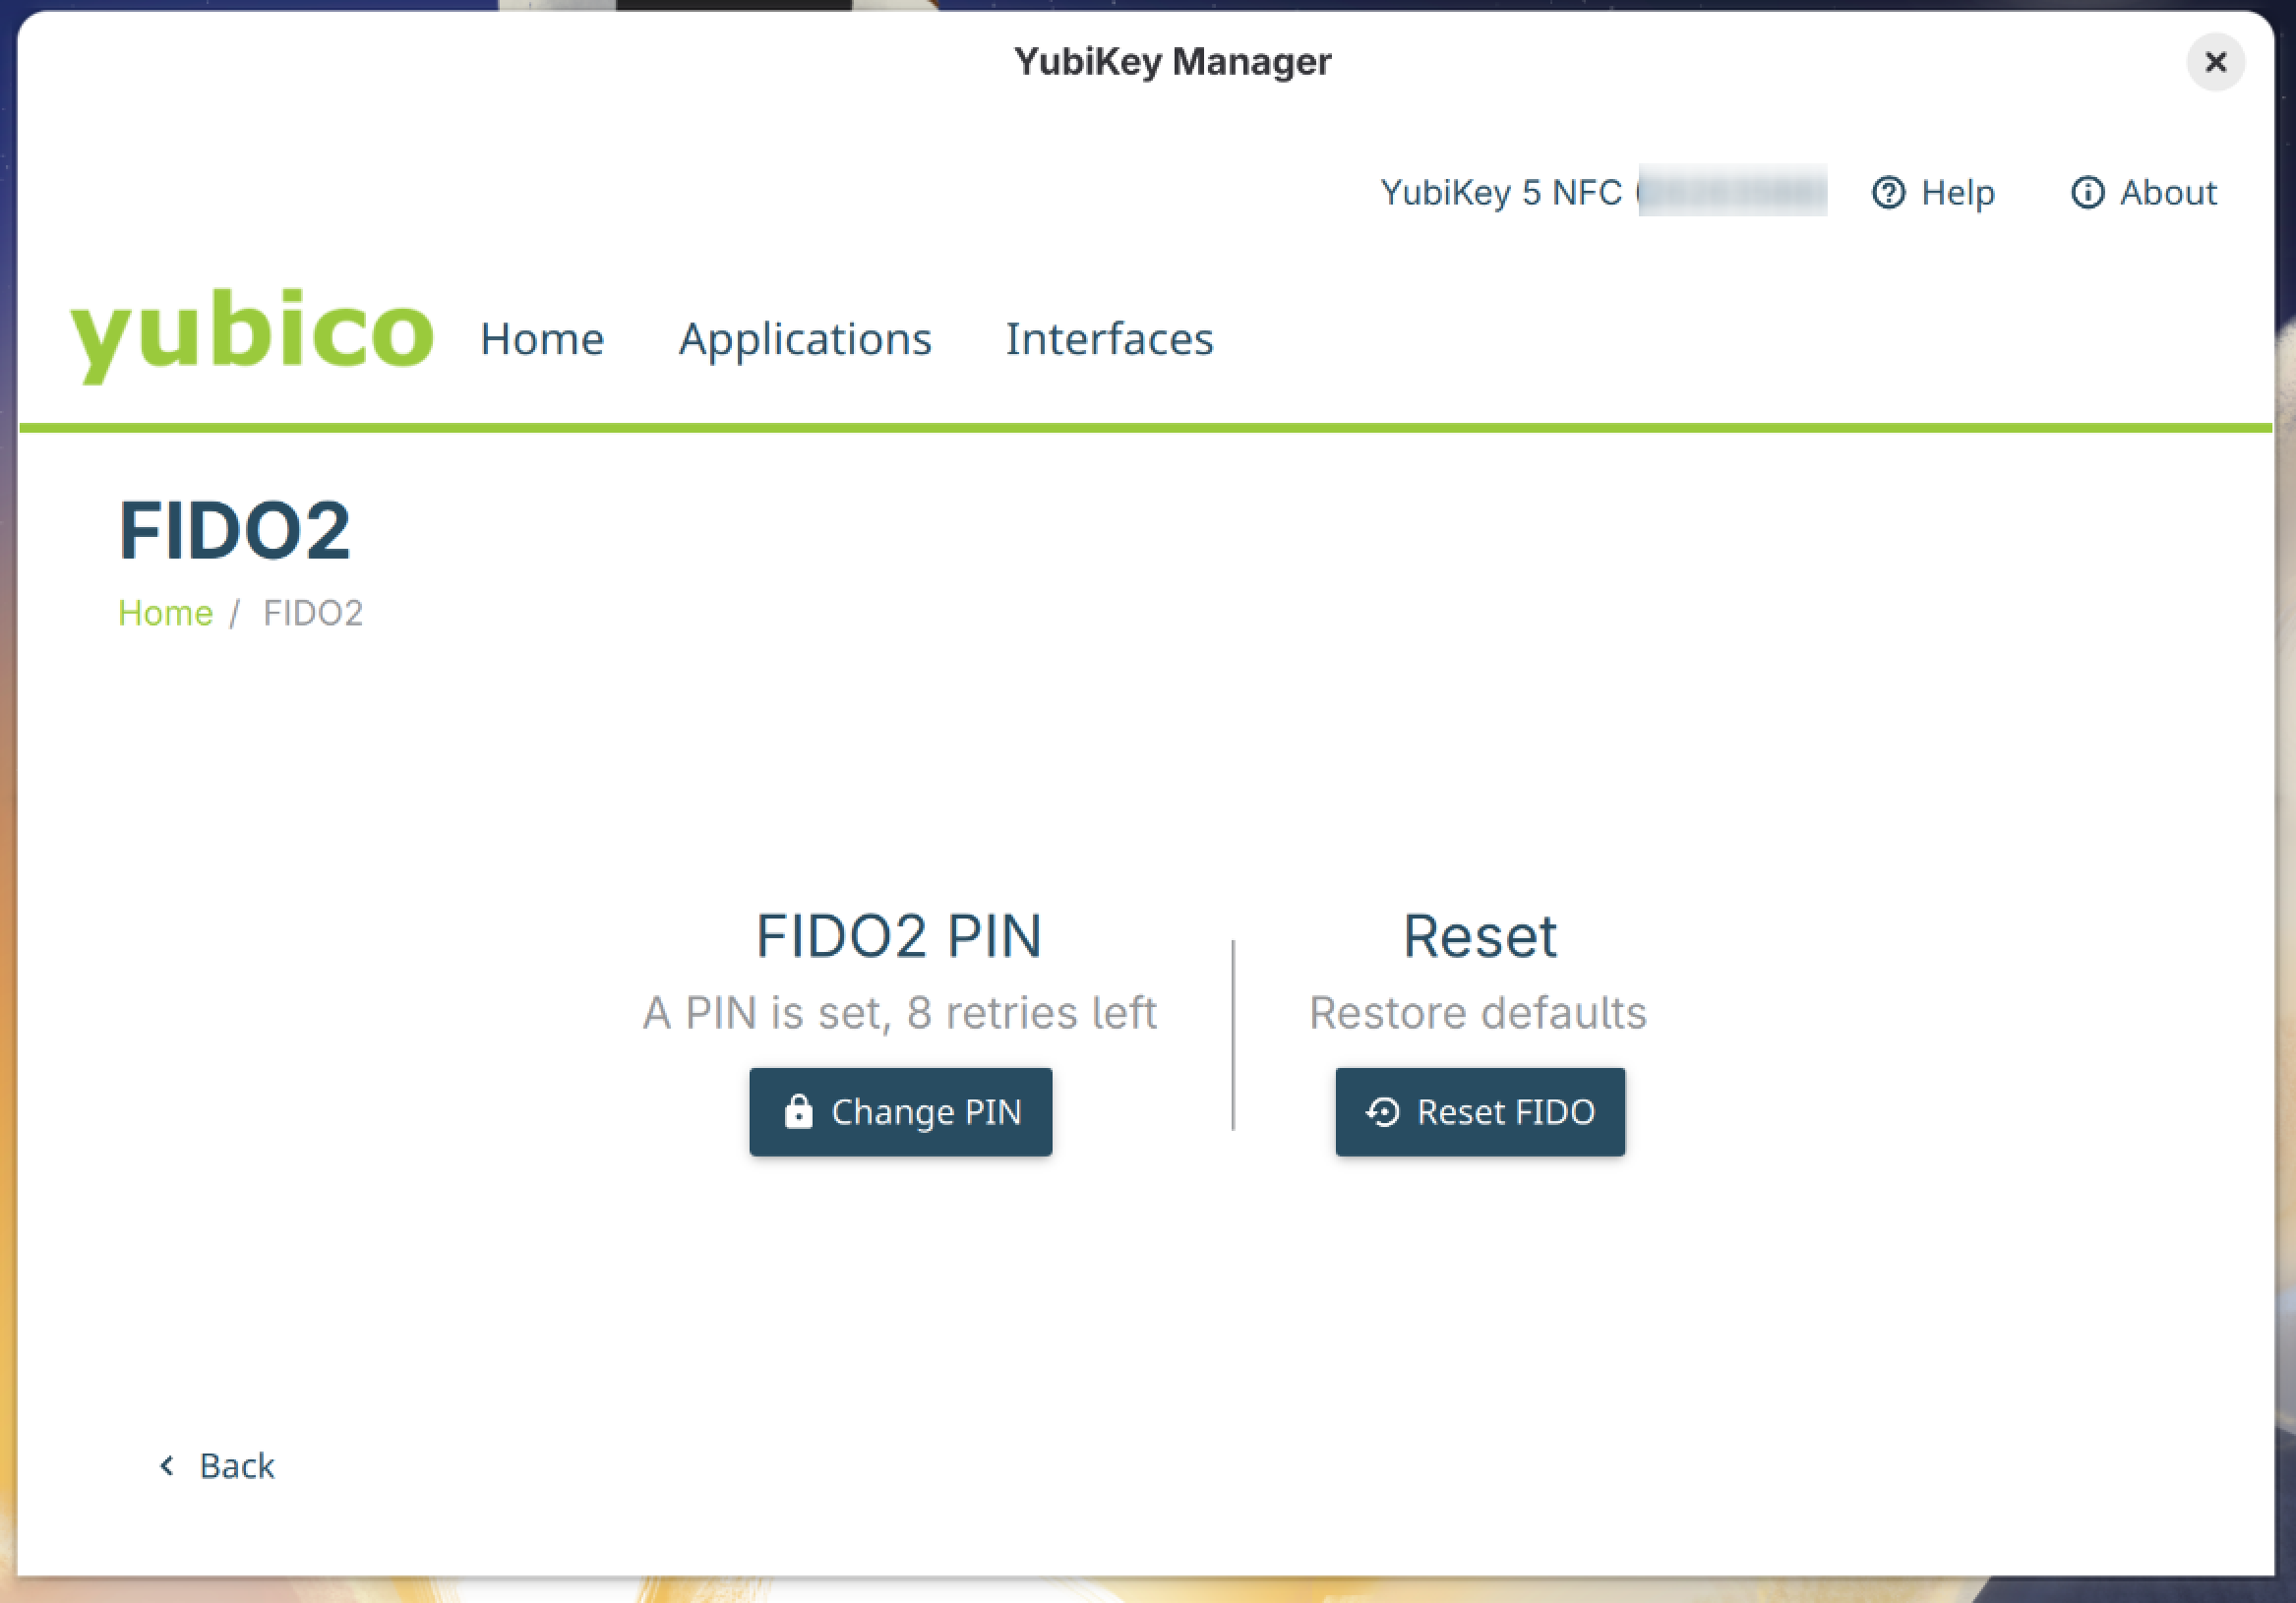
First, install the Yubikey Manager.
fedora-gnome :: ~ » sudo dnf install yubikey-manager-qt
Once installed. Start the application and navigate to Applications -> FIDO2
Here you can set the PIN.
Configure LUKS2 decryption
Check FIDO2 key
Ok. Let’s set up LUKS2 with FIDO2 authentication.
## Let's list the fido2 devices the system sees.
fedora-gnome :: ~ » sudo systemd-cryptenroll --fido2-device=list
PATH         MANUFACTURER PRODUCT               COMPATIBLE RK CLIENTPIN UP UV
/dev/hidraw8 Yubico       YubiKey OTP+FIDO+CCID ✓          ✓  ✓         ✓  ✗

Legend: RK        → Resident key
        CLIENTPIN → PIN request
        UP        → User presence
        UV        → User verification
Check LUKS2 Keyslot
Next, check the LUKS2 disk keyslots. In my case, the encrypted disk is /dev/sdb3
fedora-gnome :: ~ » sudo systemd-cryptenroll /dev/sda3
SLOT TYPE
   0 password
Enroll the FIDO2 key
Great. We can enroll the key now.
fedora-gnome :: ~ » sudo systemd-cryptenroll --fido2-device=auto
No device specified, defaulting to '/dev/sdb3'
Please enter current passphrase for disk /dev/sdb3: **********
Initializing FIDO2 credential on security token.
Please enter security token PIN: ******
Generating secret key on FIDO2 security token.
In order to allow secret key generation, please confirm presence on security token.

New FIDO2 token enrolled as key slot 1
Check Keyslot and LUKS2 header
We can check the slots again.
## Check LUKS keyslots
fedora-gnome :: ~ » sudo systemd-cryptenroll /dev/sda3
SLOT TYPE
  0 password
  1 fido2
And the disk by dumping the header information. Look for the “Tokens” section.
## Dump Header information
fedora-gnome :: ~ » sudo cryptsetup luksDump /dev/sdb3
...
a lot of information.
...
We could check the authentication with this command. But if the disk is mounted (which it is, in our case) it will fail.
fedora-gnome :: ~ » sudo systemd-cryptsetup attach <mapping-name> /dev/sdb3 none fido2-device=auto
Modify crypttab
Next, we need to modify the crypttab file. Add the line in red.
fedora-gnome :: ~ » sudo vim /etc/cryptab
luks-... UUID=...   none discard,fido2-device=auto
To finish up. Execute the following command to recreate the initramfs.
fedora-gnome :: ~ » sudo dracut --force
And that’s it. Now when booting the system, you can either use the passphrase you used when encrypting the disk or the Yubikey with the PIN you set earlier.
Create recovery-key
Now, for the last and probably most important step.
We should create a recovery key.
## create the recovery key
fedora-gnome :: ~ » sudo systemd-cryptenroll /dev/sdb3 --recovery-key
If you removed the password in the optional step, use this command. This will prompt you for the FIDO2 PIN.
## create the recovery key using FIDO2 for the authentication.
fedora-gnome :: ~ » sudo systemd-cryptenroll /dev/sdb3 --recovery-key --unlock-fido2-device=auto
Remove passphrase (optional)
If you want to remove the passphrase completely and only use the hardware key to decrypt the disk, use the following command.
WARNING
Make sure the fido2 authentication works, since there is no way to recover from this.
## Remove password authentication
fedora-gnome :: ~ » sudo systemd-cryptenroll /dev/sdb3 --wipe-slot=password
Wiped slot 0

## Check the keyslots
fedora-gnome :: ~ » sudo systemd-cryptenroll /dev/sdb3
SLOT TYPE
  1 fido2
That is it for the LUKS2 decryption via a hardware key. Let’s take a look at the privileged authentication within GNOME.
GNOME Yubikey authentication
Next, we will configure GNOME to use the hardware key for sudo authentications.
Prerequisites
First we need a few packages.
fedora-gnome :: ~ » sudo dnf install pam-u2f pamu2fcfg -y
Create a folder for the key in your home directory.
fedora-gnome :: ~ » mkdir -p ~/.config/Yubico
Create the key file
Next, we create the key file in the new folder.
fedora-gnome :: ~ » pamu2fcfg > ~/.config/Yubico/u2f_keys
If you want to add additional hardware keys, use a second redirection operator (>>).
fedora-gnome :: ~ » pamu2fcfg >> ~/.config/Yubico/u2f_keys
Enable FIDO2 authentication
To actually enable the FIDO2 authentication, we will be using the “authselect” command. Authselect is a rather new tool, mainly in Red Hat based distributions, to configure system authentication and identity sources. It modifies the required files necessary for certain features, which makes it easier to use and safer.
As far as I am aware, it replaces the older authconfig command.
Let’s continue.
Before enabling this, you should log into another terminal session as root. In case something goes wrong.
fedora-gnome :: ~ » sudo authselect select local with-pam-u2f
Once enabled, you can test this in a new terminal.
Try to execute a command with sudo.
fedora-gnome :: ~ » sudo dnf list
Please touch the FIDO authenticator
Updating....
Enable 2FA FIDO2 authentication
We didn’t need to enter a password in the example above. But if you are like me and want to have the hardware key and the password authentication, use the following command.
fedora-gnome :: ~ » sudo authselect select local with-pam-u2f-2fa
Enable Faillock
Also, if we want to make it a bit more secure, add the “with-faillock” option.
This enables the pam_faillock module, which tracks the failed login attempts and if the user exceeds the allowed number (default is 3) their account will temporarily be disabled. The default should be 600 seconds.
fedora-gnome :: ~ » sudo authselect enable-feature with-faillock
Modify the Faillock settings
We can modify these settings in the “/etc/security/faillock.conf” file.
## Modify the config file
fedora-gnome :: ~ » sudo vim /etc/security/faillock.conf
deny = 5
unlock_time = 1200
Check Faillock status
To check if a user was blocked by faillock, we can use the following command.
fedora-gnome :: ~ » sudo faillock --user <username>
If you want to reset the counter, use this command.
fedora-gnome :: ~ » sudo faillock --user <username> --reset
Check the current authselect setting
Let’s take a quick look at the currently enabled features in authselect.
fedora-gnome :: ~ » sudo authselect current
Profile ID: local
Enabled features:
 - with-pam-u2f-2fa
 - with-faillock
Here an example of the login screen with FIDO2 authentication enabled.
Once we touch the sensor, the password field is unlocked, and we can type in our credentials.

And that’s it.
Hopefully this will be useful to you.
Till next time.